
:max_bytes(150000):strip_icc():format(webp)/001_best-movies-on-hulu-right-now-5025149-3c80b5664f6541b4a0698333fc447251.jpg)
4 Ways to Fix Android Blue Screen of Death On Google Pixel 7a | Dr.fone
4 Ways to Fix Android Blue Screen of Death On Google Pixel 7a
Android is undoubtedly amongst the best smartphone platforms but comes with its own share of glitches. The Android screen of death is observed by many users all over the world who complain of their device screen turning blue rendering their phone/tablet unresponsive. This is called the Android blue screen of death and it usually occurs when you turn on your device by pressing the Power On button but your device does not boot up normally and remains stuck at a plain blue screen without any error message.
Such an Android screen of death is caused by a temporary software crash but can also occur due to certain hardware issues. We understand the inconvenience caused to you when you see the Android blue screen of death. Here are ways to fix the error and great software to extract all your data to keep it unaltered and safe.
Read on to learn more about the Android screen of death and ways to combat it.
Part 1: How to rescue data on Google Pixel 7a with blue screen of death?
The Android blue screen of death issue is not a difficult problem to deal with and can be fixed by you by following the easy steps given in this article. We suggest that all readers rescue the data stored on their Android devices to prevent data loss and keep it stored in your PC from where it can be accessed and recovered by you anytime, anywhere. This task might sound tedious, but, we have for you Dr.Fone - Data Recovery (Android) , a software specially designed to retrieve data from broken and damaged Google Pixel 7a phones and tabs, especially Google Pixel 7a devices, and keep it safe in your PC without tampering with it or altering its format. It efficiently extracts data from broken or unresponsive Google Pixel 7a devices, phones/tabs stuck at black/blue screen, or whose system crashed due to a virus attack.
Dr.Fone - Data Recovery (Android)
World’s 1st data retrieval software for broken Android devices.
- It can also be used to recover data from broken devices or devices that are damaged in any other way such as those stuck in a reboot loop.
- Highest retrieval rate in the industry.
- Recover photos, videos, contacts, messages, call logs, and more.
- Compatible with Google Pixel 7a devices.
3,145,271 people have downloaded it
Follow the steps given below to extract data when you experience an Android screen of death:
1. Download, install, and run the Dr.Fone - Data Recovery (Android) tool on your PC. Connect your device using a USB cable and move on to the main screen of the software.
2. Once you launch the software, you will see many tabs before you. Click on “Data Recovery” > “Android”.

3. And then choose “Recover from Broken Phone” from the program’s screen.

4. In this step, choose from the two options before you the true nature of your device as shown in the screenshot below.

5. You will now be asked to feed in your phone’s model type and name as shown in the screenshot below. Give correct details for the software to identify your device smoothly and hit “Next”.

6. In this step, refer to the instructions in your device manual to enter into Download Mode on your Google Pixel 7a and hit “Next”. An example of what to do to reach Download Mode is shown below.

7. Finally, let the software recognize your Google Pixel 7a, and start to download the recovery package for your device.

8. Once it does, you will be able to preview all the files on the screen in front of you before you hit “Recover to Computer”.

The process may take up to a few minutes and once it’s done all your files will be extracted and stored on your PC. You can now move on to troubleshooting the problem without the fear of losing all your important data.
 safe & secure
Part 2: One click to fix the Android blue screen of death
We understand how annoying it is to see the Android blue screen of death and fail to access your device data. But, with Dr.Fone - System Repair (Android) , your troubles would burst away.
This software effectively fixes Android screen of death issue along with app crashing, bricked or unresponsive device, stuck on Google Pixel 7a logo, etc. All Android issues are well taken care of by Dr.Fone - System Repair (Android) with one click.
Dr.Fone - System Repair (Android)
Easy and effective solution to fix the Android blue screen of death!
- Every kind of Android system error and problem is resolved.
- It is the premier Android repair software in the market.
- All the latest Google Pixel 7a devices are supported by this program.
- Android blue screen of death can be fixed with a single click.
- Easy to use and no technical skills are needed to operate it.
4,750,154 people have downloaded it
Note: Backing up your device is significant before you carry out the Android repair process. The process of fixing the Android blue screen of death issue may erase data from your Google Pixel 7a. So backing up your Android seems a viable option.
Phase 1: Connecting your Android after preparing it
Step 1: Installation and running Dr.Fone - System Repair (Android) on your system takes you to the main screen. Choose the ‘System Repair’ option followed by connecting the Android device.

Step 2: Press the ‘Android Repair’ option before tapping the ‘Start’ button.

Step 3: Over the Google Pixel 7a device information window, select all relevant data about your device followed by the ‘Next’ button.

Phase 2: Initiate repairing after entering ‘Download’ mode
Step 1: Get the Google Pixel 7a device in ‘Download’ mode to fix the Android blue screen of death issue. Here is how –
- On a ‘Home’ button-less device – you need to switch off the Google Pixel 7a device. Now, hold the ‘Volume Down’, ‘Power’, and ‘Bixby’ keys together for about 10 seconds and release. Hit the ‘Volume Up’ key to get into ‘Download’ mode.

- On a ‘Home’ button device – shut down the Android phone/tablet, and then push the ‘Power’, ‘Volume Down’, and ‘Home’ keys for 10 seconds. Let go of the keys and press the ‘Volume Up’ key to enter ‘Download’ mode.

Step 2: Tap the ‘Next’ button to download firmware.

Step 3: Dr.Fone - System Repair (Android) would verify the firmware post-download. It will start repairing the Android system automatically.

safe & secure
Part 3: Force Restart Your Google Pixel 7a
A force restart is a basic step that can clear minor software glitches. It has the potential to resolve the Android blue screen of death issue. Force restarting your device can clear temporary bugs and reset all processes. It is a simple yet often overlooked way to fix the Android blue screen of death issue. Use the following steps to force restart your Google Pixel 7a:
Step: On your Google Pixel 7a, press and hold the “Power” and “Volume Down” keys for around 10 seconds. Release the keys when your device reboots and wait for it to complete rebooting.

Part 4: Remove phone battery to fix blue screen of death
The best home remedy to fix any kind of Android screen of death remove the Google Pixel 7a device’s battery. This technique might sound too simple, but it has solved the Android blue screen of death issue for many users whose devices started normally after reinserting the battery. Here is what you should do.
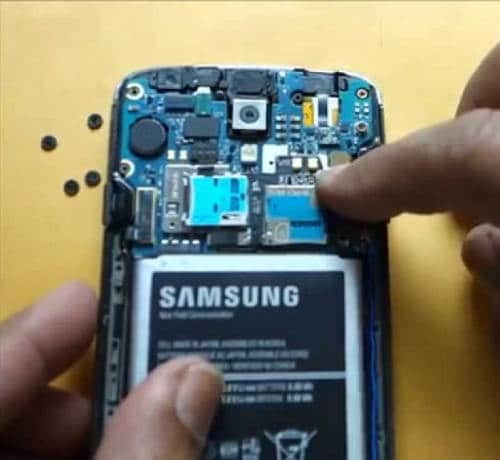
1. Open the back cover of your Google Pixel 7a and carefully remove its battery.

2. Let the battery be out for 5-7 minutes. Meanwhile, long press the power button to drain out any residual charge from your device.
3. Now reinsert the battery and attach the back cover.
4. Turn on your device and see that it boots normally all the way to the Home/Locked Screen without getting stuck at Android blue screen of death.
Note: Not all Android devices allow you to remove their battery. If you own such a device, try the next step as it is your only option to fix the Android blue screen of death problem.
Part 5: Put out your SIM Card/SD card and reinsert
In some cases, issues related to the Android blue screen of death can be caused by problems with the SIM card or SD card. Removing and reinserting these cards can help resolve potential conflicts or glitches. Remember that this method can help resolve issues related to SIM card or SD card conflicts. However, it may not address more complex software or hardware problems causing the blue screen issue.
Part 6: Clean or change the LCD connector
If you’re facing the Android blue screen of death issue, the issue might be related to a hardware problem. The problem can be a loose or damaged LCD connector. In this scenario, you can try cleaning or changing the connector. This method is more advanced and involves disassembling your device. That’s why you need to proceed with caution and only if you’re comfortable with hardware tasks.
Part 7: Update to the latest Android version
Software problems can manifest the Android equivalent of a blue screen of death. It is usually triggered by errors or anomalies within the operating system. To address these concerns, upgrading to the most recent version of the Android OS proves effective. However, updating your device’s software could introduce fresh glitches or compatibility conflicts. These steps outline the process of updating your device to the latest OS:
Step: Open the Settings app on your Google Pixel 7a by locating and launching it. Proceed by scrolling through the options and selecting “Software Update.” In the ensuing screen, choose “Download and Install” to start a search for any available updates.

Part 8: How to fix the Android blue screen of death by factory reset?
The Android screen of death is a very confusing issue as it freezes your device at a blue screen with no options to navigate further. In such a situation you may consider performing a Factory Reset, better known as Hard Reset as you will need to enter Recovery Mode to implement this technique. Although resting your device will wipe off all its data but you don’t need to worry as Dr.Fone toolkit Android Data Extraction software can retrieve all your files and keep them safe.
Accessing Recovery Mode differs for different Android devices. Thus, we suggest that you consult your device manual to understand how to boot into Recovery Mode on your particular Android device and then follow the steps given below:
Once you are on the Recovery Screen, you will see a list of options before you, similar to the screenshot below.

Use the Volume Down button to scroll downwards and reach the “Wipe data/Factory reset” option.

Now use the power button to select it and wait for the Google Pixel 7a device to reboot automatically.
You will notice that the Android device will turn back on without getting stuck at the Android blue screen of death. Now you can set up your device from scratch.
Part 9: What Should You Do if Android Still Stuck on Blue Screen?
Have you tried all the methods, and your Google Pixel 7a is still stuck on the blue screen of death? In this case, it’s important to consider the possibility of a hardware issue. Remember that hardware issues can be complex. Trying to fix things without the right expertise can result in additional harm. If you’re uncertain about the next steps, it’s wisest to ask for assistance from a trained professional.
The Android screen of death, especially the Android blue screen of death, is not a very pleasant sight and could worry you. The good news is that this problem can be fixed by you sitting at home without any technical assistance. Follow the simple and easy tips given above to reboot your device and use the Dr.Fone - Data Recovery (Damaged Device) tool to rescue your data in the most efficient and effective way, then use Dr.Fone - System Repair (Android) to repair your Google Pixel 7a.
safe & secure
Fix Google Pixel 7a Android System Webview Crash 2024 Issue
In recent months, the term “Android WebView crash 2023“ has become a common search term among Android users seeking solutions to these app crashes . The issue has been particularly prevalent on Google Pixel 7a devices, but it has also affected users of other Android models.
Android WebView for Android apps allows you to see and interact with web pages without leaving your app. But lately, it’s been causing more headaches than it’s worth.
So, what’s going on with Google Pixel 7a Android System WebView, and what can you do to fix its issues? Let’s take a look. This article will shed light on Google Pixel 7a Android System WebView crashing apps, helping you understand what triggers them, how to identify them, and what you can do to prevent them from happening again.
Part 1: What Should We Know About Google Pixel 7a Android System WebView Crashes?
This year, the term “Android WebView crash 2023“ has become a familiar and dreaded phrase. This issue has plagued Android users, causing app crashes, freezing , and frustration. But what exactly is Android WebView, and what triggers these apps to crash?
Android WebView is an integral component of Android apps, acting as the invisible engine that renders web content within these apps. It allows users to seamlessly browse websites, watch videos, and interact with web pages without switching to a separate browser. However, when WebView crashes, it disrupts this integrated experience, causing apps to malfunction.
Several signs can indicate an impending or ongoing Android WebView crash. These include:
- App Freezing
One of the earliest signs of an Google Pixel 7a Android System WebView crash is the app freezing. The app may become unresponsive, refusing to respond to your taps or gestures.
- Unexpected App Closures
Another common sign is unexpected app closing. The app may shut down without warning, abruptly ending your activity. Google Pixel 7a Android System WebView crashing apps can be disruptive if you are in the middle of a conversation, shopping online, or filling out an important form.
- Error Messages
Error messages can also provide valuable clues about the impending crash. These messages may appear as pop-ups or be displayed within the app itself.

- Slow Loading Times
Slow loading times can also be a sign of an impending crash. If webpages within the app take unusually long to load or images and other content appear pixelated or distorted, it could be a sign that Google Pixel 7a Android System WebView is struggling to handle the workload.
But why does WebView crash Android smartphones? The answer involves several factors:
- Updates and Compatibility Issues
Updates are often intended to improve software stability and compatibility, but in some cases, they can introduce new bugs or compatibility issues that lead to crashes. It is particularly evident when app developers and WebView developers release updates that don’t fully align, causing conflicts.
- Insufficient Memory
Google Pixel 7a Android System WebView requires a certain amount of memory to operate properly. If your device is running low on memory, it can cause Google Pixel 7a Android System WebView to crash. It is more likely to happen on older devices with less RAM.

- Outdated Google Pixel 7a Android System WebView
The WebView app is responsible for rendering web content within Android apps. Using an outdated version of WebView can introduce known bugs and security vulnerabilities that can cause crashes.
- Conflicts With Other Apps
WebView might crash if it conflicts with other resources or processes running on the Google Pixel 7a device. It can happen if the Google Pixel 7a device runs low on memory or other resource-intensive apps compete for system resources.
In the next section, you’ll explore potential solutions to keep your apps running smoothly.
Part 2: Android WebView Crashes? Here Are Quick and Proven Solutions
Now you’ve identified the signs and causes of Google Pixel 7a Android System WebView crashing apps on your phone. While these issues can be frustrating, there are several quick and proven solutions to fix them.
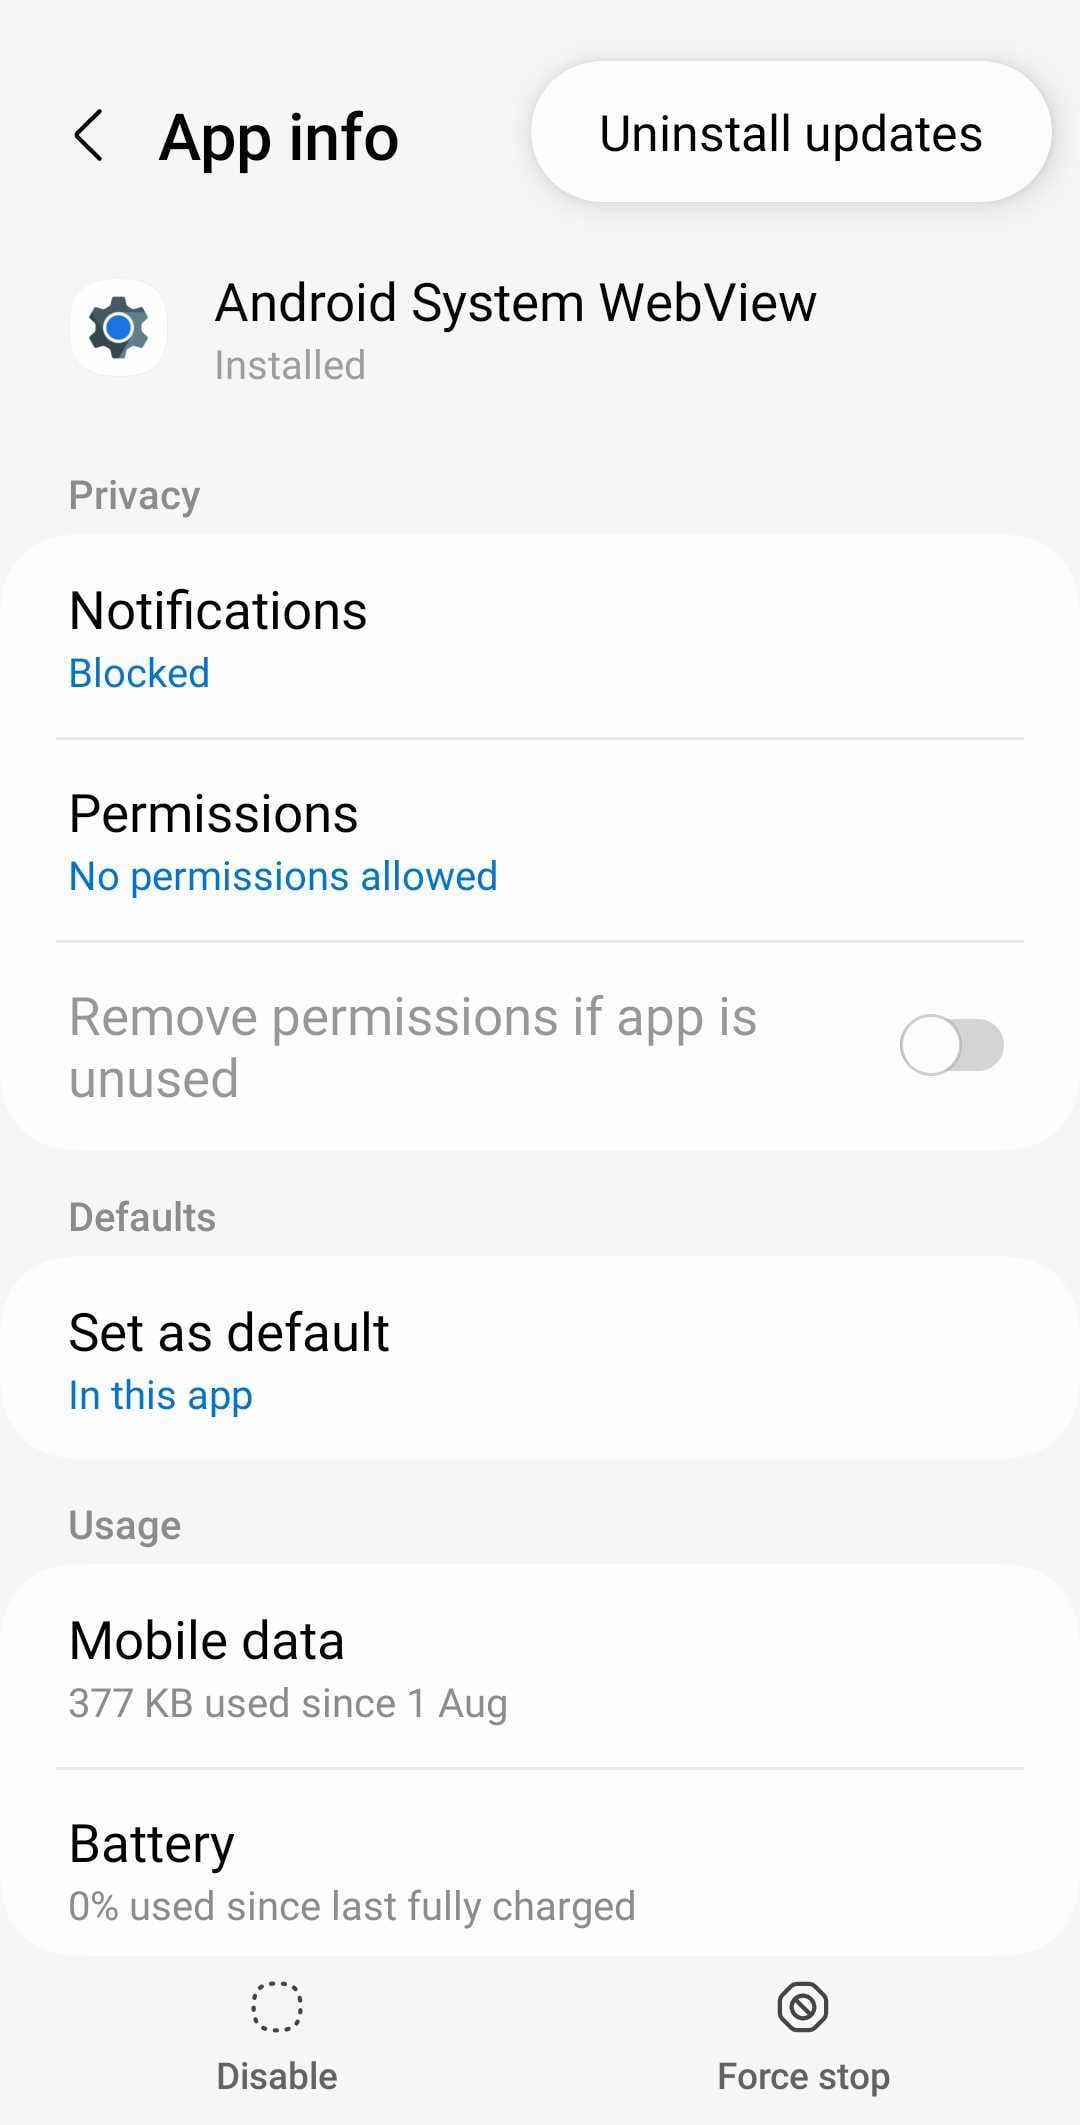
Uninstall WebView Updates
If you’re experiencing apps crashing after a recent update, consider uninstalling those updates. This action can potentially revert to a more stable version of Google Pixel 7a Android System WebView.
To do this on your Google Pixel 7a, navigate to Settings > Apps, then select Google Pixel 7a Android System WebView. Tap the menu icon in the top right corner and tap Uninstall updates.
Update Android WebView
Regularly updating Google Pixel 7a Android System WebView to the latest version is crucial for maintaining compatibility and addressing known bugs. Google releases updates to address these concerns, ensuring optimal performance and stability.
Check for available updates on Google Pixel 7a devices by navigating to Settings > Apps. Then, select Google Pixel 7a Android System WebView and tap App details in-store. If an update is available, tap Update to install it and restart your phone.

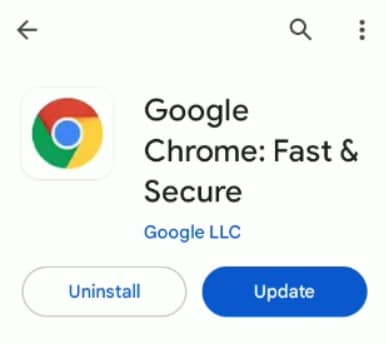
Update Google Chrome
Android WebView is closely tied to Google Chrome, and issues with Chrome can sometimes affect WebView functionality. As such, updating Chrome to the latest version can help address Android System and WebView forcibly closing your phone’s apps.
Open the Google Play Store and search for Google Chrome. If an update is available, tap Update to install it, then restart your device.
Clearing Cache and Data for Android WebView
Clearing the cache frees up phone storage and helps the app run more efficiently. To clear Google Pixel 7a Android System WebView’s cache and data, go to Settings > Apps and select Google Pixel 7a Android System WebView. Tap on Storage and tap Clear cache on the lower right corner of your screen.

Restart Device
A simple restart can often resolve temporary glitches or conflicts that might be causing Android WebView crashes. The specific steps to restart your phone will vary depending on your device type.
Check Internet Connection
A stable internet connection is essential for Google Pixel 7a Android System WebView to render web content properly. If the internet connection is unstable or down, it can lead to crashes. Ensure you have a stable internet connection before using WebView-based apps.
Update Device Software
OS updates may introduce changes to the Google Pixel 7a Android System WebView that make it more compatible with newer web standards and technologies. It can enhance the performance and stability of apps that rely on WebView for web content.
Check for available software updates by going to Settings > Software Update. If an update is required, tap on Download and install.

While problems like when the Android System WebView crashes Android phones are common, they don’t have to be a persistent problem for Google Pixel 7a users. It’s also equally important to have effective solutions when app crashes occur. This is where Wondershare Dr.Fone steps in as a reliable and comprehensive solution for restoring app stability and overall phone performance.
Part 3: Restoring Apps and Phone Stability: A Step-by-Step Guide
Dr. Fone’s System Repair tool can help you resolve common Android scenarios, including Google Play Store malfunctions and persistent app crashes.
How To Use Dr.Fone for Google Pixel 7a Android System WebView Crashing Apps?
Before attempting any repairs, it is crucial to back up your Google Pixel 7a to prevent data loss. Once you have a secure backup, follow these steps to fix WebView app crashes and restore your Google Pixel 7a to its optimal performance.
- Step 1: Download the Dr.Fone toolkit. Next, install the software on your desktop and launch it.
safe & secure
3,090,920 people have downloaded it
- Step 2: Connect your Google Pixel 7a to your computer using a USB cable. Dr.Fone will automatically detect and establish a connection.
- Step 3: Select the System Repair function from the Toolbox homepage and choose Android to confirm your device type.
- Step 4: Click Start to begin the process of fixing Google Pixel 7a Android System WebView crashes. Next, choose your device details and follow the in-app instructions to put your device in Download mode.
- Step 5: Dr.Fone will analyze your device’s system and download the firmware to solve the root cause of the issue.
- Step 6: Confirm your device information in the dialogue box. Dr.Fone will proceed to repair the detected WebView-related problems.

- Step 7: Once the repair is complete, your device will restart, and Google Pixel 7a Android System WebView crashing apps should no longer occur.
More Articles About Android System:
5 Ways to Do With & Access Android Phone with Broken Screen
Google Play Services Won’t Update? 12 Fixes are Here!
Easy Ways to Bypass Google Account Verification (FRP) On Android Phones
Conclusion
The “Android WebView crash 2023“ issue was widespread for many Android users. The common issues encountered were app crashes, slow loading times, and error messages. Fortunately, these problems are manageable with the right approach.
By understanding the signs and causes of Google Pixel 7a Android System WebView crashes, you can take proactive measures to prevent them. Quick fixes such as clearing cache and data or updates can often resolve the issue promptly.
For more comprehensive troubleshooting, Dr. Fone’s mobile solution offers a reliable and user-friendly approach. Its advanced capabilities effectively tackle app crashing issues, providing you peace of mind that your phone is functioning optimally.
safe & secure
4,684,259 people have downloaded it
How to Quickly Fix Bluetooth Not Working on Google Pixel 7a
One of the key features of an Android device these days is the Bluetooth technology. This is such an important part of the phone that many of us take for granted, but as soon as the feature stops working, it can cause all kinds of problems.
Fortunately, despite there being many reasons why a problem could occur to your Bluetooth feature, there are also plenty of fixes. Today, we’re going to share with you the complete guide that details everything you need to know to get your Bluetooth up and running once again as quickly as possible.
Let’s get straight into it!
Part 1. About Bluetooth Not Working on Android
Of course, the most common problem to occur with Bluetooth technology in your Google Pixel 7a is when it doesn’t connect to the Google Pixel 7a device you’re trying to link it to. This could be anything from a Bluetooth headset or headphones, to a portable speaker or even an in-car audio system.
However, the problems don’t stop there. You may have problems with turning your Bluetooth settings on through your actual device. Perhaps the software simply isn’t loading, or maybe the Bluetooth feature keeps turning itself off randomly.
Due to the complicated nature of Bluetooth technology, there could be many reasons as to why your Bluetooth feature is playing up in this way, but that doesn’t mean it can’t be fixed. For the rest of this guide, we’re going to explore the nine need-to-know ways you can fix the Bluetooth problems not working on your Google Pixel 7a as quickly as possible.
Part 2. 9 fixes for Bluetooth not working on Android
2.1 One click to fix Android Bluetooth issues due to Android system
Since Bluetooth is an internal technology, this indicates there’s a problem with the software or firmware of your Google Pixel 7a. If something’s broken, this means you need to fix it. Fortunately, there’s a quick and easy way to do this using software known as Dr.Fone - System Repair (Android).
Dr.Fone - System Repair (Android) is a powerful Android repair tool which is hailed as many as being on the best software applications in the industry. With all the tools you need to repair your phone not just for Bluetooth errors, but basically any internal firmware problems, this is a one-shot-tool that gets the job done.
Dr.Fone - System Repair (Android)
Android repair tool to fix Bluetooth issues in one click
- Can fix most internal software and firmware issues
- Trusted by over 50+ million people around the world
- Supports over 1,000+ unique Android brands, manufacturers, and devices
- Incredibly user-friendly and easy-to-use
- Compatible with all Windows computers
3981454 people have downloaded it
To ensure you have the best experience while using the Dr.Fone - System Repair (Android) software, here’s a complete step-by-step guide on how it works when fixing your Android’s Bluetooth problems.
Step One Make your way over to the Wondershare website and download the Dr.Fone - System Repair (Android) software to either your Mac or Windows computer. Install the downloaded file by following the on-screen instructions. Once installed, open the software, so you’re on the Main Menu.
Step Two Connect your Google Pixel 7a to your computer using the USB cable, wait a couple of seconds, and then click the System Repair option. On the Menu on the left, click Android Repair, and then press Start.
Step Three Next, use the drop-down menus to make sure all the information about your specific device is correct, including your device, operating system number, and carrier information. Click Next to confirm your selections.
Step Four When prompted, put your phone into Download Mode needed for repairs. You can do this by following the on-screen instructions which will depend on which device you have and the available buttons.
Step Five The software will now begin the repair process. This will happen automatically, and all you’ll need to do is make sure your device doesn’t disconnect during this process, and your computer doesn’t turn off.
When the repair process has been completed, you’ll receive the screen below, which means you can try again if the process didn’t work, or you can disconnect your Google Pixel 7a and start using it and your Bluetooth features.
2.2 Restart Android and turn on Bluetooth again

One of the most common solutions in technology is simply to turn it on and off again, which is the case to happen here. By restarting your device, you can clear out any problems you may be suffering from to help it get up and running again. Here’s how;
- Turn your Google Pixel 7a off by holding down the Power button
- Wait for several minutes and then turn your phone on again
- Wait for your phone to completely power up, so you’re on the Main Menu
- Navigate Settings > Bluetooth and then enable the setting
- Try to connect your Bluetooth device to what you were trying to do before
2.3 Clear the Bluetooth cache

Every service on your Google Pixel 7a using a feature called a cache. This is where information is stored to help the feature run properly and give you the best experience. However, over time this can get messy and can cause problems with your Bluetooth feature.
By clearing the cache, you can restart the service and hopefully clear up any issues or problems you may be experiencing.
- On your phone, navigate Settings > Application Manager, and you’ll see all the apps and services on your phone. Locate and select the Bluetooth service.
- Select the Storage option
- Tap the Clear Cache option
- Go back of the Menu and restart your phone
- Now turn your Bluetooth feature on and turn connecting it to your preferred device
2.4 Remove paired devices

Sometimes, you may have a problem with the Google Pixel 7a device you’re trying to connect to via Bluetooth, especially if this is a device you’ve updated. To counter and repair this, you’re going to need to remove the paired devices saved with your device and then reconnect them.
Here’s how;
- From the Main Menu of your Google Pixel 7a, head to Settings > Bluetooth > Connected Devices.
- Turn Bluetooth on, and you’ll see all the connections your Google Pixel 7a is paired with
- Go through these settings and remove/delete/forget every connection on your device
- Now when you go to connect to a device using Bluetooth, repair the Google Pixel 7a device, enter the passcode, and use a fresh paired connection.
2.5 Use Bluetooth in safe mode

If you’re having problems with your connection and paired devices, sometimes you may have conflicting software faults in your device that are causing the problems. If this is the case, you’ll need to boot your Google Pixel 7a in Safe Mode.
This is an operating state in which your phone will run the bare minimum services it needs to perform. If your Bluetooth works in Safe Mode, you know you have an app or a service that’s causing the problem.
Here’s how to find out;
- Hold the power button down, so the Android power menu turns on
- Long-press the power button again and the restart in Safe Mode option will come up
- The phone will automatically boot into Safe Mode
- Wait a minute on the Main Menu
- Now turn on your Bluetooth and connect it to your preferred device
2.6 Turn on the discoverable feature

To ensure your Bluetooth can connect to other devices, it’s important to make sure you’re making your device discoverable to other Bluetooth devices. If it’s hidden, other devices won’t be able to find it, and sometimes it can bug and prevent connections.
Here’s how to turn on your Bluetooth discoverable feature;
- From the home screen of your Android, navigate to the Menu> Settings > Bluetooth
- Toggle the Bluetooth switch, so it’s on
- Under the available settings, tick the box that allows your Bluetooth device to be discoverable
- Turn your Bluetooth feature on and connect to the Google Pixel 7a device you’re trying to connect too
2.7 Exclude Bluetooth issues of the other device

Sometimes, you might not even have a problem with your Google Pixel 7a, but rather the Bluetooth device you’re trying to connect to, whether that’s a Bluetooth speaker, an in-car entertainment system, or any other kind of Bluetooth device.
By testing out another Bluetooth device to see if it will work with your preferred device, you can rule this out from being the issue.
- Disconnect your Google Pixel 7a from the Bluetooth device and turn your Bluetooth off
- Now take another Bluetooth device and connect this to the Google Pixel 7a device you’re trying to connect too. This could be another Android device, or even a computer or iOS device
- If the new device doesn’t connect to your Bluetooth device, you’ll know there’s a problem with your Bluetooth device, not your Google Pixel 7a
- If the Google Pixel 7a devices connect, you’ll know there’s a problem with your Google Pixel 7a
2.8 Place both devices within close proximity

One of the common misconceptions of Bluetooth is just how far the wireless range is of the service. You need to make sure your devices are well and truly close to each other to make sure a stable connection can be formed.
The further away the Google Pixel 7a devices are from each other, the less likely the connection will remain secure. As a rule of thumb, Bluetooth can work up to 100 meters, but to play it safe, always try and keep your devices under 50m apart.
2.9 Avoid interference of other Bluetooth sources

The final consideration you’ll want to think about is that Bluetooth radio waves, or wireless waves, can interfere with each other. This means they can bounce off each other or get muddled up and make things confusing from your devices.
With this in mind, you’ll want to make sure you’re limiting the amount of Bluetooth activity in the area where you’re trying to use a device. While uncommon, this could be the problem.
To fix this issue, turn off all the Bluetooth connections in the area. This includes computers, laptops, mobile phones, tablets, and any other Bluetooth devices you may have. Then, try connecting your Google Pixel 7a to the Google Pixel 7a device you were trying to use. If it works, you know you were experiencing Bluetooth interference.
Also read:
- Xiaomi Redmi Note 12 4G Not Receiving Texts? 10 Hassle-Free Solutions Here | Dr.fone
- Calls on Google Pixel Fold Go Straight to Voicemail? 12 Fixes | Dr.fone
- 6 Fixes to Unfortunately WhatsApp has stopped Error Popups On Motorola Moto G24 | Dr.fone
- Why Is My Honor Play 40C Offline? Troubleshooting Guide | Dr.fone
- Full Guide How To Fix Connection Is Not Private on Tecno Spark 20 Pro | Dr.fone
- What to Do if Google Play Services Keeps Stopping on Xiaomi Redmi K70 Pro | Dr.fone
- 7 Solutions to Fix Chrome Crashes or Wont Open on Honor X7b | Dr.fone
- How To Fix Part of the Touch Screen Not Working on Nokia C12 Plus | Dr.fone
- Fix Vivo Y100A Android System Webview Crash 2024 Issue | Dr.fone
- Troubleshooting Guide How to Fix an Unresponsive Vivo Y27 4G Screen | Dr.fone
- 6 Solutions to Fix Error 505 in Google Play Store on Honor 100 | Dr.fone
- Gmail Not Working on Xiaomi Redmi Note 12 5G 7 Common Problems & Fixes | Dr.fone
- What To Do if Your Infinix Note 30 VIP Auto Does Not Work | Dr.fone
- Full Guide How To Fix Connection Is Not Private on OnePlus 12 | Dr.fone
- Xiaomi Redmi Note 12 Pro 4G Not Receiving Texts? 10 Hassle-Free Solutions Here | Dr.fone
- 4 Ways to Fix Android Blue Screen of Death On Xiaomi Civi 3 Disney 100th Anniversary Edition | Dr.fone
- Tecno Spark 20 Pro Not Receiving Texts? 10 Hassle-Free Solutions Here | Dr.fone
- Fix Cant Take Screenshot Due to Security Policy on Nubia Red Magic 8S Pro | Dr.fone
- Top 10 Fixes for Phone Keep Disconnecting from Wi-Fi On Nokia C22 | Dr.fone
- Want to Uninstall Google Play Service from Tecno Pop 8? Here is How | Dr.fone
- 8 Solutions to Solve YouTube App Crashing on Oppo Reno 10 5G | Dr.fone
- Want to Uninstall Google Play Service from Honor X50i+? Here is How | Dr.fone
- Full Guide How To Fix Connection Is Not Private on Tecno Camon 20 Premier 5G | Dr.fone
- Calls on Oppo Reno 8T Go Straight to Voicemail? 12 Fixes | Dr.fone
- Full Guide How To Fix Connection Is Not Private on Oppo A59 5G | Dr.fone
- 7 Solutions to Fix Chrome Crashes or Wont Open on Samsung Galaxy S24+ | Dr.fone
- Fixes for Apps Keep Crashing on Sony Xperia 1 V | Dr.fone
- 7 Solutions to Fix Error Code 963 on Google Play Of Oppo Reno 10 Pro+ 5G | Dr.fone
- Fix Xiaomi 13 Ultra Android System Webview Crash 2024 Issue | Dr.fone
- Troubleshooting Guide How to Fix an Unresponsive Tecno Spark Go (2023) Screen | Dr.fone
- In 2024, 9 Mind-Blowing Tricks to Hatch Eggs in Pokemon Go Without Walking On Vivo Y100 | Dr.fone
- Remove Nokia Lock Screen without Password(Nokia )
- 3 Solutions to Find Your Oppo Reno 9A Current Location of a Mobile Number | Dr.fone
- New VN Video Editor For PC - A Brief Review for 2024
- Hassle-Free Ways to Remove FRP Lock on Oppo A1x 5G Phones with/without a PC
- How to Fix the Soft Bricked Xiaomi Redmi Note 13 Pro+ 5G? | Dr.fone
- Tips And Tricks To Tell if Your iPhone 14 Pro Max Is Unlocked
- In 2024, How to Unlock iPhone 14 Plus Passcode without Computer?
- In 2024, How to Unlock iCloud Activation Lock and iCloud Account On iPhone 11?
- How Can I Unlock My Apple iPhone 15 Pro After Forgetting my PIN Code?
- Best 10 Mock Location Apps Worth Trying On Realme Narzo N55 | Dr.fone
- 3 Solutions to Hard Reset Xiaomi Civi 3 Disney 100th Anniversary Edition Phone Using PC | Dr.fone
- In 2024, Easy Ways to Manage Your Motorola Edge 2023 Location Settings | Dr.fone
- Thinking About Changing Your Netflix Region Without a VPN On Tecno Spark 20 Pro+? | Dr.fone
- The Updated Method to Bypass Samsung Galaxy A24 FRP
- How to fix Pivot Table Field Name is not Valid error in Excel 2010?
- In 2024, The Best Android SIM Unlock Code Generators Unlock Your Lava Agni 2 5G Phone Hassle-Free
- How to Easily Hard reset my Xiaomi 13T Pro | Dr.fone
- New This Article Is Actually the Guide Regarding Editing the Videos Through VEED. As a Substitute, Wondershare Filmora Is Also Under Discussion that Is Also Available for the Same Purpose
- Proven Ways in How To Hide Location on Life360 For Realme 12 Pro 5G | Dr.fone
- In 2024, 7 Best Real Time Video Translation Apps
- How to bypass Xiaomi ’s lock screen pattern, PIN or password
- In 2024, How Do I Stop Someone From Tracking My Lava Agni 2 5G? | Dr.fone
- In 2024, Does Sony Xperia 10 V Have Find My Friends? | Dr.fone
- How to use iSpoofer on Honor X9b? | Dr.fone
- In 2024, Guide to Discovering the Voice Generators/Changers with the Most Anime
- Hard Resetting an Sony Xperia 5 V Device Made Easy | Dr.fone
- In 2024, Guide on How To Change Your Apple ID Email Address On iPhone 13
- Title: 4 Ways to Fix Android Blue Screen of Death On Google Pixel 7a | Dr.fone
- Author: Ariadne
- Created at : 2024-04-30 09:39:00
- Updated at : 2024-05-01 09:39:00
- Link: https://howto.techidaily.com/4-ways-to-fix-android-blue-screen-of-death-on-google-pixel-7a-drfone-by-drfone-fix-android-problems-fix-android-problems/
- License: This work is licensed under CC BY-NC-SA 4.0.
