
4 Ways to Fix Android Blue Screen of Death On Nokia C32 | Dr.fone
4 Ways to Fix Android Blue Screen of Death On Nokia C32
Android is undoubtedly amongst the best smartphone platforms but comes with its own share of glitches. The Android screen of death is observed by many users all over the world who complain of their device screen turning blue rendering their phone/tablet unresponsive. This is called the Android blue screen of death and it usually occurs when you turn on your device by pressing the Power On button but your device does not boot up normally and remains stuck at a plain blue screen without any error message.
Such an Android screen of death is caused by a temporary software crash but can also occur due to certain hardware issues. We understand the inconvenience caused to you when you see the Android blue screen of death. Here are ways to fix the error and great software to extract all your data to keep it unaltered and safe.
Read on to learn more about the Android screen of death and ways to combat it.
Part 1: How to rescue data on Nokia C32 with blue screen of death?
The Android blue screen of death issue is not a difficult problem to deal with and can be fixed by you by following the easy steps given in this article. We suggest that all readers rescue the data stored on their Android devices to prevent data loss and keep it stored in your PC from where it can be accessed and recovered by you anytime, anywhere. This task might sound tedious, but, we have for you Dr.Fone - Data Recovery (Android) , a software specially designed to retrieve data from broken and damaged Nokia C32 phones and tabs, especially Nokia C32 devices, and keep it safe in your PC without tampering with it or altering its format. It efficiently extracts data from broken or unresponsive Nokia C32 devices, phones/tabs stuck at black/blue screen, or whose system crashed due to a virus attack.
 The Tube Sites Submitter is a fast and efficient tool for anyone who needs to upload videos quickly, easily and automatically to hundreds of tube sites in mere minutes .
 Dr.Fone - Data Recovery (Android)
World’s 1st data retrieval software for broken Android devices.
- It can also be used to recover data from broken devices or devices that are damaged in any other way such as those stuck in a reboot loop.
- Highest retrieval rate in the industry.
- Recover photos, videos, contacts, messages, call logs, and more.
- Compatible with Nokia C32 devices.
3,145,271 people have downloaded it
Follow the steps given below to extract data when you experience an Android screen of death:
1. Download, install, and run the Dr.Fone - Data Recovery (Android) tool on your PC. Connect your device using a USB cable and move on to the main screen of the software.
2. Once you launch the software, you will see many tabs before you. Click on “Data Recovery” > “Android”.

3. And then choose “Recover from Broken Phone” from the program’s screen.

4. In this step, choose from the two options before you the true nature of your device as shown in the screenshot below.
 OtsAV DJ Pro
5. You will now be asked to feed in your phone’s model type and name as shown in the screenshot below. Give correct details for the software to identify your device smoothly and hit “Next”.
 Epubor Audible Converter for Win: Download and convert Audible AAXC/AA/AAX to MP3 with 100% original quality preserved.
6. In this step, refer to the instructions in your device manual to enter into Download Mode on your Nokia C32 and hit “Next”. An example of what to do to reach Download Mode is shown below.

7. Finally, let the software recognize your Nokia C32, and start to download the recovery package for your device.

8. Once it does, you will be able to preview all the files on the screen in front of you before you hit “Recover to Computer”.


The process may take up to a few minutes and once it’s done all your files will be extracted and stored on your PC. You can now move on to troubleshooting the problem without the fear of losing all your important data.
 safe & secure
Part 2: One click to fix the Android blue screen of death
We understand how annoying it is to see the Android blue screen of death and fail to access your device data. But, with Dr.Fone - System Repair (Android) , your troubles would burst away.
This software effectively fixes Android screen of death issue along with app crashing, bricked or unresponsive device, stuck on Nokia C32 logo, etc. All Android issues are well taken care of by Dr.Fone - System Repair (Android) with one click.
 ZoneAlarm Extreme Security NextGen
Dr.Fone - System Repair (Android)
Easy and effective solution to fix the Android blue screen of death!
- Every kind of Android system error and problem is resolved.
- It is the premier Android repair software in the market.
- All the latest Nokia C32 devices are supported by this program.
- Android blue screen of death can be fixed with a single click.
- Easy to use and no technical skills are needed to operate it.
4,750,154 people have downloaded it
Note: Backing up your device is significant before you carry out the Android repair process. The process of fixing the Android blue screen of death issue may erase data from your Nokia C32. So backing up your Android seems a viable option.
Phase 1: Connecting your Android after preparing it
Step 1: Installation and running Dr.Fone - System Repair (Android) on your system takes you to the main screen. Choose the ‘System Repair’ option followed by connecting the Android device.

Step 2: Press the ‘Android Repair’ option before tapping the ‘Start’ button.

Step 3: Over the Nokia C32 device information window, select all relevant data about your device followed by the ‘Next’ button.
![]() FX PRO (Gold Robot + Silver Robot(Basic Package))
FX PRO (Gold Robot + Silver Robot(Basic Package))

Phase 2: Initiate repairing after entering ‘Download’ mode
Step 1: Get the Nokia C32 device in ‘Download’ mode to fix the Android blue screen of death issue. Here is how –
- On a ‘Home’ button-less device – you need to switch off the Nokia C32 device. Now, hold the ‘Volume Down’, ‘Power’, and ‘Bixby’ keys together for about 10 seconds and release. Hit the ‘Volume Up’ key to get into ‘Download’ mode.

- On a ‘Home’ button device – shut down the Android phone/tablet, and then push the ‘Power’, ‘Volume Down’, and ‘Home’ keys for 10 seconds. Let go of the keys and press the ‘Volume Up’ key to enter ‘Download’ mode.
 HD Video Converter Factory Pro

Step 2: Tap the ‘Next’ button to download firmware.

Step 3: Dr.Fone - System Repair (Android) would verify the firmware post-download. It will start repairing the Android system automatically.

safe & secure
Part 3: Force Restart Your Nokia C32
A force restart is a basic step that can clear minor software glitches. It has the potential to resolve the Android blue screen of death issue. Force restarting your device can clear temporary bugs and reset all processes. It is a simple yet often overlooked way to fix the Android blue screen of death issue. Use the following steps to force restart your Nokia C32:
Step: On your Nokia C32, press and hold the “Power” and “Volume Down” keys for around 10 seconds. Release the keys when your device reboots and wait for it to complete rebooting.

Part 4: Remove phone battery to fix blue screen of death
The best home remedy to fix any kind of Android screen of death remove the Nokia C32 device’s battery. This technique might sound too simple, but it has solved the Android blue screen of death issue for many users whose devices started normally after reinserting the battery. Here is what you should do.
1. Open the back cover of your Nokia C32 and carefully remove its battery.

2. Let the battery be out for 5-7 minutes. Meanwhile, long press the power button to drain out any residual charge from your device.
3. Now reinsert the battery and attach the back cover.
4. Turn on your device and see that it boots normally all the way to the Home/Locked Screen without getting stuck at Android blue screen of death.
Note: Not all Android devices allow you to remove their battery. If you own such a device, try the next step as it is your only option to fix the Android blue screen of death problem.
Part 5: Put out your SIM Card/SD card and reinsert
In some cases, issues related to the Android blue screen of death can be caused by problems with the SIM card or SD card. Removing and reinserting these cards can help resolve potential conflicts or glitches. Remember that this method can help resolve issues related to SIM card or SD card conflicts. However, it may not address more complex software or hardware problems causing the blue screen issue.
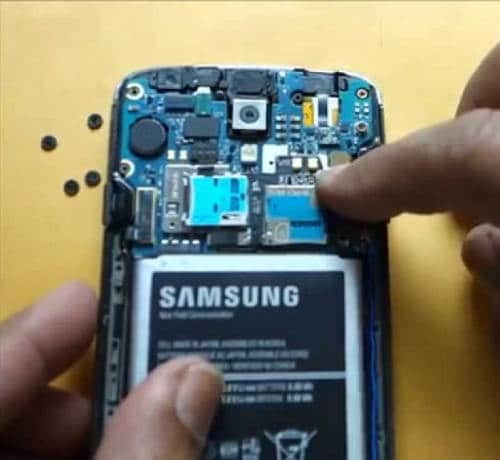
Part 6: Clean or change the LCD connector
If you’re facing the Android blue screen of death issue, the issue might be related to a hardware problem. The problem can be a loose or damaged LCD connector. In this scenario, you can try cleaning or changing the connector. This method is more advanced and involves disassembling your device. That’s why you need to proceed with caution and only if you’re comfortable with hardware tasks.

Part 7: Update to the latest Android version
Software problems can manifest the Android equivalent of a blue screen of death. It is usually triggered by errors or anomalies within the operating system. To address these concerns, upgrading to the most recent version of the Android OS proves effective. However, updating your device’s software could introduce fresh glitches or compatibility conflicts. These steps outline the process of updating your device to the latest OS:
Step: Open the Settings app on your Nokia C32 by locating and launching it. Proceed by scrolling through the options and selecting “Software Update.” In the ensuing screen, choose “Download and Install” to start a search for any available updates.

Part 8: How to fix the Android blue screen of death by factory reset?
The Android screen of death is a very confusing issue as it freezes your device at a blue screen with no options to navigate further. In such a situation you may consider performing a Factory Reset, better known as Hard Reset as you will need to enter Recovery Mode to implement this technique. Although resting your device will wipe off all its data but you don’t need to worry as Dr.Fone toolkit Android Data Extraction software can retrieve all your files and keep them safe.
Accessing Recovery Mode differs for different Android devices. Thus, we suggest that you consult your device manual to understand how to boot into Recovery Mode on your particular Android device and then follow the steps given below:
Once you are on the Recovery Screen, you will see a list of options before you, similar to the screenshot below.

Use the Volume Down button to scroll downwards and reach the “Wipe data/Factory reset” option.

Now use the power button to select it and wait for the Nokia C32 device to reboot automatically.
You will notice that the Android device will turn back on without getting stuck at the Android blue screen of death. Now you can set up your device from scratch.
Part 9: What Should You Do if Android Still Stuck on Blue Screen?
Have you tried all the methods, and your Nokia C32 is still stuck on the blue screen of death? In this case, it’s important to consider the possibility of a hardware issue. Remember that hardware issues can be complex. Trying to fix things without the right expertise can result in additional harm. If you’re uncertain about the next steps, it’s wisest to ask for assistance from a trained professional.
The Android screen of death, especially the Android blue screen of death, is not a very pleasant sight and could worry you. The good news is that this problem can be fixed by you sitting at home without any technical assistance. Follow the simple and easy tips given above to reboot your device and use the Dr.Fone - Data Recovery (Damaged Device) tool to rescue your data in the most efficient and effective way, then use Dr.Fone - System Repair (Android) to repair your Nokia C32.
safe & secure
Authentication Error Occurred on Nokia C32? Here Are 10 Proven Fixes
There are times when users get an authentication error while they connect to a Wifi network. The problem is mostly found in Android whenever a device tries to establish a connection to Wifi. If your device is also experiencing an authentication problem Wifi, then don’t worry. It can easily be resolved. In this post, we will make you familiar with the root cause for the Nokia C32 Wifi problem and how you can resolve whenever authentication error occurred on your device.
Part 1: Any idea about the Wi-Fi authentication problem?
Wi-Fi authentication has to be done every time you wish to connect to a Wi-Fi network over your smartphone or laptop. To authenticate yourself and connect to the protected Wi-Fi network, you need to have the password of it. But if after you’re putting in the correct password and still experiencing the wifi authentication problem. Here’s what you need to know.
Authentication error occurs when the “deal” between the Wi-Fi router and device fails due to certain reasons. First, the Nokia C32 device sends the password of the network and the “connect” request in an encrypted format to the Wi-Fi router. Then, the router decrypts the password and compares the password saved on it. Now, if the password matches, it sends affirmation for the “connect” request, and then the Nokia C32 device is allowed to connect to the network.
Part 2: Why Authentication Error Occurred when Connecting to Wifi?
There could be plenty of reasons for facing an authentication error on your device. Most of the time, it occurs whenever a Wifi router seems to malfunction. Furthermore, if your phone has been recently updated, then chances are that there could be an issue with its drivers. A security attack can also make your device malfunction as well. An unstable connection or a router blockage can also be a reason for this issue.
In this scenario, whenever you try to connect to a Wifi network (even after supplying the correct password and username), it doesn’t connect to it. Instead, it displays an authentication error occurred promptly. Thankfully, there are plenty of ways to overcome the authentication problem Wifi. In the next section, we have provided three different solutions to fix the Nokia C32 Wifi problem (as it mostly happens on Android devices).
Part 3: 10 Solutions to Fix Wifi Authentication Error
Before we make you familiar with different fixes for the Wifi authentication error, it is important to check your router beforehand. Chances are that you could be getting the authentication error because your router is not functioning properly. You can restart it and try to connect any other device to it as well to check it. After making sure that there is no problem with your network or router, follow these suggestions to overcome the authentication error occurred issue.
Check if extra characters added in Wi-Fi password
Ensure that no other extra characters are being added in the Wi-Fi password while you’re entering it. Key in the password carefully while viewing the characters, and then check if the authentication error occurs or not.
One-Click to Fix Wifi Authentication Error by Android System Repair
Android system repair is considered the most effective way to fix Wifi Authentication Error. As the bottom-layer Android system files may be corrupted unconsciously with days of phone use, the Wifi Authentication Error may be one of the symptoms.
So Android repair requires programming knowledge to do it?
No! With Dr.Fone - System Repair (Android), you can do Android repair in just a few steps and get all issues like Wifi Authentication error fixed easily.
Dr.Fone - System Repair (Android)
An easy-to-operate tool to fix Android system issues like a Wifi authentication error
- Fixes all Android system issues like a black screen of death, Wifi authentication error, etc.
- One-click to fix the Wifi authentication error. No technical skills required.
- Supports all the new Nokia C32 devices like Galaxy S8, S9, etc.
- Easy-to-follow instructions provided on each of the screens.
3981454 people have downloaded it
Here are the steps to fix Wifi Authentication Error by Android system repair:
Note: Android repair is effective to permanently fix Wifi Authentication Error, but may wipe out the existing phone data. Backup all the important Android data to PC before you go on.
- After the Dr.Fone tool is downloaded, install, and launch it. You can see the following screen.
- Connect your Nokia C32 to the computer, and select “Android Repair” in the middle.
- Select all the details that match your device, and click “Next”.
- Next up, you should boot your Nokia C32 in download mode by following the on-screen instructions.

- Allow the program to download the corresponding firmware. After that, the Android repair will start and get the Wifi Authentication Error fixed in minutes.

DHCP, or Dynamic Host Configuration Protocol is the default IP address assignment for the Wi-Fi settings on many devices. Whereas DHCP can cause IP address conflict during the dynamic IP address assignment. So, you’d better change “DHCP” to “Static” to see if the authentication error persists.
Step 1: Head to the “Settings” of your Nokia C32 and then opt for “Wireless and Networks” followed by “WLAN/WiFi”.
Step 2: Now, hit on the WiFi network that is showing “authentication error occurred”.
Step 3: Depending on your Nokia C32 model, look for “IP Settings” and tap on it. Now, switch the “DHCP” to “Static”.
Step 4: Note down the static IP address fields and wipe off all the fields. Punch it in again and then save it.
 SwifDoo PDF 2-Year Plan
Check carefully for duplicate Wi-Fi names before you connect
Perhaps, you might connect to a WiFi with a similar name. There are good chances that some users do not modify their WiFi network name and possibly, your neighbor may have the same WiFi network, service provider. Therefore, ensure you connect to the correct WiFi network.
Reset the Wifi network
One of the easiest ways to fix the authentication problem of Wifi is to reset the network. To do this, you would be required to forget the respective network first and then connect to it again. This can be done by simply following these steps.
1. Firstly, you need to forget a Wifi network. To do it, go to your phone’s Settings > WiFi and network. From here, you can see a list of all the Wifi hotspots that your phone connects to. Select the network you wish to forget.

2. When you would select a network, it will provide the basic information related to it. Just tap on the “Forget” button and agree to the pop-up message. This will erase the network’s information from your device.


3. Afterward, turn on your Wifi again and tap to the network you wish to connect to. Simply provide the credentials and tap on the “Connect” button to reestablish the connection. This way, you can reset the network successfully.

 Lyric Video Creator Professional Version
Modify network connection
If the above solution won’t work, then you would be required to walk the extra mile to fix the Nokia C32 Wifi problem. After you reset a network connection, if still getting issues regarding the authentication of the network, you need to modify the connection. In this technique, you will be changing the IP settings on your phone to alter the way it establishes a secure connection. You can do it by following these steps.
1. To start with, visit your phone’s Settings and open the Wifi page.


2. This will display a list of all the Wifi networks that are associated with your device. Just long-tap on the Wifi network that you wish to modify. It will open another pop-up window. From here, tap on the option of “Manage network settings”. Sometimes, users also get an option of “Modify network settings” here as well. Simply select it to proceed.

3. It will display basic information related to your Wifi network. Just tap on the “Show advanced options” button to access more options related to the network setting.

4. From the IP Settings menu, change the field from DHCP to Static. This will let you establish a static connection between your device and the router.
 EmEditor Professional (Lifetime License, non-store app)

5. As soon as you will change it to static, you will get different fields related to your network’s IP address, gateway, DNS, and more. Simply fill these fields and tap on the “Save” button once you are done.

Now, try to connect to the Wifi hotspot again. You would be able to overcome the authentication problem of Wifi.
Change Network Security Type
It has been observed that, when we connect to Wifi, our device chooses a wrong security type. This clashes with the default security protocol of the router and authentication error occurred due to this. If your device is facing the same issue, then it can be fixed by simply changing its security type. To do this, follow these instructions:
1. To change the security type of a network, you need to “Add the network”. If you already have the Wifi network saved, then simply forget the network by following the above-mentioned tutorial.
2. Now, turn on your device’s Wifi and tap on the option of “Add network”. Here, you would be asked to give a network name and select the security type. To manually select it, tap on the “Security” option.


3. From here, you will get a list of various security protocols that you can pick. Select “WPA/WPA2-PSK” and save your selection.


Now, try to connect to the network again. Most likely, it will let you fix the authentication error on your device.
Update Android firmware to the latest
There are instances where an outdated OS version of your Nokia C32 may create a hindrance in establishing a connection between your device and the WiFi network. You need to update your Android firmware to the latest version and then check if the problem persists or not.
Step 1: Launch “Settings” of your Nokia C32 and then get into the “About Phone” option.
Step 2: Now, opt for the “System Update” option. If the update is available, get your device updated to the latest OS version.
Restart the router and reset Android network settings
Sometimes, the WiFi router may hang up while establishing a connection and therefore, the wifi authentication problem occurs. Try restarting your Wi-Fi router and then check if your device connects successfully. If this doesn’t work, try to reset your Android Network Settings .
Bonus tip: Turn Airplane mode on/off
By simply turning on the Airplane mode (and later turning it off), you can easily fix the authentication problem Wifi most of the time. You can find a toggle button for Airplane mode on the notification bar of your phone. If you can’t find it there, then go to your phone’s Settings > Connection > More Networks and turn on the feature of “Airplane Mode”.

Let it do for a while. Afterward, turn it off and try to connect to the Wifi network again.
After following these quick and easy suggestions, you would be able to fix the Nokia C32 Wifi problem for sure. Even if you use any other Android device, then its authentication error can easily be resolved after these effective solutions. Go ahead and give these expert solutions a try and let us know about your experience as well. If you have any other solution to fix the authentication problem Wifi, then share it with us as well in the comments.
Nokia C32 Stuck on Screen – Finding Solutions For Stuck on Boot
The market has embraced Nokia C32 for being the pioneers in the industry. Although the company lacked in providing explicit smartphones, they were still able to catch up with the race. Nokia C32 C31, known to provide durability of the next level, is taking up the latest shelves of Nokia C32 smartphones. Although the company promises reliability, there are several problems involving such smartphones.
One prominent solution stated by Nokia C32 users involves the screen stuck in the boot. If your Nokia C32 is stuck on the “Nokia C32” screen for no particular reason, you will have to read this article. As this article tackles all reasons involving the problem, it comes up with the necessary solutions. These solutions will help Nokia C32 users find solutions for their stuck screens on the boot.
Part 1: What Causes Nokia C32 Screen Stuck on Boot?
Has your Nokia C32 recently been stuck on the boot loop screen? If it is happening or has happened to you, there are some reasons that you need to be aware of. Having an overview of the causes of Nokia C32 being stuck on the Android One screen can help you redirect yourself toward to right solution. Go through the list of all causes and find more about the issue involving screens stuck on boot in Nokia C32 smartphones:
- The Device is Damped in Liquid
It is entirely possible that your Nokia C32 smartphone is immersed in water. With a smartphone dipped in liquid, the Nokia C32 device can turn useless. If you have tried starting it again, it won’t run and might get stuck on the boot.
- Soft-Bricked Device
There are multiple conditions where your Nokia C32 smartphone can get soft-bricked. It majorly happens when a particular function in the Nokia C32 device stops working. To counter the problem, it is essential that you can get your device stuck on the boot screen.
- Outdated Device
If the equipment wears out after a certain time, there is a need to have it changed. With such obsolete models of Nokia C32, you will surely face issues like a screen stuck on the boot. Smartphone equipment cannot be revamped, and you will have to go for newer options.
- Software Update Required
A software update on your Nokia C32 smartphone might be causing issues with the screen stuck on the boot. The best way to get rid of this problem is to update your system software to the latest version.
Part 2: 5 Solutions To Solve Nokia C32 Screen Stuck on Boot
Do you seek to resolve the problem of the Nokia C32 Plus stuck on the Android One screen? There are specific techniques that can be tried as a remedy. These solutions are tried and recommended by experts. Go through the details provided below to solve the issues with your stuck Nokia C32 screen.
Solution 1: Force Restart Nokia C32
The first and most proclaimed technique to refresh Nokia C32 devices under such a problem is to force restart them. If the Nokia C32 device is stuck, you will have to perform this process by pressing the “Power” and “Volume Up” keys for 15 seconds. Continue holding the buttons until the Nokia C32 device vibrates or restarts by showing the screen again.


Solution 2: Leave the Phone For a While To Drain Its Battery
A conventional way to solve the issue of a stuck screen in Nokia C32 is to leave the phone in its position. As you let its battery drain out, the phone will turn off, and you can activate the Nokia C32 device again by charging it.
Once you restart it this way, all the procedures will initiate again, and the Nokia C32 device will be as good as new. Draining the battery has given you the leverage to regain control over the Nokia C32 device again.
Solution 3: Check For Updates on Nokia C32 Smartphones
Another quick remedy to try on your Nokia C32 smartphones involves updating their software. If there is any prevailing software update to install on the smartphone, you will have to check and update it by following the steps guided below:
Step 1: Open the “Settings” of your Nokia C32 smartphone and continue to the “System” section in the list of options. You will have to access the “Advanced” options in the “System” menu.

Step 2: As you lead to the advanced options, look for “System update” in the provided options. Look for the “Check for update” button. This will check if your Nokia C32 needs any software updates or not.

Solution 4: Using Wondershare Dr.Fone
One of the finest options available to perform is using a third-party platform that promises smooth operability. Wondershare Dr.Fone is a platform designed to provide such smartphones another life to survive. Its unique functionality repairs all the issues with a smartphone and makes it as good as a new one.
If your Nokia C32 Plus is stuck on the Android One screen, this platform is the ultimate solution for you. With the support of the latest devices and software versions, Dr.Fone – System Repair (Android) offers the best results. To know how to repair your Nokia C32 smartphone with the help of this tool, look through the steps featured next:
Step 1: Open Dr.Fone and Select System Repair
As you launch Dr.Fone after downloading it on your computer, continue to the “System Repair” option. You will have to start by connecting the Android device to the computer through a USB cable. Select “Android Repair” from the options available and continue to the following options.

Step 2: Define Device Information and Confirm
You will be directed to the Nokia C32 device information screen, where you must define the identification parameters of the Nokia C32 device. Select the brand, name, model, country, and carrier details for proper system recovery. On clicking “Next,” you will receive a warning where you will have to type the number “000000” to proceed with the method.

Step 3: Put Your Nokia C32 in Download Mode
Following this, you will have to put your Nokia C32 in Download Mode. For that, you need to follow the steps according to the condition of the Nokia C32 device:
- For Devices with Home Button:
Power off your Android and continue to press and hold the “Volume Down,” “Home,” and “Power” buttons for a few seconds. After holding them for almost 10 seconds, release and press the “Volume Up” button to enter the mode.
- For Devices without Home Button:
Turn off the Android device and hold the “Volume Down,” “Bixby,” and “Power” buttons simultaneously for a few seconds. On releasing the buttons, press the “Volume Up” button to enter Download Mode.

Step 4: Start Downloading and Verify Firmware
To proceed, tap the “Next” button to download the firmware. As you verify the firmware, the repairing process starts on your Nokia C32 device.

Solution 5: Contact the Customer Service Center of Nokia C32
If the issue of the Nokia C32 stuck on the “Nokia C32” screen continues, you will have to contact the Nokia C32 device’s customer support. With no proper method left for the Nokia C32 device, the only effective technique is to visit the authorized store for Nokia C32 smartphones and claim the issue with the Nokia C32 device. In this way, you might receive or get a fully repaired device with no additional charges if the Nokia C32 smartphone is under warranty.
Part 3: How to Avoid Nokia C32 Screen Stuck on Boot?
What if you come to know that you can avoid the Nokia C32 screen stuck-on boot problem? There are a set of tips and tricks that you can follow to explain how to prevent such an issue in the first place. Follow these tips to learn more about saving your Nokia C32 from such miserable conditions:
1. Protect from Malware
The first thing to protect your Nokia C32 smartphone from getting stuck on the boot is to keep it safe from unauthorized and malicious data. The best thing to keep a device secure is to follow all security protocols and avoid bypassing them. If you try downloading something not authorized by the Play Store itself, for instance, an APK, it can make your device vulnerable to malware.
2. Keep Your Device Updated
If you feel frustrated by issues like Nokia C32 being stuck on the Android One screen, the best thing to avoid such a problem is to keep your device updated at all costs. Whenever there is an update on your Nokia C32 smartphone, make sure to install it on time and properly. Do not leave updates uninstalled for no reason, as they can hinder the Nokia C32 device’s speed and performance.
3. Do Not Fool Around with System Files
Changing or modifying system files can be fatal for smartphones. Thus, to keep your Nokia C32 safe, you need to keep your hands away from such important files. Modifying a single file can make your device useless or put you in situations like a Nokia C32 smartphone stuck on the boot. For that, the best tip is to keep yourself out of engagement.
4. Use Wondershare Dr.Fone To Manage All Data With Ease
As you have observed, the power of Dr.Fone can be a perfect phone manager for you at all times. While providing system repair services, it can also help you manage your device’s data and other statuses. Thus, consider keeping Dr.Fone close to your device and its operations. In this way, you will be able to have complete control over all types of data present in the Nokia C32 smartphone.

safe & secure
4,675,795 people have downloaded it
Conclusion
With that, this brings the article on Nokia C32 smartphones to a conclusion. If you are still facing issues with your Nokia C32 stuck on the “Nokia C32” screen, this article is the perfect solution for your problem.
With all the provided methods, we do hope that you will be able to restore the status of your Nokia C32 smartphone and make it functional. For the finest results, you have also discovered Dr.Fone – System Repair (Android) as the best solution for repairing such devices.
- Title: 4 Ways to Fix Android Blue Screen of Death On Nokia C32 | Dr.fone
- Author: Ariadne
- Created at : 2024-07-30 07:30:38
- Updated at : 2024-07-31 07:30:38
- Link: https://howto.techidaily.com/4-ways-to-fix-android-blue-screen-of-death-on-nokia-c32-drfone-by-drfone-fix-android-problems-fix-android-problems/
- License: This work is licensed under CC BY-NC-SA 4.0.