
9 Quick Fixes to Unfortunately TouchWiz has stopped Of Nokia C12 Pro | Dr.fone
9 Quick Fixes to Unfortunately TouchWiz has stopped Of Nokia C12 Pro
“Unfortunately TouchWiz home has stopped” is the talk of the town due to annoying TouchWiz UI, a front-end user interface developed by Nokia C12 Pro. Not to mention, the Nokia C12 Pro has borne a whole lot of heat from its agitated users over the years and the reason is pretty much obvious due to the pre-installed bloatware apps and the theme launch “TouchWiz home”. That not just brutally annoys users and eats up a heck of internal storage space but lags up too often due to low speed and stability. As a result users end up with “Unfortunately TouchWiz home has stopped” and “Unfortunately, TouchWiz has stopped”. Apparently, there are several flaws in the design and functioning of this launcher and hence, Touchwiz keeps stopping or becomes unresponsive.
Part 1: Common scenarios when TouchWiz keeps stopping
Here in this section, we will introduce some scenarios that can be blamed for why TouchWiz is not working. Check out the following points:
- More often than not, the TouchWiz keeps stopping after an Android update. When we update our Nokia C12 Pro device, the old data and cache usually conflicts with TouchWIz thereby cropping up this mess.
- When you disable some built-in apps, you might get in trouble with TouchWiz. Doing this sometimes can hamper the TouchWiz operation and raise the “**unfortunately TouchWiz home has stopped**” error message.
- Many times installing some third-party apps and widgets can cause this problem. The apps like launchers can be conflicting with TouchWiz home launcher and therefore cease it to work. Also, a glitched widget is responsible for the same i.e. forces stop the TouchWiz.
Part 2: 9 Fixes to “Unfortunately TouchWiz has stopped”

Fix “TouchWiz keeps stopping” by repairing Android system
When your TouchWiz keeps stopping and you aren’t able to proceed further, the best way to handle the situation is to repair the Android system. And the best that can help you to serve the purpose is Dr.Fone - System Repair (Android). It has the ability to fix any sort of Android system issue without any complications. To fix this issue, the tool only takes few minutes of yours and performs smoothly. Moreover, you don’t have to worry if you aren’t tech pro. This tool requires no special technical know-how. Here are the advantages you get with this tool.
Dr.Fone - System Repair (Android)
One click tool to fix “Unfortunately TouchWiz has stopped”
- A very easy tool that fixes problems in just one click
- Provides full support all day all night as well as offers 7 day money back challenge
- Enjoys higher success rate and considered as first tool carrying such amazing functionalities
- Able to fix wide variety of Android issues including app crashing, black/white screen of death
- Fully secured and no harm regarding any virus infection
3,211,972 people have downloaded it
Step 1: Download the Program
The one-click repairing process begins with downloading Dr.Fone from its official website. When it is downloaded, follow the installation steps. Upon successful installation, launch the tool on your PC.
Step 2: Connect your Nokia C12 Pro Device
After you open the software, hit on the “System Repair” button from the main interface. With the help of a genuine USB cable, get your Nokia C12 Pro phone and connect it with the computer.

Step 3: Choose the Tab
Now, from the next screen, you are supposed to choose “Android Repair” tab. It is given on the left panel.

Step 4: Enter Right Information
Please keep your mobile details handy as you will need them in the next window. You will need to enter the correct brand, model, and country name etc. for better detection of your device.

Step 5: Confirm Actions
This process may result in removing your data hence we strongly recommend you to keep a backup of your data.
Tip: You can use Dr.Fone – Phone Backup (Android) to backup your Nokia C12 Pro device in case you’re wondering how.
Step 6: Take your Device in Download mode
You will get some instructions on your screen to keep your device in Download mode. Follow them according to the Nokia C12 Pro device you own and hit “Next”. When you do this, the program will detect your device and let you download the latest firmware.


Step 7: Repair Device
Now, when the firmware is downloaded, the program will itself begin to repair your device. Wait and keep the Nokia C12 Pro device connected until you get the notification for process completion.
 Epubor Audible Converter for Mac: Download and convert Audible AAXC/AA/AAX to MP3 with 100% original quality preserved.

Clear the cache data the TouchWiz
Maximum Android devices are designed to deleted cache data upon getting updated to the newest Android system. However, Nokia C12 Pro stands as an exception in such case. And therefore, many times TouchWiz starts stopping right after upgrading. Thus, due to the collection of cache data, TouchWiz can display error. This calls for removing the cache from TouchWiz and run things smoothly. Here is how to do this:
- Tap on “Apps” from the Home screen firstly.
- Launch “Settings” afterwards
- Look for “Applications” and tap on it followed by “Application Manager”.
- When Application Manager gets opened, swipe towards right to get into the “All” screen.
- Now, choose “TouchWiz” and tap “Clear Cache”.
- Now, tap “Clear Data” followed by “OK”.
- Now restart your device.
 OtsAV TV Webcaster
Please note that this will delete all your Home screens post this method.
Disable Motion & gesture settings
The functions regarding Motions and Gestures can be responsible for why TouchWiz home has stopped in your device. Usually the Nokia C12 Pro devices running on Android version less than Marshmallow are prone to encountering this issue. Or the Nokia C12 Pro devices having modest specs often fall prey to the issue. When you disable these settings, you might get out of the problem.
Change the Animation Scale
When you use TouchWiz, it may consume higher memory usage for high amount of graphic maintenance. As a result, the “**unfortunately TouchWiz home has stopped**” error might crop up. Taking this into consideration, you should try reconfiguring the animation scale and get rid of the error. Here’s how:
Clear Cache Partition
In case the above steps didn’t figure out the problem, here is the next tip. This method can be counted as one of the most effective one. Because it is able to fix minor issues in Android devices, we recommend you for “**TouchWiz home has stopped**” issue too. Let us know how you can do it:
- Turn off your Nokia C12 Pro device.
- Start pressing and holding “Volume Up” and “Power” buttons simultaneously.
- Keep doing this until you see the Android screen. This will take your device into recovery mode.
- You will observe some options on the screen. Take help of Volume buttons, scroll down to choose “Wipe Cache Partition”. Press Power button to confirm and the Nokia C12 Pro device will be rebooted.

Check now if the error is eliminated. If unfortunately not, please try the following solution.
Enable the easy mode
For some users, enabling Easy Mode has been of great assistance. This feature aims to make the user experience more efficient by simply eliminating complex features. The Easy Mode removes those features that confuse the users by messing up the screen. Hence, we suggest you to switch to this mode in order to remove “**TouchWiz not working**” problem. The steps are:
- Open “Settings” and go to “Personalization”.
- Hit on “Easy Mode” now.


Hope the TouchWiz won’t keep stopping error does not pop up anymore!
 PaperScan Professional: PaperScan Scanner Software is a powerful TWAIN & WIA scanning application centered on one idea: making document acquisition an unparalleled easy task for anyone.
Boot your phone to safe mode
Here is the next solution to be followed when TouchWiz keeps stopping. As we already said, third-party apps can cause this issue, booting your device in the Safe mode will disable those apps temporarily. Hence you need to boot your Nokia C12 Pro device to Safe mode and check if the reason is any third-party app.
- Switch off your device to initiate.
- Press “Power” button and keep doing this until device’s logo appears on the screen.
- When you see logo appearing, instantly release the button and start holding “Volume Down” button.
- Keep holding until rebooting finishes.
- You will now witness “Safe mode” on the bottom screen. You can now release the button.

Reset Factory settings
If the above method went futile and you’re still at the same place, then factory reset is the next logical step to be taken. We suggest this method because it will take your device to its factory state. As a result, TouchWiz will probably get normal and work perfectly.
Along with this, we would also suggest you go take backup of your data so that you won’t lose any of the personal information from your device after performing factory reset. For your convenience, we have stated the backup steps too in the following guide. Have a look:
- Run “Settings’ in your device and go to “Backup & Reset”.
- Notice if “Back up my data” is enabled or not. If not, turn it on and create backup.
- Now, scroll for “Factory Data reset” option and confirm it by clicking “Reset Phone”.

- Wait a few minutes and your device will reboot.
Install a new launcher to replace TouchWiz
We believe that you will find the above methods helpful. However, if still in case your TouchWiz is not working, we advice you that you should install a new theme launcher in your device. It will be a wise option to ditch TouchWiz in such scenario rather than tolerating the problem. Hope this advice will help you.
 Jet Profiler for MySQL, Enterprise Version: Jet Profiler for MySQL is real-time query performance and diagnostics tool for the MySQL database server. Its detailed query information, graphical interface and ease of use makes this a great tool for finding performance bottlenecks in your MySQL databases.
 How to Fix the Soft Bricked Nokia C12 Pro?
Bricked phone is a serious problem, as your brick smartphone could be suffering from a soft brick or hard brick problem, and must be dealt with carefully. It is very common to see a brick smartphone these days. If you are wondering what exactly is a bricked phone, here is your answer.
A bricked phone, hard brick or soft brick, is a smartphone which refuses to start or boot all the way up the home/main screen of the Nokia C12 Pro device. This issue is observed within most Android phones because users have a tendency to tamper with the Nokia C12 Pro device settings, flashing new and customized ROMs and tweaking with the essential files. Playing around with the phone’s internal set-up leads to such errors, worst of them being a brick smartphone. Usually, a bricked phone does not switch on and stays frozen at the Nokia C12 Pro device logo, a blank screen or even worse, doesn’t respond to any command, even the power on command.
If you are confused about the soft brick and hard brick problems and looking for solutions to fix your priced phone, then here is all you need to know.
Read on to find out more.
Part 1: What is the difference between soft brick and hard brick?
To begin with, let us understand the basic difference between a soft brick and hard brick issue. Both versions of a bricked phone prevent it from booting but differ in their causes and gravity of the problem.
A soft-brick problem is caused merely by a software error/crash and makes your device switch on automatically every time you manually turn it off. This phenomenon is referred to as Boot Loop. Soft bricked Android phones are not as difficult to fix as the hard bricked Android phones. It is convenient to say that a soft bricked phone only boots up half-way and not fully, whereas a hard bricked device does not switch on at all. A hard brick error is thus caused when the kernel, which is nothing but an interface for the software to communicate with the hardware, is tampered with. A hard bricked phone is not recognized by your PC when plugged in and is a serious problem. It requires troubleshooting techniques and cannot be easily fixed as the soft brick problem.

Hard bricked phones are a rare sight, but the soft brick is very common. Given below are ways to fix a soft brick Android phone. The techniques listed here are the best and the most efficient ways to get your phone back to its normal working conditions without losing your important data or damaging your device or its software.
Part 2: Stuck at the Boot Loop
This is the first sign of a soft bricked Android phone. Boot Loop is nothing but when your phone does not remain switched off and turns itself on automatically, and freezes at the logo screen or blank screen, every time you manually try to power it off.
Stuck at boot loop problem can be fixed by clearing your Cache partitions. These partitions are nothing but storage locations for your modem, kernels, system files, drivers and built-in Apps data.
It is advisable to clear Cache partitions regularly to keep your phone free from such glitches.
Since the phone refuses to boot, Cache can be cleared from entering into the Recovery Mode. Different Android devices have different ways to put it in recovery mode. Normally pressing the power key and volume down key helps, but you may refer to your phone’s guide for better understanding and then follow the steps given below to clear the cache partition:
Once you are the recovery mode screen, you will see a number of options as shown in the screenshot.

Use the volume down key to scroll down and select ”Wipe cache partition” as shown below.
 Easy and Safe Partition Software & Hard Disk Manager
 >
>
After the process is completed, select “Reboot System” which is the first option in the recovery mode screen.
This method will help you erase all the clogged up and unwanted files. You may loose some App related data, but that is a small price to pay to fix your bricked phone.
If this method does not boot up your brick smartphone and the problem still persists, there are two more things you can try. Read ahead to find out about them.
Part 3: Booting straight into recovery mode
If your bricked phone does not boot up to your Home Screen or Lock screen and instead boots directly into Recovery Mode, there is not much left to do. Booting straight into recovery mode is undoubtedly a soft brick error but it also indicates a possible problem with your current ROM. The only option you have to flash a new ROM to reboot your bricked phone back to its normal functioning.
To flash a new ROM:
Firstly, you must root your phone and unlock the Bootloader. Every phone’s mechanism to unlock the bootloader is different, thus, we suggest to refer to your user manual.
Once the Bootloader is unlocked, take a backup of all your data by selecting “Backup” or “Android” back in recovery mode. The process should not take long and all you need to do is tap “OK” to config backup.

In this step, download a ROM of your choice and store it in your SD Card. Insert the SD Card in your phone to begin the flashing process.
Once at the recovery mode, select “Install Zip from SD Card” from the options.


Scroll down using the volume key and use the power key to select the downloaded ROM.


This might take a few minutes of your time, but once the process is complete, reboot your phone.
Hopefully, your bricked phone will not boot normally and work smoothly.
Part 4: Booting straight into Bootloader
If your bricked phone boots straight into Bootloader, then this a serious issue and must not be taken lightly. Flashing a new ROM or clearing cache partitions are of little help in such a brick smartphone situation. Booting straight into Bootloader is a peculiar soft bricked Android phone feature and can be tackled only by downloading and flashing your original ROM from the manufacturer. In order to do so, a detailed study about your manufacturer’s ROM, ways to download and flash must be carried out. Since different Android phones come with different types of ROMs, it difficult to cover all the aspects about the different types of ROMs.
Brick smartphone problem has become more prominent than phone freezing or hanging issue. Android users are often seen looking for solutions to fix their soft brick and hard brick phones. Android phones are prone to get bricked and thus, it is important for us to know about the three techniques given above. These methods have been tried, tested and recommended by ay affected bricked phone users. Therefore, these tips are reliable and worth a try. So if your phone acts stubborn and refuses to boot normally, examine the problem carefully and adopt one of the solutions given above which best suits your situation.
4 Ways to Fix Android Blue Screen of Death On Nokia C12 Pro
Android is undoubtedly amongst the best smartphone platforms but comes with its own share of glitches. The Android screen of death is observed by many users all over the world who complain of their device screen turning blue rendering their phone/tablet unresponsive. This is called the Android blue screen of death and it usually occurs when you turn on your device by pressing the Power On button but your device does not boot up normally and remains stuck at a plain blue screen without any error message.
Such an Android screen of death is caused by a temporary software crash but can also occur due to certain hardware issues. We understand the inconvenience caused to you when you see the Android blue screen of death. Here are ways to fix the error and great software to extract all your data to keep it unaltered and safe.
Read on to learn more about the Android screen of death and ways to combat it.
Part 1: How to rescue data on Nokia C12 Pro with blue screen of death?
The Android blue screen of death issue is not a difficult problem to deal with and can be fixed by you by following the easy steps given in this article. We suggest that all readers rescue the data stored on their Android devices to prevent data loss and keep it stored in your PC from where it can be accessed and recovered by you anytime, anywhere. This task might sound tedious, but, we have for you Dr.Fone - Data Recovery (Android) , a software specially designed to retrieve data from broken and damaged Nokia C12 Pro phones and tabs, especially Nokia C12 Pro devices, and keep it safe in your PC without tampering with it or altering its format. It efficiently extracts data from broken or unresponsive Nokia C12 Pro devices, phones/tabs stuck at black/blue screen, or whose system crashed due to a virus attack.
Dr.Fone - Data Recovery (Android)
World’s 1st data retrieval software for broken Android devices.
- It can also be used to recover data from broken devices or devices that are damaged in any other way such as those stuck in a reboot loop.
- Highest retrieval rate in the industry.
- Recover photos, videos, contacts, messages, call logs, and more.
- Compatible with Nokia C12 Pro devices.
3,145,271 people have downloaded it
Follow the steps given below to extract data when you experience an Android screen of death:
1. Download, install, and run the Dr.Fone - Data Recovery (Android) tool on your PC. Connect your device using a USB cable and move on to the main screen of the software.
2. Once you launch the software, you will see many tabs before you. Click on “Data Recovery” > “Android”.

3. And then choose “Recover from Broken Phone” from the program’s screen.

4. In this step, choose from the two options before you the true nature of your device as shown in the screenshot below.

5. You will now be asked to feed in your phone’s model type and name as shown in the screenshot below. Give correct details for the software to identify your device smoothly and hit “Next”.


6. In this step, refer to the instructions in your device manual to enter into Download Mode on your Nokia C12 Pro and hit “Next”. An example of what to do to reach Download Mode is shown below.

7. Finally, let the software recognize your Nokia C12 Pro, and start to download the recovery package for your device.
 WonderFox DVD Ripper Pro
8. Once it does, you will be able to preview all the files on the screen in front of you before you hit “Recover to Computer”.

The process may take up to a few minutes and once it’s done all your files will be extracted and stored on your PC. You can now move on to troubleshooting the problem without the fear of losing all your important data.
 safe & secure
Part 2: One click to fix the Android blue screen of death
We understand how annoying it is to see the Android blue screen of death and fail to access your device data. But, with Dr.Fone - System Repair (Android) , your troubles would burst away.
This software effectively fixes Android screen of death issue along with app crashing, bricked or unresponsive device, stuck on Nokia C12 Pro logo, etc. All Android issues are well taken care of by Dr.Fone - System Repair (Android) with one click.
Dr.Fone - System Repair (Android)
Easy and effective solution to fix the Android blue screen of death!
- Every kind of Android system error and problem is resolved.
- It is the premier Android repair software in the market.
- All the latest Nokia C12 Pro devices are supported by this program.
- Android blue screen of death can be fixed with a single click.
- Easy to use and no technical skills are needed to operate it.
4,750,154 people have downloaded it
Note: Backing up your device is significant before you carry out the Android repair process. The process of fixing the Android blue screen of death issue may erase data from your Nokia C12 Pro. So backing up your Android seems a viable option.
Phase 1: Connecting your Android after preparing it
Step 1: Installation and running Dr.Fone - System Repair (Android) on your system takes you to the main screen. Choose the ‘System Repair’ option followed by connecting the Android device.
Step 2: Press the ‘Android Repair’ option before tapping the ‘Start’ button.
Step 3: Over the Nokia C12 Pro device information window, select all relevant data about your device followed by the ‘Next’ button.
Phase 2: Initiate repairing after entering ‘Download’ mode
Step 1: Get the Nokia C12 Pro device in ‘Download’ mode to fix the Android blue screen of death issue. Here is how –
- On a ‘Home’ button-less device – you need to switch off the Nokia C12 Pro device. Now, hold the ‘Volume Down’, ‘Power’, and ‘Bixby’ keys together for about 10 seconds and release. Hit the ‘Volume Up’ key to get into ‘Download’ mode.

- On a ‘Home’ button device – shut down the Android phone/tablet, and then push the ‘Power’, ‘Volume Down’, and ‘Home’ keys for 10 seconds. Let go of the keys and press the ‘Volume Up’ key to enter ‘Download’ mode.
Step 2: Tap the ‘Next’ button to download firmware.
Step 3: Dr.Fone - System Repair (Android) would verify the firmware post-download. It will start repairing the Android system automatically.

safe & secure
Part 3: Force Restart Your Nokia C12 Pro
A force restart is a basic step that can clear minor software glitches. It has the potential to resolve the Android blue screen of death issue. Force restarting your device can clear temporary bugs and reset all processes. It is a simple yet often overlooked way to fix the Android blue screen of death issue. Use the following steps to force restart your Nokia C12 Pro:
Step: On your Nokia C12 Pro, press and hold the “Power” and “Volume Down” keys for around 10 seconds. Release the keys when your device reboots and wait for it to complete rebooting.

Part 4: Remove phone battery to fix blue screen of death
The best home remedy to fix any kind of Android screen of death remove the Nokia C12 Pro device’s battery. This technique might sound too simple, but it has solved the Android blue screen of death issue for many users whose devices started normally after reinserting the battery. Here is what you should do.
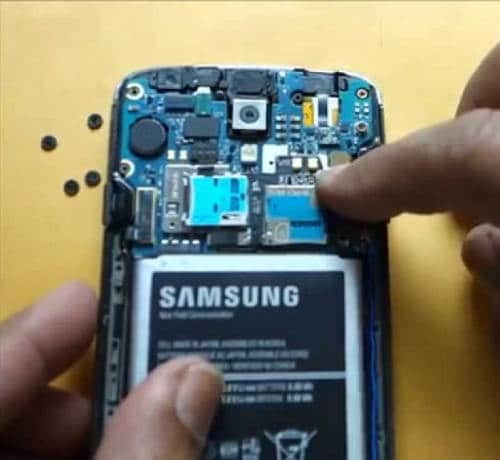
1. Open the back cover of your Nokia C12 Pro and carefully remove its battery.

2. Let the battery be out for 5-7 minutes. Meanwhile, long press the power button to drain out any residual charge from your device.
3. Now reinsert the battery and attach the back cover.
4. Turn on your device and see that it boots normally all the way to the Home/Locked Screen without getting stuck at Android blue screen of death.
Note: Not all Android devices allow you to remove their battery. If you own such a device, try the next step as it is your only option to fix the Android blue screen of death problem.
 LYRX is an easy-to-use karaoke software with the professional features karaoke hosts need to perform with precision. LYRX is karaoke show hosting software that supports all standard karaoke file types as well as HD video formats, and it’s truly fun to use.
Part 5: Put out your SIM Card/SD card and reinsert
In some cases, issues related to the Android blue screen of death can be caused by problems with the SIM card or SD card. Removing and reinserting these cards can help resolve potential conflicts or glitches. Remember that this method can help resolve issues related to SIM card or SD card conflicts. However, it may not address more complex software or hardware problems causing the blue screen issue.
Part 6: Clean or change the LCD connector
If you’re facing the Android blue screen of death issue, the issue might be related to a hardware problem. The problem can be a loose or damaged LCD connector. In this scenario, you can try cleaning or changing the connector. This method is more advanced and involves disassembling your device. That’s why you need to proceed with caution and only if you’re comfortable with hardware tasks.
Part 7: Update to the latest Android version
Software problems can manifest the Android equivalent of a blue screen of death. It is usually triggered by errors or anomalies within the operating system. To address these concerns, upgrading to the most recent version of the Android OS proves effective. However, updating your device’s software could introduce fresh glitches or compatibility conflicts. These steps outline the process of updating your device to the latest OS:
Step: Open the Settings app on your Nokia C12 Pro by locating and launching it. Proceed by scrolling through the options and selecting “Software Update.” In the ensuing screen, choose “Download and Install” to start a search for any available updates.

 Video Converter Factory Pro
Part 8: How to fix the Android blue screen of death by factory reset?
The Android screen of death is a very confusing issue as it freezes your device at a blue screen with no options to navigate further. In such a situation you may consider performing a Factory Reset, better known as Hard Reset as you will need to enter Recovery Mode to implement this technique. Although resting your device will wipe off all its data but you don’t need to worry as Dr.Fone toolkit Android Data Extraction software can retrieve all your files and keep them safe.
Accessing Recovery Mode differs for different Android devices. Thus, we suggest that you consult your device manual to understand how to boot into Recovery Mode on your particular Android device and then follow the steps given below:
Once you are on the Recovery Screen, you will see a list of options before you, similar to the screenshot below.


Use the Volume Down button to scroll downwards and reach the “Wipe data/Factory reset” option.


Now use the power button to select it and wait for the Nokia C12 Pro device to reboot automatically.
You will notice that the Android device will turn back on without getting stuck at the Android blue screen of death. Now you can set up your device from scratch.
Part 9: What Should You Do if Android Still Stuck on Blue Screen?
Have you tried all the methods, and your Nokia C12 Pro is still stuck on the blue screen of death? In this case, it’s important to consider the possibility of a hardware issue. Remember that hardware issues can be complex. Trying to fix things without the right expertise can result in additional harm. If you’re uncertain about the next steps, it’s wisest to ask for assistance from a trained professional.
The Android screen of death, especially the Android blue screen of death, is not a very pleasant sight and could worry you. The good news is that this problem can be fixed by you sitting at home without any technical assistance. Follow the simple and easy tips given above to reboot your device and use the Dr.Fone - Data Recovery (Damaged Device) tool to rescue your data in the most efficient and effective way, then use Dr.Fone - System Repair (Android) to repair your Nokia C12 Pro.
safe & secure
- Title: 9 Quick Fixes to Unfortunately TouchWiz has stopped Of Nokia C12 Pro | Dr.fone
- Author: Ariadne
- Created at : 2024-07-30 08:45:05
- Updated at : 2024-07-31 08:45:05
- Link: https://howto.techidaily.com/9-quick-fixes-to-unfortunately-touchwiz-has-stopped-of-nokia-c12-pro-drfone-by-drfone-fix-android-problems-fix-android-problems/
- License: This work is licensed under CC BY-NC-SA 4.0.