
9 Quick Fixes to Unfortunately TouchWiz has stopped Of Xiaomi 14 | Dr.fone
9 Quick Fixes to Unfortunately TouchWiz has stopped Of Xiaomi 14
“Unfortunately TouchWiz home has stopped” is the talk of the town due to annoying TouchWiz UI, a front-end user interface developed by Xiaomi 14. Not to mention, the Xiaomi 14 has borne a whole lot of heat from its agitated users over the years and the reason is pretty much obvious due to the pre-installed bloatware apps and the theme launch “TouchWiz home”. That not just brutally annoys users and eats up a heck of internal storage space but lags up too often due to low speed and stability. As a result users end up with “Unfortunately TouchWiz home has stopped” and “Unfortunately, TouchWiz has stopped”. Apparently, there are several flaws in the design and functioning of this launcher and hence, Touchwiz keeps stopping or becomes unresponsive.
 Jet Profiler for MySQL, Enterprise Version: Jet Profiler for MySQL is real-time query performance and diagnostics tool for the MySQL database server. Its detailed query information, graphical interface and ease of use makes this a great tool for finding performance bottlenecks in your MySQL databases.
 Part 1: Common scenarios when TouchWiz keeps stopping
Here in this section, we will introduce some scenarios that can be blamed for why TouchWiz is not working. Check out the following points:
- More often than not, the TouchWiz keeps stopping after an Android update. When we update our Xiaomi 14 device, the old data and cache usually conflicts with TouchWIz thereby cropping up this mess.
- When you disable some built-in apps, you might get in trouble with TouchWiz. Doing this sometimes can hamper the TouchWiz operation and raise the “**unfortunately TouchWiz home has stopped**” error message.
- Many times installing some third-party apps and widgets can cause this problem. The apps like launchers can be conflicting with TouchWiz home launcher and therefore cease it to work. Also, a glitched widget is responsible for the same i.e. forces stop the TouchWiz.
Part 2: 9 Fixes to “Unfortunately TouchWiz has stopped”

Fix “TouchWiz keeps stopping” by repairing Android system
When your TouchWiz keeps stopping and you aren’t able to proceed further, the best way to handle the situation is to repair the Android system. And the best that can help you to serve the purpose is Dr.Fone - System Repair (Android). It has the ability to fix any sort of Android system issue without any complications. To fix this issue, the tool only takes few minutes of yours and performs smoothly. Moreover, you don’t have to worry if you aren’t tech pro. This tool requires no special technical know-how. Here are the advantages you get with this tool.

Dr.Fone - System Repair (Android)
One click tool to fix “Unfortunately TouchWiz has stopped”
- A very easy tool that fixes problems in just one click
- Provides full support all day all night as well as offers 7 day money back challenge
- Enjoys higher success rate and considered as first tool carrying such amazing functionalities
- Able to fix wide variety of Android issues including app crashing, black/white screen of death
- Fully secured and no harm regarding any virus infection
3,211,972 people have downloaded it
Step 1: Download the Program
The one-click repairing process begins with downloading Dr.Fone from its official website. When it is downloaded, follow the installation steps. Upon successful installation, launch the tool on your PC.
Step 2: Connect your Xiaomi 14 Device
After you open the software, hit on the “System Repair” button from the main interface. With the help of a genuine USB cable, get your Xiaomi 14 phone and connect it with the computer.

Step 3: Choose the Tab
Now, from the next screen, you are supposed to choose “Android Repair” tab. It is given on the left panel.

Step 4: Enter Right Information
Please keep your mobile details handy as you will need them in the next window. You will need to enter the correct brand, model, and country name etc. for better detection of your device.

Step 5: Confirm Actions
This process may result in removing your data hence we strongly recommend you to keep a backup of your data.
Tip: You can use Dr.Fone – Phone Backup (Android) to backup your Xiaomi 14 device in case you’re wondering how.
Step 6: Take your Device in Download mode
You will get some instructions on your screen to keep your device in Download mode. Follow them according to the Xiaomi 14 device you own and hit “Next”. When you do this, the program will detect your device and let you download the latest firmware.


Step 7: Repair Device
Now, when the firmware is downloaded, the program will itself begin to repair your device. Wait and keep the Xiaomi 14 device connected until you get the notification for process completion.


Clear the cache data the TouchWiz
Maximum Android devices are designed to deleted cache data upon getting updated to the newest Android system. However, Xiaomi 14 stands as an exception in such case. And therefore, many times TouchWiz starts stopping right after upgrading. Thus, due to the collection of cache data, TouchWiz can display error. This calls for removing the cache from TouchWiz and run things smoothly. Here is how to do this:
- Tap on “Apps” from the Home screen firstly.
- Launch “Settings” afterwards
- Look for “Applications” and tap on it followed by “Application Manager”.
- When Application Manager gets opened, swipe towards right to get into the “All” screen.
- Now, choose “TouchWiz” and tap “Clear Cache”.
- Now, tap “Clear Data” followed by “OK”.
- Now restart your device.

Please note that this will delete all your Home screens post this method.
 NeoDownloader - Fast and fully automatic image/video/music downloader.
Disable Motion & gesture settings
The functions regarding Motions and Gestures can be responsible for why TouchWiz home has stopped in your device. Usually the Xiaomi 14 devices running on Android version less than Marshmallow are prone to encountering this issue. Or the Xiaomi 14 devices having modest specs often fall prey to the issue. When you disable these settings, you might get out of the problem.
Change the Animation Scale
When you use TouchWiz, it may consume higher memory usage for high amount of graphic maintenance. As a result, the “**unfortunately TouchWiz home has stopped**” error might crop up. Taking this into consideration, you should try reconfiguring the animation scale and get rid of the error. Here’s how:

Clear Cache Partition
In case the above steps didn’t figure out the problem, here is the next tip. This method can be counted as one of the most effective one. Because it is able to fix minor issues in Android devices, we recommend you for “**TouchWiz home has stopped**” issue too. Let us know how you can do it:
- Turn off your Xiaomi 14 device.
- Start pressing and holding “Volume Up” and “Power” buttons simultaneously.
- Keep doing this until you see the Android screen. This will take your device into recovery mode.
- You will observe some options on the screen. Take help of Volume buttons, scroll down to choose “Wipe Cache Partition”. Press Power button to confirm and the Xiaomi 14 device will be rebooted.

Check now if the error is eliminated. If unfortunately not, please try the following solution.
Enable the easy mode
For some users, enabling Easy Mode has been of great assistance. This feature aims to make the user experience more efficient by simply eliminating complex features. The Easy Mode removes those features that confuse the users by messing up the screen. Hence, we suggest you to switch to this mode in order to remove “**TouchWiz not working**” problem. The steps are:
- Open “Settings” and go to “Personalization”.
- Hit on “Easy Mode” now.

Hope the TouchWiz won’t keep stopping error does not pop up anymore!
 vMix 4K - Software based live production. vMix 4K includes everything in vMix HD plus 4K support, PTZ control, External/Fullscreen output, 4 Virtual Outputs, 1 Replay, 4 vMix Call, and 2 Recorders.
Boot your phone to safe mode
Here is the next solution to be followed when TouchWiz keeps stopping. As we already said, third-party apps can cause this issue, booting your device in the Safe mode will disable those apps temporarily. Hence you need to boot your Xiaomi 14 device to Safe mode and check if the reason is any third-party app.
- Switch off your device to initiate.
- Press “Power” button and keep doing this until device’s logo appears on the screen.
- When you see logo appearing, instantly release the button and start holding “Volume Down” button.
- Keep holding until rebooting finishes.
- You will now witness “Safe mode” on the bottom screen. You can now release the button.

Reset Factory settings
If the above method went futile and you’re still at the same place, then factory reset is the next logical step to be taken. We suggest this method because it will take your device to its factory state. As a result, TouchWiz will probably get normal and work perfectly.
Along with this, we would also suggest you go take backup of your data so that you won’t lose any of the personal information from your device after performing factory reset. For your convenience, we have stated the backup steps too in the following guide. Have a look:
- Run “Settings’ in your device and go to “Backup & Reset”.
- Notice if “Back up my data” is enabled or not. If not, turn it on and create backup.
- Now, scroll for “Factory Data reset” option and confirm it by clicking “Reset Phone”.

- Wait a few minutes and your device will reboot.
Install a new launcher to replace TouchWiz
We believe that you will find the above methods helpful. However, if still in case your TouchWiz is not working, we advice you that you should install a new theme launcher in your device. It will be a wise option to ditch TouchWiz in such scenario rather than tolerating the problem. Hope this advice will help you.
How to Fix the Soft Bricked Xiaomi 14?
Bricked phone is a serious problem, as your brick smartphone could be suffering from a soft brick or hard brick problem, and must be dealt with carefully. It is very common to see a brick smartphone these days. If you are wondering what exactly is a bricked phone, here is your answer.
A bricked phone, hard brick or soft brick, is a smartphone which refuses to start or boot all the way up the home/main screen of the Xiaomi 14 device. This issue is observed within most Android phones because users have a tendency to tamper with the Xiaomi 14 device settings, flashing new and customized ROMs and tweaking with the essential files. Playing around with the phone’s internal set-up leads to such errors, worst of them being a brick smartphone. Usually, a bricked phone does not switch on and stays frozen at the Xiaomi 14 device logo, a blank screen or even worse, doesn’t respond to any command, even the power on command.
If you are confused about the soft brick and hard brick problems and looking for solutions to fix your priced phone, then here is all you need to know.
Read on to find out more.
Part 1: What is the difference between soft brick and hard brick?
To begin with, let us understand the basic difference between a soft brick and hard brick issue. Both versions of a bricked phone prevent it from booting but differ in their causes and gravity of the problem.
A soft-brick problem is caused merely by a software error/crash and makes your device switch on automatically every time you manually turn it off. This phenomenon is referred to as Boot Loop. Soft bricked Android phones are not as difficult to fix as the hard bricked Android phones. It is convenient to say that a soft bricked phone only boots up half-way and not fully, whereas a hard bricked device does not switch on at all. A hard brick error is thus caused when the kernel, which is nothing but an interface for the software to communicate with the hardware, is tampered with. A hard bricked phone is not recognized by your PC when plugged in and is a serious problem. It requires troubleshooting techniques and cannot be easily fixed as the soft brick problem.

Hard bricked phones are a rare sight, but the soft brick is very common. Given below are ways to fix a soft brick Android phone. The techniques listed here are the best and the most efficient ways to get your phone back to its normal working conditions without losing your important data or damaging your device or its software.
Part 2: Stuck at the Boot Loop
This is the first sign of a soft bricked Android phone. Boot Loop is nothing but when your phone does not remain switched off and turns itself on automatically, and freezes at the logo screen or blank screen, every time you manually try to power it off.
Stuck at boot loop problem can be fixed by clearing your Cache partitions. These partitions are nothing but storage locations for your modem, kernels, system files, drivers and built-in Apps data.
It is advisable to clear Cache partitions regularly to keep your phone free from such glitches.
Since the phone refuses to boot, Cache can be cleared from entering into the Recovery Mode. Different Android devices have different ways to put it in recovery mode. Normally pressing the power key and volume down key helps, but you may refer to your phone’s guide for better understanding and then follow the steps given below to clear the cache partition:
Once you are the recovery mode screen, you will see a number of options as shown in the screenshot.

Use the volume down key to scroll down and select ”Wipe cache partition” as shown below.
 >
>
After the process is completed, select “Reboot System” which is the first option in the recovery mode screen.
This method will help you erase all the clogged up and unwanted files. You may loose some App related data, but that is a small price to pay to fix your bricked phone.
If this method does not boot up your brick smartphone and the problem still persists, there are two more things you can try. Read ahead to find out about them.
Part 3: Booting straight into recovery mode
If your bricked phone does not boot up to your Home Screen or Lock screen and instead boots directly into Recovery Mode, there is not much left to do. Booting straight into recovery mode is undoubtedly a soft brick error but it also indicates a possible problem with your current ROM. The only option you have to flash a new ROM to reboot your bricked phone back to its normal functioning.
To flash a new ROM:
Firstly, you must root your phone and unlock the Bootloader. Every phone’s mechanism to unlock the bootloader is different, thus, we suggest to refer to your user manual.
Once the Bootloader is unlocked, take a backup of all your data by selecting “Backup” or “Android” back in recovery mode. The process should not take long and all you need to do is tap “OK” to config backup.
In this step, download a ROM of your choice and store it in your SD Card. Insert the SD Card in your phone to begin the flashing process.
Once at the recovery mode, select “Install Zip from SD Card” from the options.

Scroll down using the volume key and use the power key to select the downloaded ROM.


This might take a few minutes of your time, but once the process is complete, reboot your phone.
Hopefully, your bricked phone will not boot normally and work smoothly.
Part 4: Booting straight into Bootloader
If your bricked phone boots straight into Bootloader, then this a serious issue and must not be taken lightly. Flashing a new ROM or clearing cache partitions are of little help in such a brick smartphone situation. Booting straight into Bootloader is a peculiar soft bricked Android phone feature and can be tackled only by downloading and flashing your original ROM from the manufacturer. In order to do so, a detailed study about your manufacturer’s ROM, ways to download and flash must be carried out. Since different Android phones come with different types of ROMs, it difficult to cover all the aspects about the different types of ROMs.
Brick smartphone problem has become more prominent than phone freezing or hanging issue. Android users are often seen looking for solutions to fix their soft brick and hard brick phones. Android phones are prone to get bricked and thus, it is important for us to know about the three techniques given above. These methods have been tried, tested and recommended by ay affected bricked phone users. Therefore, these tips are reliable and worth a try. So if your phone acts stubborn and refuses to boot normally, examine the problem carefully and adopt one of the solutions given above which best suits your situation.
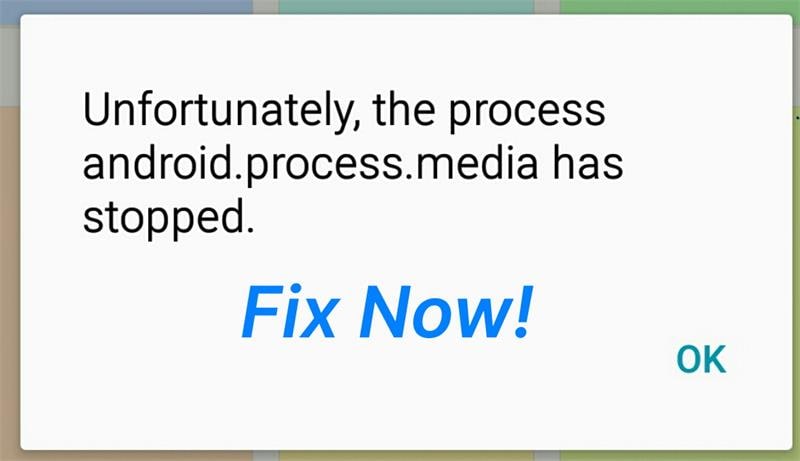
How to Fix Android.Process.Media Has Stopped on Xiaomi 14
Like any other technological system, Android is not without its fair share of problems. One of the most common issues that Android users face is the android.process.media error. If you have encountered this problem lately, you don’t need to worry, this article will clearly explain what exactly causes this error and how to fix it safely.

Part 1. Why this error pops up?
There are several reasons why this error can occur repeatedly and it is worth noting the various reasons why this happens so that you can avoid the problem in the future. Some of the most common ones include:
- 1. Moving from one custom ROM to another can cause this error to occur
- 2. A failed firmware upgrade may also be to blame
- 3. A virus attack can also result in this error among many others
- 4. Restoring apps via a Titanium backup is also a major cause
- 5. Failure of certain apps such as the download manager and the media storage
Part 2. Back up your Android Data First
It is always a good idea to back up your data especially before embarking on any attempt to fix any problem with your device. This way you will always have your data with you just in case something goes wrong and you lose all your data. Wondershare Dr.Fone will help you easily back up your Xiaomi 14. The application will allow you to back up your device with a few clicks and you can restore what you want from your backup .
Wondershare Dr.Fone
Flexibly Back up and Restore Android Data
- One-click to back up Android data to the computer.
- Preview and selectively restore the backup to any Android device.
- Supports 8000+ Android devices.
- There is no data lost during backup, export, or restore.
4,503,800 people have downloaded it
Follow the steps below to learn how to back up your phone in steps.
Step 1. Download, install, and run the program
Click the “Start Download” button above to get the software installed on your computer. Then run it. The primary window of the software looks like below.

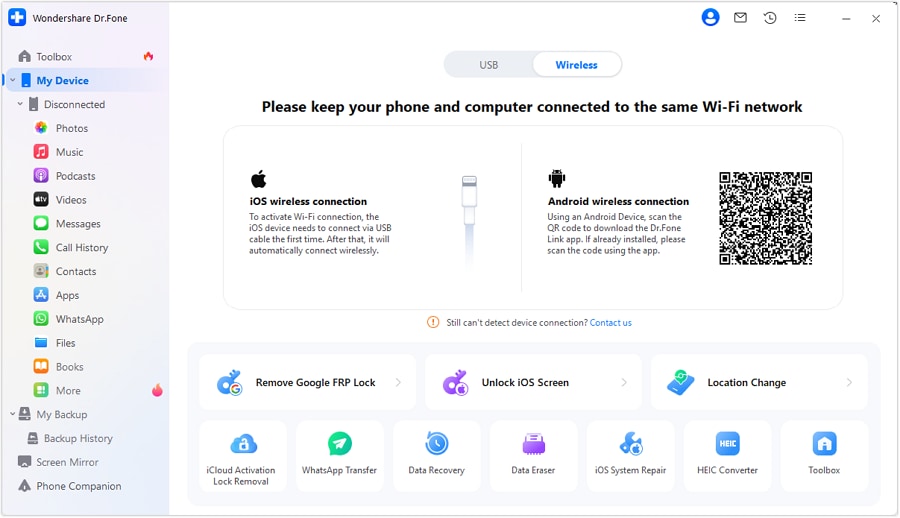
Step 2. Connect your device
Then connect your Xiaomi 14 to the computer and make sure that it can be recognized by your computer. Then click on “My Backup” on Dr.Fone.

WPS Office Premium ( File Recovery, Photo Scanning, Convert PDF)–Yearly

Step 3. Begin to backup
When your device is displayed on the window of the program, click “Back Up Now “ to begin. The rest will be done by the program.


 safe & secure
Part 3. How to Fix “Android. Process. Media” Error
With a full backup of your Xiaomi 14, you can now embark on a mission to fix the error. There are several methods to clear this error. We have outlined three of the most effective solutions here.

Method 1: Ensure app and system updates
Updates often include patches for known issues and vulnerabilities. Ensuring that both apps and the system are up to date can resolve many potential problems.
Step 1: Visit the Google Play Store to check for available app updates.
Step 2: In “Settings,” go to “System” > “Software Update” to check for system updates.
Method 2: Reset app preferences
App preference settings might sometimes lead to conflicts or anomalies. Resetting these settings can revert apps to their default state, resolving potential issues.
Step 1: Go to “Settings” on your device.
Step 2: Access “Apps.”
Step 3: Tap the menu icon in the upper-right corner and select “Reset App Preferences.”

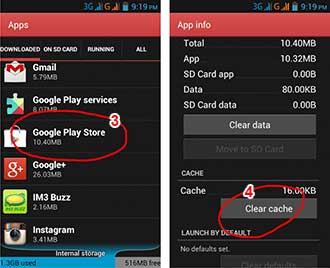
Method 3: Clear the cache and data on your device
Step 1: Go to Settings> Applications> Manage Applications and find the Google Services framework.
Step 2: Next, find Google Play from the same Manage Applications page.
Step 3: Tap on it and then Tap on clear cache.
Step 4: Press the back button to go back to the Google Services framework and then choose Force stop > clear cache > OK
Step 5: Next you need to open Google Play and when presented with an error, click OK
Step 6: Turn off the Xiaomi 14 device and then turn it back on. Go to the Google Services framework again and turn it on to see if the issue has been resolved.
Method 4: Check Google Sync & Media Storage settings
Step 1: Go to Settings > Accounts and Personal> Google Sync and uncheck all the checkboxes to stop the Google Synchronization.
Step 2: Disable and Clear all Media Storage data by going to Settings> Apps> All Apps. Find the Media Storage> Clear Data> Disable
Step 3: Use the same method as above to clear the Download Manager data
Step 4: Turn off your device and then turn it on
This Should clear the error message for good.
Method 5: Boot your device into safe mode
Safe mode can temporarily disable third-party apps, allowing only core system apps. This detects if a third-party app causes the “Android process media keeps stopping” error. If the problem disappears in safe mode, a third-party app might be the cause. Uninstalling it can restore normal function. If the problem persists in safe mode, a deeper system issue might exist, needing further investigation or support.
Method 6: Fix the error by using a dedicated repair tool
Dr.Fone - System Repair (Android)
Fix Android process media has stopped issue in one click
- Fix all Android system issues like black screen of death, won’t turn on, system UI not working, etc.
- Industry’s 1st tool for one-click Android repair. Without any data loss.
- Supports all the new Xiaomi 14 devices like Galaxy S8, S9, S22, etc.
- Step-by-step instructions provided. No technical skills required.
4,989,253 people have downloaded it
Step 1. Connect your Xiaomi 14
After launching Dr.Fone, click on “System Repair” from the main window.
Then connect your Xiaomi 14 with the correct cable and choose “Android” > click “Start”.

In the Xiaomi 14 device information interface, remember to select the correct information. Then confirm the warning and click “Next”.
To confirm the Android repair may erase all data on your device, you need to type in “000000” to proceed.

Step 2. Repair your Xiaomi 14 in Download mode.
Read and follow the guide here to boot your Xiaomi 14 in Download mode.
Then click “Next” to start downloading the firmware.
It may take a while, so you could have a cup of coffee to wait for the repair process completed.
 CollageIt Pro
safe & secure
Method 7: Factory Reset your device
If the above steps fail, you might need to perform a factory reset. A factory reset restores the Xiaomi 14 device to its initial state, which can eliminate many problems, but it will also erase all data. Ensure you back up your important data before proceeding.
Method 8: Seek Manufacturer Support
If the problem persists after trying the above steps, it could be related to specific device or software issues. It’s advisable to contact your device manufacturer’s support team for more detailed guidance and assistance.
It is our hope that when faced with this fairly common error, you will not panic. This is a fairly mild issue that can easily be fixed as we have seen above.
safe & secure
- Title: 9 Quick Fixes to Unfortunately TouchWiz has stopped Of Xiaomi 14 | Dr.fone
- Author: Ariadne
- Created at : 2024-07-30 08:49:31
- Updated at : 2024-07-31 08:49:31
- Link: https://howto.techidaily.com/9-quick-fixes-to-unfortunately-touchwiz-has-stopped-of-xiaomi-14-drfone-by-drfone-fix-android-problems-fix-android-problems/
- License: This work is licensed under CC BY-NC-SA 4.0.