
9 Solutions to Fix Process System Isnt Responding Error on Oppo A2 | Dr.fone
9 Solutions to Fix Process System Isn’t Responding Error on Oppo A2
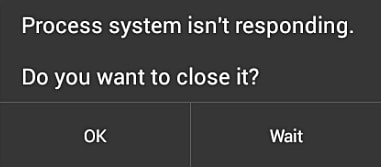
The “Process system isn’t responding” is a common error that occurs in almost every kind of Android device. Even though most Android smartphone manufacturers have taken a huge leap in the last few years, the operating system still suffers from a few pitfalls. The process system isn’t responding Android is one of those errors that have been reported plenty of times. I definitely understand encountering the ‘Process System Isn’t Responding’ error on your Oppo A2 can be frustrating.

However, there are several straightforward methods to resolve this issue. This article will provide a step-by-step guide on how to fix the problem and restore your device to normal functionality.
Before solving any Android system issues, try this Android backup software to take a full backup, in case any data loss happens.
Part 1: Reasons for process system isn’t responding error
There could be plenty of reasons for getting the process system is not responding in Android.
- Software Glitch: Android systems may experience temporary glitches due to factors like memory management issues, conflicts between apps or services, or system updates.
- Insufficient System Resources: Low system storage is another reason for getting the error. If you have too many apps on your phone, then it might take a toll on its memory and generate the “process system isn’t responding” prompt.
- Third-Party Apps: Users have also complained that they receive the “Android process system is not responding” error after installing a new app. If you have installed an app from a source other than Google Play Store, then the chances are that you can get this error. Though, even after installing an app from Play Store, there is a bleak probability of facing this issue as well.
- Outdated Software: Using outdated apps, particularly system apps or critical components, may lead to compatibility issues with the latest Android version.
- System Updates: Most of the time, it happens whenever a device is restarted after updating its Android version. Your device could have undergone a bad update or might have had an unsupported driver. This can result in the occurrence of process system not responding issue.
- Corrupt Cache Files: Corrupted cache files can lead to conflicts and result in error.
- Overclocking or Modifications: Rooting or modifying the Android device, or applying overclocking settings, can lead to instability and the process system not responding error.
- Hardware Issues: Rarely, hardware problems like failing components can interfere with the proper functioning of the system.
No matter what the cause is, there are plenty of ways to overcome this issue. We have listed a handful of them in this post.
Part 2: How to Fix Android Process Not Responding? 8 Fixes
When this error occurs, it can disrupt the normal operation of the Oppo A2 device, causing apps to freeze or crash. Fortunately, there are several effective methods to address this problem.
 ZoneAlarm Extreme Security NextGen
Fix 1: Restart your device
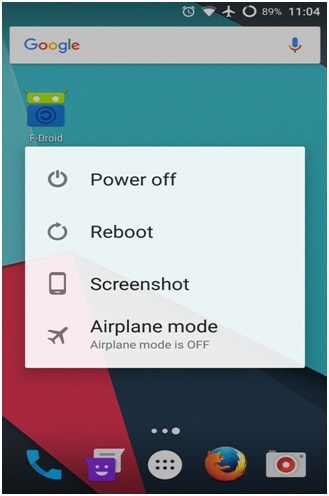
This is one of the easiest ways to resolve the process system not responding error. If you are getting this error on your phone, then try to manually restart your device. The way to restart your phone might differ from one device to another. Mostly, it can be done by long-pressing the power button. This will provide different power options. Tap on the “Reboot” one to restart your phone.
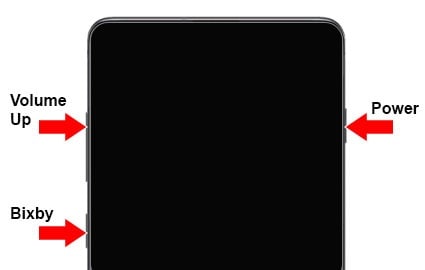
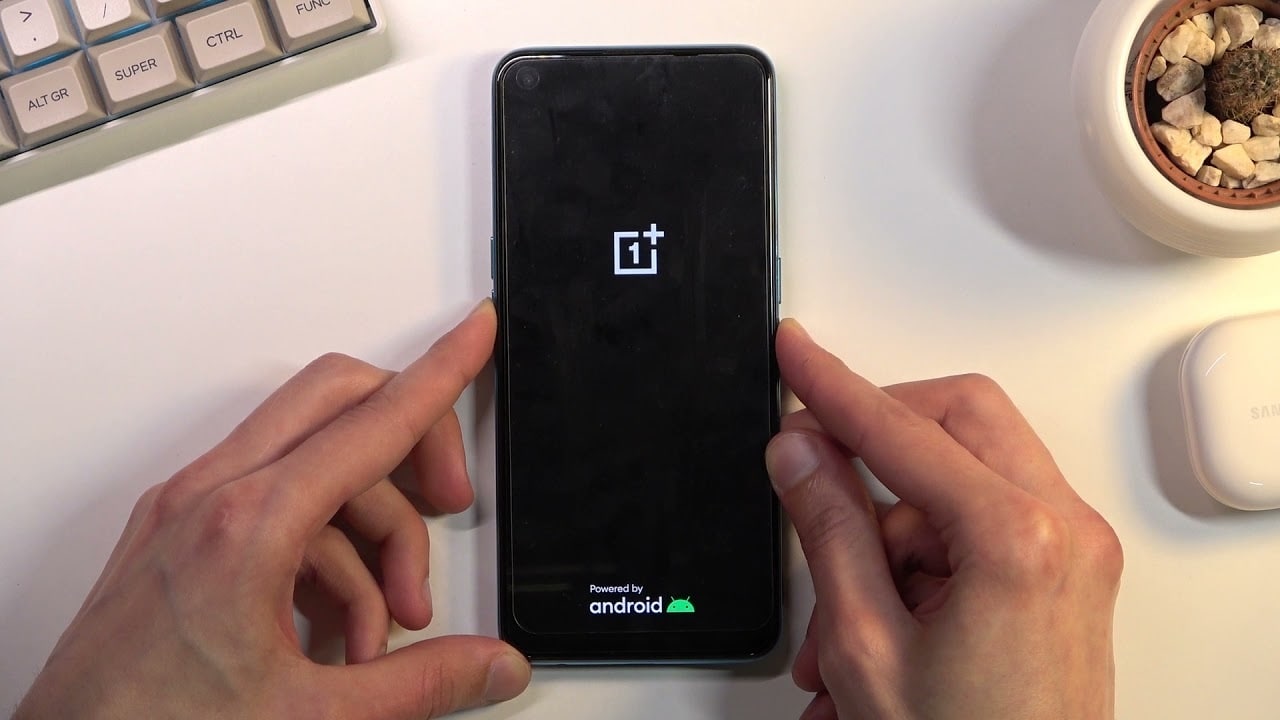
If it won’t work, then long press the Power and Volume up buttons at the same time until the screen goes off. Afterward, use the power button again to turn it on.
Fix 2: Reset App Preferences
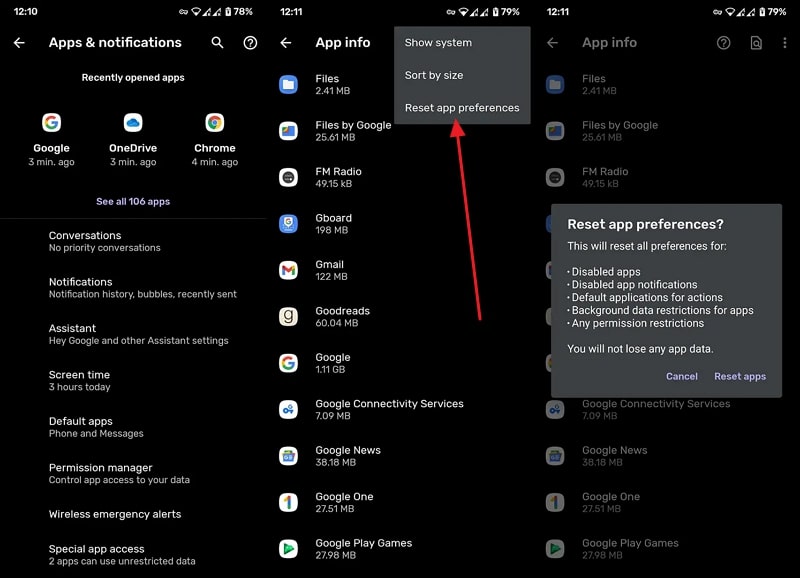
Sometimes the apps interfere with the Oppo A2 device’s settings because they were given permission to access specific functions. It is recommended to allow the asked permission precisely because some suspicious apps can also steal your sensitive data. Here are the straightforward instructions you need to follow to reset the app preferences:
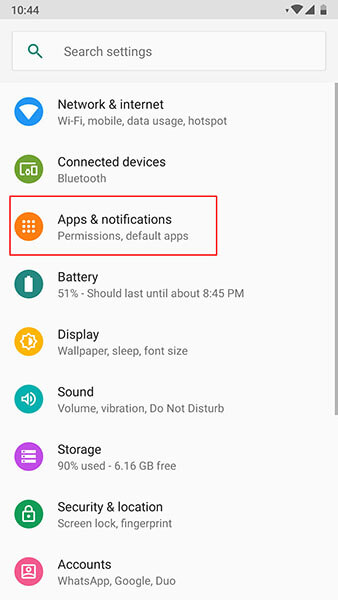
Proceed to the “Apps and Notifications” settings from the Settings app. Next, tap the “See All Apps” option and access the “Three Dots” menu. Here select the “Reset App Preferences” option and confirm the process from the confirmation pop-up.
 ZoneAlarm Pro Antivirus + Firewall NextGen
Fix 3: Free Up Space to Make Sure Android Have Enough Internal Memory
In case the Android internal memory is completely filled, it will slow down the processing speed of the Oppo A2 device. Internal memory is vital for the Oppo A2 device to run all the background apps or the process required by the OS to run the Oppo A2 device efficiently. You can follow these steps to free up some space on your Oppo A2:
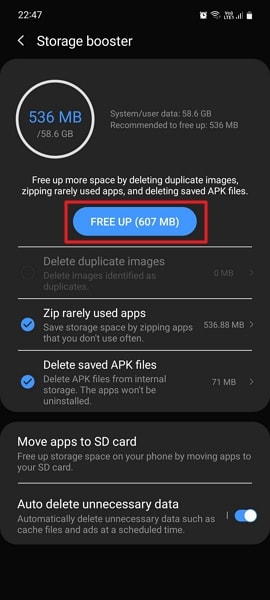
Step 1: Open the Settings app on your Oppo A2 and access the “Battery and Device Care” option by scrolling down. Next, tap on the “Three Dots” from the top right corner and choose the “Storage Booster” feature.

Step 2: Following this, you can select the data you want to remove from the internal memory. Your device will show the space it will free up for you, and you can press the “Free Up” button to free up the storage.

Fix 4: Enter Safe Mode to Uninstall Suspicious Apps
This issue can also occur if you have installed an app from the Google Play Store with a very low rating or an APK. Unlike Apple App Store, anyone can easily upload their mobile apps on Play Store, so it is important to check the app’s credibility before installing it. Following are the simplified instructions to enter the safe mode and delete all suspicious applications:
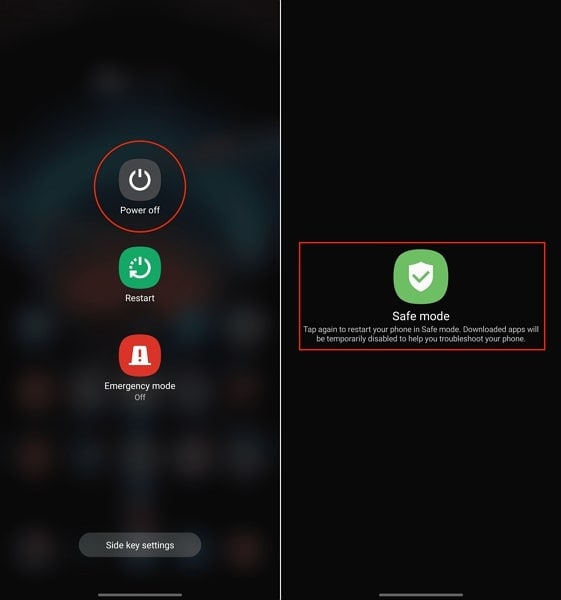
Press and hold the “Power” button of your Android and press and hold the “Power Off” option to access the “Safe Mode” feature. Afterward, confirm to enter the safe mode and remove all the suspicious apps from the Oppo A2 device. You can do this by holding on to the app and selecting the “Uninstall” option from the pop-up options.
 /a>
/a>Fix 5: Update All Apps on your Device
Updating the apps is crucial for any Android device to work with high efficiency and performance. Apps are developed to make the users’ daily tasks easy to execute. However, there might be some negligence in the development, which can leave some bugs in the app. These bugs are fixed with time by releasing the new version of the app. To update your Android app, proceed with the following step-by-step instructions:
Step 1: Locate the Play Store from the Android home screen and access it. Then, tap the “Profile” icon from the top right corner and proceed to the “Manage apps and devices” option. Afterward, you can check how many app updates are available from the “Updates available” option. To update the apps, you will have to go inside this option.
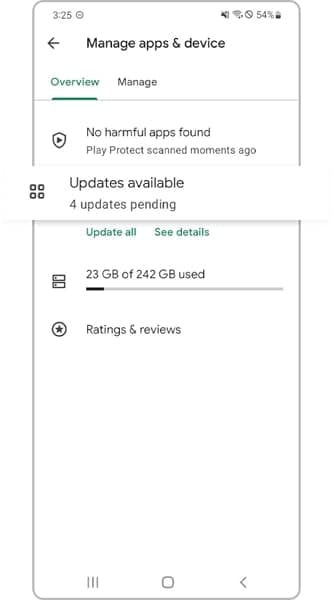
Step 2: You can tap on the “Update All” button if you want to update all the apps one by one. Otherwise, you can press the “Update” option adjacent to each app name to update the frequently used ones.

company, user or members of the same household. Action! - screen and game recorder</a>

Fix 6: Check the SD card
If you are still getting the process system isn’t responding to Android error, then chances are that there could be an issue with your SD card. Firstly, check if your SD card is working fine or not. If it is corrupted, then get another memory card for your phone. Also, it should have a prominent amount of free storage. You might be facing this issue if the SD card has limited free space.
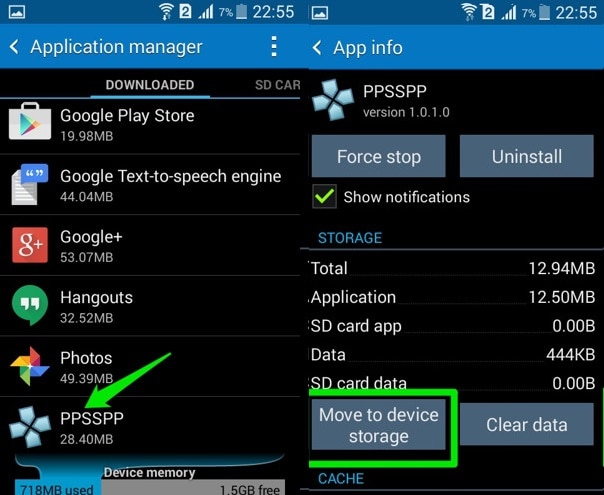
Also, if you are storing apps on the SD card, then your phone might encounter the process isn’t responding issue whenever you run a respective app. Therefore, you should move apps from your SD card to the phone’s internal memory. To do this, go to your phone’s Settings > Application Manager and select any app. If the app is stored on the SD card, then you will get an option of “Move to devise storage”. Just tap on it and manually move every app to your device storage.
 Lyric Video Creator Professional Version
Fix 7: One click to fix the process system isn’t responding error
If all the above tricks don’t get your device out of the process system not responding state, then there may be some system issues on your Android. In this case, an Android repair can successfully fix issues like process system isn’t responding.
Note: Android repair may wipe out existing Android data. Back up your Android data before going on.

Dr.Fone - System Repair (Android)
Android repair tool to fix all Android system issues in one click
- Fix all Android system issues like the black screen of death, system UI not working, etc.
- One-click for Android repair. No technical skills are required.
- Supports all the new Oppo A2 devices like Galaxy S8, S9, S22, etc.
- Step-by-step instructions are provided. Friendly UI.
3981454 people have downloaded it
Follow the easy steps below to fix process system isn’t responding error:
- 1. Download and install the Dr.Fone tool. Then select “System Repair” from the main window.

- 2. Connect your Oppo A2 to the PC. After the Oppo A2 device is detected, select the “Android” tab.

- 3. Select and confirm the correct device details of your Android. Then boot your Oppo A2 in download mode and proceed.
 The BootIt Collection covers multi-booting, partitioning, and disk imaging on traditional PC’s using the standard BIOS and newer PC’s using UEFI. The collection includes BootIt Bare Metal (BIBM) for standard BIOS systems and BootIt UEFI (BIU) for UEFI system.
- 4. Download the firmware and click “Fix Now”.

- 5. After a while, your Android will be repaired with the “process system isn’t responding” error fixed.

 safe & secure
Fix 8: Factory reset Android
It is always considered the most used way to factory reset your phone in order to resolve the process system not responding error. Though, this should be your last resort, as it will wipe off your device’s data entirely. Even if you are performing a factory reset, make sure that you back up your data by using a reliable tool like Wondershare Dr.Fone .
Wondershare Dr.Fone
Flexibly Back up and Restore Android Data
- Back up Android data to the computer with one click.
- Preview and restore selectively the backup to any Android device.
- Supports 8000+ Android devices.
- There is no data lost during backup, export, or restoration.
3,981,454 people have downloaded it
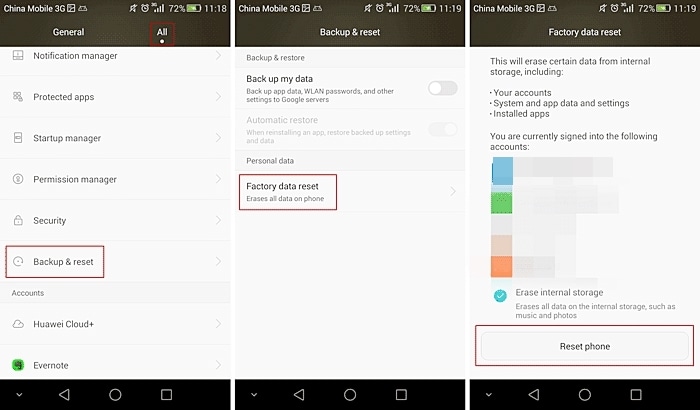
If your phone is functioning, then you can easily factory reset it by visiting Settings > General > Backup & Restore and selecting the option of “Factory Data Reset”. Your device will display a warning regarding all the data files that would be lost or un-synced. Just tap on the “Reset” button to factory reset your device.
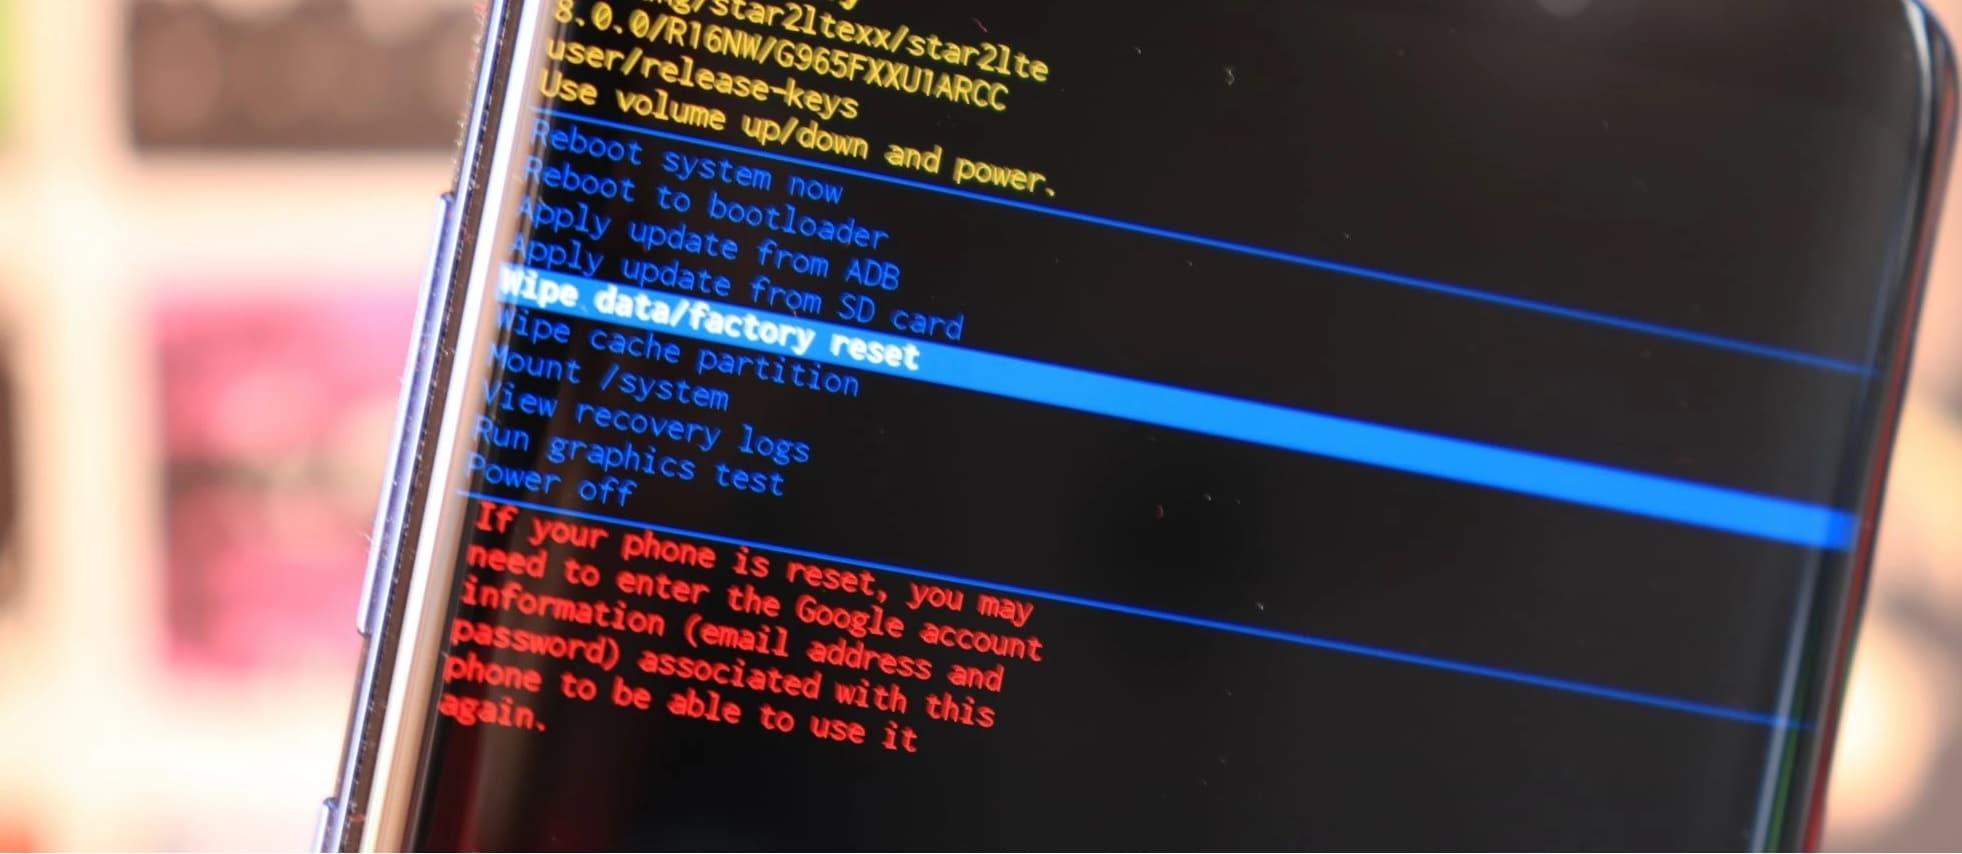
If your device is not functioning or locked, then you can perform the factory reset operation by putting your phone into Recovery mode. Most of the time, it can be done by pressing the Power and Volume up button simultaneously for at least 10 seconds. Though, the key combinations might change from one device to another.
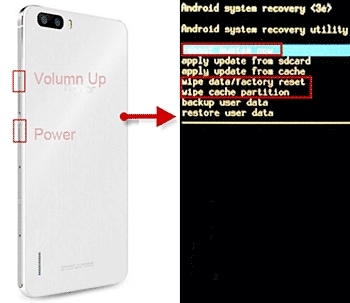
After entering the Recovery mode, go to the “wipe data/factory reset” option using the Volume up and down button. Use the Power button to make a selection. If you get an additional message, then select the “yes – delete all data” option. When it is done, you can simply reboot your device.
Fix 9: Unroot the Oppo A2 device
It has been further discovered that the process system isn’t responding error is more common in rooted devices. Therefore, if you also have a rooted Android device, then you can choose to unroot it in order to fix this issue. There are different ways to unroot an Android device. One of the easiest ways to do it is by using the SuperSU app.
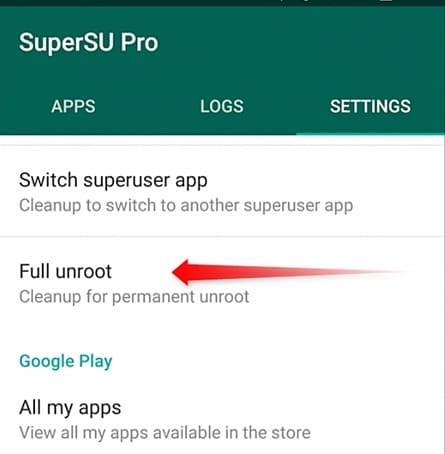
You can always download either SuperSU or SuperSU Pro app from its website here . Simply install it on our device and launch it whenever you wish to unroot it. Visit its “Settings” tab and select the option of “Full unroot”.
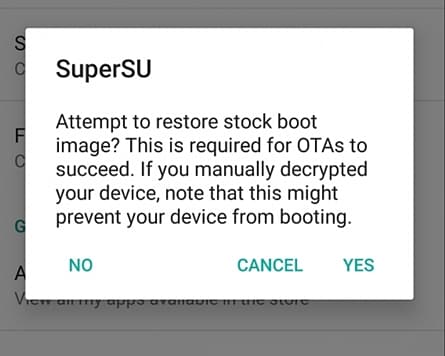
This will generate a warning message regarding all the repercussions of the unrooting process. Just tap on “Continue” to initiate the process.

If you are using an older version of Android, then you might get another pop-up to restore boot images. Simply make the desired selection and start the process. After a while, your device would be restarted the usual way, and it would be unrooted. Most probably, this will resolve the process system isn’t responding error as well.
Now that you know different ways to fix the process system not responding error, you can easily overcome this issue and make the most out of your device. Simply start with the easy fixes, and if they don’t work, then take extreme measures like unrooting your device or restoring it to factory setting. Also, make sure to back up your data before taking any extreme measures.

How To Unbrick a Dead Oppo A2

Discovering your phone died, especially among Oppo A2 models, can be disheartening. Looking online for ways to unbrick your Oneplus 8T can take up so much of your time. The unavailability of your device can disrupt your routine and connectivity. However, unbricking is the crucial solution to regain the functionality of your Oppo A2 device.
This guide teaches effective methods to unbrick your Oppo A2. The page will also discuss the early warning signs and healthy habits to prolong your Oppo A2. Read below to learn more.
Part 1. Early Warning Signs of a Hard-bricked One Plus Device
When a phone “bricks,” the Oppo A2 device becomes completely unusable and non-functional. It essentially turns into a “brick.” A bricked Oppo A2 device can be preceded by certain warning signs that you should be attentive to. Here are some of them below.
- **Corrupted Device and Boot Failures.**If your Oppo A2 freezes or fails to boot up properly, it can indicate underlying software issues that might lead to bricking.
- **Inability to Enter Fastboot Mode.**If you find it increasingly challenging to access the fastboot mode, it could signify impending trouble.
- **Consistent Black Screens.**Experiencing recurring black screens could indicate problems within the operating system. In the long run, this might escalate to bricking.
- **Unexpected Reboots and Crashes.**Frequent and unprovoked reboots, app crashes, and system instability might point toward software inconsistencies. Similar to consistent black screens, this could eventually lead to bricking.
 Forex Robotron Basic Package
Common Reasons for Your Oppo A2 Phone To Be Bricked
Understanding the factors that can trigger bricking in Oppo A2 devices is essential for preventing such scenarios.
Failed Updates or Interrupted Installations
When a firmware update is interrupted due to power loss, sudden device shutdown, or other disruptions, it can result in incomplete software installation and potential bricking.
Unauthorized User Modifications
Engaging in root access, flashing custom ROMs, or applying unsupported system modifications can destabilize the Oppo A2 device’s software, paving the way for bricking.
Incorrect Bootloader Unlocking
Mishandling the process of unlocking the bootloader, a crucial step for customization can lead to system inconsistencies and eventual bricking.
Compatibility Issues With Custom Software
Installing unofficial custom software, such as custom recoveries or third-party kernels, might not be compatible with the Oppo A2 device’s hardware or official software. That can cause conflicts that can lead to bricking.
Malware or Virus Infiltration
The presence of malicious software can cause significant disruptions to the Oppo A2 device’s functioning. It can lead to bricking if left unchecked.
 OtsAV TV Webcaster
Part 2. How To Unbrick One Plus Device Using Various Methods
The solutions below to unbrick your Oneplus are helpful methods to revive your device. Here’s an overview of these methods.
Method 1. Restore With Recovery Mode
Restoring using Recovery Mode can solve most problems that cannot be solved with a normal phone restart. Here’s how.
- Step 1: Turn off your Oppo A2 device. Press and hold the Power button and Volume Down until the Oppo A2 logo is displayed.
- Step 2: Move through the menu using the Volume Up and Volume Down buttons until you reach Recovery Mode. Press the Power button to choose it.
- Step 3: Select the Wipe data/factory reset option. Choose Yes to proceed and wait for the process to finish. Choose Reboot system now to see the results.

Method 2. Contact the Manufacturer
Engaging Oppo A2’s official support can provide insights and potential solutions. This is advantageous if your device is under warranty.
Method 3. Professional Repair Shops
Certified repair shops have the expertise to diagnose and address bricking issues, offering tailored solutions.
Method 4. Software Tools
Leveraging specialized software tools like Wondershare Dr.Fone - System Repair (Android) simplifies the process, even for non-technical users.
Part 3. Healthy Habits To Consider To Prolong Your One Plus
Maintaining the longevity of your Oppo A2 device requires adopting proactive habits. Here are vital tips to consider.
- **Regular Software Updates.**Keep your Oppo A2 up to date with the latest firmware releases. These updates often include security patches, bug fixes, and feature enhancements contributing to overall device stability.
- **Battery Care.**Avoid frequent deep discharges and overcharging. Use original charging accessories and refrain from exposing the Oppo A2 device to extreme temperatures.
- **App Management.**Review and uninstall apps you no longer use. This reduces clutter and conserves system resources, promoting smoother device operation.
- **Cache and Storage Cleanup.**Clear app caches and delete unnecessary files from your device. It optimizes storage space and prevents sluggishness caused by excessive data accumulation.
- **Screen Protection.**Apply a screen protector and sturdy phone case to shield your device from scratches, cracks, and impacts. This safeguards the physical integrity of your Oppo A2.
- **Safe Charging Practices.**Avoid using your device while charging, as this generates excess heat. Also, refrain from using non-certified chargers, which can harm the battery and device components.
- **Avoid Overloading the Oppo A2 device.**Limit multitasking and avoid running too many apps simultaneously. This minimizes strain on the Oppo A2 device’s RAM and processor, ensuring smoother performance.
- **Privacy and Security.**Implement robust, unique passwords and enable biometric authentication methods. Regularly review app permissions to enhance data privacy.

Tips: Unlock Your One Plus 6, 8T, or 10 Pro With Dr.Fone - Screen Unlock (Android)
Dr.Fone - Screen Unlock (Android) is powerful software designed to unlock Oppo A2 devices quickly. This tool is compatible with various Oppo A2 models, including the Oppo A2 6, Oppo A2, and Oppo A2 10 Pro, ensuring a wide support reach.
![]()
Dr.Fone - Screen Unlock (Android)
Unlock Oppo A2 Without Password
- Unlock your Oppo A2 quickly and securely
- Easily remove passwords and screen locks of all types
- Enjoy a streamlined experience with no technical background required
- Feel confident with solutions backed by a high success rate
3,016,652 people have downloaded it
How To Unlock Your One Plus With Dr.Fone - Screen Unlock (Android)
Below is a guide on unbricking the Oppo A2 models using Dr.Fone - Screen Unlock (Android).
Step 1: Access Screen Unlock > Android
Navigate to the Screen Unlock section and select Android. Proceed by clicking on the Unlock Android Screen option.

Step 2: Choose Your Device Brand and Initiate Data Wipe
Identify your device brand for unlocking the screen. After selecting your device brand, you will be prompted to enter a specific mode. Once in this mode, Dr.Fone will commence the Android screen unlock process.

Step 3: Successful Screen Unlock
Allow the unlock process to run its course. If unsuccessful, click ‘Try Again’ for a second attempt. Upon successful screen unlock, click ‘Done’.

 safe & secure
You May Also Like:
How To Fix iPhone Bricked After iOS 17/iOS 16/iOS 15 Update
iPhone Got Bricked? Here Is The Real Fix To Unbrick It!
How to Fix It If Your Oppo A2 Phone Got Bricked?
How to Fix the Soft Bricked Android Phone?
 KoolReport Pro is an advanced solution for creating data reports and dashboards in PHP. Equipped with all extended packages , KoolReport Pro is able to connect to various datasources, perform advanced data analysis, construct stunning charts and graphs and export your beautiful work to PDF, Excel, JPG or other formats. Plus, it includes powerful built-in reports such as pivot report and drill-down report which will save your time in building ones.
 It will help you to write dynamic data reports easily, to construct intuitive dashboards or to build a whole business intelligence cockpit.
KoolReport Pro package goes with Full Source Code, Royal Free, ONE (1) Year Priority Support, ONE (1) Year Free Upgrade and 30-Days Money Back Guarantee.
Developer License allows Single Developer to create Unlimited Reports, deploy on Unlimited Servers and able deliver the work to Unlimited Clients.
Conclusion
For Oppo A2 owners, your device’s revival rests in your hands. By embracing the abovementioned methods, you can reclaim your device from its bricked state. Act decisively to unbrick your Oppo A2 device and relish its seamless performance again.
For those who find themselves locked out of their Oppo A2 devices, there’s a reliable solution at your fingertips. Try Dr.Fone - Screen Unlock (Android) to regain access to your device swiftly and securely.
safe & secure
Gmail Not Working on Oppo A2: 7 Common Problems & Fixes
Ever since Android is introduced, it has almost eliminated the need of computers to work through Gmail. Gmail carries much importance especially when you’re a working person. A lot of work is done through mails on daily basis. But maybe today is not your lucky day. Maybe Gmail is giving you a hard time today. Is it? Is your Gmail not responding or keeps stopping you from going further? Well! There is no need to be bothered anymore. We are discussing some of the general Gmail problems along with their fixes. So, if your Gmail is not working on Android, you can go through this article and find the relevant solution.
Problem 1: Gmail App not responding or keeps crashing
First and foremost, the most common situation people meet with is when there Gmail keeps crashing. Or simply, it doesn’t respond at all. When you open it, it stuck for a few seconds and then you have to close it. It seriously is an annoying issue. If your Gmail is also not responding or crashing and you aren’t able to work properly, following are the solution you can follow.
Clear Cache
The first thing you can do to fix Gmail not responding issue is to clear the cache of Gmail. This has higher chance to get the issue resolved. To do this:
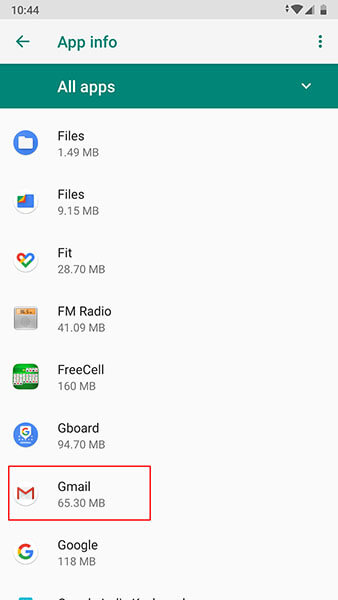
- Go to “Settings” and look for “Apps & Notifications”. Please note that the option may vary in some Android phone like it maybe “Application” or “App Manager”. So, don’t panic and look for the option carefully.

WPS Office Premium ( File Recovery, Photo Scanning, Convert PDF)–Yearly
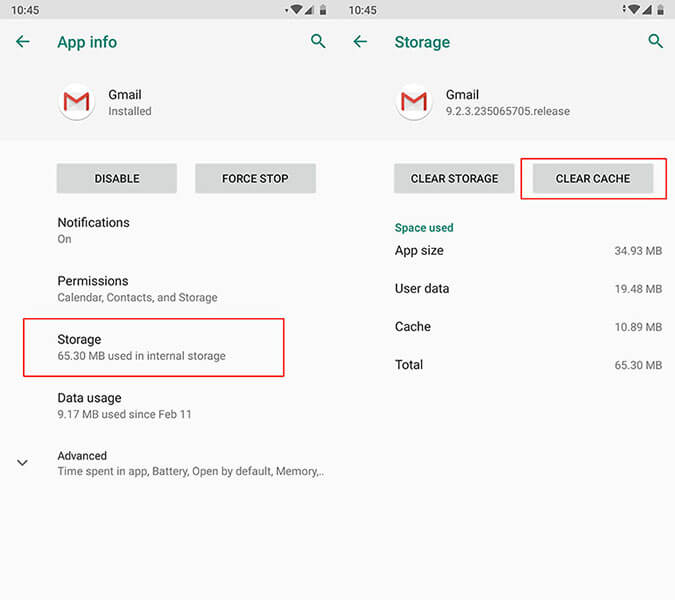
Now, from the apps list, search “Gmail” and tap on it.
Go to “Storage” followed by “Clear Cache”.
 CalendarBudget - Monthly subscription membership to CalendarBudget via web browser or mobile app. Support included.
 Restart the Oppo A2 device
Restarting the Oppo A2 device in the first place simply resolves many problems and so in the instance when Gmail keeps stopping. Simply long press the power button of your device and restart the Oppo A2 device. See of the problem gets vanished or not.

Factory Reset the Oppo A2 device
The next option that you can try is resetting your device. This will lead to data loss so we suggest you to take backup firstly and then proceed with this method.
- Hit on “Settings” and search for “Backup & Reset” option.

- Tap on “Reset” or “Erase all data” (the option name again may vary).
If unfortunately the above solutions don’t work, there is a requirement to flash the stock Android ROM again. Before you wonder how, there is a professional one-click tool that can surely be of assistance. It is Dr.Fone - System Repair (Android) . The tool takes special care of the Android phones and fixes almost every system issues with ease. It takes no special technical skills and performs efficiently.
Problem 2: Gmail won’t sync between all ends
The next most common problem where people get stuck with is when there Gmail won’t sync. Here are the solutions to this particular problem.
 HD Video Converter Factory Pro
Make Space in the Phone
When Gmail stops syncing, one of the things that can save you is clearing the storage. It is the space that maybe the culprit and therefore the syncing don’t work at all. We would like to suggest you removing the unwanted apps to clear the storage or deleting the downloaded files. You can also transfer the important files to your computer and make the space vacant.
Check Gmail Sync Settings
When still the Gmail not working issue persists and you can’t sync, make sure to check the Gmal sync settings. For this, follow the steps below:
- Launch the Gmail app and tap on the menu icon (three horizontal lines).
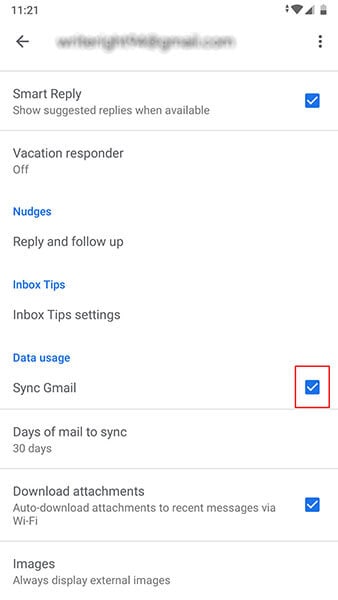
- Tap “Settings” and choose your account.
 Video Converter Factory Pro
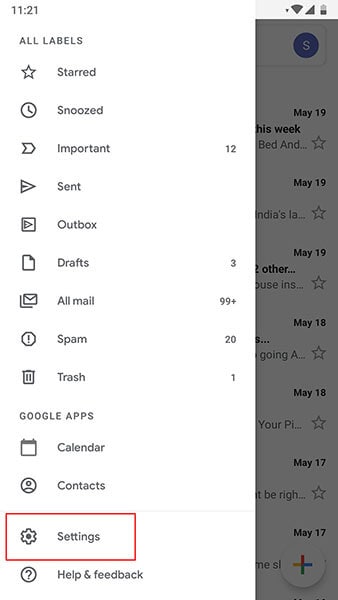
- Check the box next to “Sync Gmail” if it’s not checked.


Restart the Oppo A2 device
Again, restarting can also be helpful in this situation. When you boot the Oppo A2 device again, check if your Gmail can sync or not.
Problem 3: Gmail won’t load
In case you are using the Gmail over your web browser and it has tested your patience in loading, here are the solutions that could prove to be fruitful for you. Please check these out.
Ensure to Use Gmail Supported Browser
First of all, you need to make sure that the browser you are using works with Gmail or not. Gmail can smoothly perform in Google Chrome, Firefox, Safari, Internet Explorer and Microsoft Edge. However, the browsers should be updated. So, please make sure that these browsers are running on the latest versions. Moreover, in case you use Chromebook, don’t forget to update the operating system in order to let it support Gmail.
Clear Cache of web browser
If you tried the above method but to no avail, try to clear the cache and cookies of the web browser. But by doing so, the browser history will be removed. As well as, the records of the websites you previously enjoyed will also be lost.
Check browser extensions or add-ons
If not the above one, try this tip. It encourages you to check your browser extensions. Perhaps these are interfering with the Gmail and due to this conflict, Gmail won’t load. You can either turn off these extensions and plug-ins temporarily or make use of the incognito mode of the browser where there are no such things like extensions and plug-ins.
Problem 4: Gmail can’t send or receive
Gmail also gives you problem in sending or receive mails and messages. And to troubleshoot such issue, following are the solutions mentioned.
 LYRX is an easy-to-use karaoke software with the professional features karaoke hosts need to perform with precision. LYRX is karaoke show hosting software that supports all standard karaoke file types as well as HD video formats, and it’s truly fun to use.
Check the Latest Version of Gmail
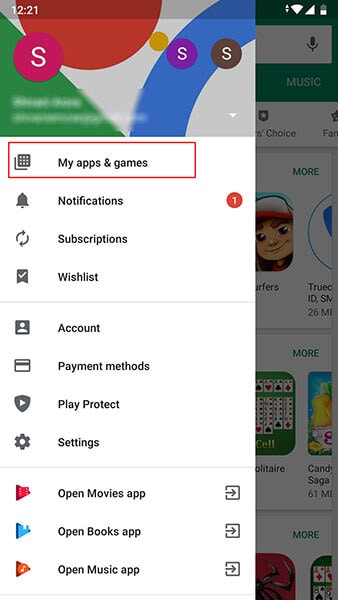
This issue is likely to emerge when you are using an outdated version of Gmail. And therefore, the first solution says you to check if the Gmail update is available. You can go to the Play Store and from the “My apps & games” option, you can see if Gmail needs to be updated or not.
Verify Internet Connection
Another thing that carries weight while you can send or receive mails is the internet connection. As we all know that Gmail won’t respond if the Oppo A2 device is not connected to the internet. Therefore, you are advised to turn off Wi-Fi and then enable it again. Also, please ensure to switch to Wi-Fi if you are using the cellular data. This may hamper the process and stop you from receiving or sending mails.
Remove you Account and Add Again
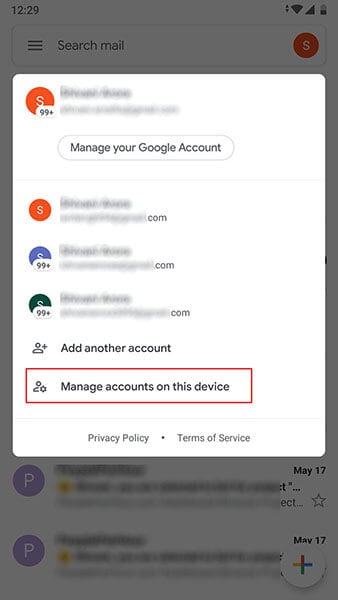
If still Gmail keeps stopping you to go ahead, make sure to once sign out from it. To do this:
Open your Gmail app and go to “Manage accounts on this device”.
Now, tap on the account you are working with. Tap on “REMOVE ACCOUNT” thereafter. After this, you can again sign in and then check if the problem is gone or not.

Problem 5: Stuck in sending
Now, here is another annoying problem that doesn’t let Gmail working on Android properly. This problem addresses the situation where users send a mail but it gets stuck on sending. If this is the problem that you are going through, the following solutions will help you.
Try Alternative Gmail Address
First of all, if Gmail is not working due to stuck in sending issue, we advise you to make use of some other Gmail address to send the mail. If the problem still occurs, jump to the next solution.
Check Network Connection
As already mentioned, be sure of an active internet connection while working with Gmail. When you are not using a stable connection, it may lead to stuck on sending, Gmail crashing and many other issues. You can fix the issue by doing these three things:
- Most importantly, use only Wi-Fi rather than cellular data if you want a smoother process.
- Turn off Wi-Fi and then turn it on again after nearly 5 seconds. Do the same with the router. Plug it out and the plug in.
- Lastly, turn on Airplane mode and after a few seconds, turn it off again.
Now try to send the mail and see if things are still the same or not.
 Jet Profiler for MySQL, Enterprise Version: Jet Profiler for MySQL is real-time query performance and diagnostics tool for the MySQL database server. Its detailed query information, graphical interface and ease of use makes this a great tool for finding performance bottlenecks in your MySQL databases.
 Check Attachments
Large attachments can also be the reason for this issue. We would here like to suggest you to check the attachments you are sending. If these are not so important, you can remove them and send the mail. Or if it is not possible to send the mail without attachments, compressing the files can be a solution.
Problem 6: “Account not synced” issue
Many times, the users get the error that says “Account not synced” while they try to work with Gmail. And this is the 6th problem we are introducing. The ways mentioned below will assist to get out of the trouble.
 Epubor Audible Converter for Mac: Download and convert Audible AAXC/AA/AAX to MP3 with 100% original quality preserved.
Make Space in the Phone
When Gmail stops to further the process by prompting “Accounts not synced” issue, be sure that your Oppo A2 has some storage in it. If not, create it straight away. As we also mentioned in one of the above solutions, you can either delete the unnecessary files or transfer the important files to the PC to make the space in the phone. Go along with this tip and see if it works.
 Nero Burning ROM:
The ultimate burning program for all your needs!
Check Gmail Sync Settings
As another solution, check Gmail sync settings to get the issue fixed.
Simply open Gmail and hit the menu icon which is three horizontal lines on the top.
Go to “Settings” and choose your account.
See the tiny box beside “Sync Gmail” and check it if it is not.

Restart the Oppo A2 device
If the above method went futile, simply restart your device. Take help of the Power button on your device. Long press it and from the options, restart it. This will hopefully work for you.
Problem 7: Gmail app running slow
The last problem that you may face is the slow-going Gmail app. In simple words, you may experience that Gmail app is operating extremely slowly. To fix this, following solutions will help you.
 Screensaver Factory, Create stunning professional screensavers within minutes. Create screensavers for yourself, for marketing or unlimited royalty-free commercial distribution. Make screensavers from images, video and swf flash, add background music and smooth sprite and transition effects. Screensaver Factory is very easy to use, and it enables you to make self-installing screensaver files and CDs for easy setup and distribution. Screensaver Factory is the most advanced software of its kind.
Restart the Phone
It is a universal method to fix minor Android system issues. And here too, we would like you to restart your Oppo A2 in the first place when you find that Gmail is not responding due to the sluggish behavior.
Clear Storage of Device
Usually all the apps start running slow when the Oppo A2 device is not having sufficient space. As the apps need space to function quickly and appropriately, having the Oppo A2 device on low storage can prove to be a bad luck for Gmail. So, make sure you wipe out the items you no longer needed on your device and create some room so that the Gmail responds nicely and won’t be running slow anymore.
Update Gmail App
As the last tip that will indeed help you is to update the Gmail app. Until you update the app when required, Gmail keeps stopping you from working and you will definitely get frustrated. Therefore, go to Play Store and look for the Gmail update. If it is available, welcome it with smile and bid farewell to the problem of slow running Gmail.
What if your problem still doesn’t get resolved after following these 3 tips? Well! If that is the case, we will again recommend you to make use of an expert one-click tool to flash the stock Android ROM.
Dr.Fone - System Repair (Android) is going to help you serving the purpose. This mighty tool possesses huge success rate and one can rely on it for its simplicity and security. It is designed to work with numerous problem related to Android system. So, no matter if your Gmail keeps crashing or keeps stopping, it has the solution for everything.
Dr.Fone - System Repair
Fix all Gmail issues caused by Android system:
- Gmail app corruption or not opening
- Gmail app crashing or stopping
- Gmail app not responding
- Title: 9 Solutions to Fix Process System Isnt Responding Error on Oppo A2 | Dr.fone
- Author: Ariadne
- Created at : 2024-07-30 08:57:22
- Updated at : 2024-07-31 08:57:22
- Link: https://howto.techidaily.com/9-solutions-to-fix-process-system-isnt-responding-error-on-oppo-a2-drfone-by-drfone-fix-android-problems-fix-android-problems/
- License: This work is licensed under CC BY-NC-SA 4.0.