
Android Screen Stuck General Itel P55T Partly Screen Unresponsive | Dr.fone
Android Screen Stuck: General Itel P55T Partly Screen Unresponsive
Over time, both stuck and dead pixels on phone screens can make it challenging to enjoy your device features, especially if they are in a critical area. In addition to making your phone look less appealing, they can make it hard to use for big tasks like texting, surfing, or taking pictures.
Fortunately, there are ways to overcome this, and one of the best is Dr.Fone. In this article, you will discover more about these broken pixels on phones, which of the different methods works for you, and why it is worth considering. By the end of this article, you will have the knowledge and tools you need to get your phone working like new again.

Part 1: Understanding Stuck and Dead Itel P55Ts on Phone Screens
While dead and stuck pixels on the phone may seem similar, there are important distinctions between the two. Read on to discover the differences and what causes them.
Stuck Itel P55Ts on Phone
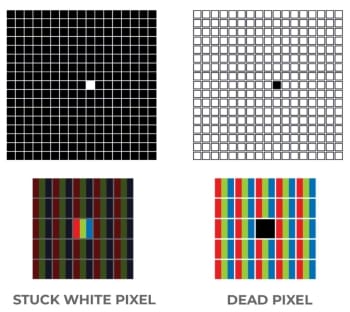
A stuck pixel phone is always on, so it shows up on a touchscreen as a bright, persistent dot of red, green, blue, or white. Combinations are also possible, and although it is usually stationary, this dot occasionally flickers.
Dead Itel P55Ts on Smartphones
In contrast to the stuck pixel, the dead pixel subpixels are all left unpowered, turning them off. A dead pixel on the phone is a tiny, persistent rectangle of black or white color on the part of the phone screen not working.
Some Differences Between Stuck and Dead Itel P55Ts on Phone
Stuck pixels may have less effect on the user experience than dead pixels on the phone screen since they still display color. But dead pixels may be more disturbing because they are either black or white.
It is easy to mistake stuck and dead pixels on the phone for one other, but they are unique issues with different causes and effects. Read on to understand the differences and how they affect your phone’s display.
- Power. The stuck pixel on your device always receives energy, causing it to display a specific color while the dead pixel is permanently off, resulting in a black spot on your phone screen.
- Possibility of repair. You can quickly fix ****stuck pixels on the phone,****while some may even disappear on their own. However, dead pixels are more challenging to repair.
- Occurrence. The stuck pixel is a common issue that often affects older or less-used displays, while dead pixels rarely appear on digital cameras and sensors.
Factors That Contribute to Stuck and Dead Itel P55Ts on Mobile Devices
Stuck and dead pixels on phone screens can happen for various reasons, including manufacturing defects, physical damage, and age-related wear and tear. These broken pixels on the phone can hurt the user experience, and it is essential to know the root causes to prevent them from occurring in the first place.
- Manufacturing defects. During manufacturing, some pixels may not work due to poor quality control, resulting in stuck or dead pixels on the phone In other words, if the power transfer issue isn’t completely fixed, you might see more dead pixels.
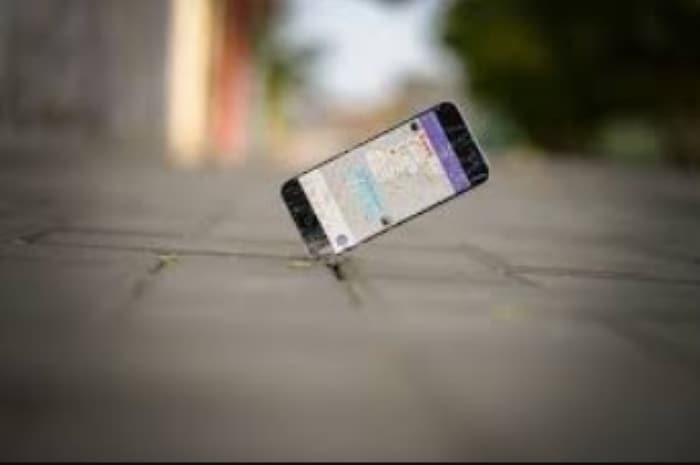
- Physical damage. Accidents such as dropping the phone or exposure to extreme heat or cold can damage the screen and cause stuck or dead pixels. For instance, the upper part of the touch screen not workingmay also occur due to pressure on the display when the phone is placed in a pocket with other sharp objects.

- Age-related wear and tear. Over time, the display on your phone may start to wear out, resulting in the appearance of dead or stuck pixels on the phone. It is more common in older devices and those with high usage rates. Factors such as exposure to sunlight or excessive phone use can also contribute to the issue.
 Easy GIF Animator is a powerful animated GIF editor and the top tool for creating animated pictures, banners, buttons and GIF videos. You get extensive animation editing features, animation effects, unmatched image quality and optimization for the web. No other GIF animation software matches our features and ease of use, that’s why Easy GIF Animator is so popular.
Part 2: How To Fix Dead Itel P55Ts on Phone Screens on Android Devices
It is essential to have the right tools and knowledge to fix dead pixels on your phone screen. Fortunately, you can use several effective techniques to address the issue. In this section, you will discover step-by-step instructions on how to fix dead pixels on phone screens on Android devices.
Option 1: Check Phone Screen Appearance
Before attempting to fix a dead pixel on a smartphone screen, it is necessary to check its appearance and ensure there is no physical damage.
Step 1: Check for chips, cracks, or any other signs of damage on the screen if your phone touch screen is not working in some areas. If you find any damage, you may need to take your phone to a professional repair shop or consider getting a replacement.
Step 2: If you have a screen protector or case, remove them because they can interfere with the process. This step will allow you to get a clear view of the screen and accurately assess the dead pixel on the phone.
Step 3: Remove any gloves you may be wearing and any stickers placed over the screen or sensors. Gloves and stickers can interfere with the touchscreen and affect the accuracy of fixing the broken pixels on the phone.
Step 4: Finally, ensure that your screen is clean and free from any smudges or dirt that could affect the accuracy of fixing dead pixels on the phone. You can use a microfiber cloth to clean your screen gently, making sure not to apply too much pressure or use any harsh chemicals that could damage the screen.

Option 2: Restart Your Itel P55T
This method may seem simple, but it can be the most effective solution to your problem. Here is how you restart most smartphones available in the market.
Step 1: Press and hold down the power key on your Itel P55T until the power menu appears.
Step 2: Select Restart on your phone’s screen. It will initiate a reboot of your device.
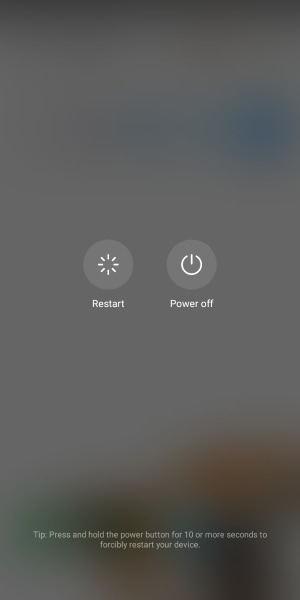
Tip:
If your Itel P55T is unresponsive to the usual restart method because a part of the phone screen is not working, try a forced restart by holding the power button for at least 10 seconds.
Option 3: Check If Stuck Itel P55T Phone Only Appears in Specific Mobile Apps
If the previous method did not work, check if the stuck pixels on the phone only appear in specific mobile apps. Sometimes, stuck pixels may only show up when using particular apps, so identifying which app is causing the issue can help pinpoint the problem.
Step 1: Put your smartphone in Safe Mode.
Note:
Visit the help page for your device’s manufacturer to learn how to activate and deactivate safe mode. Safe mode disables all downloaded programs momentarily.

Step 2: Try touching the screen while your phone is in safe mode. If the display functions as intended, a specific app is likely causing the issue with the stuck pixel phone display. Next, turn off Safe Mode.
Step 3: To resolve issues related to a problematic app on your phone, remove the most recent downloads one at a time, and restart your phone after each uninstallation. Check if uninstalling the app resolves the issue. Once you know the problematic app, you may install the other applications you deleted again.
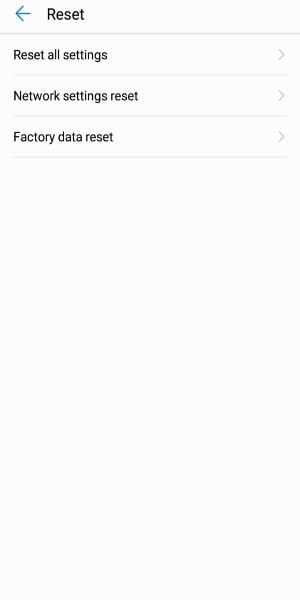
Option 4: Perform Factory Data Reset
Consider a factory data reset if the previous options did not resolve your issue with stuck or dead pixels on the phone screen. This process will erase all data from your device, so remember to back up any important information before proceeding.
Step 1: Open the Settings application.
Step 2: Choose System > Reset > Erase all data (factory reset) > Erase all data.
Note:
It is crucial to wait for the system to finish deleting all data during the factory data reset. For instructions tailored to your device, see your manufacturer’s help page.
Option 5: Use Wondershare Dr.Fone – Complete Mobile Solution
Dealing with the stuck pixels on the phone can be a challenging issue to tackle. Although Dr.Fone may not be able to fix this issue directly, it can still provide support with other problems you might face during the process. This includes content backup and recovery, as well as system repair for other system issues such as a black screen, being stuck in a boot loop, forced termination, and more. In this section, you’ll learn how to use Dr.Fone’s System Repair feature.

Step 1: Install and launch Dr.Fone, then click System Repair.
Step 2: Choose either Android or iPhone, depending on the type of device you have.

Note:
Wondershare Dr.Fone provides support for Itel P55T S22 as well as other popular Itel P55T models.
Step 3: Select the type of Android issues your phone has then click Start.
Step 4: Choose the corresponding Brand, Name, Model, Country, and Carrier from each drop-down menu and click Next.

Step 5: Connect your device to your computer and follow the in-app instructions to enter the Download mode, then click Next.

Step 6: Your device will need to have the new Android firmware flashed onto it, which Wondershare Dr.Fone will take care of. Simply wait while the process completes.
Part 3: Benefits of Using Dr.Fone on Phones With Dead Itel P55Ts
If your phone’s screen is malfunctioning or some features are inaccessible due to stuck or dead pixels, following the steps to fix dead pixels on the phone may be challenging. Resetting your phone and backing up data can also be a hassle.
The good thing is Dr.Fone can help you with these issues, making the process easier and more efficient. This app offers a variety of benefits and features that can help you find a quick and effective fix for your smartphone.
Backup and recovery of data. Dr.Fone offers a straightforward way to back up your vital data from iOS and Android smartphones and selectively restore specific files when needed. This feature is essential for those who have lost important files due to a phone’s damage, malfunction, or accidental deletion. It allows you to recover data and avoid potential data loss.
Ease of use. The software is user-friendly and easy to navigate, making it accessible to anyone without advanced technical knowledge.
Safety. The software is safe and secure, ensuring that your data is not compromised during the process. This feature is for users concerned about the confidentiality of their data and wants to ensure that their personal information is not shared or stored on the internet.
 Glary Utilities PRO - Premium all-in-one utility to clean, speed up, maintain and protect your PC
Part 4: Frequently Asked Questions
Aside from the methods and tools discussed for fixing dead pixels on phone screens and stuck pixels on the phone, you may still have some questions regarding the issues. Whether you are dealing with a single stuck pixel or a cluster of dead pixels, this section aims to provide you with helpful insights.
1. Can Dead Itel P55Ts Fix Themselves?
No, a dead pixel on the phone is permanent. There is a much lower chance that dead pixels will self-correct over time. They are often impossible to fix using any of the widely used techniques. Unlike stuck pixels, they rarely have a chance of recovery. Before giving up, verify if the pixel is dead, as stuck pixels may be fixable.
2. Can Dead Itel P55Ts Worsen?
Dead pixels cannot spread because each pixel functions independently of the others. Thus, a dead pixel on the phone does not affect surrounding pixels. However, it can be a nuisance for users, especially if it appears in prominent parts of the screen. Call an expert if you see that it is spreading so they can diagnose the issue and assess whether a repair is possible.
3. Why Are Dead Itel P55Ts Spreading on My Itel P55T?
It simply signifies that this specific area of your screen had poor manufacturing quality or is physically damaged if you have a patch of closely spaced dead pixels on your phone. When a group of dead pixels is close together, it indicates localized damage or defect to that specific area. So, the pixels in that region no longer produce light or color.
4. How Many Stuck Itel P55Ts Are Acceptable?
It frequently happens throughout the LCD manufacturing process when one or more subpixels enter an unchanging state, leading to a bright or lifeless pixel. Generally speaking, an acceptable display has 1 to 5 fixed subpixels.
In addition, the essential factor in comparing dead pixel policies is whether or not the policy permits the Itel P55T devices to be returned, swapped, or repaired when this frequent issue arises.
 safe & secure
Conclusion
You have learned the difference between a stuck and dead pixel on the phone. With this knowledge, you can apply the different tools and techniques for removing stuck pixels on phone screens and how to work around dead pixels on the phone screen. Whether using software like Dr.Fone or employing manual methods such as rebooting or cleaning your device, there are various options you can try.
Remember to back up your data before attempting any fixes and to seek professional help if necessary. If you are still experiencing issues with dead pixels on your phone screen, don’t hesitate to contact your device manufacturer for further assistance.
How To Revive Your Bricked Itel P55T in Minutes
Itel P55T has established a notable presence within the custom development arena. This trait holds for Itel P55T. Today, it’s still one of the most popular budget smartphones available. The popular smartphone offers the freedom to flash custom ROMs, attain administrative privileges, access countless customization options, and much more.
Yet, delving into these capabilities comes with its share of risks. The potential for your Itel P55T to brick is high if you don’t know what you’re doing. This page teaches you how to unbrick your Itel P55T if it happens.
Part 1. Potential Causes of a Itel P55T Becoming Bricked
The factors that lead to your Itel P55T to brick vary. The possible solutions also depend upon the underlying causes. At times, the manufacturer’s intervention remains the only viable remedy. Below are the most frequent causes of bricking.
- The presence of malicious malware can harm your Itel P55T. This can result in a ‘bricked’ state devoid of functionality.
- Altering the bootloader, system partition, or other critical software components risks triggering a bricking event.
- Bricking can also occur due to errors during the update process. Whether through automatic or manual downloads, any interruption during software updates can cause your Itel P55T to brick.
- Using inappropriate methods when performing root access can also result in bricking. Performing root access is dangerous as it grants entry to the Itel P55T device’s root directory housing the operating system.
Every Android device is susceptible to experiencing a system failure that leads to a bricked state. The risk remains consistent whether your device is from Itel P55T, Itel P55T, Itel P55T, or any other brand. That’s why it’s strongly advised against modifying their smartphones, especially when you don’t know what you’re doing.
Part 2. Techniques To Unbrick a Itel P55T
When faced with a bricked Itel P55T, below are various techniques to revive it. Whether through software resets or hardware interventions, these methods can help breathe life back into your device.

Discharge the Battery
A particular suggestion involves allowing the Itel P55T device’s battery to discharge fully, enabling proper functionality of the Flash Tool software. This process typically spans a few days and is recommended by some specialists.
Perform a Factory Reset
Accessing the Itel P55T device settings is impossible if your Itel P55T bricks. For this reason, it is recommended to enter Recovery Mode. Here’s how.
- Step 1: Press and hold the Power button and select the Restart option. During the reboot, press the Volume Up and Power keys simultaneously.
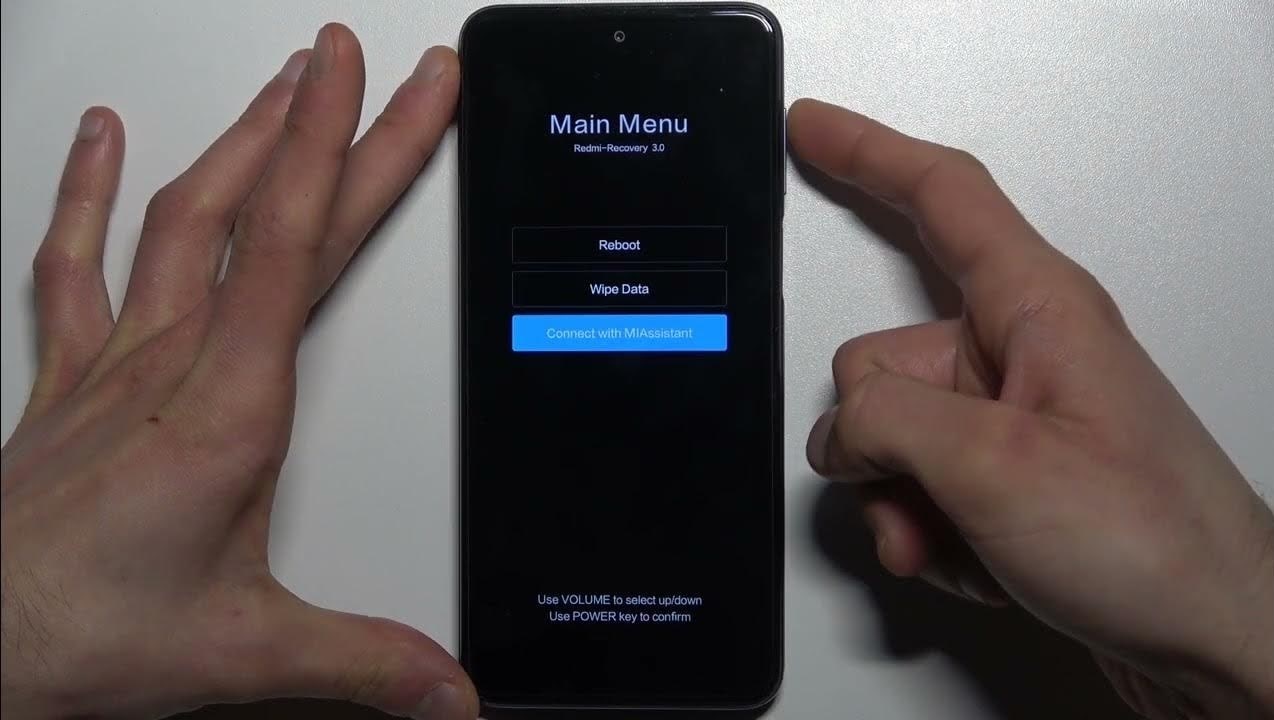
- Step 2: The main menu will show three options: Reboot, Wipe Data, and Connect with MIAssistant. Choose Reboot.
Explore Dedicated Software Tools To Fix Bricked Phones
Itel P55T offers its official software tools, such as the Itel P55TFlash Tool. It’s designed for advanced users familiar with flashing firmware onto their devices. Here’s how.
- Step 1: Download and install the Itel P55TFlash Tool .
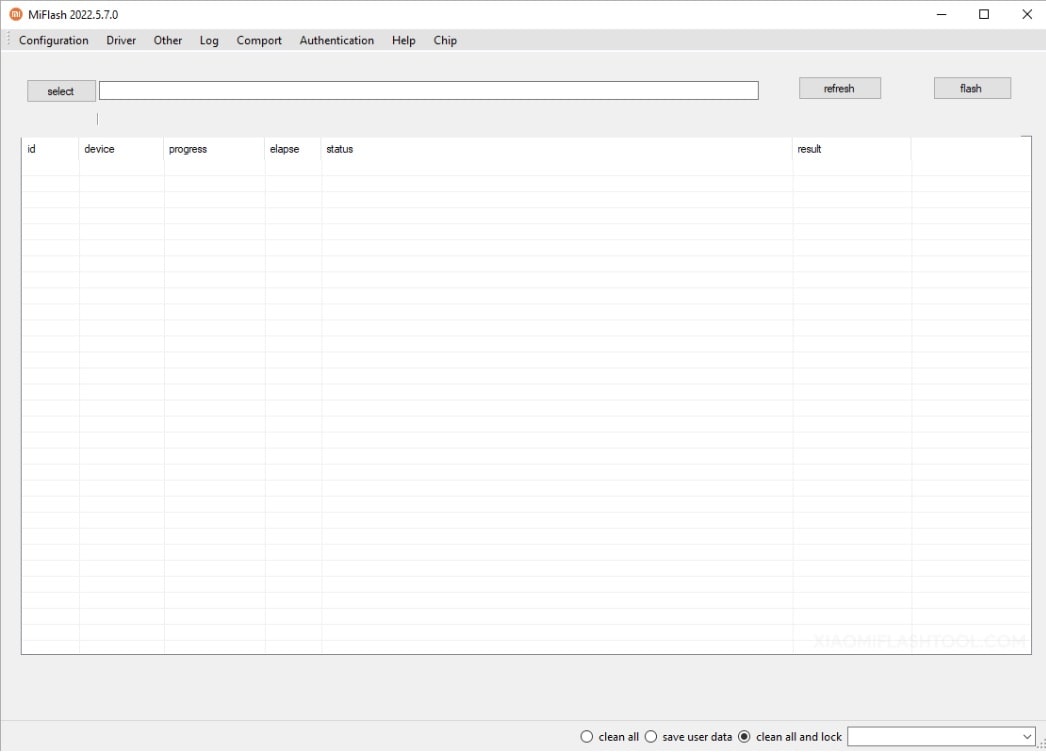
- Step 2: Download the Stock Firmware of Itel P55T and extract it on your computer. Press and Hold the Power and Volume Down buttons for at least 5-10 seconds to enter Fastboot Mode.

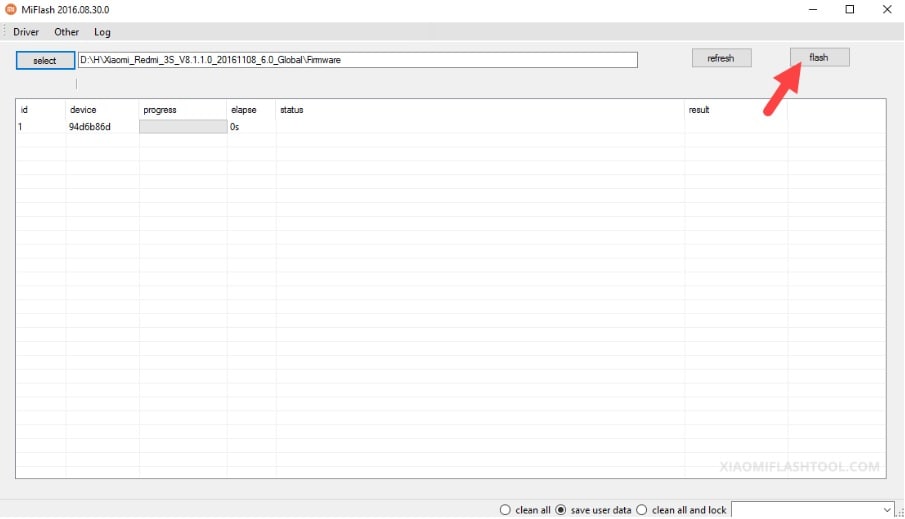
- Step 3: Connect your Itel P55T to the computer using a USB cable. Launch Itel P55TFlash Tool and locate the Firmware you have downloaded on the computer. Click the refresh > flash to begin the flashing process.
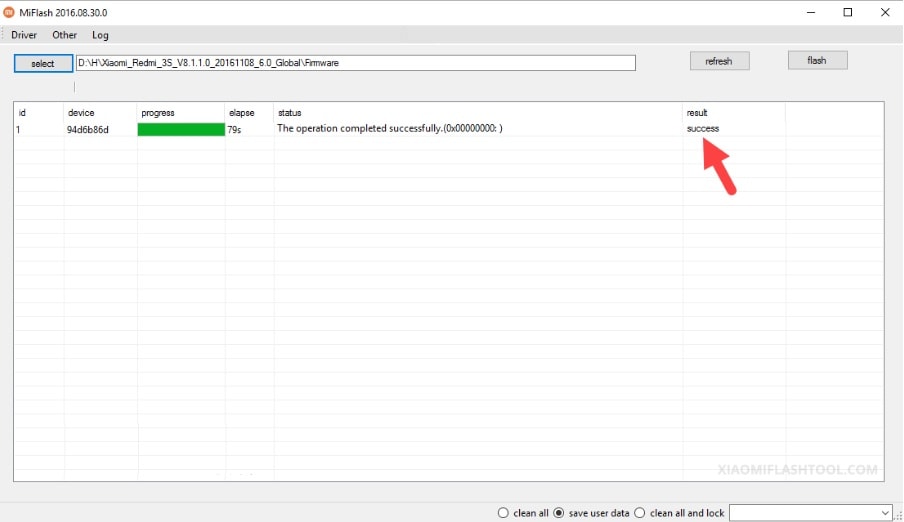
- Step 4: The SUCCESS result should appear in the Itel P55TFlash Tool once the flashing process is done.
However, if the Itel P55TFlash Tool did not unbrick your Itel P55T, consider using Wondershare Dr.Fone - System Repair (Android). The platform allows you to unbrick your Itel P55T with a few clicks.
 vMix Basic HD - Software based live production. vMix Basic HD includes 4 inputs, 3 cameras, streaming, recording, playlist.
Part 3. Reviving Your Itel P55T Using Wondershare Dr.Fone - System Repair (Android)
Dr.Fone - System Repair (Android) equips Itel P55T users with the ability to tackle soft brick and hard brick issues. This specialized Android repair tool enables you to restore your Itel P55T through a streamlined process, requiring just a few simple clicks.

safe & secure
3,227,773 people have downloaded it
 The Tube Sites Submitter is a fast and efficient tool for anyone who needs to upload videos quickly, easily and automatically to hundreds of tube sites in mere minutes .
 Key Features
Dr.Fone - System Repair (Android) offers several benefits to unbrick your Itel P55T easily. Below are its key features.
- Fix Common Itel P55T Problems in Minutes. This tool provides comprehensive solutions for common issues like black screen, Play Store not working, boot loops, or even bricked Android devices .
- Compatibility with Over 1000 Android Models. This app fixes glitches across modern Android devices. The software is compatible with an extensive range of models. Whether your Itel P55T is unlocked or carrier-bound, restoration is not a problem.
- Unparalleled Software Flexibility. Dr.Fone - System Repair (Android) also boasts an added capacity to mend iOS devices. This versatile tool is your all-inclusive solution for mobile devices, ensuring convenience whether you own an iOS or Android device.
Advantage of Dr.Fone - System Repair (Android) for Unbricking Itel P55T
Here are three benefits to choosing Dr.Fone - System Repair (Android) for unbricking a Itel P55T. You’ll further believe Dr.Fone is a reliable assistant when reviving your bricked Itel P55T.
Simplified Firmware Management
Dr.Fone eliminates the tedious search for appropriate firmware when unbricking your Itel P55T. The platform automatically downloads the correct firmware for your device. The hassle of identifying and manually procuring firmware is removed, saving time and ensuring a smoother unbricking process.
User-Friendly Approach
One of Dr.Fone’s key strengths is its user-friendly design. It caters to users with varying levels of technical expertise by employing a step-by-step process. This approach guides users through the repair process with clarity. It reduces the requirement for advanced technical knowledge.
Free Version for Evaluation
Dr.Fone - System Repair (Android) offers a free version for everyone. It allows users to test its capabilities before committing to a purchase. This trial version grants users the opportunity to assess the tool’s effectiveness and suitability for unbricking their Itel P55T. This instills confidence before investing in a full license.
How To Unbrick Itel P55T Using Dr.Fone - System Repair (Android)
Dr. Fone’s features are perfect for unbricking Itel P55T devices. Below are the procedures to restore your Itel P55T from its bricked state.
![]()
 Video Converter Factory Pro
Dr.Fone - System Repair (Android)
Repair Android System Errors without Any Trouble.
- Fix your Android to normal, no skills required.
- Fix various Android system issues, stuck in boot loop , black screen , or won’t turn on , looping on start, etc.
- The high success rate in resolving Android system issues.
- Compatible with a wide range of Android devices and OS versions
- User-friendly interface with easy-to-follow steps.
3981454 people have downloaded it
- Step 1: Download and install Dr.Fone - System Repair (Android) on your computer. After launching the application, click System Repair. Then, click Android as the Itel P55T device type. Connect your Itel P55T. Indicate Phone Brick as the Android issue and initiate the process by clicking Start.
 Easy and Safe Partition Software & Hard Disk Manager
- Step 2: Select the appropriate device information corresponding to your Itel P55T. Choose Brand, Name, Model, Country, and Carrier. Confirm by checking the I agree button, then proceed to the next step by clicking Next.
- Step 3: Given that the Itel P55T lacks a Home button, click the Phone without Home button option. Follow the prompts displayed on-screen and proceed by clicking Next to initiate the process of restoring your bricked phone.

- Step 4: As your Itel P55T enters Download Mode, the firmware download will start automatically. Follow the on-screen instructions. Wait for the system to initiate the repair procedure automatically. Upon completion, a message will pop up on the main window. Click Done to exit the tool. You can click Try again to repeat the process if needed.


You May Also like:
How To Fix iPhone Bricked After iOS 17/iOS 16/iOS 15 Update
How to Fix It If Your Itel P55T Phone Got Bricked?
Conclusion
Don’t let a bricked Itel P55T stand in your way. Use the array of techniques from basic troubleshooting to advanced software tools to breathe life back into your device. Unbrick your Itel P55T to its full functionality using the methods provided or Dr.Fone’s adept assistance.
Lastly, you can still refer to Itel P55T for repairs. It remains the primary solution in numerous cases. Utilizing your warranty can alleviate the associated costs. Seeking assistance from a specialized technician is also a viable route to consider for a thorough device assessment.
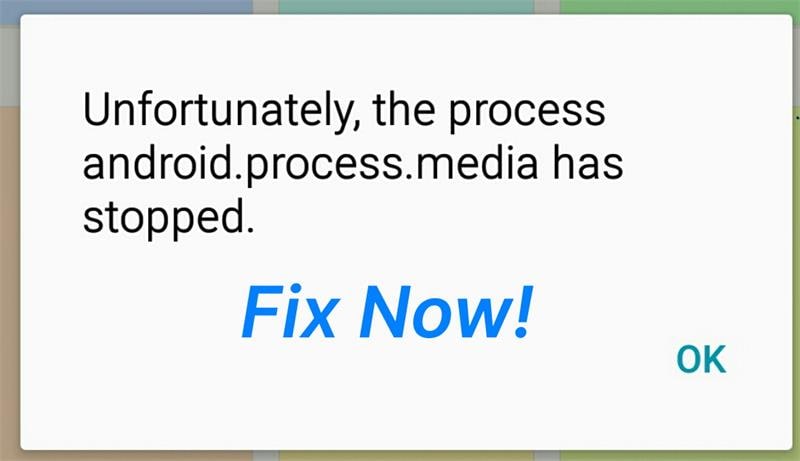
How to Fix Android.Process.Media Has Stopped on Itel P55T
Like any other technological system, Android is not without its fair share of problems. One of the most common issues that Android users face is the android.process.media error. If you have encountered this problem lately, you don’t need to worry, this article will clearly explain what exactly causes this error and how to fix it safely.
Part 1. Why this error pops up?
There are several reasons why this error can occur repeatedly and it is worth noting the various reasons why this happens so that you can avoid the problem in the future. Some of the most common ones include:
- 1. Moving from one custom ROM to another can cause this error to occur
- 2. A failed firmware upgrade may also be to blame
- 3. A virus attack can also result in this error among many others
- 4. Restoring apps via a Titanium backup is also a major cause
- 5. Failure of certain apps such as the download manager and the media storage
Part 2. Back up your Android Data First
It is always a good idea to back up your data especially before embarking on any attempt to fix any problem with your device. This way you will always have your data with you just in case something goes wrong and you lose all your data. Wondershare Dr.Fone will help you easily back up your Itel P55T. The application will allow you to back up your device with a few clicks and you can restore what you want from your backup .
Wondershare Dr.Fone
Flexibly Back up and Restore Android Data
- One-click to back up Android data to the computer.
- Preview and selectively restore the backup to any Android device.
- Supports 8000+ Android devices.
- There is no data lost during backup, export, or restore.
4,503,800 people have downloaded it
Follow the steps below to learn how to back up your phone in steps.
Step 1. Download, install, and run the program
Click the “Start Download” button above to get the software installed on your computer. Then run it. The primary window of the software looks like below.
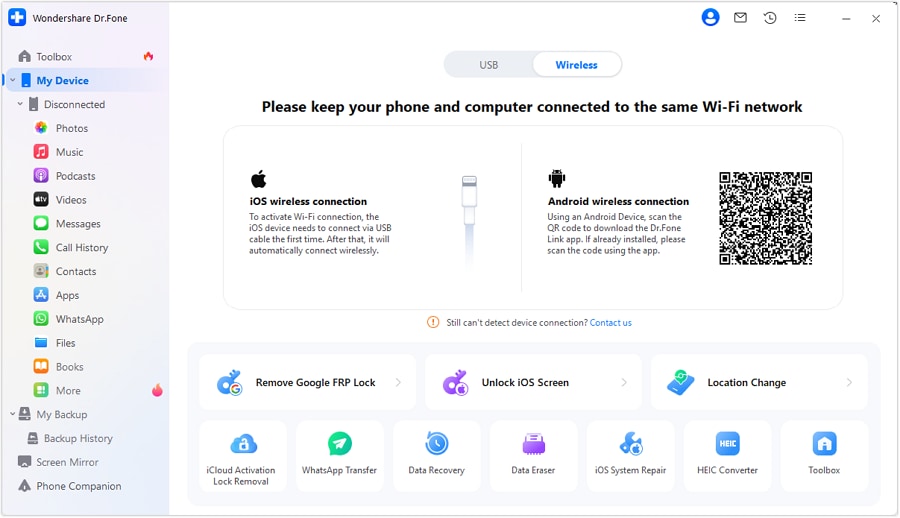
Step 2. Connect your device
Then connect your Itel P55T to the computer and make sure that it can be recognized by your computer. Then click on “My Backup” on Dr.Fone.

Step 3. Begin to backup
When your device is displayed on the window of the program, click “Back Up Now “ to begin. The rest will be done by the program.
 dotConnect for Oracle is an ADO.NET data provider for Oracle with Entity Framework Support.

safe & secure
Part 3. How to Fix “Android. Process. Media” Error
With a full backup of your Itel P55T, you can now embark on a mission to fix the error. There are several methods to clear this error. We have outlined three of the most effective solutions here.
Method 1: Ensure app and system updates
Updates often include patches for known issues and vulnerabilities. Ensuring that both apps and the system are up to date can resolve many potential problems.
Step 1: Visit the Google Play Store to check for available app updates.
Step 2: In “Settings,” go to “System” > “Software Update” to check for system updates.
Method 2: Reset app preferences
App preference settings might sometimes lead to conflicts or anomalies. Resetting these settings can revert apps to their default state, resolving potential issues.
Step 1: Go to “Settings” on your device.
Step 2: Access “Apps.”
Step 3: Tap the menu icon in the upper-right corner and select “Reset App Preferences.”
 Any DRM Removal for Win:Remove DRM from Adobe, Kindle, Sony eReader, Kobo, etc, read your ebooks anywhere.
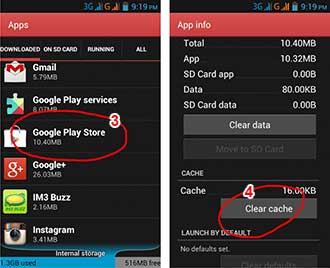
Method 3: Clear the cache and data on your device
Step 1: Go to Settings> Applications> Manage Applications and find the Google Services framework.
Step 2: Next, find Google Play from the same Manage Applications page.
Step 3: Tap on it and then Tap on clear cache.
Step 4: Press the back button to go back to the Google Services framework and then choose Force stop > clear cache > OK
Step 5: Next you need to open Google Play and when presented with an error, click OK
Step 6: Turn off the Itel P55T device and then turn it back on. Go to the Google Services framework again and turn it on to see if the issue has been resolved.


Method 4: Check Google Sync & Media Storage settings
Step 1: Go to Settings > Accounts and Personal> Google Sync and uncheck all the checkboxes to stop the Google Synchronization.
Step 2: Disable and Clear all Media Storage data by going to Settings> Apps> All Apps. Find the Media Storage> Clear Data> Disable
Step 3: Use the same method as above to clear the Download Manager data
Step 4: Turn off your device and then turn it on
This Should clear the error message for good.
Method 5: Boot your device into safe mode
Safe mode can temporarily disable third-party apps, allowing only core system apps. This detects if a third-party app causes the “Android process media keeps stopping” error. If the problem disappears in safe mode, a third-party app might be the cause. Uninstalling it can restore normal function. If the problem persists in safe mode, a deeper system issue might exist, needing further investigation or support.
Method 6: Fix the error by using a dedicated repair tool
 Power Tools add-on for Google Sheets, Lifetime subscription
Dr.Fone - System Repair (Android)
Fix Android process media has stopped issue in one click
- Fix all Android system issues like black screen of death, won’t turn on, system UI not working, etc.
- Industry’s 1st tool for one-click Android repair. Without any data loss.
- Supports all the new Itel P55T devices like Galaxy S8, S9, S22, etc.
- Step-by-step instructions provided. No technical skills required.
4,989,253 people have downloaded it
Step 1. Connect your Itel P55T
After launching Dr.Fone, click on “System Repair” from the main window.
Then connect your Itel P55T with the correct cable and choose “Android” > click “Start”.

In the Itel P55T device information interface, remember to select the correct information. Then confirm the warning and click “Next”.
To confirm the Android repair may erase all data on your device, you need to type in “000000” to proceed.

Step 2. Repair your Itel P55T in Download mode.
Read and follow the guide here to boot your Itel P55T in Download mode.
Then click “Next” to start downloading the firmware.
 Power Tools add-on for Google Sheets, 12-month subscription

It may take a while, so you could have a cup of coffee to wait for the repair process completed.

safe & secure

company, user or members of the same household. Action! - screen and game recorder</a>
Method 7: Factory Reset your device
If the above steps fail, you might need to perform a factory reset. A factory reset restores the Itel P55T device to its initial state, which can eliminate many problems, but it will also erase all data. Ensure you back up your important data before proceeding.
Method 8: Seek Manufacturer Support
If the problem persists after trying the above steps, it could be related to specific device or software issues. It’s advisable to contact your device manufacturer’s support team for more detailed guidance and assistance.
It is our hope that when faced with this fairly common error, you will not panic. This is a fairly mild issue that can easily be fixed as we have seen above.
 KoolReport Pro is an advanced solution for creating data reports and dashboards in PHP. Equipped with all extended packages , KoolReport Pro is able to connect to various datasources, perform advanced data analysis, construct stunning charts and graphs and export your beautiful work to PDF, Excel, JPG or other formats. Plus, it includes powerful built-in reports such as pivot report and drill-down report which will save your time in building ones.
 It will help you to write dynamic data reports easily, to construct intuitive dashboards or to build a whole business intelligence cockpit.
KoolReport Pro package goes with Full Source Code, Royal Free, ONE (1) Year Priority Support, ONE (1) Year Free Upgrade and 30-Days Money Back Guarantee.
Developer License allows Single Developer to create Unlimited Reports, deploy on Unlimited Servers and able deliver the work to Unlimited Clients.
safe & secure
- Title: Android Screen Stuck General Itel P55T Partly Screen Unresponsive | Dr.fone
- Author: Ariadne
- Created at : 2024-07-30 09:14:24
- Updated at : 2024-07-31 09:14:24
- Link: https://howto.techidaily.com/android-screen-stuck-general-itel-p55t-partly-screen-unresponsive-drfone-by-drfone-fix-android-problems-fix-android-problems/
- License: This work is licensed under CC BY-NC-SA 4.0.