
Best Methods for Vivo Y100t Wont Turn On | Dr.fone
Best Methods for Vivo Y100t Won’t Turn On
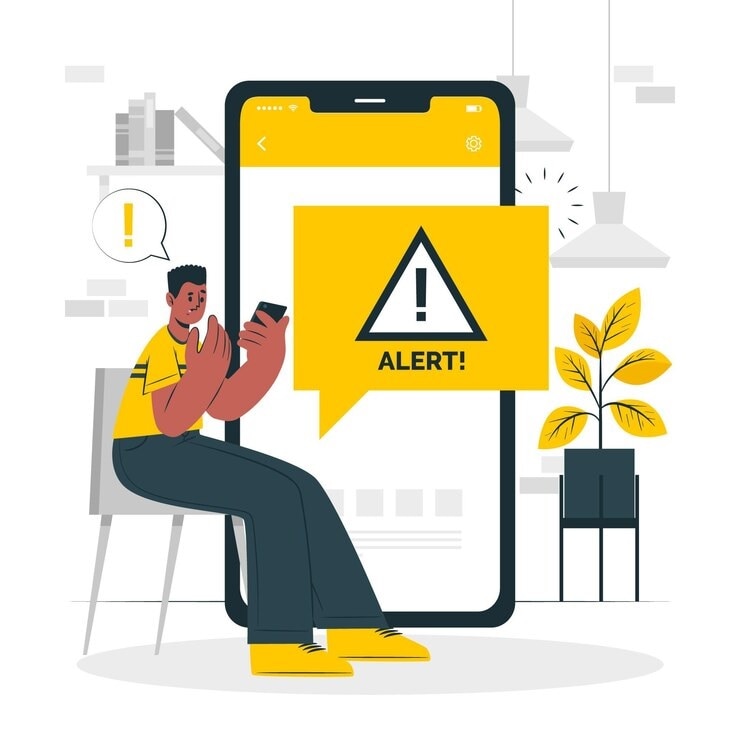
The Vivo Y100t 3 boasts numerous impressive features, making it a desirable phone. However, occasional malfunctions can result in the Vivo Y100t 3 won’t turn on issue. This issue can be incredibly frustrating. Don’t panic if you encounter this issue! There exist solutions to rectify it. This comprehensive guide aims to assist you in diagnosing and resolving the problem.
It will offer both basic steps and advanced techniques. With clear instructions and insightful tips, we’ll help troubleshoot your Vivo Y100t 3. Should you encounter this setback, follow this guide diligently to revive your Vivo Y100t 3 and have it up and running again.

Scenario 1. Phone Not Charged
A Vivo Y100t 4 not turning on might simply be a victim of a drained battery due to lack of charging. Several factors could lead to this, including a damaged charging cable or adapter. Moreover, issues with the power source or a malfunctioning charging port can be the issue.
Reason 1. Damaged Charging Cable or Adapter
Solution: Replace the charging cable or adapter with a known working one. Try using a different USB-C cable and adapter to ensure it’s not a faulty connection.
![]()
Reason 2. Faulty Power Source
Solution: Verify the power source by trying different outlets or USB ports. Ensure the power source is functional by testing it with another device.
![]()

Reason 3. Charging Port Issues
Solution: Check the charging port thoroughly to identify any dirt, debris, or signs of damage. Gently clean the port using compressed air or a small brush. If there’s visible damage, consider professional repair services.
 /a>
/a>![]()
Scenario 2. Check for Damages
Sometimes, a Vivo Y100t 3 might not turn on due to physical damage incurred by the Vivo Y100t device. Instances such as accidental drops, exposure to water or moisture, or even hardware malfunctions can be the reason. These can cause visible or invisible damage, leading to Vivo Y100t 4 won’t turn on.
Reason 1. Physical Impact or Dropping
Solution: If the Vivo Y100t 3 has experienced a significant impact or drop, inspect the exterior for any visible damage. A cracked screen or internal hardware issue might prevent the Vivo Y100t device from turning on. Consider professional repair services if necessary.
![]()
Reason 2. Water or Moisture Exposure
Solution: If the Vivo Y100t 3 has been exposed to water or moisture, immediately turn it off. Moreover, do not attempt to power it on. Place the Vivo Y100t device in a bowl of uncooked rice or silica gel packets to help absorb moisture. Alternatively, use a vacuum or hairdryer in a cool setting to draw out moisture. It’s crucial to let the Vivo Y100t device dry completely before attempting to power it on.
.png) Kanto Player Professional
Kanto Player Professional![]()
Reason 3. Hardware Malfunction
Solution: Check for any hardware malfunction symptoms such as overheating , unusual sounds, or a burnt smell. If any such signs are evident, refrain from attempting to turn on the Vivo Y100t device. You should seek professional assistance from authorized service centers.
![]()

Scenario 3. Buggy Android Smartphone
An Android smartphone, including the Vivo Y100t 3 XL, can encounter situations where the OS becomes extremely buggy. It leads to various issues, such as the Vivo Y100t 3 XL won’t turn on or getting stuck in a boot loop . Software glitches, corrupted system files, or incompatible apps can contribute to such problems.

Reason 1. Device Stuck in the Boot Loop
Solution: Try initiating a force restart to help fix this issue. You can do that by pressing and holding the “Power” and “Volume Up” keys at the same time for 10 seconds.
![]()
Reason 2. Software Glitches or System Crash
Solution: If encountering issues with the Vivo Y100t device not powering on because of software glitches or a system crash, try initiating Safe Mode by simultaneously pressing and holding the ‘Power’ button along with a Volume key. This action will cause the Power menu to be displayed. Here, tap and hold the “Power off” for a while and tap “OK” once the Safe Mode prompt appears.
![]()

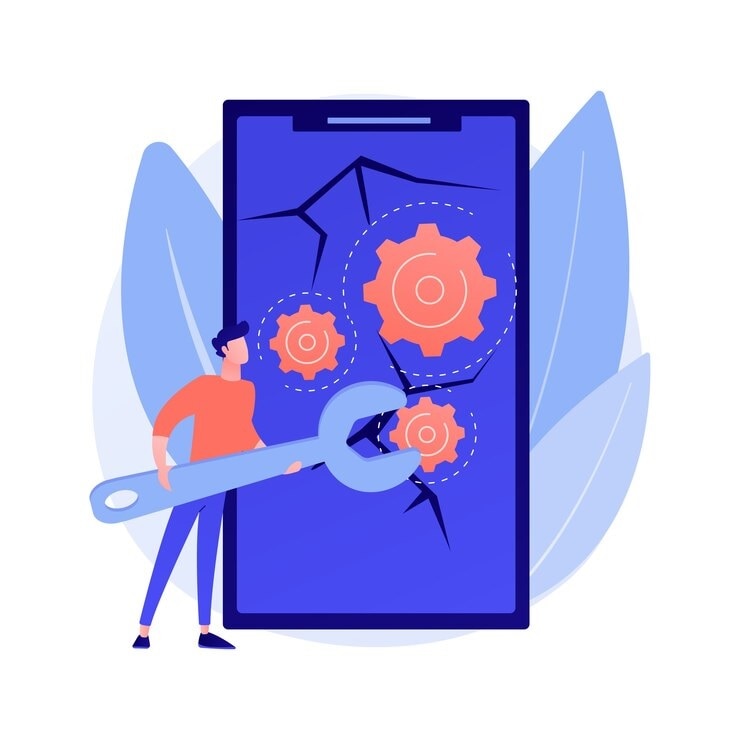
Scenario 4. System Glitches? Try Wondershare Dr.Fone as a Prioritized Solution
If you have attempted the solutions mentioned above without success, it is essential to explore a more robust option. This is important if the issue seems to be a major software problem that cannot be resolved using basic troubleshooting methods. In such cases, Wondershare Dr.Fone – System Repair emerges as a viable solution. Besides, It is a perfect fit to address the “Vivo Y100t 4 Not Turning On“ issue effectively.
Dr.Fone is designed to tackle various repairing problems that occur in Android devices. With its comprehensive setup, it can effectively address errors related to the Vivo Y100t. These measures are aligned to meet the specific requirements of your device. This is helpful in minimizing the time needed for troubleshooting.
Key Features of Wondershare Dr.Fone
- Fone allows you to repair the Android device with just a few clicks. By following the on-screen instructions, you can complete the whole process conveniently.
- It fixes all Android-related problems, including the Black screen of death , the Play Store not working, and more.
- This tool is compatible with all the mainstream Vivo Y100t models, including the latest ones.
 The Tube Sites Submitter is a fast and efficient tool for anyone who needs to upload videos quickly, easily and automatically to hundreds of tube sites in mere minutes .
 Steps Required To Resolve System Glitches via Wondershare Dr.Fone – System Repair
Now, we’ll provide you with a guide to resolve the Not Turning On issue of your Vivo Y100t. Go through the steps mentioned below to use Dr.Fone for the repair process.
- Step 1: Open Dr.Fone and Access System Repair Tool
Starting with, you will have to activate Dr.Fone on your computer and head to the “Toolbar” panel on the left of the window. From there, navigate to the “System Repair” tool and continue with the “Android” device to proceed with the repair process.

 safe & secure
4,082,195 people have downloaded it
- Step 2: Start Android System Repair
In the next step, choose the “Start” button that appears, by which your device will be recognized. You have to put in the “Name, Model, Country, and Carrier” details of the Vivo Y100t device and hit the “Next” option. Then, you need to put your Vivo Y100t on Download Mode following the on-screen instructions.

- Step 3: Utilize the Firmware
Afterward, the firmware will start to download automatically once the Vivo Y100t device enters a Download Mode. You need to select the “Fix Now” button and continue typing in a “000000” code. Then, proceed with the “Confirm” option to install the firmware on your device.


- Step 4: End the System Repair of Android
Lastly, the repair process will get started and can be viewed in a progress bar. Once it ends, hit the “Done” button to conclude the activity, and check your device to see if it starts properly.


Scenario 5. Need for a Power Cycle
At times, an Android device, including the Vivo Y100t 3/4, might benefit from a power cycle procedure. This process involves completely refreshing the Vivo Y100t device’s system. It potentially my Vivo Y100t 3 won’t turn on issues, temporary bugs, or system hang-ups. These issues prevent the Vivo Y100t device from turning on or functioning properly.
Reason 1. System Freeze or Unresponsive Device
Solution: If the Vivo Y100t 3/4 is unresponsive or frozen, perform a forced restart by holding down the “Power” and “Volume Up” for about 10 seconds. This action should force the Vivo Y100t device to shut down and reboot, potentially resolving the issue.
![]()
 Project Manager - Asset Browser for 3Ds Max
Reason 2. Battery Optimization and Refreshment
Solution: Sometimes, a power cycle helps optimize the Vivo Y100t device’s battery performance and refreshes the system. Allow the Vivo Y100t 3/4 to completely power down, charge it for at least 30 minutes, then attempt to turn it on.
 Forex Robotron Gold Package
Reason 3. Software Hang-Up or Temporary Glitch
Solution. To shut down your Vivo Y100t 3/4, press and hold the power button, then choose ‘Power Off’ from the menu that appears. After the Vivo Y100t device powers down, wait for about 30 seconds to 1 minute to ensure it has fully shut down before moving forward. Subsequently, press and hold the power button until the Google logo displays to restart your device.
Scenario 6. Software Damaged? Restore Immediately
When an Android device experiences severe software damage, it can lead to major issues like the Vivo Y100t 3 won’t turn on. This can hinder the functionality of the Vivo Y100t device. It also includes the inability to turn on or persistent system malfunctions. In such cases, performing a complete phone restore becomes a necessary solution:

Reason 1. Corrupted System Files or Firmware Issues
Solution. In cases of severe software damage or corruption of system files, performing a settings reset becomes imperative. It is to restore the Vivo Y100t device to its default settings and resolve underlying issues.
![]()
Reason 2. Factory Reset as a Solution
Performing a factory reset serves as the ultimate solution. This is true when facing critical software damage that leads to a non-responsive Vivo Y100t 3/4. This process erases all user data, apps, settings, and files stored on the Vivo Y100t device, reverting it to its original factory state.
Steps To Perform a Factory Reset on Vivo Y100t 3/4
- Step 1. Access the “Settings” application on your Vivo Y100t 3/4. Then, navigate through the menu until you locate the “System” category located further down the list. Within the “System” settings, tap the last option named “Reset Options.”
![]()
- Step 2. On the following screen, press the “Erase All Data (Factory Reset)” option. Afterward, follow the on-screen instructions to complete the process.
![]()
Scenario 7. Phone Hangs on Installed App
There are scenarios where a phone, like the Vivo Y100t 3, hangs or gets stuck on a specific installed app. It happens during the startup process, and it can prevent the Vivo Y100t device from turning on properly. This issue often arises due to a malfunctioning or poorly coded app. This app disrupts the Vivo Y100t device’s startup routine, causing Vivo Y100t 4 won’t turn on.

Reason 1. Third-Party Apps Interference
Solution: Start by booting the Vivo Y100t 3 into Safe Mode. This mode disables third-party apps, allowing you to access the Vivo Y100t device without interference from downloaded applications.
![]()

Reason 2. Problematic App
Solution: While in Safe Mode, observe if the Vivo Y100t device boots up properly. If it successfully boots, it suggests that a third-party application is causing the problem. To pinpoint the problematic app, uninstall recently added apps individually and restart the Vivo Y100t device after each removal. This process helps pinpoint the problematic app causing the hang during startup.
![]()
Reason 3. Stacked Up App Cache and Data
Solution: If the problematic app is identified, try clearing its cache and data. Go to Settings and then access “Apps.” Within “Apps,” find the Problematic App and tap “Storage & cache.” On the subsequent display, select “Clear cache “ and “Clear storage” to restore the application to its original settings. After restarting the Vivo Y100t device, verify whether the problem persists.
![]()
Reason 4. Outdated Application
Solution: If the application is essential, ensure to seek updates within the Google Play Store. Updating the app to its latest version could potentially resolve any compatibility issues. Alternatively, if updates are not available or don’t resolve the problem, consider uninstalling and reinstalling the app.
![]()
Conclusion
In conclusion, this article has aimed to address the perplexing issue of a Vivo Y100t 3 won’t turn on. It offered a range of solutions depending on different underlying reasons. The guide included basic methods like checking for charging issues and examining hardware damage. Moreover, it included advanced techniques like software repair tools such as Wondershare Dr.Fone.
Users are encouraged to follow the step-by-step instructions outlined here. These solutions can serve as effective remedies for resolving the problem. For more in-depth and advanced solutions, considering Dr.Fone stands as a significant option. It offers a robust system repair feature for resolving intricate software-related issues.
safe & secure
3,673,294 people have downloaded it
Play Store Not Working On Vivo Y100t? 8 Solutions Inside
A functional Google Play Store is crucial for Android users to access, update, and install apps. Unfortunately, common issues like your Google Play Store not working can disrupt this experience. If you find your Play Store misbehaving more often than not, don’t fret.
In this guide, discover reliable solutions when your Google Play Store is not responding. The article will teach you how to tackle these problems and ensure a seamless app experience. Don’t let technical glitches hinder your digital journey—follow these troubleshooting steps for a swift resolution. Explore the page below to learn more.

Part I. 7 Common Google Play Store Issues Users Encounter
The Google Play Store serves as the epicenter for Android users. It facilitates seamless access to a vast array of apps. However, encountering issues with the platform can impact the functionality of your device. Below are 7 common issues on why your Google Play Store is not responding.
 vMix HD - Software based live production. vMix HD includes everything in vMix Basic HD plus 1000 inputs, Video List, 4 Overlay Channels, and 1 vMix Call
Inability To Open the Play Store
The inability to open the Play Store leaves you without access to new apps or updates. The issue is often accompanied by error messages, which can leave you scratching your head.
Crashing Issues
Frequent crashes undermine the stability of the Play Store. Users attempting to browse or download apps may find themselves abruptly kicked out of the application. It can disrupt your intended tasks and cause annoyance in the long run.
Not Responding Errors
The dreaded “Not Responding” message can bring usability to a standstill. Users navigating the Play Store may experience delays or complete unresponsiveness. It can lead to a frustrating and unproductive experience.
Download and Installation Failures
When downloads and installations fail, you will be unable to enjoy new apps or updates. This issue can be annoying when trying to access crucial software improvements or security updates.
Authentication and Account Issues
Problems with authentication and account access can lock users out of their Google accounts on the Play Store. It prevents users from purchasing or downloading apps. The issue not only hampers functionality but also raises security concerns.
Update Problems
Difficulties in updating apps can leave users with outdated software. It can potentially compromise security and miss out on new features. The issue diminishes the user experience by depriving you of the latest enhancements.
Connection and Network Errors
Persistent connection and network errors impede the Play Store’s ability to fetch data. It hinders users from browsing and downloading apps. The issue is frustrating in areas with unstable internet connectivity.
Part II. Why Does the Google Play Store Keep Stopping?
If you’re wondering why does Google Play Store keeps stopping on your phone, there can be several factors. Here are some of them below.

- **Network issues.**Unstable or poor internet connections can disrupt the communication between the Vivo Y100t device and the Play Store. It can lead to frequent crashes.
- **Outdated Play Store version.**Running an outdated version of the Play Store may result in compatibility issues. The lack of essential updates can cause the application to stop unexpectedly.
- Cache and data accumulation. Over time, cached data and accumulated data in the Play Store can become corrupted. It can hinder the smooth operation of your phone and contribute to sudden stops.
- Google account problems. Authentication issues, incorrect credentials, or other problems with the linked Google account can disrupt the Play Store’s functionality. This can also lead to repeated crashes.
- **System glitches and bugs.**Inherent glitches and bugs within the Android operating system may affect the Play Store’s performance. They can cause your device to stop unexpectedly.
Part III.7 Quick Solutions To Resolve Play Store Not Working Issues
Encountering issues with the Google Play Store can be frustrating. It disrupts your ability to download, update, or access essential apps. Here are seven quick solutions when your Google Play Store unfortunately has stopped.


Clear Cache and Data
Revitalize your Google Play Store by addressing performance issues. Clearing cache and data can be a crucial step when troubleshooting malfunctions or glitches in the app. Here’s how.
- Step 1: Head to your device’s Settings and navigate to Apps or Application Manager.
- Step 2: Locate and select Google Play Store. Within Storage, choose Clear Cache and Clear Data. Confirm your action and restart the Play Store.

Update Play Store
Enhance your Play Store’s functionality by ensuring it’s up-to-date. This method suits those who haven’t updated their Google Play Store for a long time. Follow the steps below.
- Step 1: Open the Play Store app and tap the three horizontal lines in the top-left corner to access the menu.
- Step 2: Select Settings and scroll down to find the Play Store version. Install any available updates.
 TubeDigger - online video downloader from mostly any site

Check Internet Connection
Ensure a stable internet connection on your device. Switch between Wi-Fi and mobile data to identify connectivity issues. Restart your router or modem if problems persist.
Reset App Preferences
Restore your device’s app settings to default for improved functionality. Below are the steps.
- Step 1: Go to your device’s Settings and select Apps or Application Manager.
- Step 2: Tap the three dots in the top-right corner and choose Reset app preferences.

Re-add Google Account
Resolve Play Store issues by re-adding your Google account. Follow these steps in Settings to remove and re-add your Google account, ensuring a seamless and error-free experience.
- Step 1: Navigate to Settings and choose Accounts or Users & Accounts.
- Step 2: Select Google and remove the account. Re-add the Google account and verify if the Play Store functions properly.

Uninstall Play Store Updates
This method troubleshoots Play Store problems by uninstalling updates. Here’s how.
- Step 1: Access Settings and go to Apps or Application Manager.
- Step 2: Find Google Play Store and tap on Uninstall Updates. Confirm the action and restart the Play Store.


Perform a System Update
Ensure your device’s overall stability by performing a system update to ensure the stable operation of the Play Store. Follow the steps below.
- Step 1: Access Settings, scroll down, and select System or Software Update.
- Step 2: Next, choose System update or Check for Updates and install any available system updates**.**

If you’re still asking yourself why my Google Play Store is not opening after conventional methods prove ineffective, it may lead you to explore third-party tools. As a final recourse, considering reputable tools like Wondershare Dr.Fone - System Repair introduces a fresh approach to troubleshooting your device.
Part IV. How To Repair Play Store Not Working With an Alternative
Repairing your Google Play Store can be swift and effective with Dr.Fone - System Repair. This tool offers advanced features to diagnose and fix various system issues without the advanced skills required. It provides a quick and efficient resolution for a malfunctioning Google Play Store. Follow these three simple steps to get started:
- Step 1: Begin by downloading and installing Dr.Fone - System Repair (Android) on your computer.
safe & secure
4,207,329 people have downloaded it
- Step 2: Launch the program and connect your Vivo Y100t to the computer using a USB cable. Choose the Vivo Y100t device type and click Start to initiate the repair process.

- Step 3: Dr.Foneshould automatically detect the brand of your device. Next, choose the Name, Model, Country, and Carrier. Tick the checkmark and click Next to continue. Follow the on-screen instructions and wait for the repair process to complete.
- Step 4: Simply click Done on the prompt window displaying a confirmation message to exit the tool if your Vivo Y100t starts successfully. In the event that the Vivo Y100t device fails to start, select Try Again to initiate the process once more.
Bonus: What Else Can Dr.Fone - System Repair Do?
Beyond its utility in fixing Google Play Store malfunctions, Dr.Fone is known for its user-friendly interface and high success rate. Its ability to address a wide range of Android issues offers a comprehensive solution to various system-related problems. Below are the platform’s key highlights.

Key Features
- Fixes diverse Android issues. Dr.Fone - System Repair excels in resolving a multitude of Android problems. This includes a black screen, a boot loop, and bricked Android devices. Its comprehensive approach ensures you can rely on a single tool to tackle a wide range of system-related issues.
- Support for over 1000 Android models. Dr.Fone supports over 1000 Android models. The broad coverage ensures diverse devices can use the software to troubleshoot and repair their Android systems.
- User-Friendly interface. Dr.Fone is designed with simplicity in mind. It offers an easy-to-use interface that caters to both novice and experienced users.
- High success rate. The software boasts a high success rate in resolving Android issues. Its effectiveness in tackling various problems has garnered trust among users. It’s one of the go-to solutions for those seeking reliable and efficient system repairs.
safe & secure
4,131,376 people have downloaded it
Conclusion
Addressing issues when your Google Play Store does not work is crucial for an uninterrupted Android experience. Follow the outlined steps to regain control and enjoy a seamless app experience. Don’t let frustrations linger; take immediate action for a hassle-free Google Play Store.
Lastly, having Dr.Fone - System Repair at your side offers a reliable solution for a wide range of Android concerns. Don’t worry if your Google Play store is not responding, and Dr.Fone can fix it in minutes.
6 Solutions to Fix Error 505 in Google Play Store on Vivo Y100t
In case you are receiving the error code 505 while downloading an application from Google play store and have no clue what is it, then this is the right article for you. In this article we are covering the reasons behind the occurrence of Google play error 505. Not only that, we are also providing 6 solutions to fix the error code 505. Usually, this error is seen with Android 5.0 Lollipop version and occurs at the time when you try to install the already downloaded application making it hard to run the app.
Such an error is a kind of permission error. That is, in case you have two similar kinds of applications such as banking apps and both looking for similar kind of permission, causes conflict error named as error 505.
The occurrence chance is more in the old operating systems, 4 KitKat, Android version 4. Let us then proceed to know more about this error 505.
Part 1: Reasons for Google Play error 505

As per the report by some users, error 505 occurs in certain apps such as Weather App, SBI, ITV, Adobe Air 15, We Chat etc.
To have the right idea about the problem, we have listed all the reasons of it occurrence below:
- Google play store is not updated or refreshed (Causes the error during the downloading process)
- Due to installation of an outdated version (In case your Android version is outdated may result in error in the installation process)
- Cache memory(Is the redundant data occurs due to search history)
- Application is not compatible with the Android OS (If the app you are downloading is not the updated may cause error)
- Adobe air app
- Data crash (Many time app or Google play store crashed crashes after downloading it, reason may be some bugs, so many apps are open, less memory etc.)
Now that we know the reasons, let us also learn about the solutions that will guide you to resolve the error code 505.
Part 2: 6 Solutions to fix error code 505
Any error that occurs during downloading or installation process not only hinders with the new app but also takes a large amount of our time to solve the issue. To check that, let us go through the 6 solutions one by one.
Solution 1: One click to make error code 505 disappear
The most common cause for error code 505 pop-up is that Android system files that underpin the Google Play module are corrupted. To make error code 505 disappear in this condition, you should have your Android system repaired.
Dr.Fone - System Repair (Android)
One click to repair Android system and make error code 505 disappear
- Fix all Android system issues like error code 505, error code 495, error code 963, etc.
- One click to fix error code 505. No technical skills required.
- Supports all the new Vivo Y100t devices like Galaxy S8, S9, etc.
- Easy-to-understand instructions provided on each screen.
4,999,459 people have downloaded it
Now, you just need to follow these Android repair steps to fix error code 505:
Note: Android repair needs to flash the system firmware, which may erase existing Android data. To prevent data loss, back up all the important data from Android to PC .
Step1: Download the Dr.Fone - System Repair (Android) program , install and launch it. The following interface will pop up.
Step2: Select the “Android Repair” among the 3 tabs, connect your Android to PC, and click “Start”.
 Project Manager - Asset Browser for 3Ds Max
Step3: Choose the correct device details from each field, confirm them and continue.
Step4: Boot your Android in download mode, then start downloading the firmware of your device.

Step5: After the Vivo Y100t device firmware is downloaded, the tool will start repairing your Android.


Step6: When your Android is repaired, the error code 505 will disappear.
Solution 2: Check whether Download Manger is ON or not
Many times download manager is set to disable due to which you are not able to download or install the app. So, it is required to make a check whether the download manager is set on or off. So that your installation process will work properly. The process to enable the download manager is as follows.
>Go to Settings
>Select the Application Manger or App (Option depends upon the Vivo Y100t device)
At the top, an option will appear
>Swipe right till you locate Download manager at top of the screen of the Vivo Y100t device
>Then Select Enable

Enabling download manager to give permission to the Vivo Y100t device to start the download or installation process.
Solution 3: Updating to the latest version of OS of your Vivo Y100t
Working with an old operating system is ok, but many times old version also creates some problem and is the main reason behind the occurrence of any bug or error. So, updating the older version act like a rescue to get rid of any such issue or bug. The Process of updation is quite simple; you just need to follow the below steps and your device is ready to get updated to the latest version. Steps are:
- >Go to Settings
- >Select about Phone
- >Click on System Update
- >Check for updates
- >Click on Update
- >Need to click on Install (if any update is available)

Solution 4: Clearing the cache memory from Google services Framework and Google play store
While browsing data online or through Google play store some cache memory get stored for the fast access to the pages. Below mentioned simple steps will help you in clearing out the cache memory from Google services framework and Google play store.
Process to clear the Cache memory for Google Services Framework
- >Go to Settings
- >Select Applications
- >Click on Manage Applications
- >Click to select ‘ALL’
- >Click on Google services framework
- >Select ‘Clear data and clear cache’
That will remove the cache memory of your Google services framework
Steps to Cache memory of Google Play Store
- >Go to Settings
- >Applications
- >Manage Applications
- >Click to select ‘ALL’
- >Select Google Play store
- >Clear data and clear cache
It will clear the cache of Google play store

Clearing the cache memory remove the extra temporary memory, thus free up space for the further installation process.
Solution 5: Reinstalling play store Updates
The reason behind the installation error code 505 might be Google play store updates.
Due to continuous updation of new apps and services Google Play store used to be flooded with so many updates or sometimes does not updated properly. That sometimes caused the problem in dealing with app installation. Resolving the issue is important to make your play store ready for future updation and installation.

- >Go to Settings
- >Visit Application Manager or Apps
- >Select Google Play Store
- >Click on Uninstalling Updates
- >A Message will appear ‘Change play store app to factory version’- Accept it
- >Now Open Google play store>It will refresh the updates within 5 to 10 minutes(So you need to keep your internet connection on while Google play store is updating its store for new updates.)

Solution 6: Third party App
In the case, error 505 occur due to the installation of two or more apps with duplicate permission of data, as many times we use to install two similar kind of app that creates the situation where both seeking out for somewhat similar permissions for the installation. The manual finding is a long and tiring process. Then you can take the assistance of ‘Lucky Patcher App’ to find out which app is creating the conflict. This app will assist you in finding out the duplicity if any and then modifying it. Through this app, once you will find out which particular app is causing the conflict, then you can delete that conflicting app from your phone so that problem of error code 505 gets sort out.
Download link: https://www.luckypatchers.com/download/

Note: If still, you are in the state of trouble to solve the issue of error code 505 then Google Play help center is here to look out all troubles related to app store and its service. You can check out the details by visiting the following link:
https://support.google.com/googleplay/?hl=en-IN#topic=3364260
Or call them at their call center number regarding the issue.

Bonus FAQ about Google Play error
Q1: What is a 505 error code?
The HyperText Transfer Protocol (HTTP) error 505: HTTP Version Not Supported response status code means that the HTTP version used in the request is not supported by the server.
Q2: What is a 506 error?
The 506 error code is a frequent error when operating the Google Play Store. You will sometimes see this error code when you are downloading an app. The app may seem to be downloading just fine when suddenly, near the end of the installation, an error occurs, and a message pops up saying, “App could not be downloaded due to an error 506.”
Q3: How to fix the 506?
Solution 1: Restart your device which can help solve most problems.
Solution 2: Remove the SD card safely.
Solution 3: Correct date and time if it is wrong.
Solution 4: Add your Google Account again.
Solution 5: Clear Google Play Store data and cache.
However, sometimes the five simple couldn’t work anymore. A system repair software can be helpful quickly. We really recommend the Dr.Fone - System Repair (Android) , only a few minutes, the error will be fixed.
Conclusion
Not being able to download or install the app is very frustrating and time-consuming also. Therefore, in this article, we went through the reasons behind the occurrence error code 505 as well as resolving the issue by following five effective methods. I hope that you would be able to sort out the error 505 by following above methods thus would be able to install the application without further delay.
- Title: Best Methods for Vivo Y100t Wont Turn On | Dr.fone
- Author: Ariadne
- Created at : 2024-07-30 09:42:21
- Updated at : 2024-07-31 09:42:21
- Link: https://howto.techidaily.com/best-methods-for-vivo-y100t-wont-turn-on-drfone-by-drfone-fix-android-problems-fix-android-problems/
- License: This work is licensed under CC BY-NC-SA 4.0.