
Bricked Your Tecno Pova 5 Pro? Heres A Full Solution | Dr.fone
Bricked Your Tecno Pova 5 Pro? Here’s A Full Solution
A bricked phone is a device that won’t turn on no matter what you do and everything you try to do to fix it doesn’t work. Most people will tell you that there is really nothing you can do to fix a bricked device. But with the right information, the right buttons to push and useful additional software you can actually try to fix a bricked device.
In this article we are going to look at how you can fix your device if you are sure it is bricked, how to rescue the data on your bricked device and even how you can avoid this situation in the future.
Part 1: Rescue the data on your Bricked Android Phone
Before we can learn how to fix a bricked device, it is important that you are able to save the data that is on the Tecno Pova 5 Pro device. Having the data saved somewhere else will be the added insurance you need in case anything goes wrong during the process. There are very few software solutions in the market to help you get back data from a bricked device. One of these and the most reliable is Wondershare Dr.Fone - Data Recovery (Android) .
Dr.Fone - Data Recovery (Android)
World’s 1st Android smartphone and tablet recovery software.
- Recover data from broken Android in different situations.
- Scan and preview files before starting the retrieval process.
- SD card recovery on any Android devices.
- Recover contacts, messages, photos, call logs, etc.
- It works great with any Android devices.
- 100% safe to use.
4,771,974 people have downloaded it
How to Use Dr.Fone - Data Recovery (Android) to Rescue Data from a Bricked Android
If your device is completely unresponsive, don’t worry Dr.Fone can help you get all the data back. Simply follow these steps to gain access to the Tecno Pova 5 Pro device and recover all your data.
Step 1: Download and install Wondershare Dr.Fone to your PC. Launch the program and then click on Data Recovery. Select the data types you would like to recover and then click on Next.


Step 2. Select the issue type for your phone. Choose from “Touch screen not responsive or cannot access the phone” or “Black/broken screen”.
 Greeting Card Builder
Step 3: In the next step, you need to select your device model. If you don’t know the model of your device click on “How to check the Tecno Pova 5 Pro device model” to get help.

Step 4: The next screen will provide instructions on how to enter “Download mode.” Connect the Tecno Pova 5 Pro device to your PC once it is in “Download Mode”

Step 5: The program will begin an analysis of your device and then download the recovery package.

Step 6: Then Dr.Fone will display all the recoverable file types. You can click on the files to preview them. Select the ones you need and click on “Recover to Computer” to save them to your computer.

 CollageIt Pro
Part 2: How to Fix Your Bricked Android Phone
Android devices are usually very flexible in allowing users to flash ROM but sometimes an incorrect process can result in a bricked device. While there are few solutions to this problem, here are a few things you can do;

When the Tecno Pova 5 Pro device Boots Straight into Recovery
If the Tecno Pova 5 Pro device can boot to the recovery screen, you can find an alternative ROM to install and copy it your device. Installation can then be done in the recovery menu. If the Tecno Pova 5 Pro device is booting to recovery mode there is a chance that it can be fixed.
Step 1: Load up Clockworkmod or any other recovery tool that you have been using.
Step 2: Once you are in, navigate to the “Reboot system now.” If you are using Clockworkmod, this should be your first option. Hopefully everything will work just right if you do this, If it doesn’t you may need to download and re-flash the ROM again.

 DEX 3 RE is Easy-To-Use DJ Mixing Software for MAC and Windows Designed for Today’s Versatile DJ.
Mix from your own library of music, iTunes or use the Pulselocker subsciprtion service for in-app access to over 44 million songs. Use with over 85 supported DJ controllers or mix with a keyboard and mouse.
DEX 3 RE is everything you need without the clutter - the perfect 2-deck mixing software solution for mobile DJs or hard-core hobbiests.
PCDJ DEX 3 RE (DJ Software for Win & MAC - Product Activation For 3 Machines)
When the Tecno Pova 5 Pro device won’t stop rebooting
Here’s what to do if the Tecno Pova 5 Pro device wont stop rebooting.
Step 1: Turn off the Tecno Pova 5 Pro device and then reboot in recovery mode.
Step 2: Go to “Advanced” which will bring up a number of options to choose from.
Step 3: One of the options should be “Wipe Dalvik cache” select this option and then follow the instructions. When finished select “Go Back” to return to the main menu.

Step 4: Go to the “Wipe Cache Partition” and select it.
Step 5: Go to “Wipe data/ factory reset.”

Step 6: Finally reboot the Tecno Pova 5 Pro device by selecting “Reboot system now.” This should fix the problem. You may also want to flash the same ROM or try a new one.
If the above methods don’t work, try one of the following options.
You can return to resource where you found the flash tools and search or ask for advice
Sometimes these errors can be caused if the ROM installation was performed via SD card. In this case reformatting the SD card might help.
If all else fails, it is time to returning the Tecno Pova 5 Pro device to the vendor if your warranty is still applicable.

Part 3: Useful Tips to avoid Bricking your Android Phone
If you are planning on installing custom ROM you need to install Custom Recovery. This will enable you restore the Tecno Pova 5 Pro device to its original settings should anything go wrong and hopefully help you avoid bricking your device.
- Ensure that you are familiar with the Fastboot or ADB commands before doing anything. You should know how to recover your device by flashing a command line and also manually transfer important files to your device.
- Make a backup of your device. This is obvious but most people fail to adhere to it. At the very least you can get back all your files and settings to transfer to a new phone.
- Keep a full Nandroid backup on your phone
- Keep another backup on your PC which you can access should anything go wrong with the Custom ROM installation
- Know how to hard reset your device. It may come in handy when your device freezes on you.
- You should also consider enabling USB debugging. This is because many solutions for a Bricked device rely on USB debugging.
- Ensure the Custom ROM you choose can actually be used on your device model.
While installing Custom ROM can actually be a great way to customize your device, it is also the leading reason for bricked devices. Therefore ensure that you understand what you are doing when you decide to customize your device. Learn as much as you can about the process before attempting everything.
Home Button Not Working on Tecno Pova 5 Pro? Here Are Real Fixes
There is no doubt that it is quite frustrating when your device buttons, such as home and back don’t work properly. The reasons can be software as well as hardware issues. If you are wondering whether there is any solution to fix this problem, then you’ve come to the right place. Firstly, yes some methods can probably help you to come out of this issue. Here, in this guide, we have covered various solutions you can try to resolve the “home button not working Android” problem no matter whether it is due to software or hardware reason.
Part 1: 4 Common Measures to Fix Home Button Not Working Android
Here, we are going to mention four common methods that you can try to resolve the home button problem on your Tecno Pova 5 Pro with ease.
1.1 One click to fix Android Home Button Not Working
[Try It Free](https://download.wondershare.com/drfone_repair_full3371.exe)When it comes to the home button not working Tecno Pova 5 Pro problem, the most common reason is the unknown system issues. In such a scenario, the best solution is using Dr.Fone - System Repair (Android) software to repair your Android system to normal in one click. This tool is powerful enough to resolve various Android issues within a few minutes.
Dr.Fone - System Repair (Android)
Android repair tool to fix home button not working on Android
- The tool can help you to fix the Android operating system in a wide range of scenarios.
- It is compatible with all Tecno Pova 5 Pro devices.
- There is no need for technical skills to use the software.
- The software comes with a high success rate for fixing the Android system.
- It provides easy steps to resolve Android issues.
3981454 people have downloaded it
To learn how to fix home button not working problem, download and install the Dr.Fone - System Repair (Android) software on your computer, follow the below step-by-step guide:
Step 1: To begin with the process, launch the software on your computer and select the “System Repair” option from the software main window.

Step 2: Thereafter, connect your Tecno Pova 5 Pro to the computer using a USB cable and select the “Android Repair” tab from the left menu.

Step 3: Next, you will navigate to a device information page where you have to provide your device information.

Step 4: After that, the software will download the appropriate firmware to repair your Android system.


Step 5: After downloading the firmware, the software will start the repair process. Wait for a few seconds, the problem should get fixed and your phone will get back to its normal state.

1.2 Force Restart your Android
Whenever you encounter with Android virtual soft keys, not working problem, the first thing you should try is to force restart your phone . If the problem is due to a software issue, then it can be probably fixed by simply force restarting your Android.
Here are simple steps on how to force restart on Android:
Step 1: To begin with, press and hold the power button and either volume up or down button at the same time until your device screen goes off.
Step 2: Next, press the power button for a few moments to force restart your device.

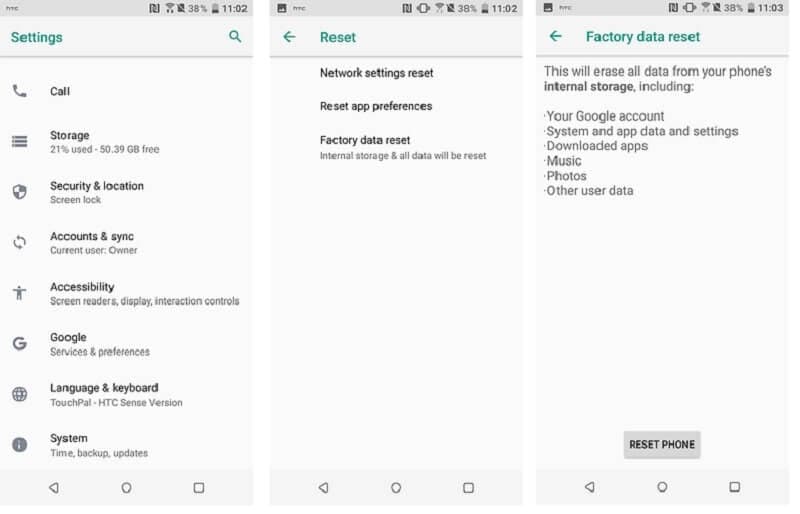
1.3 Restore Factory Settings
If force restarting won’t help you to fix the problem you are facing, it’s time to reset your Tecno Pova 5 Pro to factory settings. The factory reset on an Android device will erase all of your phone settings, third-party apps, user data, and other app data to restore your device to its original manufacturer condition or settings. It means that this can bring back your device to its normal state.
To learn how to restore factory settings, follow the below steps:
Step 1: Go to your ‘Settings” and then, go to “System”>” Advanced”>” Reset options”.
Step 2: Next, tap on “Erase all data”>” Reset phone” to factory reset on your phone. Here, you may need to enter the password or pin or pattern.
Once you are done with the above steps, restart your phone and restore your data and this might be fixed the problem for you. If not, then try the next solution.
1.4 Update Android Firmware
It might be the case that your Android firmware is not updated and that’s why you are experiencing the home button not working Android problem. Sometimes, not updating your Android firmware can cause various issues and problems while using your device. So, you should update it, and here are steps on how to do it:
Step 1: Open the Settings and then, go to “About device”. Next, click “System updates”.
Step 2: After that, click “Check for updates” and if updates are available, then download and install it to update your Android version.

Part 2: What if the Home Button fails due to hardware reasons?
When your Android home and back button not working because of hardware reasons, you can’t get the problem resolved by simply rebooting your device. In such cases, you have to use alternative apps to replace the home button.
2.1 Simple Control app
The Simple Control app is the first and foremost solution to fix the Android home button not working issue. With the help of this app, you can fix many soft keys of your device. It is specially designed for Android users facing trouble using home, volume, back, and camera buttons. Plus, the app utilizes Accessibility service, but it doesn’t get access to your sensitive and personal information.
Pros:
- It can easily replace broken and failed buttons.
- The app is quite easy to use.
Cons:
- It is not as much efficient as other similar apps available out there.
URL: https://play.google.com/store/apps/details?id=ace.jun.simplecontrol&hl=en_US
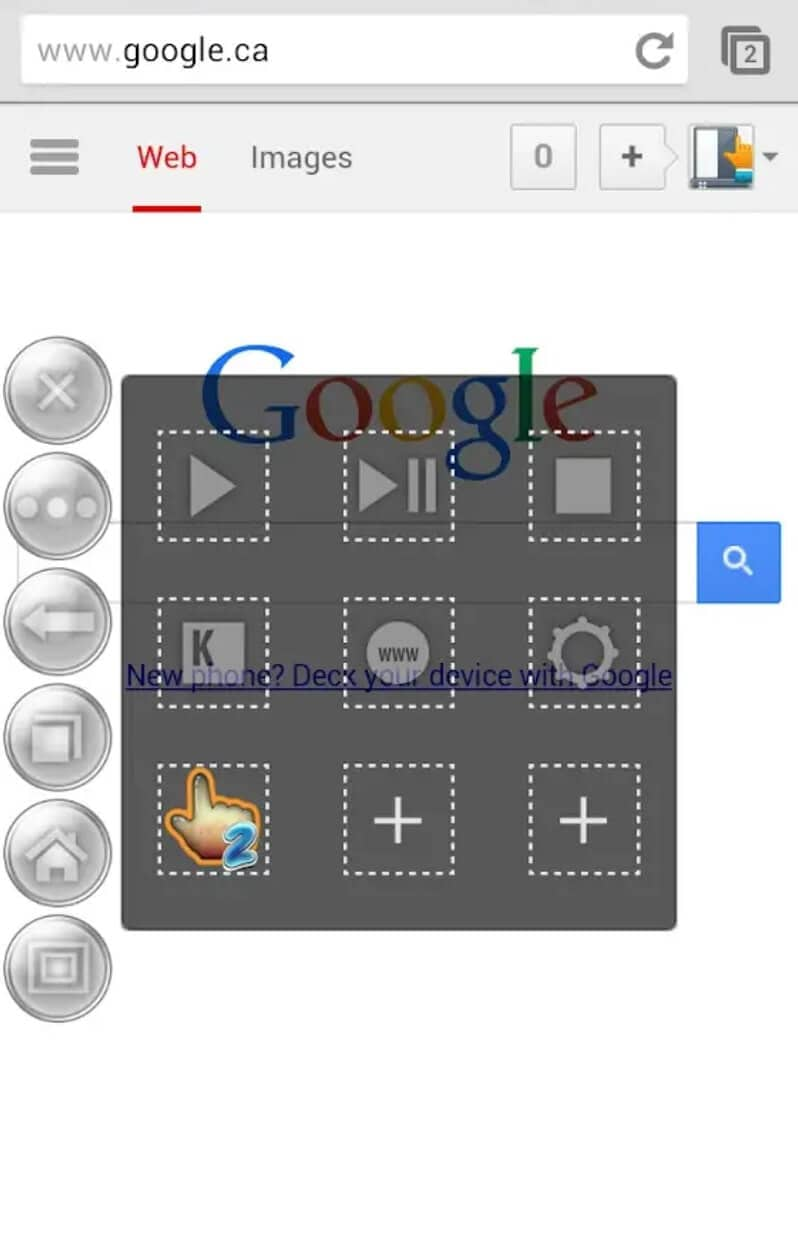
2.2 Button Savior app
Button Savior app is one of the ultimate apps that can help you to fix the Android home button not working problem with ease. For this app, root and no root versions are available on the Google Play store. To fix the Home button not working issue, no root version is the right one. But, if you want to fix the Back button or other buttons, then you need to go for the root version.
Pros:
- It comes with a root as well as no root version.
- The app is powerful enough to fix a wide range of buttons.
- It shows information regarding the date and time and battery.
Cons:
- The root version of the app can cause data loss.
URL: https://play.google.com/store/apps/details?id=com.smart.swkey" target="_blank” rel=”nofollow
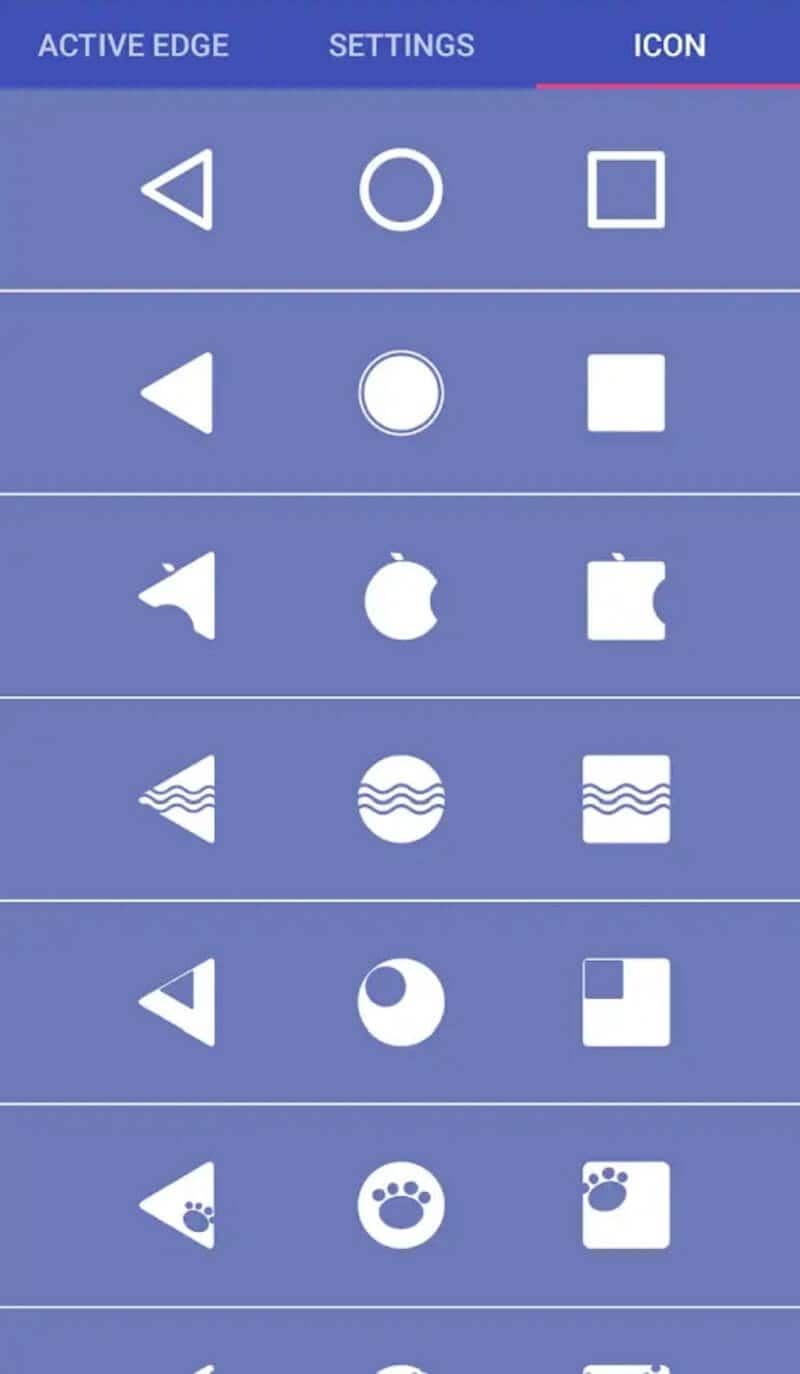
2.3 Navigation Bar (Back, Home, Recent Button) app
Navigation Bar app is another great solution to fix the home button not responding problem. It can replace broken and failed button for users who are facing difficulty using navigation bar panel or buttons not working properly. The app offers numerous features, and it is easy to use.
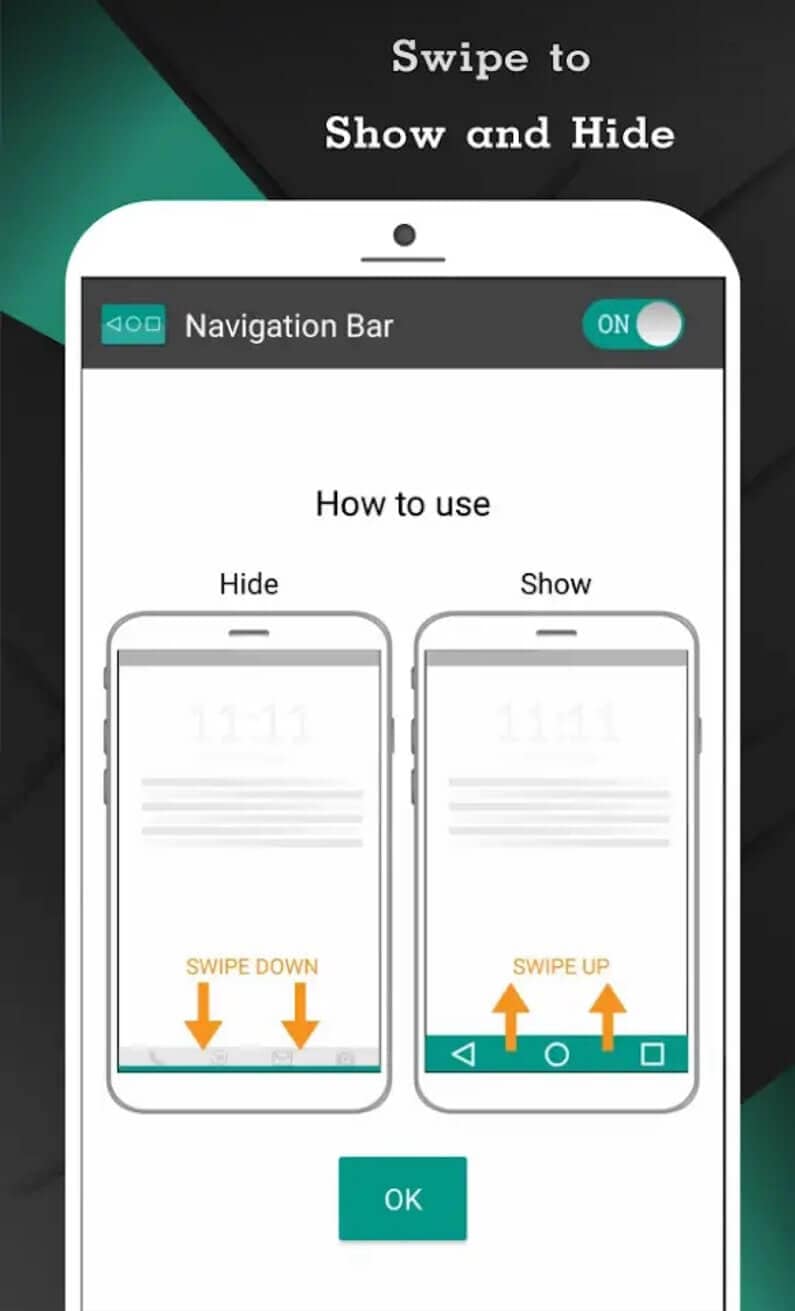
Pros:
- It offers many colors to make an incredible navigation bar.
- The app provides 15 themes for customization.
- It comes with the ability to change the size of the navigation bar.
Cons:
- Sometimes, the navigation bar stopped working.
- It comes with ads.
URL: https://play.google.com/store/apps/details?id=nu.nav.bar
2.4 Home Button app
Home button app is another remarkable solution to replace broken and failed home buttons for users having trouble while using buttons. With this app, it is quite easy to press or even long press on the home button as assistive touch.

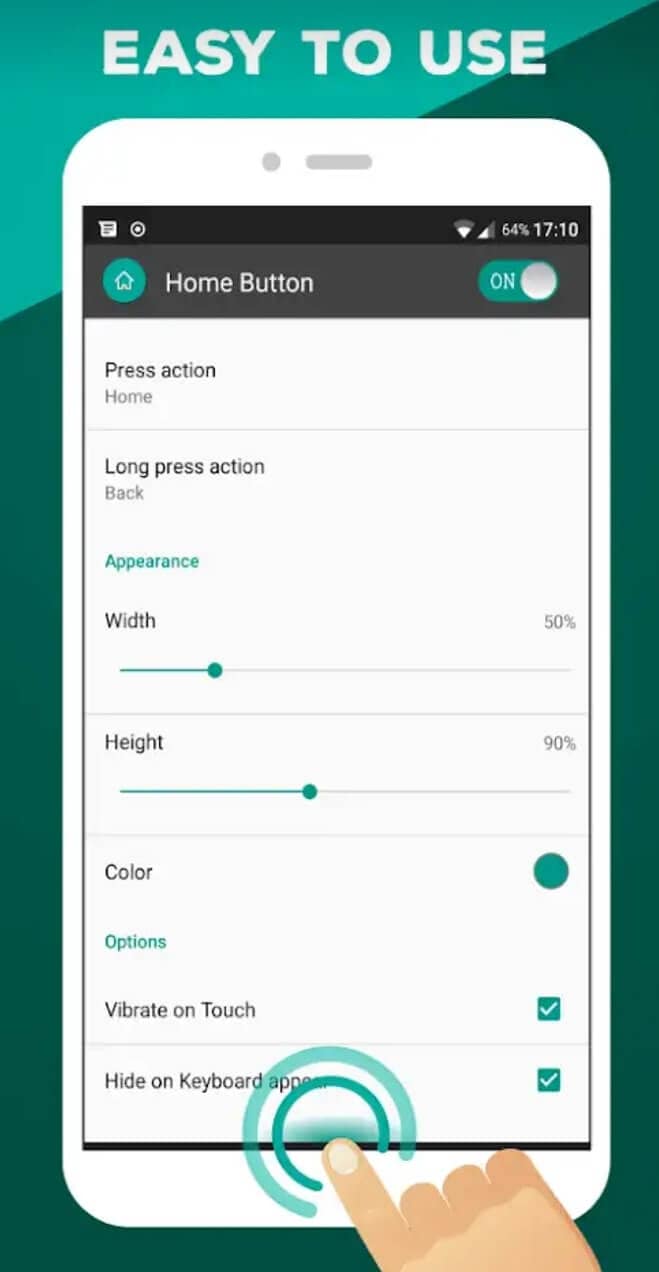
Pros:
- You can change the button of color using the app.
- With the help of it, you can set a vibrate setting on touch.
- It provides support for many press actions, such as home, back, power menu, etc.
Cons:
- It doesn’t come with a lot of features, unlike other apps.
- Sometimes, it shuts down automatically.
URL: https://play.google.com/store/apps/details?id=nu.home.button
2.5 Multi-action Home Button app
Is your Android physical home button is broken or dead? If yes, then the Multi-action Home Button app can help you to fix it with ease. With the help of it, you can create a button in centre-bottom of your device screen, and you can also add numerous actions to that button.
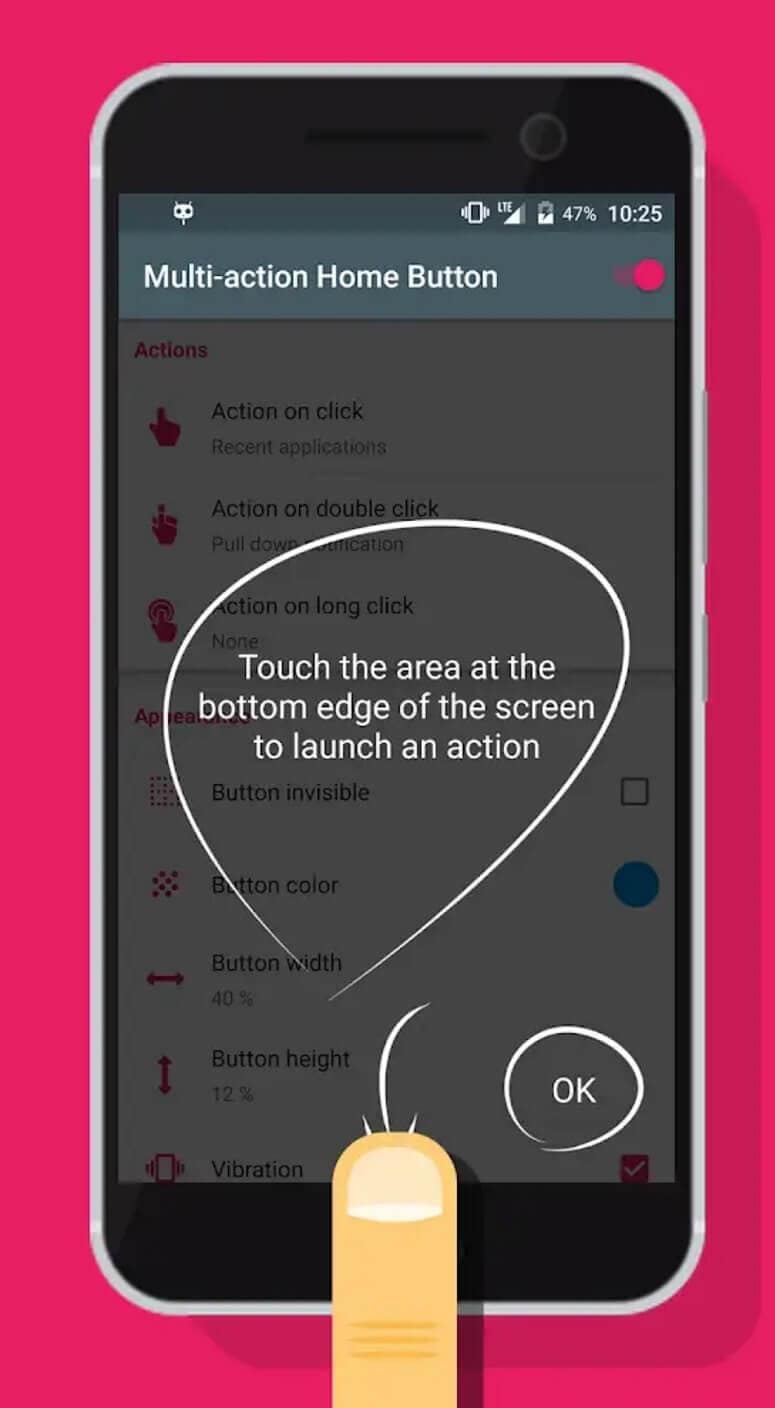
Pros:
- It provides various actions with the button.
- It is very simple and easy to use.
Cons:
- The app’s very useful feature comes with its pro version.
URL: https://play.google.com/store/apps/details?id=com.home.button.bottom
Conclusion
Hopefully, the methods covered in this post helps you to fix Android home and back button not working problem for you. If it is a system issue, then the best thing you can do is to take advantage of Dr.Fone - System Repair (Android) software. It can surely help you to fix your Android system to normal within a few minutes.
 KoolReport Pro is an advanced solution for creating data reports and dashboards in PHP. Equipped with all extended packages , KoolReport Pro is able to connect to various datasources, perform advanced data analysis, construct stunning charts and graphs and export your beautiful work to PDF, Excel, JPG or other formats. Plus, it includes powerful built-in reports such as pivot report and drill-down report which will save your time in building ones.
 It will help you to write dynamic data reports easily, to construct intuitive dashboards or to build a whole business intelligence cockpit.
KoolReport Pro package goes with Full Source Code, Royal Free, ONE (1) Year Priority Support, ONE (1) Year Free Upgrade and 30-Days Money Back Guarantee.
Developer License allows Single Developer to create Unlimited Reports, deploy on Unlimited Servers and able deliver the work to Unlimited Clients.
[Solved] Warning: Camera Failed on Tecno Pova 5 Pro
In this article, you will learn why camera fails on Tecno Pova 5 Pro devices, how to make camera work again, as well as a system repair tool to fix this issue in few clicks.

Tecno Pova 5 Pro devices are one of the best Android devices available in the market and their users are always satisfied with their features. However, it is a recent observation that many Tecno Pova 5 Pro users complain about Tecno Pova 5 Pro camera failed error while using the camera App on the Tecno Pova 5 Pro device. It is a strange error and pops up suddenly with only one option to tap on, i.e., “OK”
The error message reads as follows: “Warning: Camera Failed”.
Once you click on “OK” the app shuts down abruptly and your Tecno Pova 5 Pro camera is failed. We understand this is not a very pleasing situation, thus, here are ways to tackle the camera failed Tecno Pova 5 Pro issue. Let us now move ahead and find out why exactly you experience Warning: Camera Failed error and how to fix it.

Part 1: Why Tecno Pova 5 Pro phone has Warning: Camera Failed error?
We are all aware that no device runs smoothly, without any glitches. We also know that there is a cause behind every problem. Listed below are a few reasons behind camera failed error, especially on Tecno Pova 5 Pro devices:

- If you have recently updated your OS version, there are chances that certain bugs are preventing the camera App from functioning normally. Also, if the update is interrupted and not downloaded completely, certain apps may suffer.
- There are chances of your internal storage being cluttered with unwanted Apps and files leaving no space for the camera App to save its data and work smoothly.
- If you haven’t cleared camera Cache and Data, the chances of the App to get clogged up increase tremendously which disrupt its working.
- Warning: Camera Failed error can also be a direct outcome of a change in the system settings or the Tecno Pova 5 Pro device’s internal settings.
- Finally, if you tamper a lot with the camera settings and do not update the App whenever it is available, Tecno Pova 5 Pro Camera App will not be efficient.
There might be much more reasons for the camera failed error, but these are the most obvious ones. Now let us now move on to troubleshooting the problem.

Part 2: How to fix Tecno Pova 5 Pro Camera Failed in One Click?
If you are experiencing some kind of issues in your Tecno Pova 5 Pros such as Tecno Pova 5 Pro camera failed, the Tecno Pova 5 Pro device stopped working, black screen, play store not working, etc. There is a special software is designed for such kind of issues in Android devices, i.e. dr. fone. The tool enables the users to fix various kinds of issues in the Tecno Pova 5 Pro devices and perform a complete system repair so the Tecno Pova 5 Pro device starts working normally.
Dr.Fone - System Repair (Android)
One-click solution to fix camera failed on Tecno Pova 5 Pro devices
- The tool has a one-click operation which makes it super easy to use.
- You don’t need any technical skills expertise to operate the software.
- The software supports all the Tecno Pova 5 Pro devices including the latest and older ones.
- The software can fix the “warning camera failed”, the app is crashing, failed update, etc.
4,616,396 people have downloaded it
Note: You have to remember that the system repair may erase all the Tecno Pova 5 Pro device data. So, create a backup of your Tecno Pova 5 Pro data first and then try fixing the Tecno Pova 5 Pro phone.
Follow the steps given below and fix the camera failed error:
Step 1. Download the software on your computer and launch it. Connect your device and select the System Repair option from the main interface. In the next screen, select Android Repair module.

Step 2. You will have to provide the Tecno Pova 5 Pro device details accurately to ensure that the software provides a precise firmware package to be downloaded. Enter brand, name, model, country, and carrier of your device and agree to the terms and condition.

Step 3. Now put your device in the download mode. The software will provide you with a guide to put the phone in download mode to begin the downloading process.

Step 4. As soon as the firmware is downloaded, the software will automatically initiate the repair process. You will be able to see the ongoing repair.

When the software is done repairing the system, you will be notified. Thus, the Camera failed Tecno Pova 5 Pro error in your phone will be fixed.
Part 3: How to fix Camera Failed error by clearing camera data?
Has anyone ever informed you that it is absolutely necessary to keep clearing camera data every once in a while? Yes, since it deletes all unnecessary data stored in respect of the App and no, it does not mean that all your photos and videos will get deleted. Just follow the steps given below to clear camera data:
1. First, visit “Settings’” on your Tecno Pova 5 Pro device and select “Apps” or Application Manager”.

2. Now a list of all Apps will appear before you. Keep scrolling down until your find “Camera”.
 Glary Utilities PRO - Premium all-in-one utility to clean, speed up, maintain and protect your PC

Tap on “Camera” to open the “Camera Info” screen and once you are there, hit “Clear Data” option as shown below.

That’s all, now return to the Home Screen and access the camera again. Hopefully, it will work now.
Part 4: How to fix Camera Failed error by removing third-party Apps?
Another tip to fix Tecno Pova 5 Pro camera failed error is by deleting a few unwanted third-party Apps (recently installed) to free some space in the Tecno Pova 5 Pro device’s internal storage. It is essential to create and keep storage space for the camera App to function smoothly and allow it to store its data as well. Also, if this issue only happens recently, it might be some newly installed Apps causing some glitches with the camera.
Simply, follow the instructions given below to remove Apps from Tecno Pova 5 Pro Devices:
1. Click on the “Settings” icon on the Home Screen and from the options before you, select “Apps”/ “Application Manager”.
2. You will see that a list of downloaded and built-in Apps will open up before you as follows.

WPS Office Premium ( File Recovery, Photo Scanning, Convert PDF)–Yearly

3. Now, once you select the App you want to uninstall, the App Info screen will appear. Tap on “Uninstall” option and then tap on “Uninstall” again on the pop-up message.
 Screensaver Factory, Create stunning professional screensavers within minutes. Create screensavers for yourself, for marketing or unlimited royalty-free commercial distribution. Make screensavers from images, video and swf flash, add background music and smooth sprite and transition effects. Screensaver Factory is very easy to use, and it enables you to make self-installing screensaver files and CDs for easy setup and distribution. Screensaver Factory is the most advanced software of its kind.
The App will be removed immediately and its icon will disappear from the Home Screen and you will notice an increase in the storage capacity of your device.
Part 5: How to fix Camera Failed error by wiping Cache Partition?
This method might seem tedious and time-consuming and you may also lose your data and essential settings. However, wiping the Cache Partition only cleans your device system internally and gets rid off any unwanted and trouble making elements causing Warning: Camera Failed error. Follow the step-by-step guide given below to clean Cache Partition smoothly:
1. Firstly, switch off the Tecno Pova 5 Pro device by pressing the power button and tapping on “Power Off” as shown in the screenshot below. Then wait for the lit screen to turn off completely before proceeding further.

2. Now, press and hold the power on/off, home and volume up button simultaneously. Your device will now vibrate. This a signal to let go of the power button (only).

3. Once the Recovery Screen appears, leave all buttons and use the volume down key till you reach “Wipe Cache Partition”.

4. Now, to select the option to use the power on/off button and wait for the process to get over. Once this done, tap on “Reboot system now” and see that your device restarts normally.

You may try to use the camera app once the process completes.
Part 6: How to fix Camera Failed error by Reset Settings?
Resetting the camera settings solves the problem 9 out of 10 times and thus is worth a try.
1. To reset, first, launch the Camera App by tapping on its icon.


2. Then go to Camera “Settings” by tapping on the circular gear like icon.

3. Now look for “Reset Settings” options and click on it.

Once done, go back to the Home Screen and start the camera App again to use it.
Part 7: How to fix Camera Failed error by Factory Reset?
Lastly, if the above-mentioned techniques do not help you in fixing the camera failed error, you can consider performing a Factory Reset. Note: This method will delete all your saved data so it is advised to backup before you start the process.
Here are the steps to factory reset your device to fix “Warning: Camera Failed” Error:
1. Start by visiting “Settings” on your Tecno Pova 5 Pro device on which the camera has failed.

2. Now from the list of options before you, select “Backup and reset” and move ahead.

3. Now you must first select “Factory data reset” and then tap on “Reset Device” as shown in the screenshot below.


4. Finally, you have to click on “Erase Everything” and wait for the Tecno Pova 5 Pro device to reboot itself.

Note: You will have to set up your Tecno Pova 5 Pro device from scratch once it is reset, however, that is a small price to pay to fix your Camera App.
Warning: Camera Failed error is not a rare phenomenon and many users experience it on daily basis. So, there is no need to panic, All you need to do is carefully follow the instructions given above and repair your Camera App yourself. You do not need to seek any technical assistance for the same as the camera failed issue is not difficult to deal with. So go ahead and try these tricks to enjoy using the Camera App on your Tecno Pova 5 Pro devices.
- Title: Bricked Your Tecno Pova 5 Pro? Heres A Full Solution | Dr.fone
- Author: Ariadne
- Created at : 2024-07-30 09:48:55
- Updated at : 2024-07-31 09:48:55
- Link: https://howto.techidaily.com/bricked-your-tecno-pova-5-pro-heres-a-full-solution-drfone-by-drfone-fix-android-problems-fix-android-problems/
- License: This work is licensed under CC BY-NC-SA 4.0.