
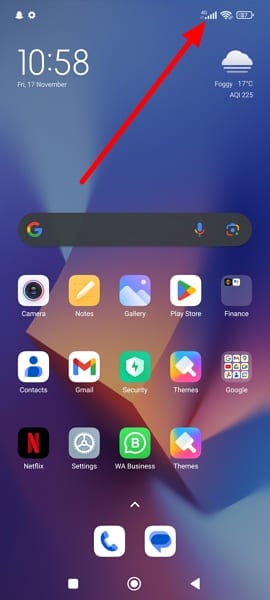
Cellular Network Not Available for Voice Calls On Lenovo ThinkPhone | Dr.fone
Cellular Network Not Available for Voice Calls On Lenovo ThinkPhone
The “Cellular Network Not Available for Voice Calls“ error is a common experience for many Android users. In our contemporary world, communication stands as the fundamental pillar of our existence. Yet, the malfunctioning of our devices hinders this connectivity. It often gives rise to numerous complications. Fortunately, your concerns are now a thing of the past.
This article serves as your guide for troubleshooting and overcoming this frustrating dilemma. It has compiled expert perspectives, valuable tips, and detailed, systematic solutions. The article will go through the underlying causes behind this issue and explore potential fixes. By the conclusion of this article, you’ll be armed with the necessary knowledge to tackle this problem.


Part 1. Preliminary Reasons For Cellular Network Not Available For Voice Calls
Facing the “Cellular Network Not Available for Voice Calls Android“ error can be overwhelming. Thus, it becomes evident that specific reasons underlie this issue. Solutions indeed exist to tackle this problem. Yet, comprehending the underlying reasons is equally crucial to resolve the issue:
1. Internet Access
One primary reason behind cellular network unavailability glitches lies in unstable internet access. Voice calls over cellular networks often require a stable internet connection. When this connection fluctuates or drops, it can result in the dreaded error message.

2. Terrain Coverage
Another contributing factor is the geographical terrain. In remote or sparsely populated areas, cellular tower coverage might be limited. It causes a signal disturbance or complete loss of the network.
3. Network Congestion
During peak usage hours or in densely populated areas, network congestion can also be a cause. It leads to temporary unavailability of the cellular network for voice calls. When the network is overloaded with traffic, it might struggle to accommodate more voice calls. That results in connectivity issues.
4. Technical Glitches
Furthermore, technical glitches within the Lenovo ThinkPhone device or network infrastructure can cause this issue. These glitches could range from software bugs to hardware malfunctions.
5. Battery or Power Issues
In some instances, insufficient battery power or power-saving modes on devices can cause this issue. They affect the Lenovo ThinkPhone device’s capacity to sustain a consistent connection with the cellular network. This consequently causes voice call unavailability.
Part 2. Prominent Solutions For Cellular Network Not Available For Voice Calls Android
A myriad of purposeful solutions exists to resolve the TracFone cellular network not available for voice calls issue. These solutions are specifically designed to address various underlying causes. The aim of these solutions is to restore smooth connectivity for voice calls. Described below are the top 8 solutions to fix the “Cellular Network Not Available” error:
| Method | Efficiency | Difficulty | Duration (Minutes) |
|---|---|---|---|
| Check Network Availability | Moderate | Easy | 5-10 |
| Check Airplane Mode | Low | Easy | 2-5 |
| Select Network Operator | Moderate | Moderate | 5-10 |
| Restart Device | Low to Moderate | Easy | 3-5 |
| Enable Roaming Settings | Moderate | Easy | 3-7 |
| Update Android Smartphone | Moderate | Moderate | 15-30 |
| Performing Factory Reset | High (Last Resort) | Difficult | 30-60+ |
| Contact Carrier Provider | High (Specialized Help) | Moderate | Varies (Depends on Carrier Provider) |
| Wondershare Dr.Fone - System Repair | Highest (Complex Issues) | Easiest | 5-10 |
 Project Manager - Asset Browser for 3Ds Max
Solution 1. Check the Availability of Cellular Networks
Before diving into complex fixes, the first thing to do is to check if nearby cell networks are available and how strong their signals are. It is an essential step when trying to fix the “Cellular Network Not Available“ error. This basic check ensures your phone is close enough to a working network tower, which matters for staying connected. It allows you to find out the availability of nearby cellular networks.
Moreover, with it, you can ensure your device is connected to a reliable network. This preliminary check sets the foundation for further troubleshooting.
Solution 2. Check the Airplane Mode of the Smartphone
Another crucial step in resolving this error involves ensuring that the Airplane Mode is disabled. This mode, when activated, disables all wireless connections. It also includes cellular networks, which could lead to connectivity issues. Follow these simple steps to check and disable Airplane Mode on your device:
Instructions: Swipe down on your phone’s screen from the top to access the Notification Panel, unveiling the Quick Settings tiles. Search for the airplane-shaped icon; if Airplane Mode is active, the icon will be highlighted or shown in a distinct color. Tap the Airplane Mode to turn off the Airplane Mode on your Android.

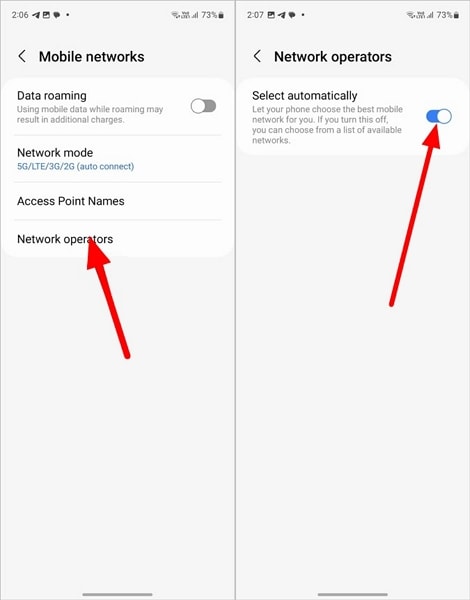
Solution 3. Selecting the Network Operator of the Lenovo ThinkPhone device
In certain instances, manually selecting your network operator can help. It effectively resolves the “Cellular Network Not Available for Voice Calls Android“ error on your Lenovo ThinkPhone. By choosing the network operator manually, you ensure a deliberate connection to a specific carrier. This potentially bypasses issues related to automatic network selection. Follow these steps to select your network operator manually:
- Step 1. Access “Settings” on your Lenovo ThinkPhone, then tap on “Connections.” From there, navigate to “Mobile Networks” and proceed by selecting “Network Operators.”


- Step 2. Look for the “Automatically Select” toggle, which will be turned on. Toggle it off to see available networks and choose the one best suited to your device.
Solution 4. Restart Your Device
Sometimes, resolving the “Cellular Network Not Available for Voice Calls“ error on your Lenovo ThinkPhone can be as simple as performing a restart. This basic troubleshooting step helps refresh the Lenovo ThinkPhone device’s software. It clears temporary glitches and reestablishes essential connections, potentially resolving network-related issues. Follow these straightforward steps to restart your Lenovo ThinkPhone:
Instructions: Hold down the “Power” button until the Power menu emerges on the display. From there, select “Restart” to initiate the Lenovo ThinkPhone device’s reboot process.


Solution 5. Enable Roaming Settings
There are situations where you’re in an area with weak or no coverage from your primary network provider. In such a case, enabling roaming settings on your Lenovo ThinkPhone can sometimes resolve the issue at hand. Enabling roaming allows your device to connect to partner networks. This extends your coverage beyond your home network’s reach. Follow these steps to enable roaming settings on your Lenovo ThinkPhone:
- Step 1. Start by accessing your device’s Settings and tapping the “Connections” option. Here, scroll downward to press “Mobile Networks.”

- Step 2. Presently, you will encounter the “Data Roaming” option. Toggle this option on to enable data roaming on your device and resolve the issue.
 TubeDigger - online video downloader from mostly any site

Solution 6. Update Android Smartphone
Updating your Lenovo ThinkPhone’s OS to the latest version can often resolve performance issues. It can also fix network connectivity issues, including the “Cellular Network Not Available” error. Manufacturers regularly release system updates containing bug fixes and security patches. It also includes enhancements that can address underlying software-related problems. Follow these steps to update your Android smartphone:
- Step 1. In your device’s Settings, scroll through to find the “Software Update” option. Select it, and on the subsequent screen, verify the availability of any updates.

- Step 2. If an update is accessible, select the ‘Download and Install’ choice. Then, proceed by following the prompts displayed on the screen to finalize the process.


Solution 7. Performing Factory Reset
Performing a factory reset is a drastic but effective measure. It can resolve persistent software-related issues, including the “Cellular Network Not Available” error. Be aware that initiating a factory reset results in the deletion of all data and settings stored on your device. Hence, it is crucial to back up any vital information before proceeding with this action. Here is how to fix the Verizon cellular network not available for voice calls:
- Step 1. To access your device’s “General Management” section, navigate through Settings. There, tap on “Reset,” and select “Factory Data Reset” from the subsequent screen.

- Step 2. You will need to tap “Reset” to confirm your choice. Then, follow the on-screen guidelines carefully to complete the reset process.


Solution 8. Contact Carrier Provider
If you’ve exhausted all options and the issue persists, reaching out to your carrier provider for assistance is a viable solution. Carrier providers can offer specific insights and guidance regarding network-related issues. When connected to customer service, explain the issue you’re experiencing in detail. Contacting your carrier provider enables you to tap into their expertise and resources.

You May Also Like:
Top 5 DFU Tools for iPhone to Enter DFU Mode
9 Ways to Fix iPhone Error 4013 or iTunes Error 4013
Lenovo ThinkPhone ROM Download & Install: The Definitive Guide
Part 3. [100% Resolvable] Resolve Cellular Network Not Available For Calls Issues
Despite all your attempts, the cellular network not available for voice calls remains unresolved. It might state a more complex software-related issue or glitch within the Lenovo ThinkPhone device. However, there’s a solution designed explicitly for addressing such complex issues. That software is Wondershare Dr.Fone, a comprehensive toolkit for Android devices. It stands out as the world’s first one-click Android repair tool.
Dr.Fone specializes in resolving a wide array of Android system issues, including the notorious black screen of death. With this tool, users can effortlessly restore their Android system to normal functionality.
Key Features of Wondershare Dr.Fone
- Fone’s advanced repairing mechanism has the ability to repair even the bricked Android devices.
- This tool supports more than 1000 models of Android devices across different brands for system repair.
- It boasts the highest success rate when it comes to fixing Android devices.
![]()
 Epubor Audible Converter for Win: Download and convert Audible AAXC/AA/AAX to MP3 with 100% original quality preserved.
Dr.Fone - System Repair (Android)
Repair Android System Errors without Any Trouble.
- Fix your Android to normal, no skills required.
- Fix various Android system issues, stuck in boot loop , black screen , or won’t turn on , looping on start, etc.
- The high success rate in resolving Android system issues.
- Compatible with a wide range of Android devices and OS versions
- User-friendly interface with easy-to-follow steps.
3981454 people have downloaded it
Steps Needed To Fix the Cellular Network Not Available for Calls Issue via Wondershare Dr.Fone
The following are the steps to resolve the Tracfone cellular network not available for voice calls using Wondershare Dr.Fone:
- Step 1. Open Wondershare Dr.Fone and Opt for System Repair
Launch the software. Then, navigate to the “Toolbox” section located in the left panel. Connect your Lenovo ThinkPhone and proceed by choosing “System Repair.” Then, opt for “Android” to specify the Lenovo ThinkPhone device type. On the subsequent screen, click “Start” to commence the repair procedure.

- Step 2. Provide Details of Your Android Device
The system automatically identifies the brand of the Android device undergoing repair. Afterward, choose the “Name,” “Model,” “Country,” and “Carrier” from the provided list options. If the Lenovo ThinkPhone device is already unlocked, you can choose OPEN in the Carrier section. Then, confirm by checking the warning box indicating agreement and readiness to proceed. Click on “Next” to initiate the repair process for your Lenovo ThinkPhone.

- Step 3. Complete the Android Repair Process Successfully
Follow the guidance displayed on your device’s screen to access Download Mode. Once in, the firmware download begins automatically. During this process, the platform verifies and presents the firmware details. Select “Fix Now” to proceed with the installation of the firmware onto your Lenovo ThinkPhone. Since Android repair will result in the deletion of all data, input “000000” to confirm. This action initiates the system repair process.

 safe & secure
3,336,459 people have downloaded it
 The BootIt Collection covers multi-booting, partitioning, and disk imaging on traditional PC’s using the standard BIOS and newer PC’s using UEFI. The collection includes BootIt Bare Metal (BIBM) for standard BIOS systems and BootIt UEFI (BIU) for UEFI system.
Conclusion
In conclusion, facing the “Cellular Network Not Available for Voice Calls“ problem on your Lenovo ThinkPhone can be frustrating. This article has explored many ways to fix this issue. These include simple checks like turning off Airplane Mode to solutions like contacting your carrier. However, when facing persistent network problems, a tool like Wondershare Dr.Fone becomes the only hope.
Among the various methods discussed, Dr.Fone stands out as a top choice. Its thorough system repair function targets and removes complex software glitches. The tool’s easy interface, broad compatibility, and secure repair process make it perfect. It is ideal for users looking for a reliable solution beyond regular troubleshooting.
![]() Why isn’t My Lenovo ThinkPhone establishing a connection with the cellular network?
Why isn’t My Lenovo ThinkPhone establishing a connection with the cellular network?

![]() What steps can I take when the mobile network isn’t available?
What steps can I take when the mobile network isn’t available?
![]() What might be causing my SIM card to not display a network?
What might be causing my SIM card to not display a network?
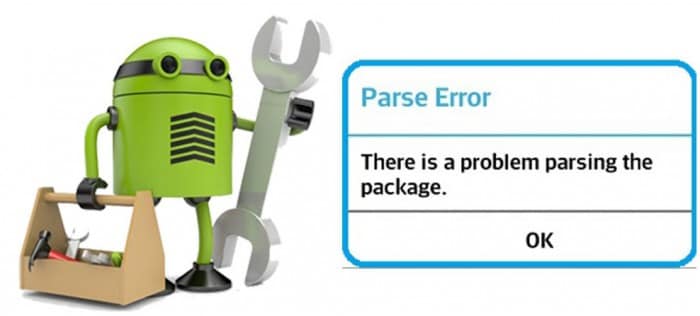
Proven Ways to Fix There Was A Problem Parsing the Package on Lenovo ThinkPhone
Unable to install your favorite Apps from Google Play Store because there was a problem parsing the package?
The Parse Error or there was a problem parsing the package error is very common with Android devices. Android is a versatile platform and, therefore, a very popular OS. It is an open software and allows users to download and use various types of apps from the Play store. Android is also a cheaper alternative as compared to other Operating Software.
Since many of us are well versed with most of the Android devices, parse error, or there is a problem parsing the package is an error is not something new and uncommon.
The error message usually pops up on the Lenovo ThinkPhone device screen when we try to download and install an App, for example, “There is a problem parsing the package Pokémon Go ”.
The error message which appears reads as follows:
“Parse error: There is a problem parsing the package”.
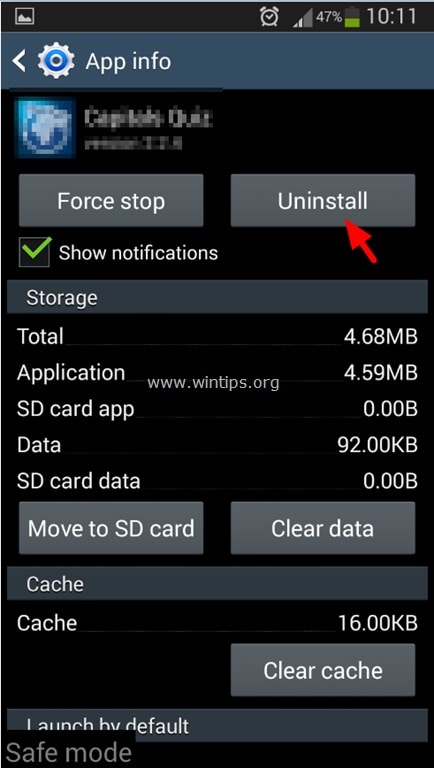
Android users who have experienced this would know that the parse error leaves us with only one option, i.e., “OK” as shown in the image below.
There was a problem parsing the package may occur due to several reasons, most of which are listed and explained below. Furthermore, there is a list of solutions to choose from to eliminate the “there is a problem parsing the package” error.
Read on to find out more.
Part 1: Reasons for the parsing error
Parse Error, better known as “there was a problem parsing the package” error is very common and normally surfaces when we try to download and install new Apps onto our Android devices from Google Play Store.
The reason for the error message to pop-up are many but none of them can be blamed singularly for the “there is a problem parsing the package” error. Given below is a list of the most probable reasons for Parse Error to stop an App from installing. Examine them carefully before moving on to the solutions to fix the “there was a problem parsing the package” error.
• Updating the OS may cause some disturbances in the manifest files of different Apps leading to Parse Error.
• Sometimes, the APK File, i.e., Android Application Package, gets infected due to improper or incomplete App installation causing “there is a problem parking the package” error.
• When Apps are downloaded and installed from unknown sources, due permission is needed. In the absence of such permission, the chances of the Parse Error to occur increase.
• Certain Apps are not compatible or supported by the latest and updated Android versions.
• Anti-virus and other cleaning Apps are also a major reason for the “there was a problem parsing the package” error.
The causes listed above are not App specific. The Parse Error may occur due to any one or more of these reasons, but what is more important is to try to get rid of the problem.
Let us move on to learn ways to fix the there was a problem parsing the package error.
Part 2: 8 Solutions to fix the parsing error
“There is problem parking the package” error can be dealt with easily if only we do not panic and deliberately follows the steps explained in this segment. Here are 7 of the most reliable and trustworthy methods to fix the Parse Error.
They are easy, user-friendly, and do not take much of your time. So don not waste any more of your time and try them now.
2.1 One Click to Fix ‘There is a Problem Parsing the Package
If you’re still encountering the Parsing error, there may be a problem with the Lenovo ThinkPhone device data on your device, which means you’ll need to repair it. Luckily, there’s a simple, one-click solution you can follow called Dr.Fone - System Repair .
![]() FX PRO (Gold Robot + Silver Robot(Basic Package))
FX PRO (Gold Robot + Silver Robot(Basic Package))
Dr.Fone - System Repair (Android)
Android repair tool to fix all android system issues in one click
- Simple, clean, and user-friendly interface
- No technical knowledge required
- Easy one-click repair to fix ‘there is a problem parsing the package’ error
- Should repair most parsing problems with apps, like ‘there is a problem parsing the package Pokemon Go’ error
- Supports most Lenovo ThinkPhone devices and all the latest models like Galaxy S9/S8/Note 8
3981454 people have downloaded it
If this sounds like the solution you’re looking for, here’s a step by guide on how to use it yourself;
Note: Please note that this repair process can erase all data on your phone, including your personal information. This is why it’s so important to back up your Lenovo ThinkPhone before proceeding.
Step #1 Head over to the Dr.Fone website and download the software. Install the downloaded software and open it. From the main menu, select the System Repair option.

Input your device and firmware information to confirm you’re installing the right version of the operating system.
Step #2 Follow the onscreen instructions on how to get into Download Mode to start the Repair process.

Once complete, the firmware will start downloading.

Step #3 Once the firmware has downloaded, it will automatically install it to your device.
When this is completed, you’ll be free to disconnect your Lenovo ThinkPhone and use it how you please without the ‘there is a problem with the parsing package’ error.

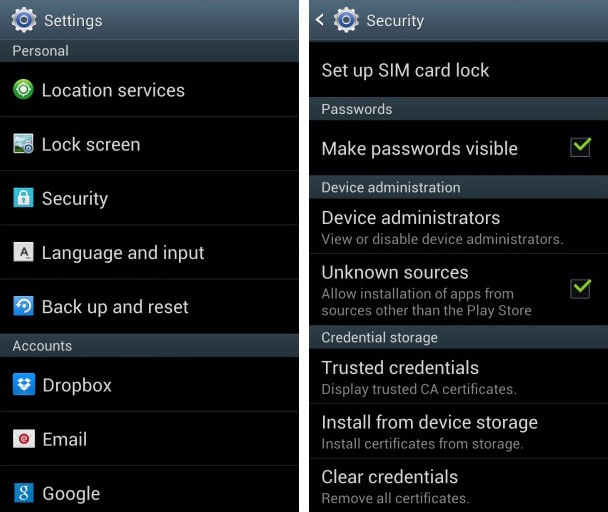
2.2 Allow installation from unknown sources
When we install Apps from other sources and not Google Play Store, there might be a glitch in using such Apps. To overcome this problem, turn on “Allow App installation from other sources”. Follow the steps given below for better understanding:
• Visit “Settings” and select “Applications”.
• Now tick mark on the option saying allow App installation from unknown sources.
2.3 Enable USB debugging
USB debugging is not considered necessary by many users but these methods give you an edge over others while using an Android device as it lets you access things on your phone, etc which you could not earlier.
To enable USB Debugging to fix “There is a problem parsing the package” error, follow these steps:
• Visit “Settings” and select “About Device”.
• Now click on “Build Number” not once but continuously for seven times.

• Once you see a pop-up saying “You are now a developer”, go back to “Settings”.

• In this step, select “Developer Options” and turn on “USB Debugging”.

This should solve the problem. If not, move on to the other techniques.
2.4 Check APK File
An incomplete and irregular App installation may cause the .apk file to get corrupted. Make sure you download the file completely. If need be, delete the existing App or its .apk file and reinstall it from Google Play Store for it to be compatible with your device’s software and to use the App smoothly.
2.5 Check App Manifest File
Manifested App files are nothing but .apk files which are improvised by you. Such changes may cause the Parse Error to occur more frequently. Modifications in the App file can be made by changing its name, App settings, or more advanced customizations. Make sure you roll back all changes and restore the App file to its original state to prevent it from getting corrupted.
2.6 Disable Antivirus and other cleaner Apps
Antivirus software and other cleaning Apps are very helpful in blocking unwanted and harmful Apps from damaging your device. However, sometimes such Apps also prevent you from using other safe Apps.
We do not suggest that you delete the Antivirus App permanently. Temporary uninstallation will be useful here. To do so:
• Visit “Settings” and then select “Apps”.
• Select the antivirus App to click on “Uninstall” and then tap “OK”.
Now download and install the desired App again. Once this is done, do not forget to install the Antivirus App again.
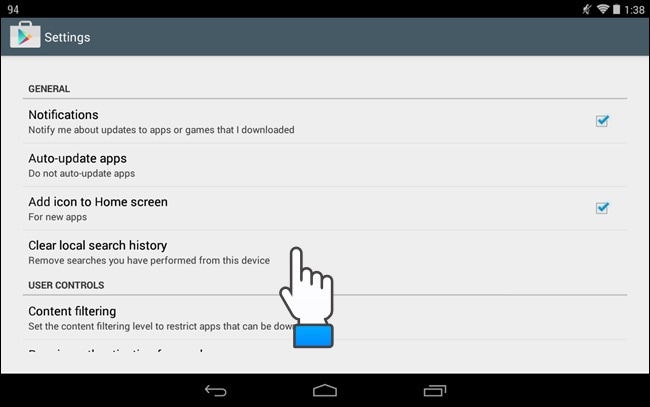
2.7 Clear Cache cookies of Play Store
Clearing Play Store Cache cleans the Android Market platform by deleting all clogged up unwanted data. Follow the steps given below to delete Play Store cache:
• Tap on Google Play Store App.
• Now visit Play Store’s “Settings”.
 ZoneAlarm Pro Antivirus + Firewall NextGen

• Select “General Settings” to “Clear local search history”.

2.8 Factory Reset Android
Factory Resetting your device to fix the Parse Error should be the last thing you try. Make sure you take a back-up of all your data on your Google Account or a Pen Drive because this technique erases all media, contents, data, and other files, including your device settings.
Follow the steps given below to factory reset your device:
• Visit “Settings”.
• Now select “Backup and Reset”.
 Any DRM Removal for Mac: Remove DRM from Adobe, Kindle, Sony eReader, Kobo, etc, read your ebooks anywhere.
• In this step, select “Factory data reset” and then “Reset Device” to confirm Factory Reset.
The whole process of factory resetting your Lenovo ThinkPhone might sound tedious, risky, and cumbersome but it helps to fix the Android SystemUI has stopped error 9 out of 10 times. So, think carefully before using this remedy.
Parse Error: There was a problem parsing the package is an error message that has troubled many Android users. The good part is that the above-stated fixes not only solve the problem but also prevent it from occurring in the future. So, keep them in mind the next time you or anyone you know faces such an issue.
How To Revive Your Bricked Lenovo ThinkPhone in Minutes
Lenovo ThinkPhone has established a notable presence within the custom development arena. This trait holds for Lenovo ThinkPhone. Today, it’s still one of the most popular budget smartphones available. The popular smartphone offers the freedom to flash custom ROMs, attain administrative privileges, access countless customization options, and much more.
Yet, delving into these capabilities comes with its share of risks. The potential for your Lenovo ThinkPhone to brick is high if you don’t know what you’re doing. This page teaches you how to unbrick your Lenovo ThinkPhone if it happens.
Part 1. Potential Causes of a Lenovo ThinkPhone Becoming Bricked
The factors that lead to your Lenovo ThinkPhone to brick vary. The possible solutions also depend upon the underlying causes. At times, the manufacturer’s intervention remains the only viable remedy. Below are the most frequent causes of bricking.
- The presence of malicious malware can harm your Lenovo ThinkPhone. This can result in a ‘bricked’ state devoid of functionality.
- Altering the bootloader, system partition, or other critical software components risks triggering a bricking event.
- Bricking can also occur due to errors during the update process. Whether through automatic or manual downloads, any interruption during software updates can cause your Lenovo ThinkPhone to brick.
- Using inappropriate methods when performing root access can also result in bricking. Performing root access is dangerous as it grants entry to the Lenovo ThinkPhone device’s root directory housing the operating system.
Every Android device is susceptible to experiencing a system failure that leads to a bricked state. The risk remains consistent whether your device is from Lenovo ThinkPhone, Lenovo ThinkPhone, Lenovo ThinkPhone, or any other brand. That’s why it’s strongly advised against modifying their smartphones, especially when you don’t know what you’re doing.
Part 2. Techniques To Unbrick a Lenovo ThinkPhone
When faced with a bricked Lenovo ThinkPhone, below are various techniques to revive it. Whether through software resets or hardware interventions, these methods can help breathe life back into your device.
Discharge the Battery
A particular suggestion involves allowing the Lenovo ThinkPhone device’s battery to discharge fully, enabling proper functionality of the Flash Tool software. This process typically spans a few days and is recommended by some specialists.
 CollageIt Pro
Perform a Factory Reset
Accessing the Lenovo ThinkPhone device settings is impossible if your Lenovo ThinkPhone bricks. For this reason, it is recommended to enter Recovery Mode. Here’s how.
- Step 1: Press and hold the Power button and select the Restart option. During the reboot, press the Volume Up and Power keys simultaneously.
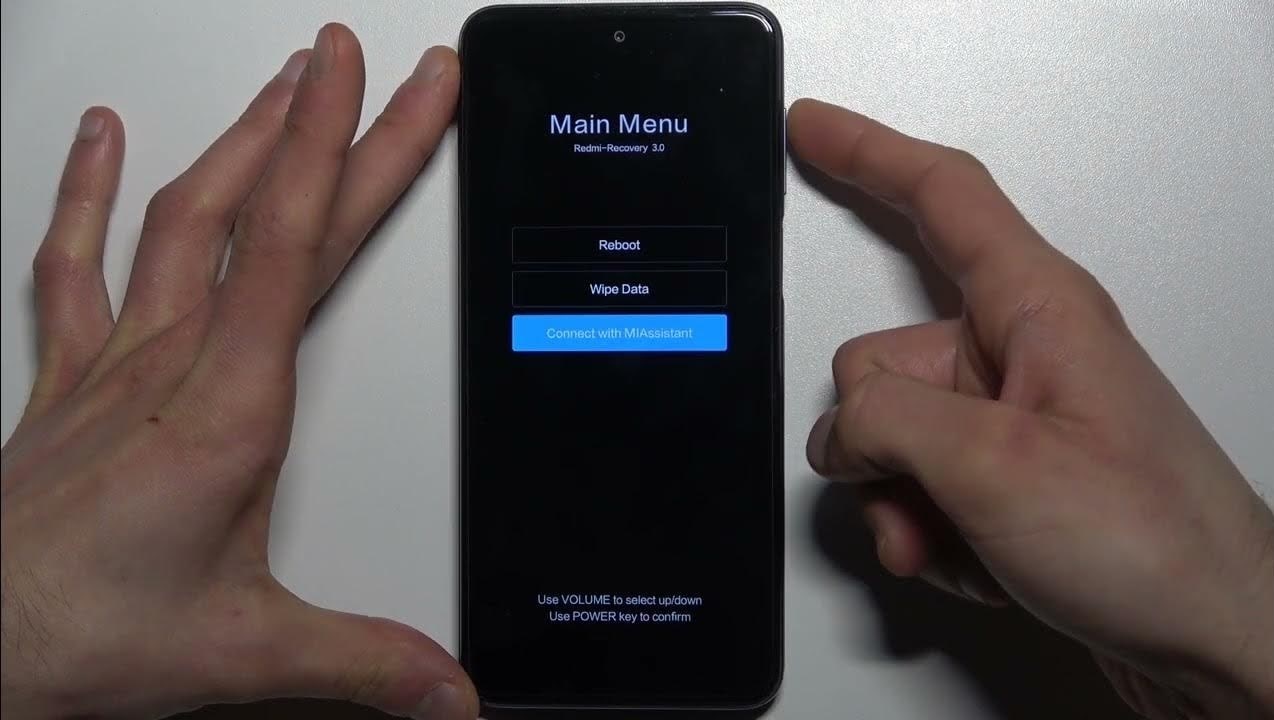
- Step 2: The main menu will show three options: Reboot, Wipe Data, and Connect with MIAssistant. Choose Reboot.
Explore Dedicated Software Tools To Fix Bricked Phones
Lenovo ThinkPhone offers its official software tools, such as the Lenovo ThinkPhoneFlash Tool. It’s designed for advanced users familiar with flashing firmware onto their devices. Here’s how.
- Step 1: Download and install the Lenovo ThinkPhoneFlash Tool .
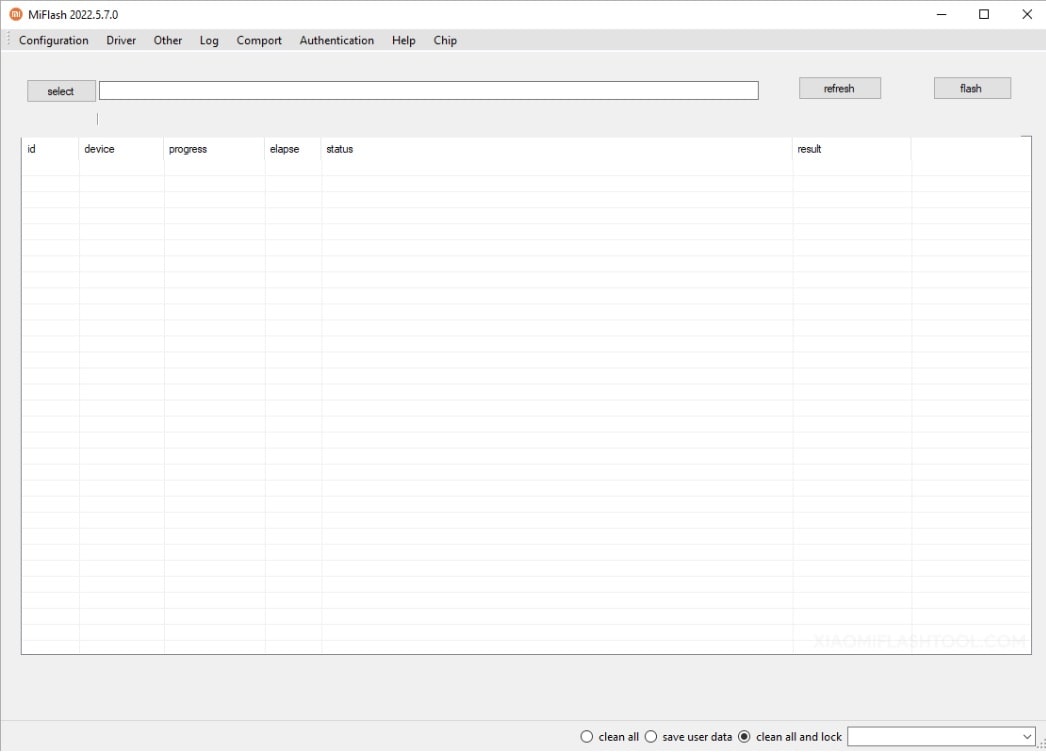
- Step 2: Download the Stock Firmware of Lenovo ThinkPhone and extract it on your computer. Press and Hold the Power and Volume Down buttons for at least 5-10 seconds to enter Fastboot Mode.
- Step 3: Connect your Lenovo ThinkPhone to the computer using a USB cable. Launch Lenovo ThinkPhoneFlash Tool and locate the Firmware you have downloaded on the computer. Click the refresh > flash to begin the flashing process.
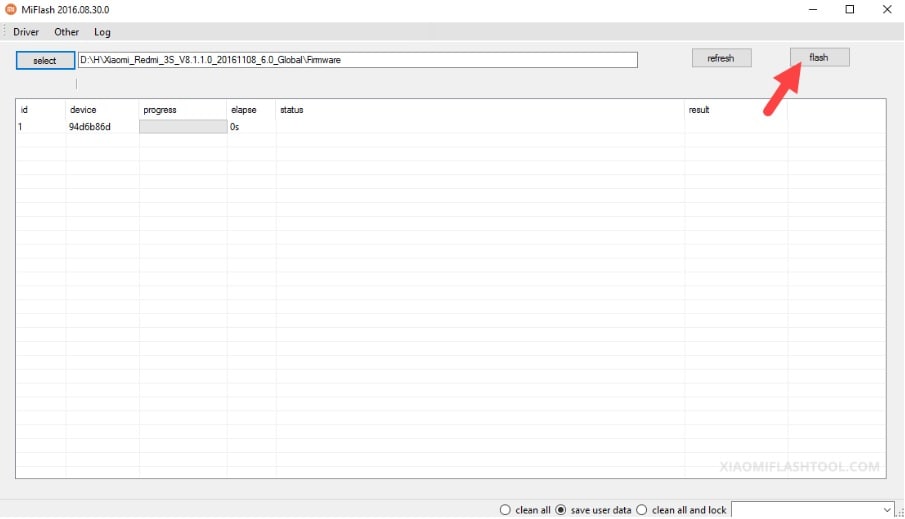
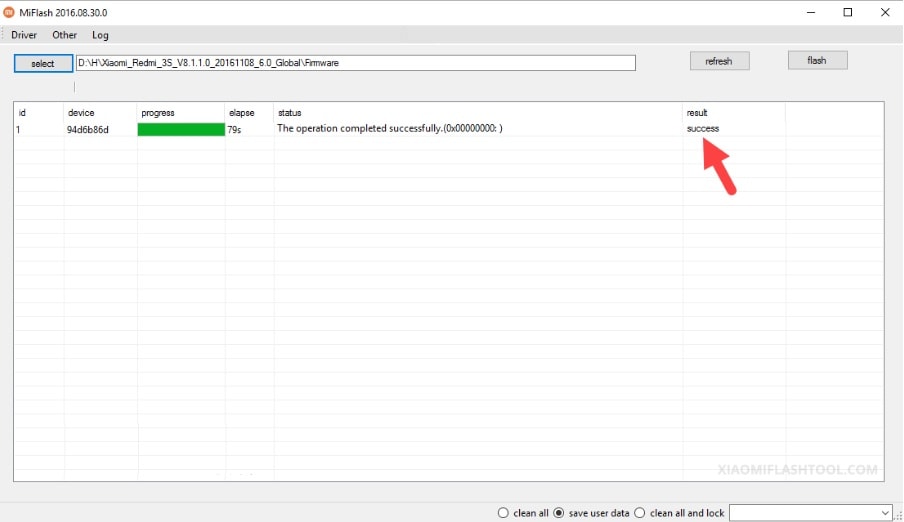
- Step 4: The SUCCESS result should appear in the Lenovo ThinkPhoneFlash Tool once the flashing process is done.
However, if the Lenovo ThinkPhoneFlash Tool did not unbrick your Lenovo ThinkPhone, consider using Wondershare Dr.Fone - System Repair (Android). The platform allows you to unbrick your Lenovo ThinkPhone with a few clicks.
Part 3. Reviving Your Lenovo ThinkPhone Using Wondershare Dr.Fone - System Repair (Android)
Dr.Fone - System Repair (Android) equips Lenovo ThinkPhone users with the ability to tackle soft brick and hard brick issues. This specialized Android repair tool enables you to restore your Lenovo ThinkPhone through a streamlined process, requiring just a few simple clicks.


safe & secure
3,227,773 people have downloaded it
Key Features
Dr.Fone - System Repair (Android) offers several benefits to unbrick your Lenovo ThinkPhone easily. Below are its key features.
- Fix Common Lenovo ThinkPhone Problems in Minutes. This tool provides comprehensive solutions for common issues like black screen, Play Store not working, boot loops, or even bricked Android devices .
- Compatibility with Over 1000 Android Models. This app fixes glitches across modern Android devices. The software is compatible with an extensive range of models. Whether your Lenovo ThinkPhone is unlocked or carrier-bound, restoration is not a problem.
- Unparalleled Software Flexibility. Dr.Fone - System Repair (Android) also boasts an added capacity to mend iOS devices. This versatile tool is your all-inclusive solution for mobile devices, ensuring convenience whether you own an iOS or Android device.
Advantage of Dr.Fone - System Repair (Android) for Unbricking Lenovo ThinkPhone
Here are three benefits to choosing Dr.Fone - System Repair (Android) for unbricking a Lenovo ThinkPhone. You’ll further believe Dr.Fone is a reliable assistant when reviving your bricked Lenovo ThinkPhone.
Simplified Firmware Management
Dr.Fone eliminates the tedious search for appropriate firmware when unbricking your Lenovo ThinkPhone. The platform automatically downloads the correct firmware for your device. The hassle of identifying and manually procuring firmware is removed, saving time and ensuring a smoother unbricking process.
User-Friendly Approach
One of Dr.Fone’s key strengths is its user-friendly design. It caters to users with varying levels of technical expertise by employing a step-by-step process. This approach guides users through the repair process with clarity. It reduces the requirement for advanced technical knowledge.
Free Version for Evaluation
Dr.Fone - System Repair (Android) offers a free version for everyone. It allows users to test its capabilities before committing to a purchase. This trial version grants users the opportunity to assess the tool’s effectiveness and suitability for unbricking their Lenovo ThinkPhone. This instills confidence before investing in a full license.
 Forex Robotron Basic Package
How To Unbrick Lenovo ThinkPhone Using Dr.Fone - System Repair (Android)
Dr. Fone’s features are perfect for unbricking Lenovo ThinkPhone devices. Below are the procedures to restore your Lenovo ThinkPhone from its bricked state.
![]()
Dr.Fone - System Repair (Android)
Repair Android System Errors without Any Trouble.
- Fix your Android to normal, no skills required.
- Fix various Android system issues, stuck in boot loop , black screen , or won’t turn on , looping on start, etc.
- The high success rate in resolving Android system issues.
- Compatible with a wide range of Android devices and OS versions
- User-friendly interface with easy-to-follow steps.
3981454 people have downloaded it
- Step 1: Download and install Dr.Fone - System Repair (Android) on your computer. After launching the application, click System Repair. Then, click Android as the Lenovo ThinkPhone device type. Connect your Lenovo ThinkPhone. Indicate Phone Brick as the Android issue and initiate the process by clicking Start.

- Step 2: Select the appropriate device information corresponding to your Lenovo ThinkPhone. Choose Brand, Name, Model, Country, and Carrier. Confirm by checking the I agree button, then proceed to the next step by clicking Next.
- Step 3: Given that the Lenovo ThinkPhone lacks a Home button, click the Phone without Home button option. Follow the prompts displayed on-screen and proceed by clicking Next to initiate the process of restoring your bricked phone.

- Step 4: As your Lenovo ThinkPhone enters Download Mode, the firmware download will start automatically. Follow the on-screen instructions. Wait for the system to initiate the repair procedure automatically. Upon completion, a message will pop up on the main window. Click Done to exit the tool. You can click Try again to repeat the process if needed.
You May Also like:
How To Fix iPhone Bricked After iOS 17/iOS 16/iOS 15 Update
How to Fix It If Your Lenovo ThinkPhone Phone Got Bricked?
 KoolReport Pro is an advanced solution for creating data reports and dashboards in PHP. Equipped with all extended packages , KoolReport Pro is able to connect to various datasources, perform advanced data analysis, construct stunning charts and graphs and export your beautiful work to PDF, Excel, JPG or other formats. Plus, it includes powerful built-in reports such as pivot report and drill-down report which will save your time in building ones.
 It will help you to write dynamic data reports easily, to construct intuitive dashboards or to build a whole business intelligence cockpit.
KoolReport Pro package goes with Full Source Code, Royal Free, ONE (1) Year Priority Support, ONE (1) Year Free Upgrade and 30-Days Money Back Guarantee.
Developer License allows Single Developer to create Unlimited Reports, deploy on Unlimited Servers and able deliver the work to Unlimited Clients.
Conclusion
Don’t let a bricked Lenovo ThinkPhone stand in your way. Use the array of techniques from basic troubleshooting to advanced software tools to breathe life back into your device. Unbrick your Lenovo ThinkPhone to its full functionality using the methods provided or Dr.Fone’s adept assistance.
Lastly, you can still refer to Lenovo ThinkPhone for repairs. It remains the primary solution in numerous cases. Utilizing your warranty can alleviate the associated costs. Seeking assistance from a specialized technician is also a viable route to consider for a thorough device assessment.
- Title: Cellular Network Not Available for Voice Calls On Lenovo ThinkPhone | Dr.fone
- Author: Ariadne
- Created at : 2024-07-30 10:00:02
- Updated at : 2024-07-31 10:00:02
- Link: https://howto.techidaily.com/cellular-network-not-available-for-voice-calls-on-lenovo-thinkphone-drfone-by-drfone-fix-android-problems-fix-android-problems/
- License: This work is licensed under CC BY-NC-SA 4.0.