
Fix Cant Take Screenshot Due to Security Policy on Itel P40+ | Dr.fone
Fix Can’t Take Screenshot Due to Security Policy on Itel P40+
“Can’t take screenshots due to security policy” is a screenshot restriction on your Android smartphone. You’ve probably seen this error message before, especially when taking screenshots of banking or video streaming apps. But why do apps and websites block screenshots? It’s actually for your good.
Screenshots can be misused to steal money or pirate copyrighted content. By prohibiting screenshots, apps and websites can help to protect your data and privacy. If you want to learn more, keep reading. This article will explain why apps and websites prevent screenshot capture and why it’s important for security. We’ll also give you tips on how to take photos of apps and websites that don’t let you take screenshots.
Part 1. Can’t Take Screenshots Due to Security Policy on Android? Here’s Why
Why can’t you take a screenshot of something on your phone and get the error message that says, “Can’t take screenshot due to security policy”? Apps and websites turn off or remove the screenshot feature for a variety of reasons, including:
Device Restrictions
Lots of workplaces and schools have rules against taking screenshots on devices used for work or school. Organizations do this to protect sensitive information and prevent data breaches.
Protect Sensitive Information
Say you’re trying to take a screenshot on your Itel P40+ device, and you get the notification “Can’t take screenshot due to security policy.” Itel P40+ smartphones are not necessarily the problem.
Some apps and websites, such as banking apps, store private data like financial and credit card details. Blocking capturing screenshots is a way to prevent unauthorized access to confidential information.


Follow Regulations
Some industries and organizations have regulations that need them to protect sensitive data. Financial institutions must protect their customers’ financial information, for example. Disabling screenshots is one way to follow these regulations.
DRM-Protected Content
Android can’t take screenshots due to security policy, especially to prevent piracy. Piracy is the distribution of copyrighted material without permission. It can harm businesses that depend on copyright protection.
To prevent this, you can use DRM (digital rights management) to protect copyrighted content. DRM-protected content cannot be screenshotted or copied.
Prevent Fraud
Scammers and other criminals often use screenshots to commit fraud. For instance, people might send fake screenshots to trick others into sharing personal details or money. Disabling screenshots can help to prevent this type of fraud.
Protect Intellectual Property
Many businesses and organizations have valuable information they want to keep safe, such as trade secrets. Disabling screenshots can be helpful to prevent the theft of this intellectual property.
Protect User Privacy
Some apps and websites allow users to share private information. Some apps, like messaging apps, let users share private info. But there are limits.
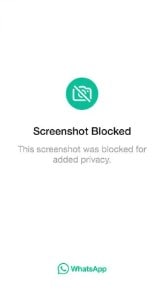
You can’t take screenshots due to security policy Whatsapp features, View Once media option. This method stops people from taking pictures of private media chats, protecting users’ privacy.
You Are Using a Secure Folder
Companies design secure folders to protect your most sensitive data from unauthorized access, so screenshots are not allowed within them.
Part 2. 8 Ways To Take Screenshots When You Can’t Due to Security Policy
If you’re trying to take a screenshot of an app or website with a security policy in place, there’s usually no way to circumvent it. However, there are a few things you can do to take pictures of these apps and website content.
Enable Screen Capture on Android
Sudden “can’t take screenshot due to security policy” notifications, failing to take a screenshot, and a Itel P40+ user?
If you are using this Android device, you can enable the screen capture feature in the Settings app.
- Step 1: Go to Settings > Apps, then tap the More options icon in the upper right corner.

- Step 2: Choose Special access > All files access.


- Step 3: Enable Itel P40+ capture.

Once you have enabled screen capture, you can check if you can take screenshots of any app or website.
Enable Screenshots in Incognito Mode
Apps and websites may prohibit screenshots in incognito mode to protect your privacy. However, you can enable the Incognito Screenshot experimental flag in Chrome to bypass this restriction.
- Step 1: Open Chrome on your Itel P40+ and type “chrome://flags” in the address bar.

- Step 2: Search for Incognito Screenshot and choose Enabled from the drop-down menu.


- Step 3: Tap Relaunch on the lower right corner of the screen.
Once Chrome has relaunched, you should be able to take screenshots in incognito mode by pressing the power and volume-down buttons at the same time.
Use Google Assistant
With Google Assistant, taking screenshots on your Itel P40+ is now easier than ever. Just say, “Hey, Google, take a screenshot,” Google Assistant will capture the screen and save it to your gallery.


Use a Third-Party App To Take Screenshots
You can download several applications on Google Play Store if you still can’t take a screenshot due to security policy. Some popular third-party screenshot apps include:
- Screenshot Easy
- Screenshot Tile
- Screen Master: Screenshot Markup
Third-party screenshot apps often use different methods to capture the screen. These might bypass the security measures that prevent you from taking screenshots with the built-in screenshot function.
Capture Your Phone Display With Another Device
If you own another smartphone, you can use it to take a photo of the screen of the Itel P40+ device you’re trying to take a screenshot of. This is a simple workaround for any security policies that may be in place. To do this, open the camera app on your other smartphone and point it at the screen of the first device.
Check the Banking App Settings for Screenshot Permissions
Some banking apps may turn off screenshots by default, but some may allow them in the settings. To check this, open the banking app and select the settings menu. Look for a setting that allows taking in-app photos. If you find it, enable it to allow screenshots to be taken in the app.
Screen Mirroring
Smart View allows you to display your Itel P40+ device’s screen on your smart TV, where you can then take a screenshot of the TV to capture the app or website you need.
- Step 1: Swipe down the top of the screen to access the Quick Settings panel.
- Step 2: Tap the Smart View icon.
- Step 3: Select your TV from the list of available devices and tap Start Now.
 OtsAV DJ Pro
Alternatively, if you don’t have a smart TV, you can still mirror your phone screen display to your desktop or tablet using the Itel P40+ Flow app and take a screenshot of your phone’s screen instead.
Use Disable Flag Secure Magisk Module
Still experiencing the error message, “Can’t take screenshot due to security policy?” Bypass Android phone error like this using a module.
The module patches the Android framework to remove the FLAG_SECURE flag from apps. It is a relatively simple process but requires root access and Magisk. This module will turn off the security flag to take screenshots in Incognito mode and other apps.

Authors Verdict
There are a few ways to bypass screenshot restrictions on Android apps and websites, but some methods are more complicated than others. All methods should work, but if you think your device has been compromised, it is important to check if it is a system issue.
You can use a third-party tool like Wondershare Dr.Fone without rooting your device. It is easy to use and supports many Android smartphones. You can try Dr.Fone for free to test if it supports your device and can fix the underlying system issues.
Part 3. Dr.Fone: A Comprehensive Solution for Fixing Android System Issues
Dr.Fone’s System Repair tool for Android cannot bypass the security apps of banking apps and video streaming apps like Netflix. This is because these apps use sophisticated security measures to protect their users’ data.
However, Dr.Fone System Repair tool for Android can fix a wide range of other Android system issues that might happen from installing third-party apps on your smartphone, such as:
Follow this step-by-step guide and learn how to use Dr.Fone to scan your Android smartphone for system issues and repair them.
- Step 1: Once you have downloaded Dr.Fone, install it and launch it on your desktop. Then, connect your Itel P40+ to your desktop using a USB cable.
 safe & secure
3,567,199 people have downloaded it
- Step 2: From the Toolbox homepage, select System Repair > Android.

- Step 3: Click Start on the new window.

- Step 4: Select an option from the Name, Model, Country, and Carrier in the drop-down lists. Next, select the checkbox to agree with the warning, then click Next in the bottom right corner.

- Step 5: Follow the in-app instructions to put your Itel P40+ on Download mode, then click Next.
 ZoneAlarm Pro Antivirus + Firewall NextGen

- Step 6: Wait while the firmware automatically downloads.

- Step 7: Review the details on the screen and click Fix Now to install the firmware on your smartphone.

- Step 8: Read the dialogue box note, enter the code in the input box, and click Confirm.
 OtsAV TV Webcaster
- Step 9: Keep your smartphone connected and avoid using it while Dr.Fone is repairing it.

company, user or members of the same household. Action! - screen and game recorder</a>

- Step 10: If your device has started properly, click Done to close this app. Otherwise, click Try again.
 Glarysoft File Recovery Pro - Helps to recover your lost file/data, even permanently deleted data.

Conclusion
You can fix the “Can’t take screenshot due to security policy” error on Android in different ways. But it depends on the cause of the error. If an app is causing the error, you can try two things. First, remove the app’s screenshot restriction. Second, download a different screenshot app or a different device to take screenshots.
Although there are ways to bypass the “Can’t take screenshot due to security policy” error message, it’s crucial to know why screenshots are not allowed. Many apps and websites do not permit it to protect sensitive information, prevent piracy, and follow regulations. They also do it to prevent fraud, protect user privacy, and safeguard intellectual property.
If you think the issue is with your Android system, or your device becomes bricked after trying other methods, experiencing app crashes, or otherwise malfunctioning, try using the Dr.Fone System Repair tool. It is worth trying and can fix most Android system issues in a few minutes.

Top 10 Fixes for Phone Keep Disconnecting from Wi-Fi On Itel P40+
The revolutionized world is about the internet, online life, and social media. You can get all the information you need from the internet. You are a click away from booking tickets, buying groceries, calling your loved ones, or even you can handle office meetings with the internet.

Since everything revolves around the internet, it’s annoying if your WI-FI disconnects. You might question yourself why does my Wi-Fi keep disconnecting from the phone? To know the answer, read the article below.
Part 1: Why Does Your Phone Keep Disconnecting from WiFi?
Is your phone frequently getting disconnected from Wi-Fi? Or the internet service is lagging? We have a few options from which you can inspect your problem. Not all internet issues arise from the service provider, as some issues are because of the Itel P40+ devices that are using the internet. Some of these issues are discussed below for your assistance:
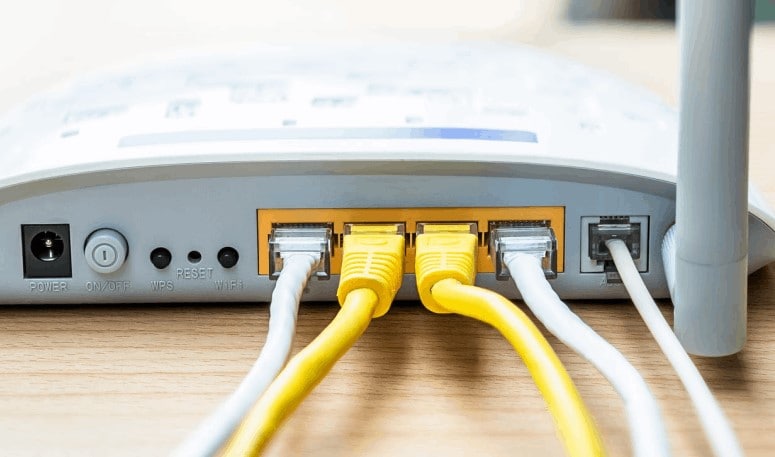
- Router Problems
If the internet provider is doing their job right, the router might not deliver you the right thing. Like other electronic devices, they can also misbehave. This can happen because the router is faulty, or it can happen because the firmware is outdated.
- Out of Wi-Fi Range
Why does My Itel P40+ keep disconnecting from Wi-Fi? It is because you might be out of range! The router’s placement is very important. The router transmits frequencies that have a limited range. If you are moving out of the range, the internet automatically disconnects.
- Wi-Fi Signals Getting Blocked
The signals from the router can dissipate from any other electronic device nearby. Signals like radio and microwaves can interfere with signal strength.
- Devices Connected with Router
Commonly, a house has around a dozen devices connected to the internet router. People do not think that the router has limited connection slots. It is unable to entertain a specific number of requests for service facilitation. The router has limitations; the service quality will drop if the limitations are exceeded. This drop in quality can also cause internet disconnection from devices.
- Unstable Internet
If your Itel P40+ gets disconnected frequently, then this disconnection is due to unstable internet, but apart from the above-mentioned problems, there is another reason for internet disconnection.
Sometimes, the internet is stable, but it still disconnects. This is because the internet service provider might not send the best quality internet you have acquired it for. If your internet is stable and the phone still keeps disconnecting, then head onto the next part that will share the top 10 fixes to sort out this issue.

Part 2: 10 Ways to Fix Wi-Fi Keep Disconnecting on Phone
As we have mentioned earlier if your Wi-Fi is stable, but it keeps disconnecting from Itel P40+ S22 or other Android phones, the coming section of this article is for you. We will provide you with 10 solutions with complete assistance to fix the “Wi-fi keeps disconnecting Android“ issue.
### Fix 1: Restart Your PhoneIf the Wi-Fi keeps disconnecting from your Itel P40+, but the internet is stable, then you should try to fix the issue by restarting your phone. Sometimes, it’s the phone that’s causing a problem, so to resolve it, you can follow the steps given below:
Step 1: Firstly, unlock your phone. Now, press the Power button and hold it for a few seconds.
Step 2: Now, select the ‘Reboot’ option to resolve the issue from the options on the screen.


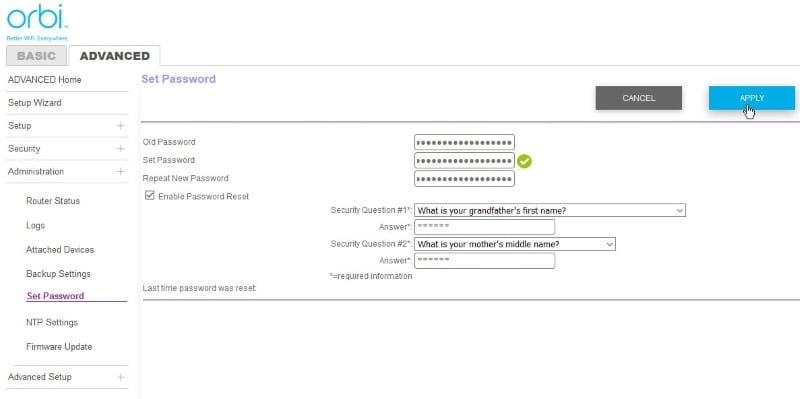
Fix 2: Check Router Settings
If your Android keeps disconnecting from Wi-Fi, you can also fix the problem by checking the router settings. This is because your phone might be blocked from connecting to the network, and if this is the scenario, your phone will never maintain the connection. You should check the Router’s admin panel or app to remove your phone from the blocklist.
Fix 3: Reconnect to Network
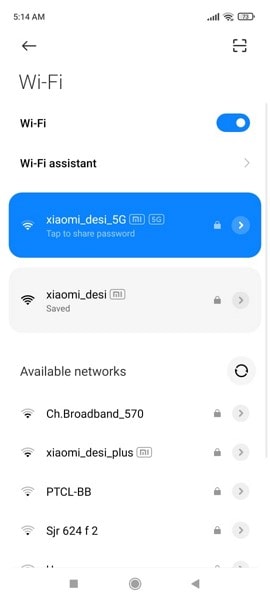
To fix the annoying problem that your Wi-Fi keeps disconnecting, you should try forgetting the network and then reconnecting to it. This could be done easily by following the steps below:
Step 1: First, you need to open the Wi-Fi settings menu. This could be done by pressing and holding the Wi-Fi option from the drop-down menu of your phone until the settings open up.

Step 2: A list of all the Wi-Fi networks will appear on the screen. Select the network that is causing trouble from that list and hit the ‘Forget Network’ option.
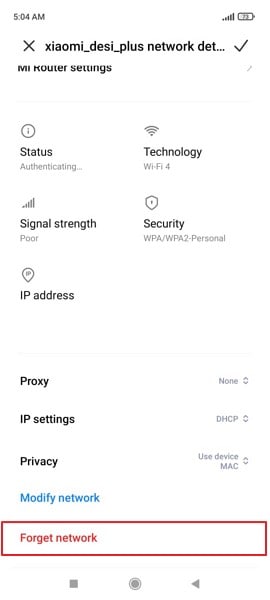
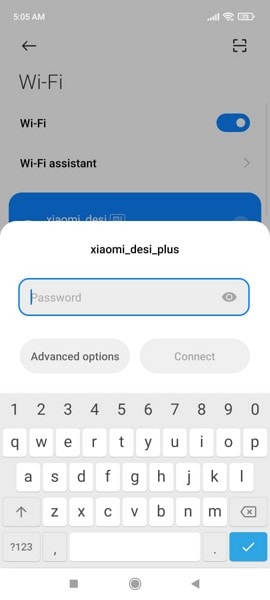
Step 3: After that, you should reconnect to this Wi-Fi network by selecting it from the Wi-Fi list and entering its password.

Fix 4: Restart Your Router
As we discussed, to restart your phone, you can also restart the router to get rid of the problem. For this, hit the restart button on the router to get a fresh start. If the Itel P40+ device has no button, disconnect the power supply and plug it back in to connect again. Most internet issues are resolved by restarting the router.

Fix 5: Forget Old Networks
The problem that your Wi-Fi keeps disconnecting can also occur because of the list of networks you have connected to. Having yourselves connected to different set of networks could turn out to be quite problematic in the process. In the process of finding and switching to the best network, your device’s Wi-Fi will continually disconnect and reconnect with the nearby networks. To finish this irritating issue, you should remove and forget all the extra networks that you connected previously.
Step 1: You should start by pressing and holding the Wi-Fi option from the drop-down menu on your phone until the Wi-Fi settings screen appears.


Step 2: You will see a list of all the Wi-Fi networks you have connected to previously. One by one, select each network and hit the ‘Forget Network’ button to remove it.
Parental Control Software
Fix 6. Check Recently Installed Applications
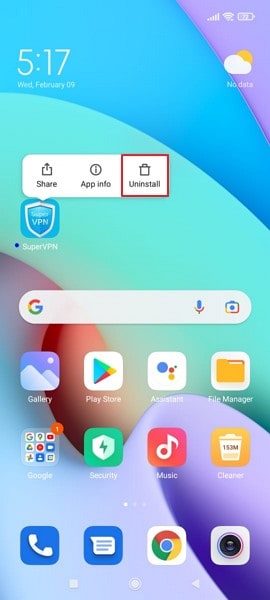
Sometimes, different installed applications can also cause trouble. If your Wi-Fi was fine, but suddenly it started disconnecting, then don’t forget to check the recently installed apps. This is because with not knowing the damage it can cause, you might have installed some VPNs, connections boosters, or firewalls. You can try and disable them but if that doesn’t resolve the problem, then uninstall the app.
Step 1: For uninstalling the problematic application, you have to select it and hold it. You will see a pop-up menu of multiple options; choose the option of ‘Uninstall’ to remove the app from the phone.
Fix 7: Reset Network Settings on your Phone
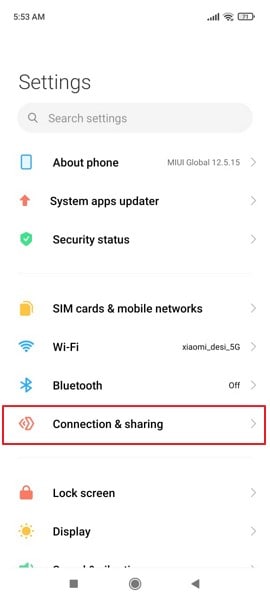
It’s annoying that your Wi-Fi keeps disconnecting while you are working or studying. Android users can easily get over this problem by resetting the network settings. The steps for this fix are as follows:
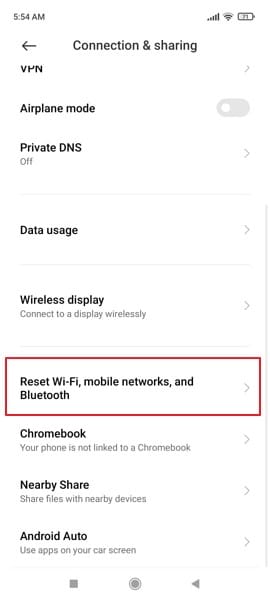
Step 1: For resetting the network, start by opening the ‘Settings’ menu on your phone. Then, scroll down, look for the ‘Connection & Sharing’ option, and select it.
Step 2: As you progress onto a new screen, you will find the option of “Reset Wi-Fi, Mobile Networks, and Bluetooth” in the menu. Select the option to lead to the next window.

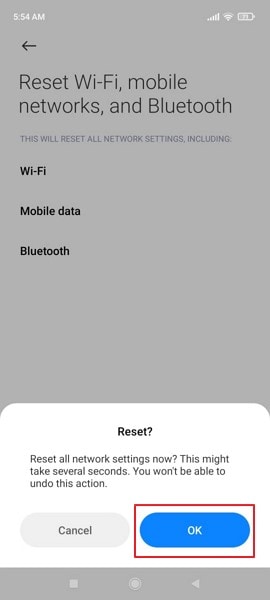
Step 3: Click on the option of “Reset Settings” present on the bottom of the next screen that shows up. Provide confirmation of resetting these settings by inserting your device’s PIN, if any.

Step 4: After providing the appropriate clearances, you will be asked for another confirmation of resetting the Itel P40+ device’s networks to default. Click “OK” to execute.
 vMix Pro - Software based live production. vMix Pro includes everything in vMix 4K plus 8 channels of Replay and 8 vMix Call
Fix 8: Check Routers Range
If your Wi-Fi automatically disconnects and connects again while you are roaming in the house, then it is because of the router’s range; you should check it. For this, you can consider changing and modifying your AP (Access Point) band on your router.
Although the 5GHz frequency band is recognized for providing better network speeds, this band has a shorter range as compared to the 2.4GHz band, which has a better coverage of area. You can easily shift your router’s range through its configuration page. It is considered optimal to utilize the 2.4GHz frequency band for better ranges.
 Easy GIF Animator is a powerful animated GIF editor and the top tool for creating animated pictures, banners, buttons and GIF videos. You get extensive animation editing features, animation effects, unmatched image quality and optimization for the web. No other GIF animation software matches our features and ease of use, that’s why Easy GIF Animator is so popular.
Fix 9: Stay Connected while Asleep
Most Android phones have a battery-saving feature. This feature disables the network connections to save the battery of the phone. If this is why the Wi-Fi keeps disconnecting, follow the steps shared below to fix it:
Step 1: Start by opening the ‘Settings’ menu on your phone. Then scroll down until you find the ‘Battery’ option and open it.

Step 2: Then, from the battery screen, hit the ‘More Battery Settings’ options. Then, you will see the ‘Stay Connected while Asleep’ option; turn it on.

 Allavsoft Batch Download Online Videos, Music Offline to MP4, MP3, MOV, etc format
Fix 10: Upgrade Router Firmware
If none of the above-shared fixes work, the last fix to resolve the problem is upgrading your router firmware. For this, you should contact any professional who knows network operations as upgrading router firmware takes time and requires knowledge.
Wi-Fi Stay Connected
The article above has discussed 10 solutions that offer a comprehensive toolkit to tackle the persistent issue of Wi-Fi keeps turning off Android. By toggling Airplane Mode, restarting your device, adjusting settings, and updating firmware, among other steps, you can effectively address and resolve this connectivity problem. With these solutions at your disposal, you can regain a stable and uninterrupted Wi-Fi experience on your Itel P40+.
Fix the Error of Unfortunately the Process.com.android.phone Has Stopped on Itel P40+
Nowadays, smartphones are integral to life. They serve as your communication lifeline and powerful personal assistant. However, it can be frustrating when a sudden error disrupts our phone’s functionality. One common error Android users encounter is the “Unfortunately, The process.com.android.phone has stopped” error. Fear not if you have come across this error message on your Itel P40+.
This beginner’s guide is here to help you understand the causes of this problem. It will also provide you with practical “unfortunately the phone has stopped solutions.”
Part 1: Learn Why Unfortunately the process.com.android.phone Has Stopped
The error message “Unfortunately, the process com.android.phone has stopped“ typically appears on Android devices when there is an issue with the Phone app. Issues with underlying processes responsible for handling phone-related functions are also a cause.
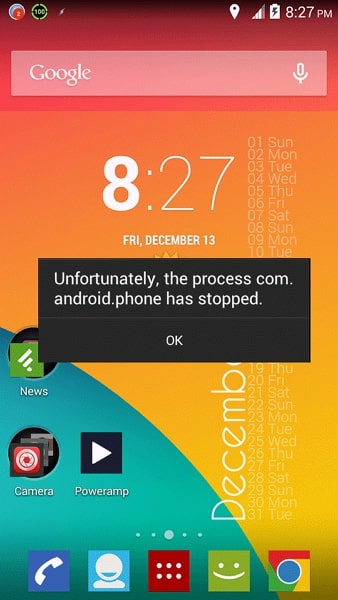
It can prevent you from making or receiving phone calls, accessing contacts, or using other phone-related features. Following are some of the possible reasons why you may encounter this error:
App or System Update
When you update your device’s OS or the Phone app itself, it is possible to encounter bugs or compatibility issues. These issues can lead to the Phone app crashing and displaying this error message. Sometimes, the updated software may not work with the existing configurations of the Phone app. It results in instability which causes this error.

App Cache/Data Corruption
The Phone app relies on cached data and stored settings to function properly. If the cache or data of the app becomes corrupted, it can cause the Phone app to malfunction. The reasons include interrupted app installations or updates, improper shutdowns, or software conflicts. As a result, you may see the error message indicating that the process com.android.phone has stopped.
Insufficient System Resources
Android devices need sufficient memory (RAM) and processing power to run apps smoothly. If your device is running low on memory or processing capacity, it may struggle to handle the Phone app and its processes. It can lead to crashes and the error message. Running many resource-intensive apps at the same time also causes this issue. Other reasons include too many background processes that contribute to this error.
Conflicting Third-Party Apps
Third-party apps installed on your device can sometimes conflict with the Phone app. These conflicts can occur for various reasons, such as incompatible app versions. The software bugs within the third-party apps or configurations can also clash with the Phone app. Such conflicts can disrupt the normal operation of the Phone app. The result of all this trigger the error message.
 PDF application, powered by AI-based OCR, for unified workflows with both digital and scanned documents.
 Software or Firmware Glitches
Software glitches or firmware issues can occasionally occur in Android devices. These glitches can affect the functioning of system processes, including the Phone app. They may arise from programming errors and system inconsistencies. Sometimes unexpected interactions between different OS components can also lead to this error.
Part 2: 100% Working Fixes To Fix Unfortunately the process.com.android.phone Has Stopped
Having been denied access to your Phone can cause a lot of issues. Luckily, many simple fixes to the “process.com.android.phone has stopped“ error exist. These solutions have worked for many users, and by following them, you may be able to resolve the issue too. Given below are the top 8 fixes to resolve this error and restore your device’s phone functions:
Fix 1: Restart/Reboot your Android Device
One of the simplest yet effective solutions to tackle the “Unfortunately, the process com.android.phone has stopped“ error is to reboot your Itel P40+. Restarting your device can often resolve temporary software glitches or conflicts. This fix requires no technical expertise.
So, it is worth trying before moving on to more complex solutions. Follow the guide below to restart your Itel P40+ and potentially fix the error:
- Step: Long-press your Itel P40+’s “Side” key and wait for the power menu to appear. Here, select “Restart” to initiate the reboot of your phone.


Fix 2: Re-insert the SIM Card
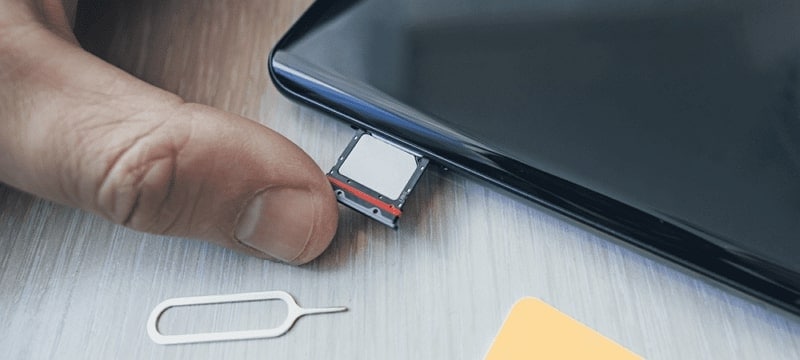
There is also a chance that the reason you are seeing this error message relates to the SIM card. A loose or improperly inserted SIM card can cause disruptions in the phone’s communication functions. As a result, you see the “Unfortunately, the process com.android.phone has stopped“ error.
To fix this error, you can remove the SIM card and then re-insert it. If the issue is actually related to a SIM card, the issue will get resolved after you resolve the problem.
Fix 3: Clear the Cache and Data of the Phone App
The “Unfortunately, the process com.android.phone has stopped“ error is connected to the Phone app. In this situation, clearing the cache and data of the Phone app itself can often resolve the issue. This fix focuses on removing any corrupted or conflicting data within the app.
Once the corrupted data is gone, it will restore the Phone app to proper functioning. Here is how to clear the cache and data of the Phone app on an Android device:
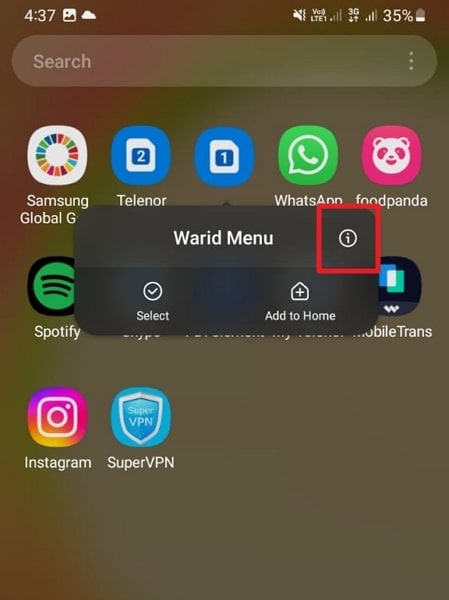
- Step 1: Find the Phone app on your Itel P40+ and long-press its icon. A small menu will pop up where you need to select “App Info.”

- Step 2: It will lead you to detailed information about the Phone app. Here, press “Storage,” and following that, you will see the “Clear Cache” and “Clear Data” options. Use them in the same order to clear the cache and data of the Phone app.

Fix 4: Disable Automatic Updates Feature
In some cases, this error may occur due to conflicts or compatibility issues with the automatic app updates feature. The automatic update on your Itel P40+ keeps your apps updated. Disabling this feature temporarily can help resolve the problem.
As a result, you will be able to use the Phone app without interruptions. To disable the automatic updates option on the Google Play Store, you can use the following steps:
- Step 1: Navigate to the Google Play Store app on your Itel P40+ and launch it. Next, tap on the profile icon in the screen’s top right corner. From the options presented, select “Settings.”
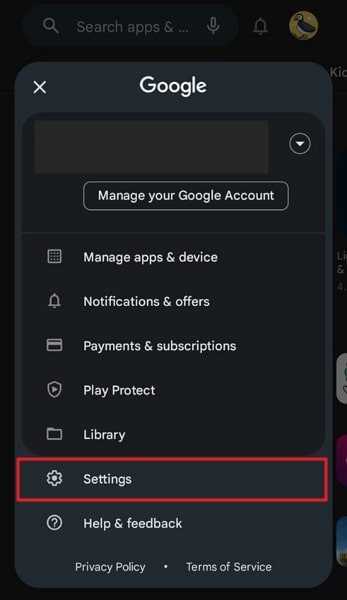
- Step 2: In Settings, press “Network Preferences” to expand the option. Now, open the “Auto-update apps” settings and enable the “Don’t auto-update apps” option.

Fix 5: Clear All Apps Cache and Data
When dealing with this error, clearing the cache and data of all apps on your Itel P40+ can also help. Doing this will remove any corrupt or conflicting data that might be causing the issue. This fix targets the overall app ecosystem on your device.
It intends to ensure a clean slate and potentially resolve the error. Use the following guide to clear the cache and data of all apps:
- Step 1: Access your Itel P40+’s Settings and tap the “Apps” option. It will lead you to all the apps running on your phone. Here, select an app to see detailed app info.

- Step 2: On the app info screen, scroll down and press “Storage.” Now use “Clear Cache” to clean the app’s cache and “Clear Data” to erase the app’s data. Repeat the same process for all the apps installed on your device.

Fix 6: Clear SIM Toolkit Cache and Data
It is worth considering the SIM Toolkit is a potential source of the problem. The SIM Toolkit is an app that provides functionality related to your SIM card. Its functions include accessing value-added services and managing mobile network settings. Clearing the cache and data of the SIM Toolkit app can help resolve this issue. The steps you need to clear the cache and data of this app are the following:
- Step 1: On your Itel P40+, find the SIM Toolkit app. After finding it, press and hold its icon until a short menu appears. Choose “App Info” from the available options to access its settings.
- Step 2: Now, you need to tap “Storage” to proceed. On the next screen, first, tap “Clear Cache” to clean the cache, and later press “Clear Data.”

Fix 7: Perform Factory Reset
If all previous fixes have been unsuccessful, performing a factory reset is also an option to resolve this issue. It is a drastic measure that can potentially address underlying software issues. However, it’s important to note that a factory reset will erase the entire data and settings of your device.
So, it’s crucial to back up your important files before proceeding with this fix. By doing so, you can restore your device to its original state and eliminate the error. Use the detailed guide described below to factory reset your Itel P40+:
- Step 1: Start by launching the Settings app and selecting “General Management.” Here, choose “Reset,” and following that on the next screen, tap “Factory data reset.”

- Step 2: After tapping “Factory data reset,” hit the “Reset” option. Next, enter your Itel P40+ PIN to confirm the process, and use “Delete All” to start the factory reset process.

Fix 8: Try Wondershare Dr.Fone - The Best and Most Reliable Android System Repair Tool
It must be a frustrating experience to try one solution after the next and not be able to resolve the issue. In such situations, the best thing you can do is find a tool that can resolve all Android system problems. While there are many options available online, not all are great. The best Android system repair tool currently available is Wondershare Dr.Fone.
Using Wondershare Dr.Fone, you can fix issues like “Unfortunately, the process.com.android.phone has stopped,” Play Store not working, frozen phone, and many more. It is a specialized tool for resolving Android system issues in Itel P40+ devices with support for all modern Itel P40+ phones.
Key Features of Wondershare Dr.Fone
- You do not need any technical skills to fix your Android system issues when using Dr.Fone.
- It has the highest success rate in fixing complex software issues related to Android OS.
- Wondershare Dr.Fone supports over 1000 Android models for system repair and can fix most issues within minutes.
Steps To Fix the process.com.android.phone Has Stopped via Wondershare Dr.Fone
All you need to fix your Itel P40+’s system issues is a computer with Wondershare Dr.Fone installed and your device connected to it. Here is the simplified process of resolving most Android system issues in a matter of minutes:
- Step 1: Link Your Android Device with Wondershare Dr.Fone
To start, connect your Itel P40+ to your computer. Launch Wondershare Dr.Fone on your computer screen and click on “Toolbox,” located in the left sidebar. From the options available, select “System Repair” and follow it by clicking “Android” on the next screen.
- Step 2: Enter the Required Details of Your Itel P40+
Click on “Start” to initiate the process, and following that, you will be prompted to provide specific details about your Itel P40+. These details include the “Brand,” “Name,” “Model,” “Country,” and “Carrier.” Afterward, tick the box that says, “I agree with the warning, and I am ready to proceed,” and click “Next.”
 CalendarBudget - Monthly subscription membership to CalendarBudget via web browser or mobile app. Support included.
- Step 3: Resolve The process.com.android.phone Has Stopped Issue
The subsequent step involves entering Download Mode on your device, following the on-screen instructions provided by the software. Once your device is in Download Mode, this Android repair toolkit will proceed to download and install the relevant firmware. Now, select “Fix Now” and confirm the repair of your Itel P40+ by entering the code “000000.”
safe & secure
3,595,007 people have downloaded it
Conclusion
To sum the article up, encountering the frustrating error message “Unfortunately, the process com.android.phone has stopped“ can be daunting. However, with the right knowledge and tools, resolving this issue becomes achievable. Throughout this guide, we have explored various troubleshooting methods. These included clearing the cache, rebooting the Itel P40+ device, and even performing a factory reset.
While there are many options to fix this error, only one is an excellent choice: Wondershare Dr.Fone. With its powerful Android system repair feature, Wondershare Dr.Fone is a reliable solution to resolve this error.
- Title: Fix Cant Take Screenshot Due to Security Policy on Itel P40+ | Dr.fone
- Author: Ariadne
- Created at : 2024-07-30 10:14:41
- Updated at : 2024-07-31 10:14:41
- Link: https://howto.techidaily.com/fix-cant-take-screenshot-due-to-security-policy-on-itel-p40plus-drfone-by-drfone-fix-android-problems-fix-android-problems/
- License: This work is licensed under CC BY-NC-SA 4.0.