
Fix Cant Take Screenshot Due to Security Policy on Oppo Find N3 | Dr.fone
Fix Can’t Take Screenshot Due to Security Policy on Oppo Find N3
“Can’t take screenshots due to security policy” is a screenshot restriction on your Android smartphone. You’ve probably seen this error message before, especially when taking screenshots of banking or video streaming apps. But why do apps and websites block screenshots? It’s actually for your good.
Screenshots can be misused to steal money or pirate copyrighted content. By prohibiting screenshots, apps and websites can help to protect your data and privacy. If you want to learn more, keep reading. This article will explain why apps and websites prevent screenshot capture and why it’s important for security. We’ll also give you tips on how to take photos of apps and websites that don’t let you take screenshots.
Part 1. Can’t Take Screenshots Due to Security Policy on Android? Here’s Why
Why can’t you take a screenshot of something on your phone and get the error message that says, “Can’t take screenshot due to security policy”? Apps and websites turn off or remove the screenshot feature for a variety of reasons, including:
Device Restrictions
Lots of workplaces and schools have rules against taking screenshots on devices used for work or school. Organizations do this to protect sensitive information and prevent data breaches.
Protect Sensitive Information
Say you’re trying to take a screenshot on your Oppo Find N3 device, and you get the notification “Can’t take screenshot due to security policy.” Oppo Find N3 smartphones are not necessarily the problem.
Some apps and websites, such as banking apps, store private data like financial and credit card details. Blocking capturing screenshots is a way to prevent unauthorized access to confidential information.


Follow Regulations
Some industries and organizations have regulations that need them to protect sensitive data. Financial institutions must protect their customers’ financial information, for example. Disabling screenshots is one way to follow these regulations.
DRM-Protected Content
Android can’t take screenshots due to security policy, especially to prevent piracy. Piracy is the distribution of copyrighted material without permission. It can harm businesses that depend on copyright protection.
To prevent this, you can use DRM (digital rights management) to protect copyrighted content. DRM-protected content cannot be screenshotted or copied.
Prevent Fraud
Scammers and other criminals often use screenshots to commit fraud. For instance, people might send fake screenshots to trick others into sharing personal details or money. Disabling screenshots can help to prevent this type of fraud.
Protect Intellectual Property
Many businesses and organizations have valuable information they want to keep safe, such as trade secrets. Disabling screenshots can be helpful to prevent the theft of this intellectual property.
Protect User Privacy
Some apps and websites allow users to share private information. Some apps, like messaging apps, let users share private info. But there are limits.
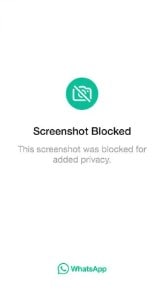
You can’t take screenshots due to security policy Whatsapp features, View Once media option. This method stops people from taking pictures of private media chats, protecting users’ privacy.

You Are Using a Secure Folder
Companies design secure folders to protect your most sensitive data from unauthorized access, so screenshots are not allowed within them.
Part 2. 8 Ways To Take Screenshots When You Can’t Due to Security Policy
If you’re trying to take a screenshot of an app or website with a security policy in place, there’s usually no way to circumvent it. However, there are a few things you can do to take pictures of these apps and website content.
Enable Screen Capture on Android
Sudden “can’t take screenshot due to security policy” notifications, failing to take a screenshot, and a Oppo Find N3 user?
If you are using this Android device, you can enable the screen capture feature in the Settings app.
- Step 1: Go to Settings > Apps, then tap the More options icon in the upper right corner.

- Step 2: Choose Special access > All files access.

- Step 3: Enable Oppo Find N3 capture.

Once you have enabled screen capture, you can check if you can take screenshots of any app or website.
Enable Screenshots in Incognito Mode
Apps and websites may prohibit screenshots in incognito mode to protect your privacy. However, you can enable the Incognito Screenshot experimental flag in Chrome to bypass this restriction.
- Step 1: Open Chrome on your Oppo Find N3 and type “chrome://flags” in the address bar.

- Step 2: Search for Incognito Screenshot and choose Enabled from the drop-down menu.


- Step 3: Tap Relaunch on the lower right corner of the screen.
Once Chrome has relaunched, you should be able to take screenshots in incognito mode by pressing the power and volume-down buttons at the same time.
Use Google Assistant
With Google Assistant, taking screenshots on your Oppo Find N3 is now easier than ever. Just say, “Hey, Google, take a screenshot,” Google Assistant will capture the screen and save it to your gallery.

Use a Third-Party App To Take Screenshots
You can download several applications on Google Play Store if you still can’t take a screenshot due to security policy. Some popular third-party screenshot apps include:
- Screenshot Easy
- Screenshot Tile
- Screen Master: Screenshot Markup
Third-party screenshot apps often use different methods to capture the screen. These might bypass the security measures that prevent you from taking screenshots with the built-in screenshot function.
Capture Your Phone Display With Another Device
If you own another smartphone, you can use it to take a photo of the screen of the Oppo Find N3 device you’re trying to take a screenshot of. This is a simple workaround for any security policies that may be in place. To do this, open the camera app on your other smartphone and point it at the screen of the first device.
Check the Banking App Settings for Screenshot Permissions
Some banking apps may turn off screenshots by default, but some may allow them in the settings. To check this, open the banking app and select the settings menu. Look for a setting that allows taking in-app photos. If you find it, enable it to allow screenshots to be taken in the app.
Screen Mirroring
Smart View allows you to display your Oppo Find N3 device’s screen on your smart TV, where you can then take a screenshot of the TV to capture the app or website you need.
- Step 1: Swipe down the top of the screen to access the Quick Settings panel.
- Step 2: Tap the Smart View icon.
- Step 3: Select your TV from the list of available devices and tap Start Now.
 The Tube Sites Submitter is a fast and efficient tool for anyone who needs to upload videos quickly, easily and automatically to hundreds of tube sites in mere minutes .
Alternatively, if you don’t have a smart TV, you can still mirror your phone screen display to your desktop or tablet using the Oppo Find N3 Flow app and take a screenshot of your phone’s screen instead.
Use Disable Flag Secure Magisk Module
Still experiencing the error message, “Can’t take screenshot due to security policy?” Bypass Android phone error like this using a module.
The module patches the Android framework to remove the FLAG_SECURE flag from apps. It is a relatively simple process but requires root access and Magisk. This module will turn off the security flag to take screenshots in Incognito mode and other apps.


Authors Verdict
There are a few ways to bypass screenshot restrictions on Android apps and websites, but some methods are more complicated than others. All methods should work, but if you think your device has been compromised, it is important to check if it is a system issue.
You can use a third-party tool like Wondershare Dr.Fone without rooting your device. It is easy to use and supports many Android smartphones. You can try Dr.Fone for free to test if it supports your device and can fix the underlying system issues.
Part 3. Dr.Fone: A Comprehensive Solution for Fixing Android System Issues
Dr.Fone’s System Repair tool for Android cannot bypass the security apps of banking apps and video streaming apps like Netflix. This is because these apps use sophisticated security measures to protect their users’ data.
However, Dr.Fone System Repair tool for Android can fix a wide range of other Android system issues that might happen from installing third-party apps on your smartphone, such as:
Follow this step-by-step guide and learn how to use Dr.Fone to scan your Android smartphone for system issues and repair them.
- Step 1: Once you have downloaded Dr.Fone, install it and launch it on your desktop. Then, connect your Oppo Find N3 to your desktop using a USB cable.
.png) Kanto Player Professional
Kanto Player Professional safe & secure
3,567,199 people have downloaded it
- Step 2: From the Toolbox homepage, select System Repair > Android.

- Step 3: Click Start on the new window.

- Step 4: Select an option from the Name, Model, Country, and Carrier in the drop-down lists. Next, select the checkbox to agree with the warning, then click Next in the bottom right corner.

- Step 5: Follow the in-app instructions to put your Oppo Find N3 on Download mode, then click Next.


- Step 6: Wait while the firmware automatically downloads.
 Easy GIF Animator is a powerful animated GIF editor and the top tool for creating animated pictures, banners, buttons and GIF videos. You get extensive animation editing features, animation effects, unmatched image quality and optimization for the web. No other GIF animation software matches our features and ease of use, that’s why Easy GIF Animator is so popular.
- Step 7: Review the details on the screen and click Fix Now to install the firmware on your smartphone.

- Step 8: Read the dialogue box note, enter the code in the input box, and click Confirm.


- Step 9: Keep your smartphone connected and avoid using it while Dr.Fone is repairing it.

- Step 10: If your device has started properly, click Done to close this app. Otherwise, click Try again.

Conclusion
You can fix the “Can’t take screenshot due to security policy” error on Android in different ways. But it depends on the cause of the error. If an app is causing the error, you can try two things. First, remove the app’s screenshot restriction. Second, download a different screenshot app or a different device to take screenshots.
Although there are ways to bypass the “Can’t take screenshot due to security policy” error message, it’s crucial to know why screenshots are not allowed. Many apps and websites do not permit it to protect sensitive information, prevent piracy, and follow regulations. They also do it to prevent fraud, protect user privacy, and safeguard intellectual property.
If you think the issue is with your Android system, or your device becomes bricked after trying other methods, experiencing app crashes, or otherwise malfunctioning, try using the Dr.Fone System Repair tool. It is worth trying and can fix most Android system issues in a few minutes.
Strategies for Apps That Won’t Download From Play Store On Oppo Find N3
The frustration of apps not downloading in the Google Play Store can annoy users. A seamless download experience is crucial for user satisfaction and app success. When you encounter such issues, they disrupt the interaction expected from your device.
The inconvenience can impact user trust and the overall perception of an app’s reliability. Addressing these challenges is crucial to maintaining a satisfied user experience and ensuring the success of apps on the platform. Explore the article below to learn what to do when apps not downloading from the Play Store issue appears.
Part I. 7 Usual Reasons Behind Apps Not Downloading in Google Play Store
The reasons below collectively contribute to the frustration users experience when apps are unable to download from the Play Store:
Connectivity Issues
Slow or unstable internet connections can interfere with the download process. It often leads to failed or delayed app installations. You will experience frustration when faced with connectivity issues, impacting your ability to access desired apps.
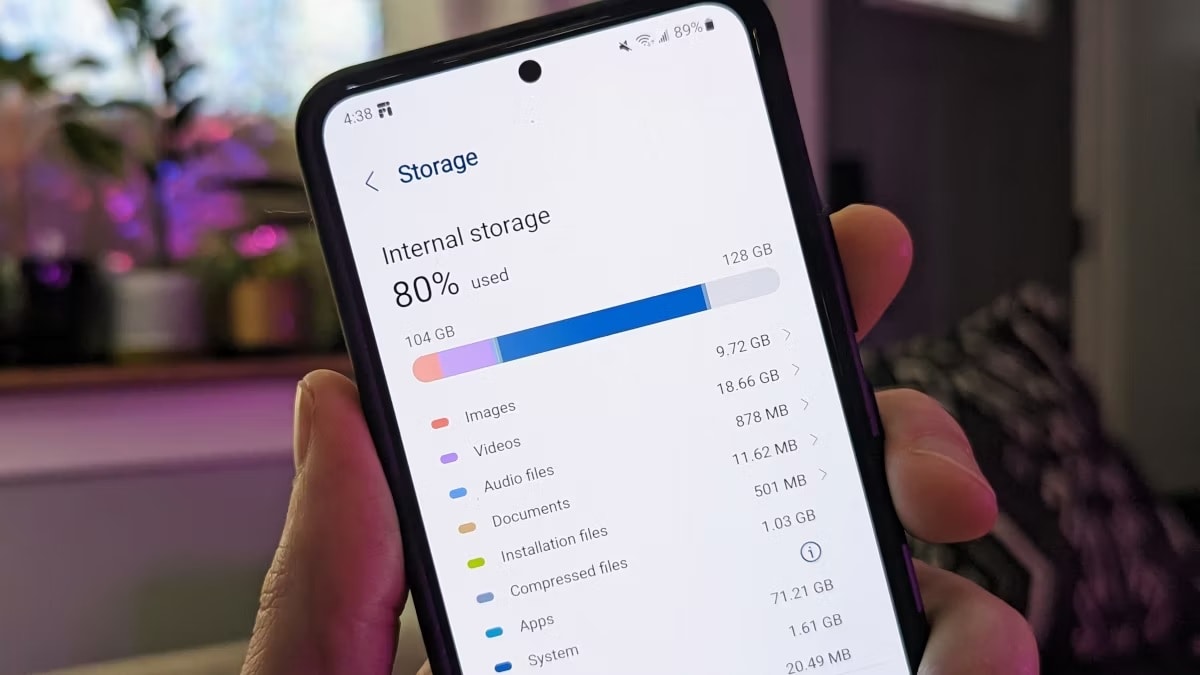
Insufficient Storage
Limited available storage on the Oppo Find N3 device prevents the installation of new apps. Users may find it challenging to manage their storage effectively. It can hinder the expansion of your app library and impact the overall device functionality.
Outdated Play Store Version
Running an outdated version of the Play Store can cause compatibility issues with the newest versions of apps. You’ll miss out on new features and improvements, affecting the overall user experience and the efficiency of the Play Store.
 OtsAV TV Webcaster
Google Account Authentication Problems
Issues with verifying Google accounts can restrict access to the Play Store. It prevents you from downloading or updating apps. Authentication problems pose a significant barrier, impacting your ability to stay current with app versions.
App Download Restrictions
Device settings or parental controls may impose restrictions on certain app downloads. You may encounter limitations in accessing specific apps. It can affect the Oppo Find N3 device’s versatility.
Incorrect Date and Time Settings
Inaccurate date and time settings on the Oppo Find N3 device can disrupt the Play Store’s functionality. You’ll face obstacles in downloading apps due to authentication errors or syncing issues. It can have a negative impact on the overall user experience.
Play Store Bugs and Glitches
Technical issues within the Play Store, such as bugs or glitches, can lead to failed downloads. You may encounter unexpected errors, causing uncertainty and potential distrust in the reliability of the app platform.
If you encounter any of these issues, having a reliable tool to fix them is essential. Wondershare Dr.Fone - System Repair offers a solution if you cannot download from the Play Store. The platform ensures you can download apps again with a high success rate in minutes.
Part II. Having a Third-Party Tool Is Essential To Safeguard Your Apps
Dr.Fone - System Repair is a dependable alternative offering a comprehensive solution to various Android-related problems. Its key features set it apart, making it an essential asset for users facing app download challenges.
4,307,222 people have downloaded it
Key Features
The summarized points show why Dr.Fone is a flexible and powerful tool for Android users with various phone models.
Supports up to 1000+ Android Models
Dr.Fone System Repair boasts compatibility with a vast range of Android models. It provides a universal solution for users regardless of their device. The extensive support ensures that users with diverse Android devices can rely on the tool for effective issue resolution.
Fixes All Kinds of Android Problems in Minutes
The tool is designed to address a wide array of Android problems. Whether it’s connectivity issues, authentication problems, or glitches within the Play Store, Dr.Fone - System Repair solves these issues within minutes. Its efficiency in tackling diverse problems makes it a valuable asset for users seeking a quick and reliable solution.
High Success Rate Without Data Loss
One of the standout features of Dr.Fone - System Repair is its high success rate in problem resolution without causing data loss. You can have confidence that your apps and important data remain intact throughout the repair process. It ensures a smooth solution and maintains the integrity of the user’s device and data.
When grappling with persistent issues hindering app downloads on the Google Play Store, having a reliable third-party tool becomes essential to safeguard your apps and ensure a seamless user experience. The next section will show you how to use the platform to fix the apps not downloading in the Google Play Store problem.

Part III. First Choice: Use Dr.Fone - System Repair for App Downloading Issues
Using Dr.Fone - System Repair to resolve app downloading issues is straightforward. Here are three simple steps to effectively address app-related challenges:
**Note:**It is highly recommended that you back up your Android data before using Dr.Fone for Android repair.
- Step 1: Download and install Dr.Fone - System Repair on your computer. Launch the program and select System Repair from the available options.
 LYRX is an easy-to-use karaoke software with the professional features karaoke hosts need to perform with precision. LYRX is karaoke show hosting software that supports all standard karaoke file types as well as HD video formats, and it’s truly fun to use.
safe & secure
3,143,540 people have downloaded it
- Step 2: Connect your Oppo Find N3 to the computer using a USB cable. Dr.Fone will detect your device, and you’ll be prompted to choose your device’s type. Select Android Repair.

- Step 3: Follow the on-screen instructions until the app downloads the correct firmware for your device. As it downloads, Dr.Fone will verify it and put your device details on display. You can install the firmware on your Oppo Find N3 by choosing Fix Now.
Step 4: Initiating the system repair process will be accompanied by a progress bar visible on the screen. Upon completion, a prompt window will emerge, presenting a completion message.
If you can download apps successfully, click Doneto close the tool.
If the problem persists, select TryAgain to rerun the process.
If you can’t download Dr.Fone for some reason, you can try these common fixes to try to resolve your app download issues on your device
## Part IV. 8 Other Methods of Resolving Common App Downloading IssuesHere are 8 other methods to troubleshoot and resolve common app downloading problems:
 EmEditor Professional (Lifetime License, non-store app)
Check Internet Connection
A stable internet connection is essential for downloading apps. Do an Internet signal check to ensure you are connected to a reliable Wi-Fi network or have a strong mobile data signal. If the connection is weak, consider switching to a more robust network.
Free Up Storage Space
Insufficient storage on your device can hinder app installations. Navigate to the Oppo Find N3 device settings, access the Storage section, and clear unnecessary files or apps. Creating more space ensures a smoother download experience.
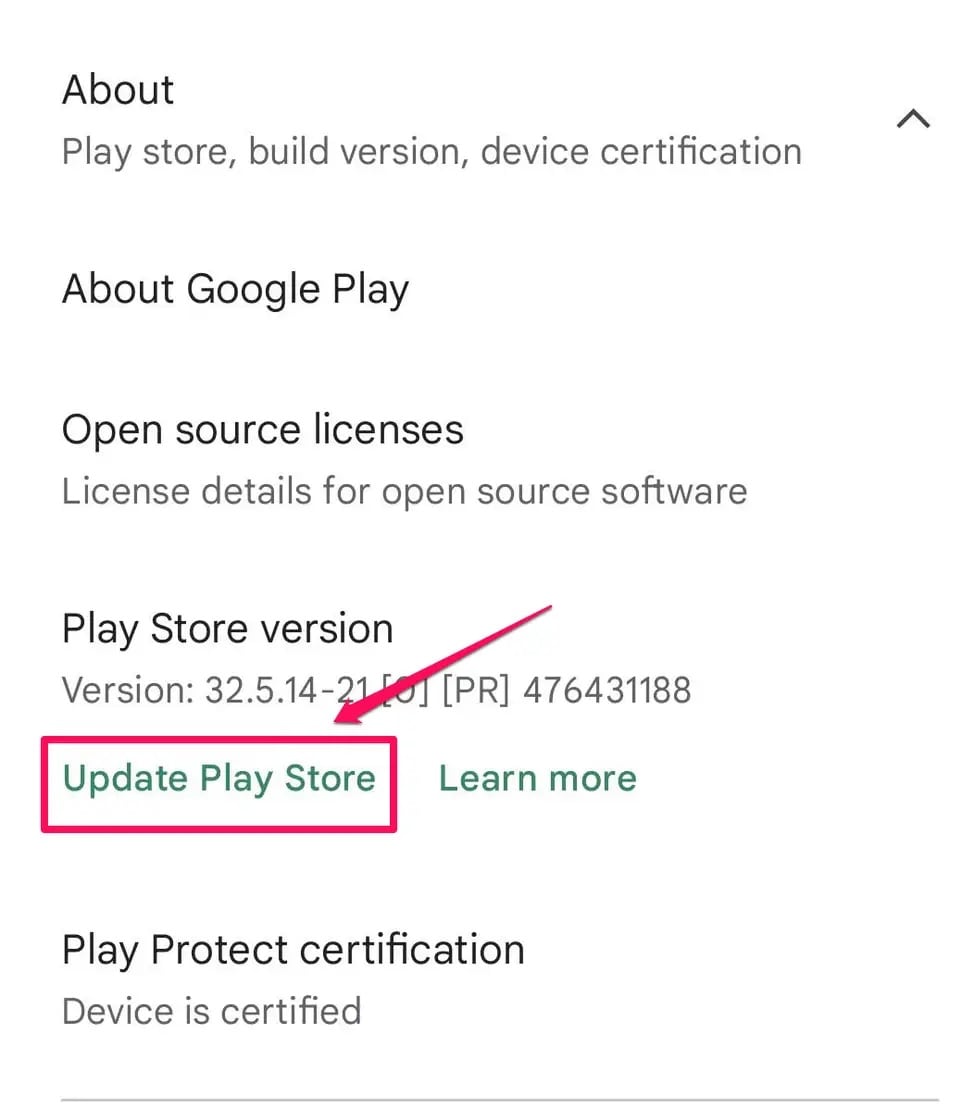
Update the Play Store
An outdated Play Store version may lead to compatibility issues. Open the Google Play Store, go to Settings, and tap the Play Store version. If an update is available, install it to ensure compatibility with the latest apps.
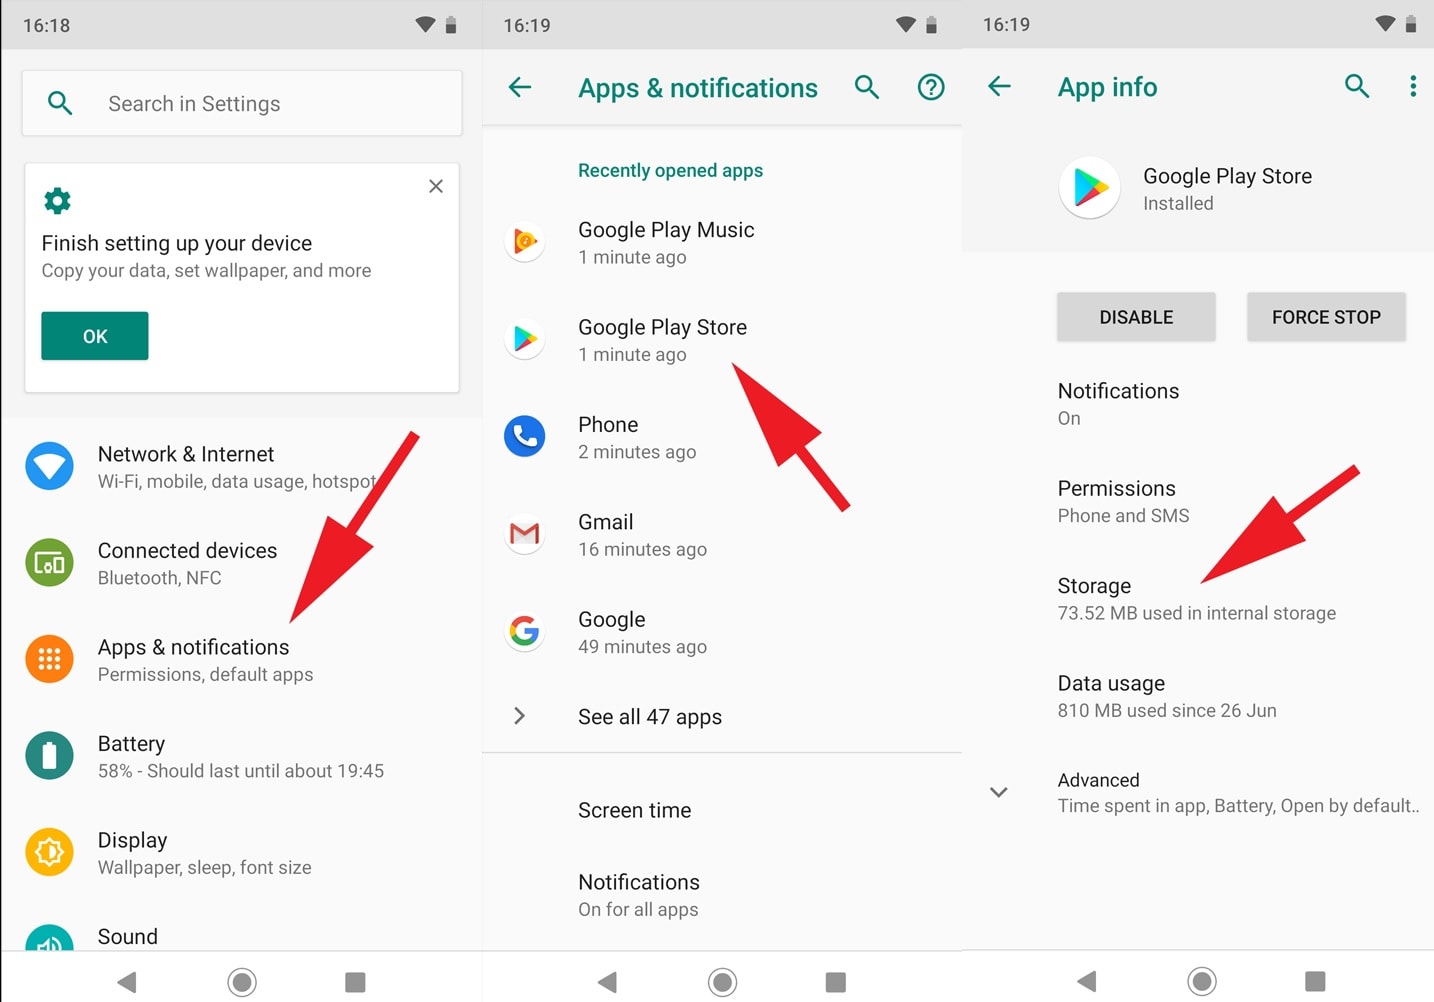
Clear Play Store Cache and Data
Cached data in the Play Store can sometimes cause download problems. Head to the Oppo Find N3 device settings and open Apps or Application Manager. Locate Google Play Store, and tap Storage. Clear both the cache and data to refresh the app.
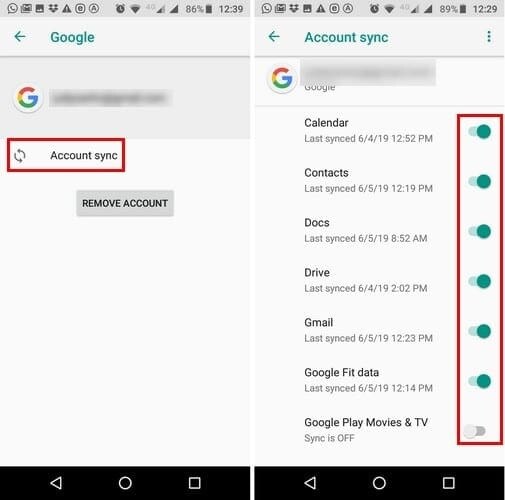
Verify Google Account
Authentication issues with your Google account can prevent app downloads. Confirm that your Google account is properly verified. Go to the Oppo Find N3 device settings, select Accounts, and ensure your Google account is active and synced.
 Project Manager - Asset Browser for 3Ds Max
 vMix HD - Software based live production. vMix HD includes everything in vMix Basic HD plus 1000 inputs, Video List, 4 Overlay Channels, and 1 vMix Call
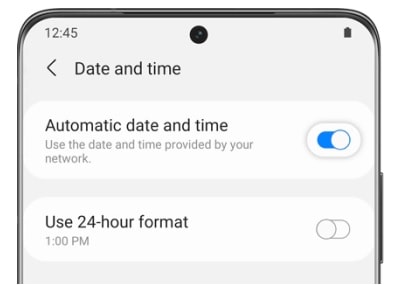
Check Date and Time Settings
Incorrect date and time settings may disrupt the authentication process. Verify that your device’s date and time are set correctly. Enable automatic date and time settings to ensure accuracy.
 Power Tools add-on for Google Sheets, Lifetime subscription
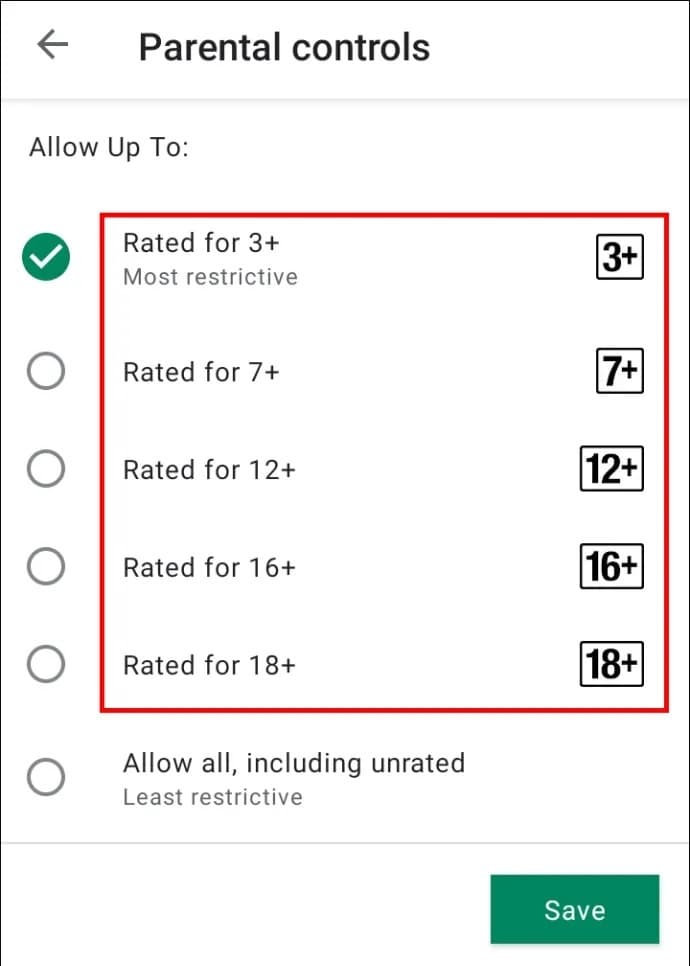
Review Download Restrictions
Device settings or parental controls might impose restrictions on certain app downloads. Examine the download restrictions in the Oppo Find N3 device settings and adjust them accordingly to allow for the installation of desired apps.
Restart the Oppo Find N3 device
Sometimes, a simple restart can resolve various issues. Power off your device, wait a few seconds and then power it back on. This can help refresh system processes and eliminate temporary glitches.
Conclusion
Ensuring a smooth app download experience demands attention to various factors. From connectivity to storage management, each step contributes to resolving download challenges. The careful review of date/time settings and download restrictions further enhances the process when you cannot download from the Play Store.
For persistent issues, consider Dr.Fone - System Repair. The app is a viable option, providing a comprehensive approach. Embracing these measures ensures you can easily fix apps that won’t download from the Play Store. Having a reliable tool beside you also fosters an uninterrupted and enjoyable downloading journey from the Play Store.
6 Solutions to Fix Error 505 in Google Play Store on Oppo Find N3
In case you are receiving the error code 505 while downloading an application from Google play store and have no clue what is it, then this is the right article for you. In this article we are covering the reasons behind the occurrence of Google play error 505. Not only that, we are also providing 6 solutions to fix the error code 505. Usually, this error is seen with Android 5.0 Lollipop version and occurs at the time when you try to install the already downloaded application making it hard to run the app.
Such an error is a kind of permission error. That is, in case you have two similar kinds of applications such as banking apps and both looking for similar kind of permission, causes conflict error named as error 505.
The occurrence chance is more in the old operating systems, 4 KitKat, Android version 4. Let us then proceed to know more about this error 505.
Part 1: Reasons for Google Play error 505

As per the report by some users, error 505 occurs in certain apps such as Weather App, SBI, ITV, Adobe Air 15, We Chat etc.
To have the right idea about the problem, we have listed all the reasons of it occurrence below:
- Google play store is not updated or refreshed (Causes the error during the downloading process)
- Due to installation of an outdated version (In case your Android version is outdated may result in error in the installation process)
- Cache memory(Is the redundant data occurs due to search history)
- Application is not compatible with the Android OS (If the app you are downloading is not the updated may cause error)
- Adobe air app
- Data crash (Many time app or Google play store crashed crashes after downloading it, reason may be some bugs, so many apps are open, less memory etc.)
Now that we know the reasons, let us also learn about the solutions that will guide you to resolve the error code 505.
 PCDJ DEX 3 for Windows & MAC is the total entertainment DJ software solution, offering audio, video, and karaoke mixing ability. Automatic beat-sync, smart looping, 4 decks, DJ MIDI controller support, Karaoke Streaming and much more.
Part 2: 6 Solutions to fix error code 505
Any error that occurs during downloading or installation process not only hinders with the new app but also takes a large amount of our time to solve the issue. To check that, let us go through the 6 solutions one by one.
Solution 1: One click to make error code 505 disappear
The most common cause for error code 505 pop-up is that Android system files that underpin the Google Play module are corrupted. To make error code 505 disappear in this condition, you should have your Android system repaired.
Dr.Fone - System Repair (Android)
One click to repair Android system and make error code 505 disappear
- Fix all Android system issues like error code 505, error code 495, error code 963, etc.
- One click to fix error code 505. No technical skills required.
- Supports all the new Oppo Find N3 devices like Galaxy S8, S9, etc.
- Easy-to-understand instructions provided on each screen.
4,999,459 people have downloaded it
Now, you just need to follow these Android repair steps to fix error code 505:
Note: Android repair needs to flash the system firmware, which may erase existing Android data. To prevent data loss, back up all the important data from Android to PC .
Step1: Download the Dr.Fone - System Repair (Android) program , install and launch it. The following interface will pop up.
Step2: Select the “Android Repair” among the 3 tabs, connect your Android to PC, and click “Start”.
Step3: Choose the correct device details from each field, confirm them and continue.
Step4: Boot your Android in download mode, then start downloading the firmware of your device.

Step5: After the Oppo Find N3 device firmware is downloaded, the tool will start repairing your Android.
Step6: When your Android is repaired, the error code 505 will disappear.
Solution 2: Check whether Download Manger is ON or not
Many times download manager is set to disable due to which you are not able to download or install the app. So, it is required to make a check whether the download manager is set on or off. So that your installation process will work properly. The process to enable the download manager is as follows.
>Go to Settings
>Select the Application Manger or App (Option depends upon the Oppo Find N3 device)
At the top, an option will appear
>Swipe right till you locate Download manager at top of the screen of the Oppo Find N3 device
>Then Select Enable

Enabling download manager to give permission to the Oppo Find N3 device to start the download or installation process.
Solution 3: Updating to the latest version of OS of your Oppo Find N3
Working with an old operating system is ok, but many times old version also creates some problem and is the main reason behind the occurrence of any bug or error. So, updating the older version act like a rescue to get rid of any such issue or bug. The Process of updation is quite simple; you just need to follow the below steps and your device is ready to get updated to the latest version. Steps are:
- >Go to Settings
- >Select about Phone
- >Click on System Update
- >Check for updates
- >Click on Update
- >Need to click on Install (if any update is available)

Solution 4: Clearing the cache memory from Google services Framework and Google play store
While browsing data online or through Google play store some cache memory get stored for the fast access to the pages. Below mentioned simple steps will help you in clearing out the cache memory from Google services framework and Google play store.
Process to clear the Cache memory for Google Services Framework
- >Go to Settings
- >Select Applications
- >Click on Manage Applications
- >Click to select ‘ALL’
- >Click on Google services framework
- >Select ‘Clear data and clear cache’
That will remove the cache memory of your Google services framework
Steps to Cache memory of Google Play Store
- >Go to Settings
- >Applications
- >Manage Applications
- >Click to select ‘ALL’
- >Select Google Play store
- >Clear data and clear cache
It will clear the cache of Google play store

Clearing the cache memory remove the extra temporary memory, thus free up space for the further installation process.
Solution 5: Reinstalling play store Updates
The reason behind the installation error code 505 might be Google play store updates.
Due to continuous updation of new apps and services Google Play store used to be flooded with so many updates or sometimes does not updated properly. That sometimes caused the problem in dealing with app installation. Resolving the issue is important to make your play store ready for future updation and installation.

- >Go to Settings
- >Visit Application Manager or Apps
- >Select Google Play Store
- >Click on Uninstalling Updates
- >A Message will appear ‘Change play store app to factory version’- Accept it
- >Now Open Google play store>It will refresh the updates within 5 to 10 minutes(So you need to keep your internet connection on while Google play store is updating its store for new updates.)

Solution 6: Third party App
In the case, error 505 occur due to the installation of two or more apps with duplicate permission of data, as many times we use to install two similar kind of app that creates the situation where both seeking out for somewhat similar permissions for the installation. The manual finding is a long and tiring process. Then you can take the assistance of ‘Lucky Patcher App’ to find out which app is creating the conflict. This app will assist you in finding out the duplicity if any and then modifying it. Through this app, once you will find out which particular app is causing the conflict, then you can delete that conflicting app from your phone so that problem of error code 505 gets sort out.
Download link: https://www.luckypatchers.com/download/

Note: If still, you are in the state of trouble to solve the issue of error code 505 then Google Play help center is here to look out all troubles related to app store and its service. You can check out the details by visiting the following link:
https://support.google.com/googleplay/?hl=en-IN#topic=3364260
Or call them at their call center number regarding the issue.


Bonus FAQ about Google Play error
Q1: What is a 505 error code?
The HyperText Transfer Protocol (HTTP) error 505: HTTP Version Not Supported response status code means that the HTTP version used in the request is not supported by the server.
Q2: What is a 506 error?
The 506 error code is a frequent error when operating the Google Play Store. You will sometimes see this error code when you are downloading an app. The app may seem to be downloading just fine when suddenly, near the end of the installation, an error occurs, and a message pops up saying, “App could not be downloaded due to an error 506.”
Q3: How to fix the 506?
Solution 1: Restart your device which can help solve most problems.
Solution 2: Remove the SD card safely.
Solution 3: Correct date and time if it is wrong.
Solution 4: Add your Google Account again.
Solution 5: Clear Google Play Store data and cache.
However, sometimes the five simple couldn’t work anymore. A system repair software can be helpful quickly. We really recommend the Dr.Fone - System Repair (Android) , only a few minutes, the error will be fixed.
Conclusion
Not being able to download or install the app is very frustrating and time-consuming also. Therefore, in this article, we went through the reasons behind the occurrence error code 505 as well as resolving the issue by following five effective methods. I hope that you would be able to sort out the error 505 by following above methods thus would be able to install the application without further delay.
- Title: Fix Cant Take Screenshot Due to Security Policy on Oppo Find N3 | Dr.fone
- Author: Ariadne
- Created at : 2024-07-30 10:16:34
- Updated at : 2024-07-31 10:16:34
- Link: https://howto.techidaily.com/fix-cant-take-screenshot-due-to-security-policy-on-oppo-find-n3-drfone-by-drfone-fix-android-problems-fix-android-problems/
- License: This work is licensed under CC BY-NC-SA 4.0.