
Fix Itel A60s Android System Webview Crash 2024 Issue | Dr.fone
Fix Itel A60s Android System Webview Crash 2024 Issue
In recent months, the term “Android WebView crash 2023“ has become a common search term among Android users seeking solutions to these app crashes . The issue has been particularly prevalent on Itel A60s devices, but it has also affected users of other Android models.
Android WebView for Android apps allows you to see and interact with web pages without leaving your app. But lately, it’s been causing more headaches than it’s worth.
So, what’s going on with Itel A60s Android System WebView, and what can you do to fix its issues? Let’s take a look. This article will shed light on Itel A60s Android System WebView crashing apps, helping you understand what triggers them, how to identify them, and what you can do to prevent them from happening again.


Part 1: What Should We Know About Itel A60s Android System WebView Crashes?
This year, the term “Android WebView crash 2023“ has become a familiar and dreaded phrase. This issue has plagued Android users, causing app crashes, freezing , and frustration. But what exactly is Android WebView, and what triggers these apps to crash?
Android WebView is an integral component of Android apps, acting as the invisible engine that renders web content within these apps. It allows users to seamlessly browse websites, watch videos, and interact with web pages without switching to a separate browser. However, when WebView crashes, it disrupts this integrated experience, causing apps to malfunction.
Several signs can indicate an impending or ongoing Android WebView crash. These include:
- App Freezing
One of the earliest signs of an Itel A60s Android System WebView crash is the app freezing. The app may become unresponsive, refusing to respond to your taps or gestures.
- Unexpected App Closures
Another common sign is unexpected app closing. The app may shut down without warning, abruptly ending your activity. Itel A60s Android System WebView crashing apps can be disruptive if you are in the middle of a conversation, shopping online, or filling out an important form.
- Error Messages
Error messages can also provide valuable clues about the impending crash. These messages may appear as pop-ups or be displayed within the app itself.

- Slow Loading Times
Slow loading times can also be a sign of an impending crash. If webpages within the app take unusually long to load or images and other content appear pixelated or distorted, it could be a sign that Itel A60s Android System WebView is struggling to handle the workload.
But why does WebView crash Android smartphones? The answer involves several factors:
- Updates and Compatibility Issues
Updates are often intended to improve software stability and compatibility, but in some cases, they can introduce new bugs or compatibility issues that lead to crashes. It is particularly evident when app developers and WebView developers release updates that don’t fully align, causing conflicts.
- Insufficient Memory
Itel A60s Android System WebView requires a certain amount of memory to operate properly. If your device is running low on memory, it can cause Itel A60s Android System WebView to crash. It is more likely to happen on older devices with less RAM.


- Outdated Itel A60s Android System WebView
The WebView app is responsible for rendering web content within Android apps. Using an outdated version of WebView can introduce known bugs and security vulnerabilities that can cause crashes.
- Conflicts With Other Apps
WebView might crash if it conflicts with other resources or processes running on the Itel A60s device. It can happen if the Itel A60s device runs low on memory or other resource-intensive apps compete for system resources.
In the next section, you’ll explore potential solutions to keep your apps running smoothly.
Part 2: Android WebView Crashes? Here Are Quick and Proven Solutions
Now you’ve identified the signs and causes of Itel A60s Android System WebView crashing apps on your phone. While these issues can be frustrating, there are several quick and proven solutions to fix them.
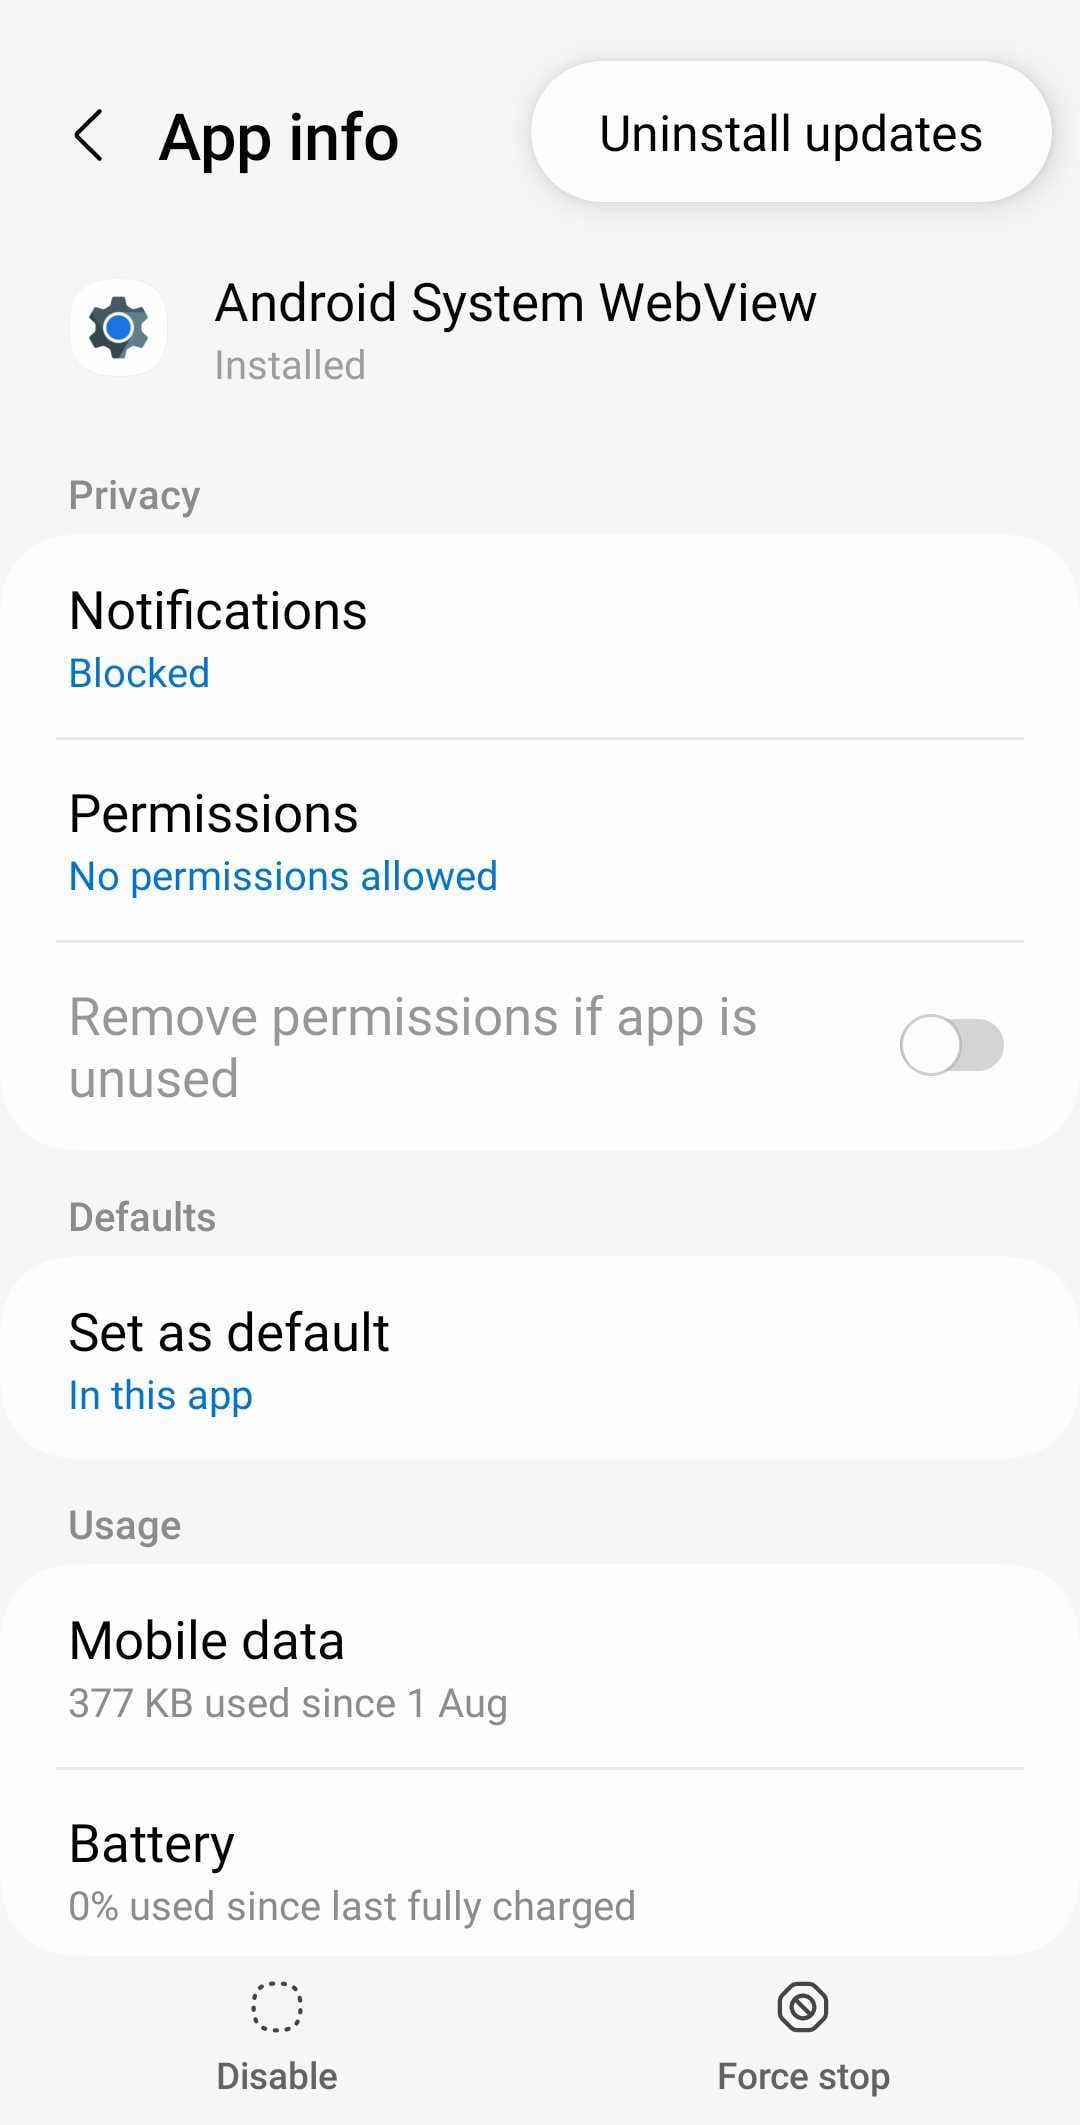
Uninstall WebView Updates
If you’re experiencing apps crashing after a recent update, consider uninstalling those updates. This action can potentially revert to a more stable version of Itel A60s Android System WebView.
To do this on your Itel A60s, navigate to Settings > Apps, then select Itel A60s Android System WebView. Tap the menu icon in the top right corner and tap Uninstall updates.
Update Android WebView
Regularly updating Itel A60s Android System WebView to the latest version is crucial for maintaining compatibility and addressing known bugs. Google releases updates to address these concerns, ensuring optimal performance and stability.
Check for available updates on Itel A60s devices by navigating to Settings > Apps. Then, select Itel A60s Android System WebView and tap App details in-store. If an update is available, tap Update to install it and restart your phone.
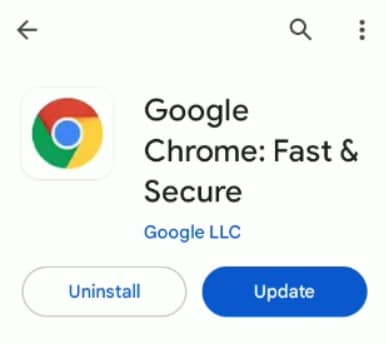
Update Google Chrome
Android WebView is closely tied to Google Chrome, and issues with Chrome can sometimes affect WebView functionality. As such, updating Chrome to the latest version can help address Android System and WebView forcibly closing your phone’s apps.
Open the Google Play Store and search for Google Chrome. If an update is available, tap Update to install it, then restart your device.
Clearing Cache and Data for Android WebView
Clearing the cache frees up phone storage and helps the app run more efficiently. To clear Itel A60s Android System WebView’s cache and data, go to Settings > Apps and select Itel A60s Android System WebView. Tap on Storage and tap Clear cache on the lower right corner of your screen.

Restart Device
A simple restart can often resolve temporary glitches or conflicts that might be causing Android WebView crashes. The specific steps to restart your phone will vary depending on your device type.
Check Internet Connection
A stable internet connection is essential for Itel A60s Android System WebView to render web content properly. If the internet connection is unstable or down, it can lead to crashes. Ensure you have a stable internet connection before using WebView-based apps.
Update Device Software
OS updates may introduce changes to the Itel A60s Android System WebView that make it more compatible with newer web standards and technologies. It can enhance the performance and stability of apps that rely on WebView for web content.
Check for available software updates by going to Settings > Software Update. If an update is required, tap on Download and install.

While problems like when the Android System WebView crashes Android phones are common, they don’t have to be a persistent problem for Itel A60s users. It’s also equally important to have effective solutions when app crashes occur. This is where Wondershare Dr.Fone steps in as a reliable and comprehensive solution for restoring app stability and overall phone performance.
Part 3: Restoring Apps and Phone Stability: A Step-by-Step Guide
Dr. Fone’s System Repair tool can help you resolve common Android scenarios, including Google Play Store malfunctions and persistent app crashes.
How To Use Dr.Fone for Itel A60s Android System WebView Crashing Apps?
Before attempting any repairs, it is crucial to back up your Itel A60s to prevent data loss. Once you have a secure backup, follow these steps to fix WebView app crashes and restore your Itel A60s to its optimal performance.
- Step 1: Download the Dr.Fone toolkit. Next, install the software on your desktop and launch it.
 safe & secure
3,090,920 people have downloaded it
- Step 2: Connect your Itel A60s to your computer using a USB cable. Dr.Fone will automatically detect and establish a connection.
- Step 3: Select the System Repair function from the Toolbox homepage and choose Android to confirm your device type.

- Step 4: Click Start to begin the process of fixing Itel A60s Android System WebView crashes. Next, choose your device details and follow the in-app instructions to put your device in Download mode.


- Step 5: Dr.Fone will analyze your device’s system and download the firmware to solve the root cause of the issue.

- Step 6: Confirm your device information in the dialogue box. Dr.Fone will proceed to repair the detected WebView-related problems.

- Step 7: Once the repair is complete, your device will restart, and Itel A60s Android System WebView crashing apps should no longer occur.

More Articles About Android System:
5 Ways to Do With & Access Android Phone with Broken Screen
Google Play Services Won’t Update? 12 Fixes are Here!
Easy Ways to Bypass Google Account Verification (FRP) On Android Phones

Conclusion
The “Android WebView crash 2023“ issue was widespread for many Android users. The common issues encountered were app crashes, slow loading times, and error messages. Fortunately, these problems are manageable with the right approach.
By understanding the signs and causes of Itel A60s Android System WebView crashes, you can take proactive measures to prevent them. Quick fixes such as clearing cache and data or updates can often resolve the issue promptly.
For more comprehensive troubleshooting, Dr. Fone’s mobile solution offers a reliable and user-friendly approach. Its advanced capabilities effectively tackle app crashing issues, providing you peace of mind that your phone is functioning optimally.
safe & secure
4,684,259 people have downloaded it
How to Fix the Soft Bricked Itel A60s?
Bricked phone is a serious problem, as your brick smartphone could be suffering from a soft brick or hard brick problem, and must be dealt with carefully. It is very common to see a brick smartphone these days. If you are wondering what exactly is a bricked phone, here is your answer.
A bricked phone, hard brick or soft brick, is a smartphone which refuses to start or boot all the way up the home/main screen of the Itel A60s device. This issue is observed within most Android phones because users have a tendency to tamper with the Itel A60s device settings, flashing new and customized ROMs and tweaking with the essential files. Playing around with the phone’s internal set-up leads to such errors, worst of them being a brick smartphone. Usually, a bricked phone does not switch on and stays frozen at the Itel A60s device logo, a blank screen or even worse, doesn’t respond to any command, even the power on command.
If you are confused about the soft brick and hard brick problems and looking for solutions to fix your priced phone, then here is all you need to know.
Read on to find out more.
Part 1: What is the difference between soft brick and hard brick?
To begin with, let us understand the basic difference between a soft brick and hard brick issue. Both versions of a bricked phone prevent it from booting but differ in their causes and gravity of the problem.
A soft-brick problem is caused merely by a software error/crash and makes your device switch on automatically every time you manually turn it off. This phenomenon is referred to as Boot Loop. Soft bricked Android phones are not as difficult to fix as the hard bricked Android phones. It is convenient to say that a soft bricked phone only boots up half-way and not fully, whereas a hard bricked device does not switch on at all. A hard brick error is thus caused when the kernel, which is nothing but an interface for the software to communicate with the hardware, is tampered with. A hard bricked phone is not recognized by your PC when plugged in and is a serious problem. It requires troubleshooting techniques and cannot be easily fixed as the soft brick problem.

Hard bricked phones are a rare sight, but the soft brick is very common. Given below are ways to fix a soft brick Android phone. The techniques listed here are the best and the most efficient ways to get your phone back to its normal working conditions without losing your important data or damaging your device or its software.
 Easy and Safe Partition Software & Hard Disk Manager
Part 2: Stuck at the Boot Loop
This is the first sign of a soft bricked Android phone. Boot Loop is nothing but when your phone does not remain switched off and turns itself on automatically, and freezes at the logo screen or blank screen, every time you manually try to power it off.
Stuck at boot loop problem can be fixed by clearing your Cache partitions. These partitions are nothing but storage locations for your modem, kernels, system files, drivers and built-in Apps data.
It is advisable to clear Cache partitions regularly to keep your phone free from such glitches.
Since the phone refuses to boot, Cache can be cleared from entering into the Recovery Mode. Different Android devices have different ways to put it in recovery mode. Normally pressing the power key and volume down key helps, but you may refer to your phone’s guide for better understanding and then follow the steps given below to clear the cache partition:
Once you are the recovery mode screen, you will see a number of options as shown in the screenshot.

Use the volume down key to scroll down and select ”Wipe cache partition” as shown below.
 >
>
After the process is completed, select “Reboot System” which is the first option in the recovery mode screen.
This method will help you erase all the clogged up and unwanted files. You may loose some App related data, but that is a small price to pay to fix your bricked phone.
If this method does not boot up your brick smartphone and the problem still persists, there are two more things you can try. Read ahead to find out about them.
Part 3: Booting straight into recovery mode
If your bricked phone does not boot up to your Home Screen or Lock screen and instead boots directly into Recovery Mode, there is not much left to do. Booting straight into recovery mode is undoubtedly a soft brick error but it also indicates a possible problem with your current ROM. The only option you have to flash a new ROM to reboot your bricked phone back to its normal functioning.
To flash a new ROM:
Firstly, you must root your phone and unlock the Bootloader. Every phone’s mechanism to unlock the bootloader is different, thus, we suggest to refer to your user manual.
Once the Bootloader is unlocked, take a backup of all your data by selecting “Backup” or “Android” back in recovery mode. The process should not take long and all you need to do is tap “OK” to config backup.

In this step, download a ROM of your choice and store it in your SD Card. Insert the SD Card in your phone to begin the flashing process.
Once at the recovery mode, select “Install Zip from SD Card” from the options.

Scroll down using the volume key and use the power key to select the downloaded ROM.

 Project Manager - Asset Browser for 3Ds Max

This might take a few minutes of your time, but once the process is complete, reboot your phone.
Hopefully, your bricked phone will not boot normally and work smoothly.

Part 4: Booting straight into Bootloader
If your bricked phone boots straight into Bootloader, then this a serious issue and must not be taken lightly. Flashing a new ROM or clearing cache partitions are of little help in such a brick smartphone situation. Booting straight into Bootloader is a peculiar soft bricked Android phone feature and can be tackled only by downloading and flashing your original ROM from the manufacturer. In order to do so, a detailed study about your manufacturer’s ROM, ways to download and flash must be carried out. Since different Android phones come with different types of ROMs, it difficult to cover all the aspects about the different types of ROMs.
Brick smartphone problem has become more prominent than phone freezing or hanging issue. Android users are often seen looking for solutions to fix their soft brick and hard brick phones. Android phones are prone to get bricked and thus, it is important for us to know about the three techniques given above. These methods have been tried, tested and recommended by ay affected bricked phone users. Therefore, these tips are reliable and worth a try. So if your phone acts stubborn and refuses to boot normally, examine the problem carefully and adopt one of the solutions given above which best suits your situation.
 LYRX is an easy-to-use karaoke software with the professional features karaoke hosts need to perform with precision. LYRX is karaoke show hosting software that supports all standard karaoke file types as well as HD video formats, and it’s truly fun to use.
8 Workable Fixes to the SIM not provisioned MM#2 Error on Itel A60s
SIM cards are small chips that act as a connecting medium between your cell phone and your carrier. It is programmed to help your carrier identify your cell phone account with certain information. And eventually, you are enabled to make calls and to make use of mobile internet. Now, if your device is showing “SIM not provisioned” on Android then it signifies that the connection to carrier network cannot be established or perhaps, your carrier isn’t able to identify your cell phone account.

Part 1. Why does the error “SIM not provisioned MM#2” pop up?
There can be numerous reasons behind the pop up that reads “SIM not provisioned” on Android. But basically, it most probably affects the users who have registered a new SIM card. If you get to experience this issue in other situations or if the SIM is not working in Android, then the problem is with the SIM card and needs to be replaced. Anyways, here is a list of situations when the “SIM not provisioned” error may bother you.
- You got a new SIM card for your new phone.
- You are transferring your contacts into the new SIM card.
- In case, the carrier network provider’s authorization server is unavailable.
- Perhaps, you’re out of the reach of the carrier coverage area and that too, without active roaming agreement.
- Though new SIM cards work flawlessly. But it is often necessary to get your SIM card activated due to security reasons.
Just in case, you haven’t bought any new SIM card and the one you were using was working fine until now, then the most probable reasons behind it could be listed below:
- If your SIM card is too old, possibly it might have gone dead, try replacing it.
- Perhaps, the SIM card was not properly inserted into the slot or there might be some dirt between the SIM and smartphone pins.
A yet another reason could be that your SIM card got deactivated by your carrier provider as it could have been locked to a particular phone. Now, if you insert such a SIM card to another device or a new device even, you may get to witness a message that reads “SIM not valid”.
2.1 One click to fix the “SIM not provisioned MM#2” error on Android
Without talking any further, let’s straightly get to the first and the easiest way to repair SIM not provisioned issue on Android. For this purpose, we’re glad to introduce Dr.Fone - System Repair (Android) , one of its kind of tool that is capable of repairing almost all sort of Android OS issues in just a matter of few clicks. Whether it is SIM not provisioned on Android or SIM not working in Android or your device stuck in a boot loop or black/white screen of death. The most probable reason for these errors is Android OS corruption. And with Dr.Fone – Repair (Android) you can efficiently and effectively repair your Android OS in a hassle freeway.
 NeoDownloader - Fast and fully automatic image/video/music downloader.
Dr.Fone - System Repair (Android)
Android repair tool to fix “SIM not provisioned MM#2” error
- Fix any type of Android system issue with ease.
- Even novice users can use it without any hassle.
- Compatible with all major Itel A60s smartphone models.
- Highest success rate in the market for fixing Android issues.
- Supports all Android OS versions.
3981454 people have downloaded it
Step by step Tutorial to fix “SIM not provisioned MM#2” error
Step 1. Connect your Itel A60s
Download and launch the Dr.Fone toolkit on your computer and then opt for the “System Repair” option from the main interface. Meanwhile, get your Itel A60s connected with the computer using a genuine cable.
Step 2. Opt for Android Repair and key in important information
Now, hit on the “Android Repair” from the 3 options on the left, followed by hitting the “Start” button. From the upcoming screen, you’ll be asked to key in important device-related information, like brand, model, country, and carrier details. Hit “Next” afterward.

Step 3. Boot your device in Download mode
You must put your device in Download mode for better repairing of your Android OS. Simply follow the onscreen guide to boot your Android in DFU mode and hit “Next” thereafter. Once done, the software will automatically start downloading the most compatible and recent firmware for your device.
Step 4. Initiate Repairing
As soon as the download completes, the software verifies the firmware and automatically initiates repairing your Itel A60s. Within a short period, you’ll notice that your Itel A60s has been successfully repaired.
 Power Tools add-on for Google Sheets, Lifetime subscription
 safe & secure
2.2 Ensure the SIM card is not dirty or wet
At times, the issue can be as simple as cleaning your SIM card and SIM slot properly. Ensuring that SIM is not wet either and then putting it back into its place. If this works, then the SIM not working in Android was due to the dirt or moisture that was preventing proper contact between SIM card pins and smartphone circuit.
2.3 Insert the SIM card correctly
If your SIM card was working properly until yet, there is a good possibility that the SIM card may have moved a bit from its actual location. Eventually, there is poor contact between the SIM card pins and the circuit. Try inserting your SIM card properly with the following steps.
- Power off your Itel A60s and with the help of Q pin, eject the SIM card holder from the SIM slot of your device.
- Now, grab a soft rubber pencil eraser and gently rub it in on the gold pins of SIM card to clean them properly. Then, with the help of a soft cloth wipe away the rubber residue from the SIM card.
- Next, push the SIM back into the SIM card holder properly and push it back into the SIM slot now.
- Turn your device back on and look if your SIM not provisioned on the Android issue is resolved or not.
2.4 Activate the SIM card
Usually, when you buy a new SIM card, it gets automatically activated within 24 hours of being plugged into a new device. But if that’s not happening in your case and you’re wondering how to activate SIM card, make use of the three options below to enable activation:
- Call your carrier service provider
- Send an SMS
- Log on to your carrier’s website and look for the activation page over it.
Note: The aforementioned options are straightforward and are quick ways to enable activation. It depends on your carrier network whether they support them.
2.5 Contact your carrier
Even if your SIM isn’t activated, grab another working device to make a phone call to your carrier or network. Ensure, to explain the entire situation and the error message to them. Be patient while they investigate the issue. It may eat up a heck load of time or may get resolved in a few minutes that completely depend upon the complexity of the issue.
 Forex Robotron Basic Package
2.6 Try the other SIM card slot
A yet another reason why SIM not working in Android can be because of the SIM card slot might have gone corrupted. Thanks to the dual SIM technology, you do not have to rush immediately to get it to check or repair. You can simply rule out this possibility by ejecting the SIM card from its original SIM slot and then replacing it into the other SIM card slot. If this solution did work out for you then it is obvious that the problem was with the SIM card slot that got corrupted. And hence, it was triggering SIM not responding issue.
 Epubor Audible Converter for Mac: Download and convert Audible AAXC/AA/AAX to MP3 with 100% original quality preserved.
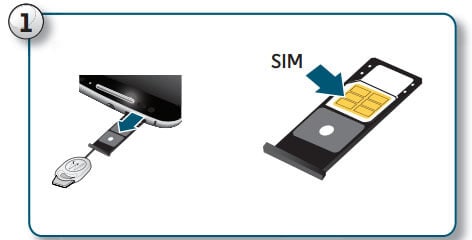
2.7 Try the SIM card in other phones
Or just in case, you’ve still no joy and the SIM not provisioned on Android message is bothering you. Try making use of another Android device. Eject the SIM card from the Itel A60s device which is creating problems and try plugging it into other Itel A60s] and other smartphones. Perhaps, this will let you know whether the issue is with your device only or with the SIM card itself.
2.8 Try a new SIM card
Still, wondering how to fix SIM not provisioned? Perhaps, nothing worked for you, right? Well, on that note, you must head to your carrier store and request a new SIM card. Also, inform them about the “SIM not provisioned MM2” error, they will be able to execute proper diagnostics over your old SIM card and hopefully get it resolved. Or else, they’ll equip you with a brand new SIM card and swap the new SIM card into your device and get it activated in the meantime. Eventually, restoring the normal functioning of your device.
Conclusion
In wrapping up, SIM not provisioned errors on Android can be troubling, but they’re certainly fixable. There are several methods, from a simple device restart to reaching out to your network provider. But if these don’t work, we suggest trying Dr.Fone - System Repair (Android) . This tool is known for its ability to handle an array of Android issues and could be just what your device needs. Navigate your tech challenges with ease using Dr.Fone.
safe & secure
- Title: Fix Itel A60s Android System Webview Crash 2024 Issue | Dr.fone
- Author: Ariadne
- Created at : 2024-07-30 10:22:07
- Updated at : 2024-07-31 10:22:07
- Link: https://howto.techidaily.com/fix-itel-a60s-android-system-webview-crash-2024-issue-drfone-by-drfone-fix-android-problems-fix-android-problems/
- License: This work is licensed under CC BY-NC-SA 4.0.