
Fix the Error of Unfortunately the Process.com.android.phone Has Stopped on Vivo V27 | Dr.fone
Fix the Error of Unfortunately the Process.com.android.phone Has Stopped on Vivo V27
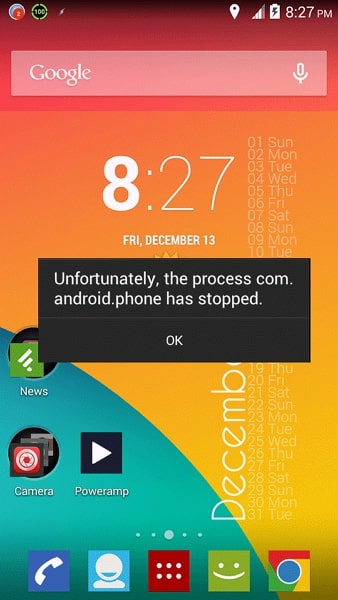
Nowadays, smartphones are integral to life. They serve as your communication lifeline and powerful personal assistant. However, it can be frustrating when a sudden error disrupts our phone’s functionality. One common error Android users encounter is the “Unfortunately, The process.com.android.phone has stopped” error. Fear not if you have come across this error message on your Vivo V27.
This beginner’s guide is here to help you understand the causes of this problem. It will also provide you with practical “unfortunately the phone has stopped solutions.”
Part 1: Learn Why Unfortunately the process.com.android.phone Has Stopped
The error message “Unfortunately, the process com.android.phone has stopped“ typically appears on Android devices when there is an issue with the Phone app. Issues with underlying processes responsible for handling phone-related functions are also a cause.
It can prevent you from making or receiving phone calls, accessing contacts, or using other phone-related features. Following are some of the possible reasons why you may encounter this error:
App or System Update
When you update your device’s OS or the Phone app itself, it is possible to encounter bugs or compatibility issues. These issues can lead to the Phone app crashing and displaying this error message. Sometimes, the updated software may not work with the existing configurations of the Phone app. It results in instability which causes this error.
App Cache/Data Corruption
The Phone app relies on cached data and stored settings to function properly. If the cache or data of the app becomes corrupted, it can cause the Phone app to malfunction. The reasons include interrupted app installations or updates, improper shutdowns, or software conflicts. As a result, you may see the error message indicating that the process com.android.phone has stopped.
Insufficient System Resources
Android devices need sufficient memory (RAM) and processing power to run apps smoothly. If your device is running low on memory or processing capacity, it may struggle to handle the Phone app and its processes. It can lead to crashes and the error message. Running many resource-intensive apps at the same time also causes this issue. Other reasons include too many background processes that contribute to this error.
Conflicting Third-Party Apps
Third-party apps installed on your device can sometimes conflict with the Phone app. These conflicts can occur for various reasons, such as incompatible app versions. The software bugs within the third-party apps or configurations can also clash with the Phone app. Such conflicts can disrupt the normal operation of the Phone app. The result of all this trigger the error message.

Software or Firmware Glitches
Software glitches or firmware issues can occasionally occur in Android devices. These glitches can affect the functioning of system processes, including the Phone app. They may arise from programming errors and system inconsistencies. Sometimes unexpected interactions between different OS components can also lead to this error.
Part 2: 100% Working Fixes To Fix Unfortunately the process.com.android.phone Has Stopped
Having been denied access to your Phone can cause a lot of issues. Luckily, many simple fixes to the “process.com.android.phone has stopped“ error exist. These solutions have worked for many users, and by following them, you may be able to resolve the issue too. Given below are the top 8 fixes to resolve this error and restore your device’s phone functions:
Fix 1: Restart/Reboot your Android Device
One of the simplest yet effective solutions to tackle the “Unfortunately, the process com.android.phone has stopped“ error is to reboot your Vivo V27. Restarting your device can often resolve temporary software glitches or conflicts. This fix requires no technical expertise.
So, it is worth trying before moving on to more complex solutions. Follow the guide below to restart your Vivo V27 and potentially fix the error:
- Step: Long-press your Vivo V27’s “Side” key and wait for the power menu to appear. Here, select “Restart” to initiate the reboot of your phone.


Fix 2: Re-insert the SIM Card
There is also a chance that the reason you are seeing this error message relates to the SIM card. A loose or improperly inserted SIM card can cause disruptions in the phone’s communication functions. As a result, you see the “Unfortunately, the process com.android.phone has stopped“ error.
To fix this error, you can remove the SIM card and then re-insert it. If the issue is actually related to a SIM card, the issue will get resolved after you resolve the problem.

Fix 3: Clear the Cache and Data of the Phone App
The “Unfortunately, the process com.android.phone has stopped“ error is connected to the Phone app. In this situation, clearing the cache and data of the Phone app itself can often resolve the issue. This fix focuses on removing any corrupted or conflicting data within the app.
Once the corrupted data is gone, it will restore the Phone app to proper functioning. Here is how to clear the cache and data of the Phone app on an Android device:
- Step 1: Find the Phone app on your Vivo V27 and long-press its icon. A small menu will pop up where you need to select “App Info.”

- Step 2: It will lead you to detailed information about the Phone app. Here, press “Storage,” and following that, you will see the “Clear Cache” and “Clear Data” options. Use them in the same order to clear the cache and data of the Phone app.

Fix 4: Disable Automatic Updates Feature
In some cases, this error may occur due to conflicts or compatibility issues with the automatic app updates feature. The automatic update on your Vivo V27 keeps your apps updated. Disabling this feature temporarily can help resolve the problem.
As a result, you will be able to use the Phone app without interruptions. To disable the automatic updates option on the Google Play Store, you can use the following steps:
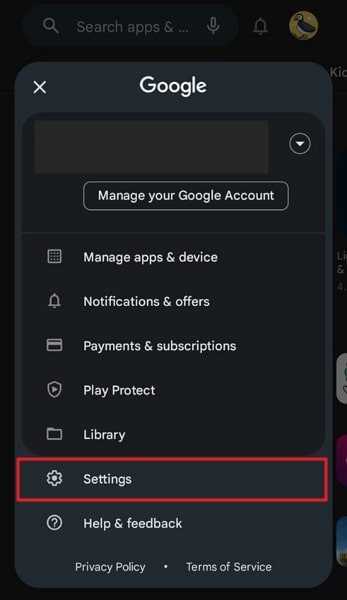
- Step 1: Navigate to the Google Play Store app on your Vivo V27 and launch it. Next, tap on the profile icon in the screen’s top right corner. From the options presented, select “Settings.”
- Step 2: In Settings, press “Network Preferences” to expand the option. Now, open the “Auto-update apps” settings and enable the “Don’t auto-update apps” option.

When dealing with this error, clearing the cache and data of all apps on your Vivo V27 can also help. Doing this will remove any corrupt or conflicting data that might be causing the issue. This fix targets the overall app ecosystem on your device.
It intends to ensure a clean slate and potentially resolve the error. Use the following guide to clear the cache and data of all apps:
- Step 1: Access your Vivo V27’s Settings and tap the “Apps” option. It will lead you to all the apps running on your phone. Here, select an app to see detailed app info.

- Step 2: On the app info screen, scroll down and press “Storage.” Now use “Clear Cache” to clean the app’s cache and “Clear Data” to erase the app’s data. Repeat the same process for all the apps installed on your device.

Fix 6: Clear SIM Toolkit Cache and Data
It is worth considering the SIM Toolkit is a potential source of the problem. The SIM Toolkit is an app that provides functionality related to your SIM card. Its functions include accessing value-added services and managing mobile network settings. Clearing the cache and data of the SIM Toolkit app can help resolve this issue. The steps you need to clear the cache and data of this app are the following:
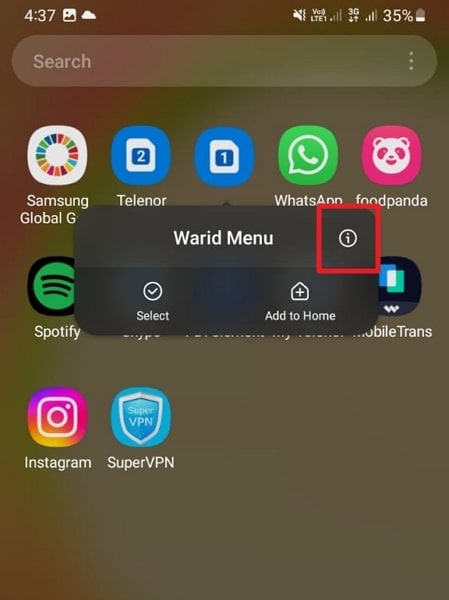
- Step 1: On your Vivo V27, find the SIM Toolkit app. After finding it, press and hold its icon until a short menu appears. Choose “App Info” from the available options to access its settings.
- Step 2: Now, you need to tap “Storage” to proceed. On the next screen, first, tap “Clear Cache” to clean the cache, and later press “Clear Data.”

Key features:
• Import from any devices and cams, including GoPro and drones. All formats supported. Сurrently the only free video editor that allows users to export in a new H265/HEVC codec, something essential for those working with 4K and HD.
• Everything for hassle-free basic editing: cut, crop and merge files, add titles and favorite music
• Visual effects, advanced color correction and trendy Instagram-like filters
• All multimedia processing done from one app: video editing capabilities reinforced by a video converter, a screen capture, a video capture, a disc burner and a YouTube uploader
• Non-linear editing: edit several files with simultaneously
• Easy export to social networks: special profiles for YouTube, Facebook, Vimeo, Twitter and Instagram
• High quality export – no conversion quality loss, double export speed even of HD files due to hardware acceleration
• Stabilization tool will turn shaky or jittery footage into a more stable video automatically.
• Essential toolset for professional video editing: blending modes, Mask tool, advanced multiple-color Chroma Key

Fix 7: Perform Factory Reset
If all previous fixes have been unsuccessful, performing a factory reset is also an option to resolve this issue. It is a drastic measure that can potentially address underlying software issues. However, it’s important to note that a factory reset will erase the entire data and settings of your device.
So, it’s crucial to back up your important files before proceeding with this fix. By doing so, you can restore your device to its original state and eliminate the error. Use the detailed guide described below to factory reset your Vivo V27:
- Step 1: Start by launching the Settings app and selecting “General Management.” Here, choose “Reset,” and following that on the next screen, tap “Factory data reset.”

- Step 2: After tapping “Factory data reset,” hit the “Reset” option. Next, enter your Vivo V27 PIN to confirm the process, and use “Delete All” to start the factory reset process.
 With Screensaver Wonder you can easily make a screensaver from your own pictures and video files. Create screensavers for your own computer or create standalone, self-installing screensavers for easy sharing with your friends. Together with its sister product Screensaver Factory, Screensaver Wonder is one of the most popular screensaver software products in the world, helping thousands of users decorate their computer screens quickly and easily.
Fix 8: Try Wondershare Dr.Fone - The Best and Most Reliable Android System Repair Tool
It must be a frustrating experience to try one solution after the next and not be able to resolve the issue. In such situations, the best thing you can do is find a tool that can resolve all Android system problems. While there are many options available online, not all are great. The best Android system repair tool currently available is Wondershare Dr.Fone.
Using Wondershare Dr.Fone, you can fix issues like “Unfortunately, the process.com.android.phone has stopped,” Play Store not working, frozen phone, and many more. It is a specialized tool for resolving Android system issues in Vivo V27 devices with support for all modern Vivo V27 phones.
Key Features of Wondershare Dr.Fone
- You do not need any technical skills to fix your Android system issues when using Dr.Fone.
- It has the highest success rate in fixing complex software issues related to Android OS.
- Wondershare Dr.Fone supports over 1000 Android models for system repair and can fix most issues within minutes.
Steps To Fix the process.com.android.phone Has Stopped via Wondershare Dr.Fone
All you need to fix your Vivo V27’s system issues is a computer with Wondershare Dr.Fone installed and your device connected to it. Here is the simplified process of resolving most Android system issues in a matter of minutes:
- Step 1: Link Your Android Device with Wondershare Dr.Fone
To start, connect your Vivo V27 to your computer. Launch Wondershare Dr.Fone on your computer screen and click on “Toolbox,” located in the left sidebar. From the options available, select “System Repair” and follow it by clicking “Android” on the next screen.

- Step 2: Enter the Required Details of Your Vivo V27
Click on “Start” to initiate the process, and following that, you will be prompted to provide specific details about your Vivo V27. These details include the “Brand,” “Name,” “Model,” “Country,” and “Carrier.” Afterward, tick the box that says, “I agree with the warning, and I am ready to proceed,” and click “Next.”

- Step 3: Resolve The process.com.android.phone Has Stopped Issue
The subsequent step involves entering Download Mode on your device, following the on-screen instructions provided by the software. Once your device is in Download Mode, this Android repair toolkit will proceed to download and install the relevant firmware. Now, select “Fix Now” and confirm the repair of your Vivo V27 by entering the code “000000.”

 safe & secure
3,595,007 people have downloaded it
Conclusion
To sum the article up, encountering the frustrating error message “Unfortunately, the process com.android.phone has stopped“ can be daunting. However, with the right knowledge and tools, resolving this issue becomes achievable. Throughout this guide, we have explored various troubleshooting methods. These included clearing the cache, rebooting the Vivo V27 device, and even performing a factory reset.
While there are many options to fix this error, only one is an excellent choice: Wondershare Dr.Fone. With its powerful Android system repair feature, Wondershare Dr.Fone is a reliable solution to resolve this error.
 HD Video Converter Factory Pro
Vivo V27 Bootloop Problem, How to Fix it Without Data Loss
Have you, like many other users, faced the bootloop Android problem and wondered what exactly is Android boot loop. Well, Android boot loop is nothing but an error that makes your phone switch on itself every time you manually turn it off. To be precise, when your Vivo V27 does not remain switched off or powered off and starts to boot up automatically after a few seconds, it might be stuck in the boot loop Android.
An Android boot loop is a very common problem and is one of the first symptoms of a soft-bricked device. Also, when your device is experiencing Android boot loop issue, it does not start normally to reach the Home or Locked Screen and remains frozen at the Vivo V27 device’s logo, Recovery Mode or a lit-up screen. Many people fear losing their data and other files due to this error and thus, it is a very confusing situation to be in.
We understand the inconvenience caused, therefore, here are ways to tell you how to fix the bootloop problem in Android devices without losing any important data.
However, before moving on, let us learn a little about the causes for the Android boot loop error.
Part 1: What might cause the bootloop issue on Android?
Android boot loop error might seem weird and unexplainable but it occurs because of some specific reasons.
Firstly, please understand that it is a misnomer that boot loop error occurs only in a rooted device. Boot loop Android error can also occur in a stock device with the original software, ROM, and firmware.
In a rooted device, changes made, such as flashing a new ROM or customized firmware which are not compatible with the Vivo V27 device’s hardware or existing software, can be blamed for the boot loop problem.
Moving on, when your device’s software is unable to communicate with the system files during the start-up process, Android boot loop problem may arise. Such a glitch is caused if you have recently updated the Android version.
Also, corrupt App update files may also cause the bootloop Android issue. Apps and programs downloaded from unknown sources bring in a particular type of virus that prevents you from using your device smoothly.
All-in-all, Android boot loop error is a direct outcome of when you try to tamper with your device’s internal settings.
Hence, if you are looking for ways to guide you about how to fix boot loop issue, you will have to revamp the Vivo V27 device internally by either resetting it or adopting a recovery method.
Read on to know more about how to fix the bootloop error without any data loss when your device suffers from the bootloop Android problem.

Part 2: One click to Fix Android Bootloop without factory reset
If you are trying to figure out how to fix boot loop, the first option you have is the one-click fix to Android Bootloop which involves using the Dr.Fone - System Repair software.
This is designed to repair any data corruption on your device and restores your firmware to its usual working condition.
Dr.Fone - System Repair (Android)
One click to fix boot loop of Android
- #1 Android repair solution from your PC, can fix a wide range of Android system issues, such as boot loop, black screen, etc.
- The software requires no technical expertise, and anybody can use it
- A one-click solution when learning how to fix Android boot loop
- Not require root Android phones.
- Works with most Vivo V27 devices, including the latest Vivo V27 phones like S22
- Simple and easy-to-use user interface
4,689,059 people have downloaded it
To help you get started, here’s a step-by-step guide on how to use Dr.Fone - System Repair.
Note: This method can erase data on your device, including your personal files, so make sure you’ve backed up your device before proceeding.
Step #1 Download the Dr.Fone - System Repair software from the website and install it onto your computer.
Open the software and select the System Repair option from the main menu to fix the Android bootloop error.
Step #2 Connect your Vivo V27 to your computer using the official cable and select the “Android” option from the three menu items. Click “Start” to confirm.
You’ll then need to input the Vivo V27 device information, such as your carrier info, device name, model, and country/region in order to ensure you’re downloading and repairing the correct firmware to your phone.


Step #3 Now you’ll need to put your phone into Download Mode to remove the Android bootloop.
For this, you can simply follow the onscreen instructions for both phones with and without home buttons.


Click “Next”, and the software will begin downloading the firmware repair files.

Step #4 Now you can sit back and watch the magic happen!
Make sure your computer stays connected to the internet, and your device stays connected to your computer throughout the entire process. Once the firmware has been downloaded, it will be automatically installed onto your mobile device, removing the boot loop Android error.

You’ll be notified when the process is done and when you can remove your device and start using free from the boot loop Android error!
safe & secure
 Software Update Pro - Check and update software installed on your computer.
Part 3: Soft reset to fix Android bootloop issue
When your device is stuck in Android boot loop, it does not necessarily mean that it is bricked. Boot loop might be occurring due to a simpler problem which can be fixed by turning off your device. This sounds like a home remedy for a serious problem but it works and resolves the problem most of the time.
Follow the steps given below to soft reset your device:
Turn the Vivo V27 device off and take out its battery.

If you cannot take the battery out, let the phone be off for about 3 to 5 minutes, and then turn it back on.
Simply performing a soft reset on your device can help you if you are looking for solutions for how to fix the bootloop issue. This a very useful method as it does not result in any kind of loss in data and protects all your media files, documents, settings, etc.
In case the Vivo V27 device does not turn on normally and is still stuck in the bootloop Android problem, be prepared to use the troubleshooting techniques given and explained below.
Part 4: Boot into Safe Mode to fix Android boot loop


Booting your Vivo V27 into Safe Mode is a useful troubleshooting step to fix boot loop issues caused by third-party apps. When in Safe Mode, the Vivo V27 device will start up with only essential system apps, and any downloaded apps that might be causing conflicts won’t run. Here’s how you can boot your Vivo V27 into Safe Mode to address the boot loop problem:
Step 1: Power Off Your Device
Hold down the power button until it turns off completely.
Step 2: Access Safe Mode
To enter Safe Mode, follow these steps based on your device model:
- For most Android devices: Press and hold the power button to turn on your device. As soon as the manufacturer’s logo appears, press and hold the Volume Down button until the Vivo V27 device finishes booting. You should see “Safe Mode” displayed in the bottom left or right corner of the screen.
- Some devices might require slightly different key combinations. Refer to your device’s user manual or perform an online search for the specific method to enter Safe Mode for your model.
Step 3: Observe the Vivo V27 device
Once your device has booted into Safe Mode, use it for a while to see if the boot loop issue persists. If the boot loop doesn’t occur in Safe Mode, it indicates that the problem is likely caused by a third-party app.
Step 4: Identify and Uninstall Problematic Apps
Now that you’re in Safe Mode, it’s time to identify the troublesome app. Start by uninstalling recently installed apps one by one until the boot loop problem is resolved. After each uninstallation, restart your device normally to check if the boot loop still occurs. Continue this process until you find the problematic app.
Step 5: Restart Normally
Once you’ve identified and uninstalled the problematic app, restart your device normally to exit Safe Mode. Your Android device should now start up without getting stuck in a boot loop.
By following these steps and using Safe Mode to isolate problematic apps, you can effectively troubleshoot and resolve boot loop issues on your Vivo V27.
Part 4: Factory reset to fix Android bootloop issue
Factory reset, also known as Hard Reset, is a one-stop solution for all your software resulting in issues. Android boot loop being such problem, can be easily overcome by performing a factory reset.
Please note that all your device’s data and settings will be deleted by adopting this method. However, if you have a Google account signed in on your Vivo V27, you will be able to retrieve most of your data once the Vivo V27 device turns on.
To factory reset your Android boot loop device, you must first boot into the Recovery Mode screen.
To do this:
Press the volume down button and power button together until you see a screen with multiple options before you.

When you are at the Recovery Mode screen, scroll down using the volume down key, and from the options given, select “Factory Reset” using the power key.

Wait for your device to perform the task and then:
Reboot the phone in Recovery Mode by selecting the first option.

This solution is known to fix the boot loop error 9 out of 10 times, but if you still can’t start your Vivo V27 normally, consider using a CWM Recovery to resolve the Android boot loop issue.
Part 5: Use CWM Recovery to fix bootloop on rooted Android
CWM stands for ClockworkMod and it is a very popular custom recovery system. To use this system to solve the boot loop Android error, your Vivo V27 must be rooted with CWM Recovery System which basically means CWM must be downloaded and installed on your device.
Furthermore, to use CWM Recovery to fix boot loop on rooted Android devices, follow the steps given below:
Press the home, power, and volume up buttons to launch the CWM Recovery screen.
Note: you might have to use a different combination of keys to enter into Recovery Mode, depending on your device’s model.

Scroll down using” the volume key to select “Advanced”.


Now select “Wipe” and choose to wipe “Dalvik Cache”.


In this step, select “Mounts and Storage” to click on “Wipe” or “Cache”.
Once this is done, make sure to reboot your Vivo V27.
This process with successfully fix the Android boot loop error and not cause any loss of data stored on your device stuck in boot loop.
So the bottom line is that boot loop Android issue may seem like an irreparable error but it can be resolved by carefully following the techniques explained above. These methods not only tell you how to fix the bootloop problem but also prevent it from occurring in the future.
An Android boot loop is a common phenomenon with all Android devices because we tend to tamper with our device’s internal settings. Once the ROM, firmware, kernel, etc are damaged or rendered incompatible with the Vivo V27 device’s software, you cannot expect it to function smoothly, hence, the boot loop error occurs. Since you are not the only one suffering from the Android boot loop problem, be rest assured that the ways, given above, to combat it are recommended by users facing similar troubles. So, don’t hesitate and go ahead to try them on.
safe & secure

Authentication Error Occurred on Vivo V27? Here Are 10 Proven Fixes
There are times when users get an authentication error while they connect to a Wifi network. The problem is mostly found in Android whenever a device tries to establish a connection to Wifi. If your device is also experiencing an authentication problem Wifi, then don’t worry. It can easily be resolved. In this post, we will make you familiar with the root cause for the Vivo V27 Wifi problem and how you can resolve whenever authentication error occurred on your device.
Part 1: Any idea about the Wi-Fi authentication problem?
Wi-Fi authentication has to be done every time you wish to connect to a Wi-Fi network over your smartphone or laptop. To authenticate yourself and connect to the protected Wi-Fi network, you need to have the password of it. But if after you’re putting in the correct password and still experiencing the wifi authentication problem. Here’s what you need to know.
Authentication error occurs when the “deal” between the Wi-Fi router and device fails due to certain reasons. First, the Vivo V27 device sends the password of the network and the “connect” request in an encrypted format to the Wi-Fi router. Then, the router decrypts the password and compares the password saved on it. Now, if the password matches, it sends affirmation for the “connect” request, and then the Vivo V27 device is allowed to connect to the network.
Part 2: Why Authentication Error Occurred when Connecting to Wifi?
There could be plenty of reasons for facing an authentication error on your device. Most of the time, it occurs whenever a Wifi router seems to malfunction. Furthermore, if your phone has been recently updated, then chances are that there could be an issue with its drivers. A security attack can also make your device malfunction as well. An unstable connection or a router blockage can also be a reason for this issue.
In this scenario, whenever you try to connect to a Wifi network (even after supplying the correct password and username), it doesn’t connect to it. Instead, it displays an authentication error occurred promptly. Thankfully, there are plenty of ways to overcome the authentication problem Wifi. In the next section, we have provided three different solutions to fix the Vivo V27 Wifi problem (as it mostly happens on Android devices).
Part 3: 10 Solutions to Fix Wifi Authentication Error
Before we make you familiar with different fixes for the Wifi authentication error, it is important to check your router beforehand. Chances are that you could be getting the authentication error because your router is not functioning properly. You can restart it and try to connect any other device to it as well to check it. After making sure that there is no problem with your network or router, follow these suggestions to overcome the authentication error occurred issue.
Check if extra characters added in Wi-Fi password
Ensure that no other extra characters are being added in the Wi-Fi password while you’re entering it. Key in the password carefully while viewing the characters, and then check if the authentication error occurs or not.
One-Click to Fix Wifi Authentication Error by Android System Repair
Android system repair is considered the most effective way to fix Wifi Authentication Error. As the bottom-layer Android system files may be corrupted unconsciously with days of phone use, the Wifi Authentication Error may be one of the symptoms.
So Android repair requires programming knowledge to do it?
No! With Dr.Fone - System Repair (Android), you can do Android repair in just a few steps and get all issues like Wifi Authentication error fixed easily.
### [Dr.Fone - System Repair (Android)](https://tools.techidaily.com/wondershare/drfone/android-repair/)An easy-to-operate tool to fix Android system issues like a Wifi authentication error
- Fixes all Android system issues like a black screen of death, Wifi authentication error, etc.
- One-click to fix the Wifi authentication error. No technical skills required.
- Supports all the new Vivo V27 devices like Galaxy S8, S9, etc.
- Easy-to-follow instructions provided on each of the screens.
3981454 people have downloaded it
Here are the steps to fix Wifi Authentication Error by Android system repair:
Note: Android repair is effective to permanently fix Wifi Authentication Error, but may wipe out the existing phone data. Backup all the important Android data to PC before you go on.
- After the Dr.Fone tool is downloaded, install, and launch it. You can see the following screen.
- Connect your Vivo V27 to the computer, and select “Android Repair” in the middle.
- Select all the details that match your device, and click “Next”.
- Next up, you should boot your Vivo V27 in download mode by following the on-screen instructions.
 WonderFox DVD Ripper Pro
- Allow the program to download the corresponding firmware. After that, the Android repair will start and get the Wifi Authentication Error fixed in minutes.
Use static IP address instead of DHCP
DHCP, or Dynamic Host Configuration Protocol is the default IP address assignment for the Wi-Fi settings on many devices. Whereas DHCP can cause IP address conflict during the dynamic IP address assignment. So, you’d better change “DHCP” to “Static” to see if the authentication error persists.
Step 1: Head to the “Settings” of your Vivo V27 and then opt for “Wireless and Networks” followed by “WLAN/WiFi”.
Step 2: Now, hit on the WiFi network that is showing “authentication error occurred”.
Step 3: Depending on your Vivo V27 model, look for “IP Settings” and tap on it. Now, switch the “DHCP” to “Static”.
Step 4: Note down the static IP address fields and wipe off all the fields. Punch it in again and then save it.


company, user or members of the same household. Action! - screen and game recorder</a>
Check carefully for duplicate Wi-Fi names before you connect
Perhaps, you might connect to a WiFi with a similar name. There are good chances that some users do not modify their WiFi network name and possibly, your neighbor may have the same WiFi network, service provider. Therefore, ensure you connect to the correct WiFi network.
 TubeDigger - online video downloader from mostly any site
Reset the Wifi network
One of the easiest ways to fix the authentication problem of Wifi is to reset the network. To do this, you would be required to forget the respective network first and then connect to it again. This can be done by simply following these steps.
1. Firstly, you need to forget a Wifi network. To do it, go to your phone’s Settings > WiFi and network. From here, you can see a list of all the Wifi hotspots that your phone connects to. Select the network you wish to forget.

2. When you would select a network, it will provide the basic information related to it. Just tap on the “Forget” button and agree to the pop-up message. This will erase the network’s information from your device.


3. Afterward, turn on your Wifi again and tap to the network you wish to connect to. Simply provide the credentials and tap on the “Connect” button to reestablish the connection. This way, you can reset the network successfully.

Modify network connection
If the above solution won’t work, then you would be required to walk the extra mile to fix the Vivo V27 Wifi problem. After you reset a network connection, if still getting issues regarding the authentication of the network, you need to modify the connection. In this technique, you will be changing the IP settings on your phone to alter the way it establishes a secure connection. You can do it by following these steps.
1. To start with, visit your phone’s Settings and open the Wifi page.


2. This will display a list of all the Wifi networks that are associated with your device. Just long-tap on the Wifi network that you wish to modify. It will open another pop-up window. From here, tap on the option of “Manage network settings”. Sometimes, users also get an option of “Modify network settings” here as well. Simply select it to proceed.

3. It will display basic information related to your Wifi network. Just tap on the “Show advanced options” button to access more options related to the network setting.

4. From the IP Settings menu, change the field from DHCP to Static. This will let you establish a static connection between your device and the router.

5. As soon as you will change it to static, you will get different fields related to your network’s IP address, gateway, DNS, and more. Simply fill these fields and tap on the “Save” button once you are done.
Parental Control Software
Now, try to connect to the Wifi hotspot again. You would be able to overcome the authentication problem of Wifi.
Change Network Security Type
It has been observed that, when we connect to Wifi, our device chooses a wrong security type. This clashes with the default security protocol of the router and authentication error occurred due to this. If your device is facing the same issue, then it can be fixed by simply changing its security type. To do this, follow these instructions:
1. To change the security type of a network, you need to “Add the network”. If you already have the Wifi network saved, then simply forget the network by following the above-mentioned tutorial.
2. Now, turn on your device’s Wifi and tap on the option of “Add network”. Here, you would be asked to give a network name and select the security type. To manually select it, tap on the “Security” option.

3. From here, you will get a list of various security protocols that you can pick. Select “WPA/WPA2-PSK” and save your selection.
 Jet Profiler for MySQL, Enterprise Version: Jet Profiler for MySQL is real-time query performance and diagnostics tool for the MySQL database server. Its detailed query information, graphical interface and ease of use makes this a great tool for finding performance bottlenecks in your MySQL databases.
Now, try to connect to the network again. Most likely, it will let you fix the authentication error on your device.

WPS Office Premium ( File Recovery, Photo Scanning, Convert PDF)–Yearly
Update Android firmware to the latest
There are instances where an outdated OS version of your Vivo V27 may create a hindrance in establishing a connection between your device and the WiFi network. You need to update your Android firmware to the latest version and then check if the problem persists or not.
Step 1: Launch “Settings” of your Vivo V27 and then get into the “About Phone” option.
Step 2: Now, opt for the “System Update” option. If the update is available, get your device updated to the latest OS version.
Restart the router and reset Android network settings
Sometimes, the WiFi router may hang up while establishing a connection and therefore, the wifi authentication problem occurs. Try restarting your Wi-Fi router and then check if your device connects successfully. If this doesn’t work, try to reset your Android Network Settings .
Bonus tip: Turn Airplane mode on/off
By simply turning on the Airplane mode (and later turning it off), you can easily fix the authentication problem Wifi most of the time. You can find a toggle button for Airplane mode on the notification bar of your phone. If you can’t find it there, then go to your phone’s Settings > Connection > More Networks and turn on the feature of “Airplane Mode”.

Let it do for a while. Afterward, turn it off and try to connect to the Wifi network again.
After following these quick and easy suggestions, you would be able to fix the Vivo V27 Wifi problem for sure. Even if you use any other Android device, then its authentication error can easily be resolved after these effective solutions. Go ahead and give these expert solutions a try and let us know about your experience as well. If you have any other solution to fix the authentication problem Wifi, then share it with us as well in the comments.
- Title: Fix the Error of Unfortunately the Process.com.android.phone Has Stopped on Vivo V27 | Dr.fone
- Author: Ariadne
- Created at : 2024-07-30 10:32:34
- Updated at : 2024-07-31 10:32:34
- Link: https://howto.techidaily.com/fix-the-error-of-unfortunately-the-processcomandroidphone-has-stopped-on-vivo-v27-drfone-by-drfone-fix-android-problems-fix-android-problems/
- License: This work is licensed under CC BY-NC-SA 4.0.