
Fix Unfortunately Settings Has Stopped on Realme 11 Pro+ Quickly | Dr.fone
Fix Unfortunately Settings Has Stopped on Realme 11 Pro+ Quickly
All of you, sooner or later, must have found the “Unfortunately Settings has stopped” error on your Realme 11 Pro+. The problem can occur if the Settings keeps stopping or crashing. Many times, you may try to open the Settings but it doesn’t even open. Or possibly, it may freeze after getting opened thereby hampering the Realme 11 Pro+ device’s performance.

Well! There can be a number of reasons why this thing happens. For instance, custom ROM installations, not enough space in the Realme 11 Pro+ device or perhaps an outdated version of Android. If you are struggling with the same issue and want to know what to do when Android Settings is not responding, this post will help you. We have explained everything in detail along with the solutions. So, scroll down and get things sorted.
- Part 1: Clear the cache of Settings and Google Play Service
- Part 2: Clear the Android phone’s RAM and retry
- Part 3: Uninstall the Google update
- Part 4: Uninstall the custom ROM or re-flash the stock ROM
- Part 5: Wipe cache partition to restore Settings
- Part 6: Factory reset your Android
- Part 7: Check and update Android OS

WPS Office Premium ( File Recovery, Photo Scanning, Convert PDF)–Yearly
Part 1: Clear the cache of Settings and Google Play Service
It is possible that the corrupted cache files are responsible for this error. Hence, as the first tip, we would like you to clear the Settings cache if that is what triggers the “Unfortunately Settings has stopped” issue. Clearing it would definitely make Settings run appropriately. And The steps to clear the cache of the Google Play Services app are similar. Here is how to clear the cache of Settings:
- Open “Settings” on your Realme 11 Pro+ and choose “Apps & Notifications”/”Apps”/”Application Manager” (the option may differ on different devices).
- In the list of applications, look for “Settings” and open it.
- Now, select “Storage” followed by “Clear Cache”.
 WinUtilities Pro
Note: In some phones, the “Clear Cache” option may come after tapping on “Force Stop”. Therefore, go accordingly without getting confused.
Part 2: Clear the Android phone’s RAM and retry
As the next tip, we would like to suggest you clear your device’s RAM by ceasing the running apps in the background. RAM, if at the increased level, is responsible for the Realme 11 Pro+ device’s freezing, poor performance, and most probably is the reason behind crashing Settings. Also, if the apps in the background keep running, they might conflict with the Settings and stop it to perform properly. Therefore clearing RAM is important when Android Settings is not responding. Here is how to do it.
- Firstly, you need to go to the Recent apps screen. For this, long-press the Home key.
Note: Please note that different devices have different ways to go to the Recent apps screen. Do it according to the Realme 11 Pro+ device you own. - Now, swipe the apps and tap on the clear option. You will be able to notice the amount of RAM cleared

Part 3: Uninstall the Google update
Uninstalling Google Play Store updates has also responded well to many users. It has worked in the case of the “Unfortunately Settings has stopped” error. So, we would also like to suggest you use this tip if the others don’t work. Here are the steps to be followed for this.
- Open “Settings” on your Android and tap on “Application manager” or “Apps” or “Application.
- Now, head to all the apps and select “Google Play Store” from there.
- Tap on “Uninstall Updates” and restart your device to check if the crashing Settings issue has been resolved.

 PearlMountain Image Converter
Part 4: Uninstall the custom ROM or re-flash the stock ROM
Using a custom ROM on your device brings up this problem due to incompatibility or improper installation. Therefore, you should either uninstall the custom ROM or re-flash the stock ROM. in order to re-flash the stock ROM of your Realme 11 Pro+, the best way would be Dr.Fone - System Repair (Android). It offers one-click functionality to flash stock ROM and that too with full security. Supporting all Realme 11 Pro+ devices, it ranks among its counterparts when it comes to fixing crashing Phone app issues or any other Android system issue. It is loaded with the beneficial features which are discussed below.
 PDF application, powered by AI-based OCR, for unified workflows with both digital and scanned documents.
 Dr.Fone - System Repair (Android)
Android repair tool to fix “Unfortunately, Settings Has Stopped”
- You needn’t be a tech-savvy to use this
- Supports a wide range of Android devices easily, 1000+ being more precise
- One-click tool and supports any sort of Android system issue
- Higher success rate along with millions of trusted users
- Trustworthy and offers an extremely easy interface
4,635,310 people have downloaded it
How to fix crashing Settings using Dr.Fone - System Repair (Android)
Step 1: Download Tool
Visit the official website of Dr.Fone and download the toolbox from there. Go for the installation process and wait until the installation gets over. Launch it now and choose the “System Repair” tab from the main window.

Step 2: Get the Phone Connected
With the help of a USB cable, plug your Realme 11 Pro+ into the PC. Upon proper connection, hit on the “Android Repair” option from the left panel.

Step 3: Feed Correct Information
In the next window, you need to fill in some necessary information like the name and model of the mobile device. Enter details like country and career. Check once and hit on “Next”.


Step 4: Enter Download Mode
Now, you need to take your device into Download mode. For this, you need to follow the onscreen instruction according to your device. Click “Next” and you will notice the firmware downloading progress on your screen.

Step 5: Repair the Issue
Once the firmware is completely downloaded, your Realme 11 Pro+ will automatically start getting repaired. Stay there and you will receive a notification that the repair is done.


Part 5: Wipe cache partition to restore Settings
Like RAM, wiping cache is also vital so as to make the Realme 11 Pro+ device’s operation smoother. And when you are getting the “Unfortunately Settings has stopped” error, it might be due to the collected cache. To remove it, you will need to enter the recovery mode. And the steps for recovery mode range from device to device. For instance, Realme 11 Pro+ users have to press the “Home”, “Power” and “Volume Up” buttons. Similarly, HTC and LG device users are supposed to press the “Volume Down” and “Power” buttons. For Nexus, it is “Volume Up, Down” and Power key combinations. Therefore, before going further, make sure what device you own and enter the recovery mode according to it. Now, follow the detailed guide below to wipe the cache partition in order to fix crashing Settings.
- Primarily, turn off the Realme 11 Pro+ device and enter the recovery mode by pressing the respective key combinations.
- You will notice a Recovery screen on your device.
- On showing up the recovery screen, look for the “Wipe Cache partition” option and use the “Volume Down” and “Volume Up” buttons to scroll down and up respectively.
- On reaching the required option, press the “Power” button to start wiping.
- Once finished, click the reboot option and the Realme 11 Pro+ device will be rebooted, fixing the issue hopefully.

Part 6: Factory reset your Android
You can also opt for Factory resetting your device to fix the issue of Settings keeps stopping. By removing everything from the Realme 11 Pro+ device, it will make your device run properly. If you have important data on your device, please make sure to create a backup before taking action if you don’t want to lose it. The steps are as follows.
- In the “Settings, go to “Backup and Reset”.
- Tap on “Factory data reset” followed by “Reset device”.
- Wait for the completion of the process and check if Settings is stopping or not after it gets rebooted.


Part 7: Check and update Android OS
A lot of times minor issues crop up due to the operating systems that get outdated. It is because the Realme 11 Pro+ device needs to get updated from time-to-time for proper functioning otherwise it will not be able to match up with the fading technologies thereby coming up with issues like “Unfortunately Settings has stopped”. We recommend here you check for the available update and update your device. For this follow the guide below.
- Go to “Settings” and tap “About Phone” on your device.
- Now, hit on “System Update” and the Realme 11 Pro+ device will look for any available update.
- If there is any, go along with the prompts to install it and make your phone even smarter.


Conclusion
If your Realme 11 Pro+ shows the “Unfortunately Settings has stopped” error, don’t worry. This problem can come from many things like old software or cache issues. You can try easy fixes like clearing cache or updating your system. Sometimes, removing custom ROMs might be needed.
For iOS users facing similar problems, we recommend using Dr.Fone-System Repair (iOS) . It’s known for fixing many iOS problems without losing any data. Remember, a well-working device is just a few steps away!

 safe & secure

My Videos Aren’t Playing on Realme 11 Pro+ – What Can I Do?
 /a>
/a>
There’s a reason Android holds over two-thirds of the mobile operating system market share. It’s a powerful OS that gives you the utmost freedom and flexibility, allowing you to customize your phone to suit your needs.
However, regardless of the capabilities of Android phones and the features that come with their OS, just like any other smartphone, they’re prone to glitches and annoying issues – especially with their video files.
You may encounter videos not playing on your Realme 11 Pro+ more frequently than you like. Whether it’s video files you’ve recorded using your phone or files you’ve downloaded, this glitch can get pretty annoying pretty fast. Fortunately, there are several solutions you could try to fix it.
See what you can do if videos won’t play on your Android.
Why Are My Videos Not Playing On Android?
 Screensaver Factory, Create stunning professional screensavers within minutes. Create screensavers for yourself, for marketing or unlimited royalty-free commercial distribution. Make screensavers from images, video and swf flash, add background music and smooth sprite and transition effects. Screensaver Factory is very easy to use, and it enables you to make self-installing screensaver files and CDs for easy setup and distribution. Screensaver Factory is the most advanced software of its kind.
Considering how most smartphone manufacturers tend to emphasize the unbelievable quality of their cameras, perfect night modes, seamless slow-motion recordings, superb resolution, and more, you’d expect all images and videos to function flawlessly on your Android. Unfortunately, that’s not always the case.
Occasionally, you could find that the videos you access from your gallery won’t play, sending you the message that “video cannot be played” or “can’t play video.” Other times, you might find that YouTube videos won’t load correctly or your downloaded videos won’t open in your media player.
There could be a wide variety of reasons that is happening, including:
- Corrupted video
- Corrupted SD card
- Outdated media player
- Outdated OS
- Incomplete download from the source
- Low storage
- Video downloaded from a suspicious source
An array of hardware and software issues could lead to you being unable to play videos on your Android. However, that doesn’t mean you should immediately send your device for repairs or delete the videos that won’t play. There might be a few better solutions you could try.
What You Can Do if Your Videos Aren’t Playing On Android Phone
Since there are many reasons for having problems with videos not playing on your Android, you could also try many solutions.
1. Do a Factory Reset
While a factory reset shouldn’t always be the first solution you go to, it can usually prove to be the most effective one.
A factory reset, aka a master reset or a hard reset, returns all your software configurations to the original state when the phone was first manufactured. In the process, all your data is lost – any photos and videos you have on your phone and the apps you’ve installed will be deleted. You’ll be logged out of all your accounts and won’t have access to your message history, contacts, and more.
While it seems like an extreme step, it can help fix any video issues you might encounter due to software bugs.
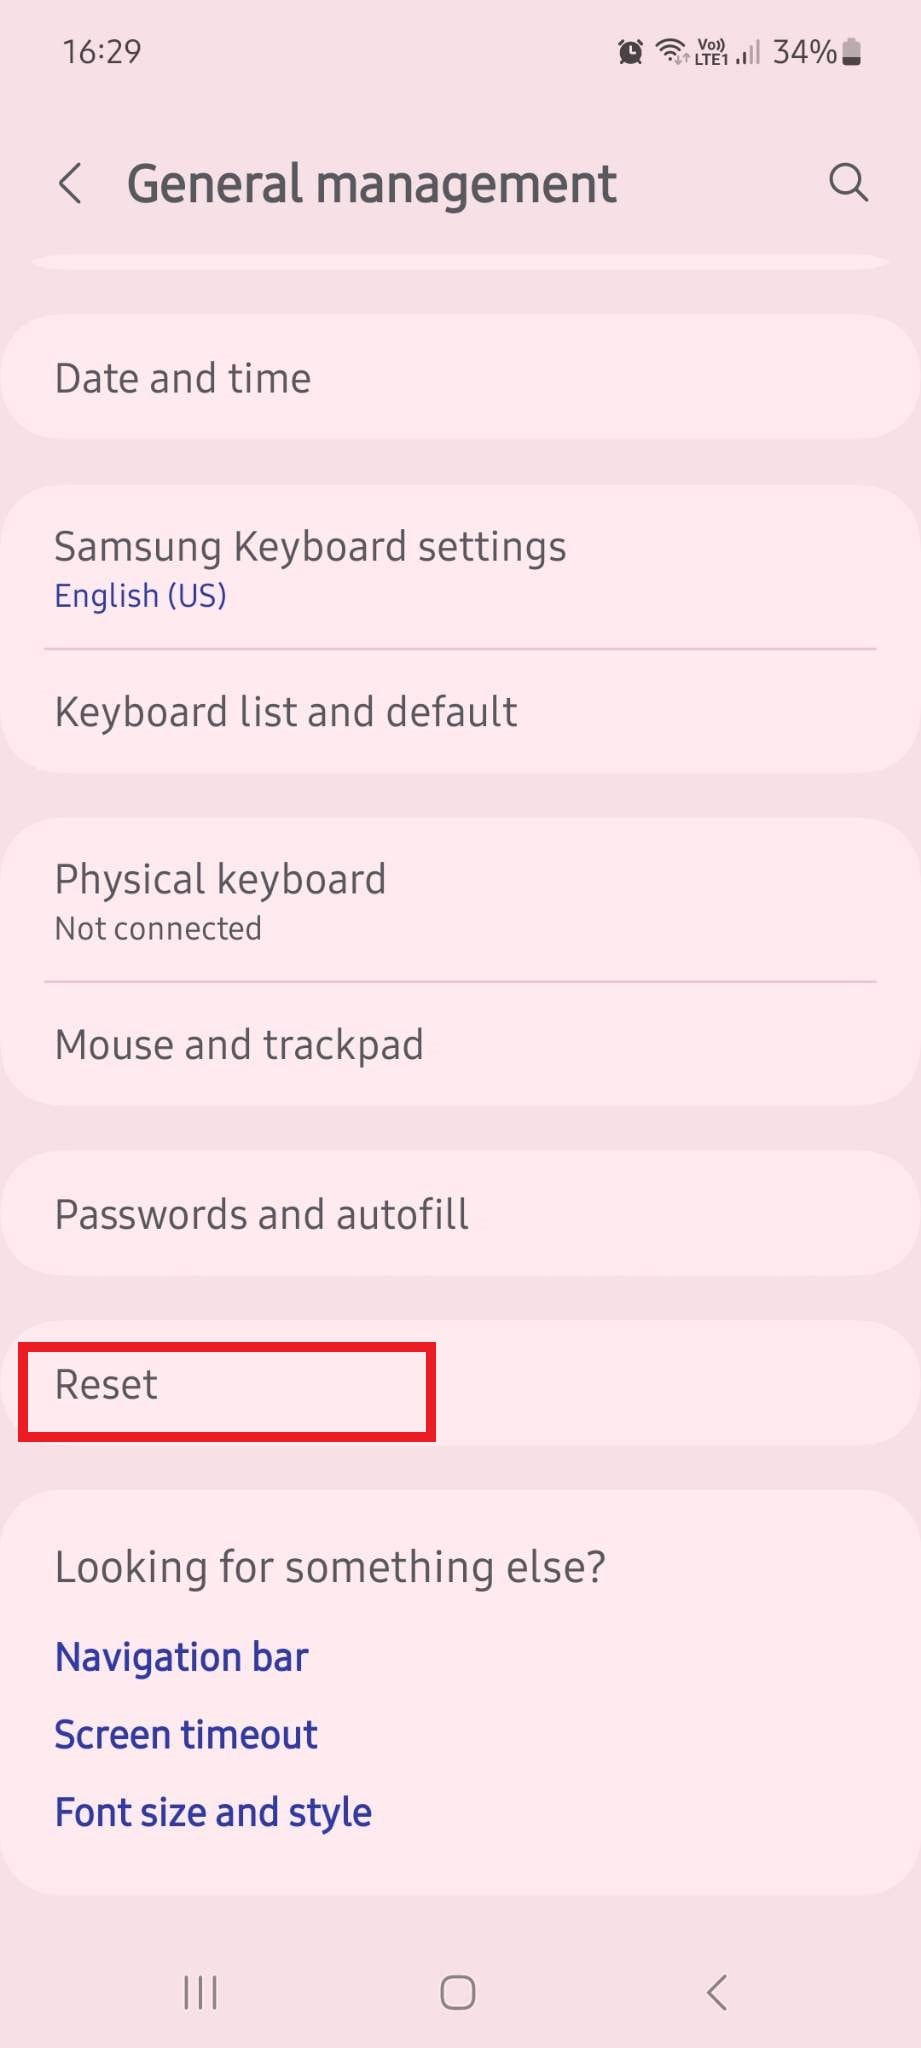
Though there could be slight variations between different phones, you can usually perform a factory reset by going to Settings > General Management > Reset > Factory data reset > Reset.

2. Restart Your Realme 11 Pro+
While a factory reset is all but guaranteed to fix the issues you’re encountering with your videos, sometimes a simple restart might do the trick just fine. A restart works by clearing your RAM (Random Access Memory).
In a nutshell, RAM stores short-term data that helps your processor complete tasks quickly. This data is always easily accessible, and it’s what helps your phone quickly open webpages and apps you’ve recently used.
Over time, however, your RAM can get filled with unnecessary data and data fragments, which, in turn, can confuse your processor.
Restarting your phone will clear your RAM and potentially eliminate any data fragments causing your videos to be unplayable.

3. Check the Video Format
As a general rule of thumb, the videos you capture should be in a format your device supports. However, the videos you’ve downloaded might not be. That’s why checking the files’ video format before trying other possible fixes is in your best interest.
If the format isn’t supported, installing the right video player with the necessary compatibility is the most straightforward fix. Some of the most popular video players for Android include VLC for Android, GOM Player, MX Player, Bsplayer, and RealPlayer. You can easily find all of them in the Google Play Store.
4. Check the Internet Connection
If you’re having problems playing downloaded or online videos, check your internet connection to see if there’s an issue there. If your internet’s down, any downloaded videos might not have downloaded correctly, and any online videos that haven’t been loaded will not play.
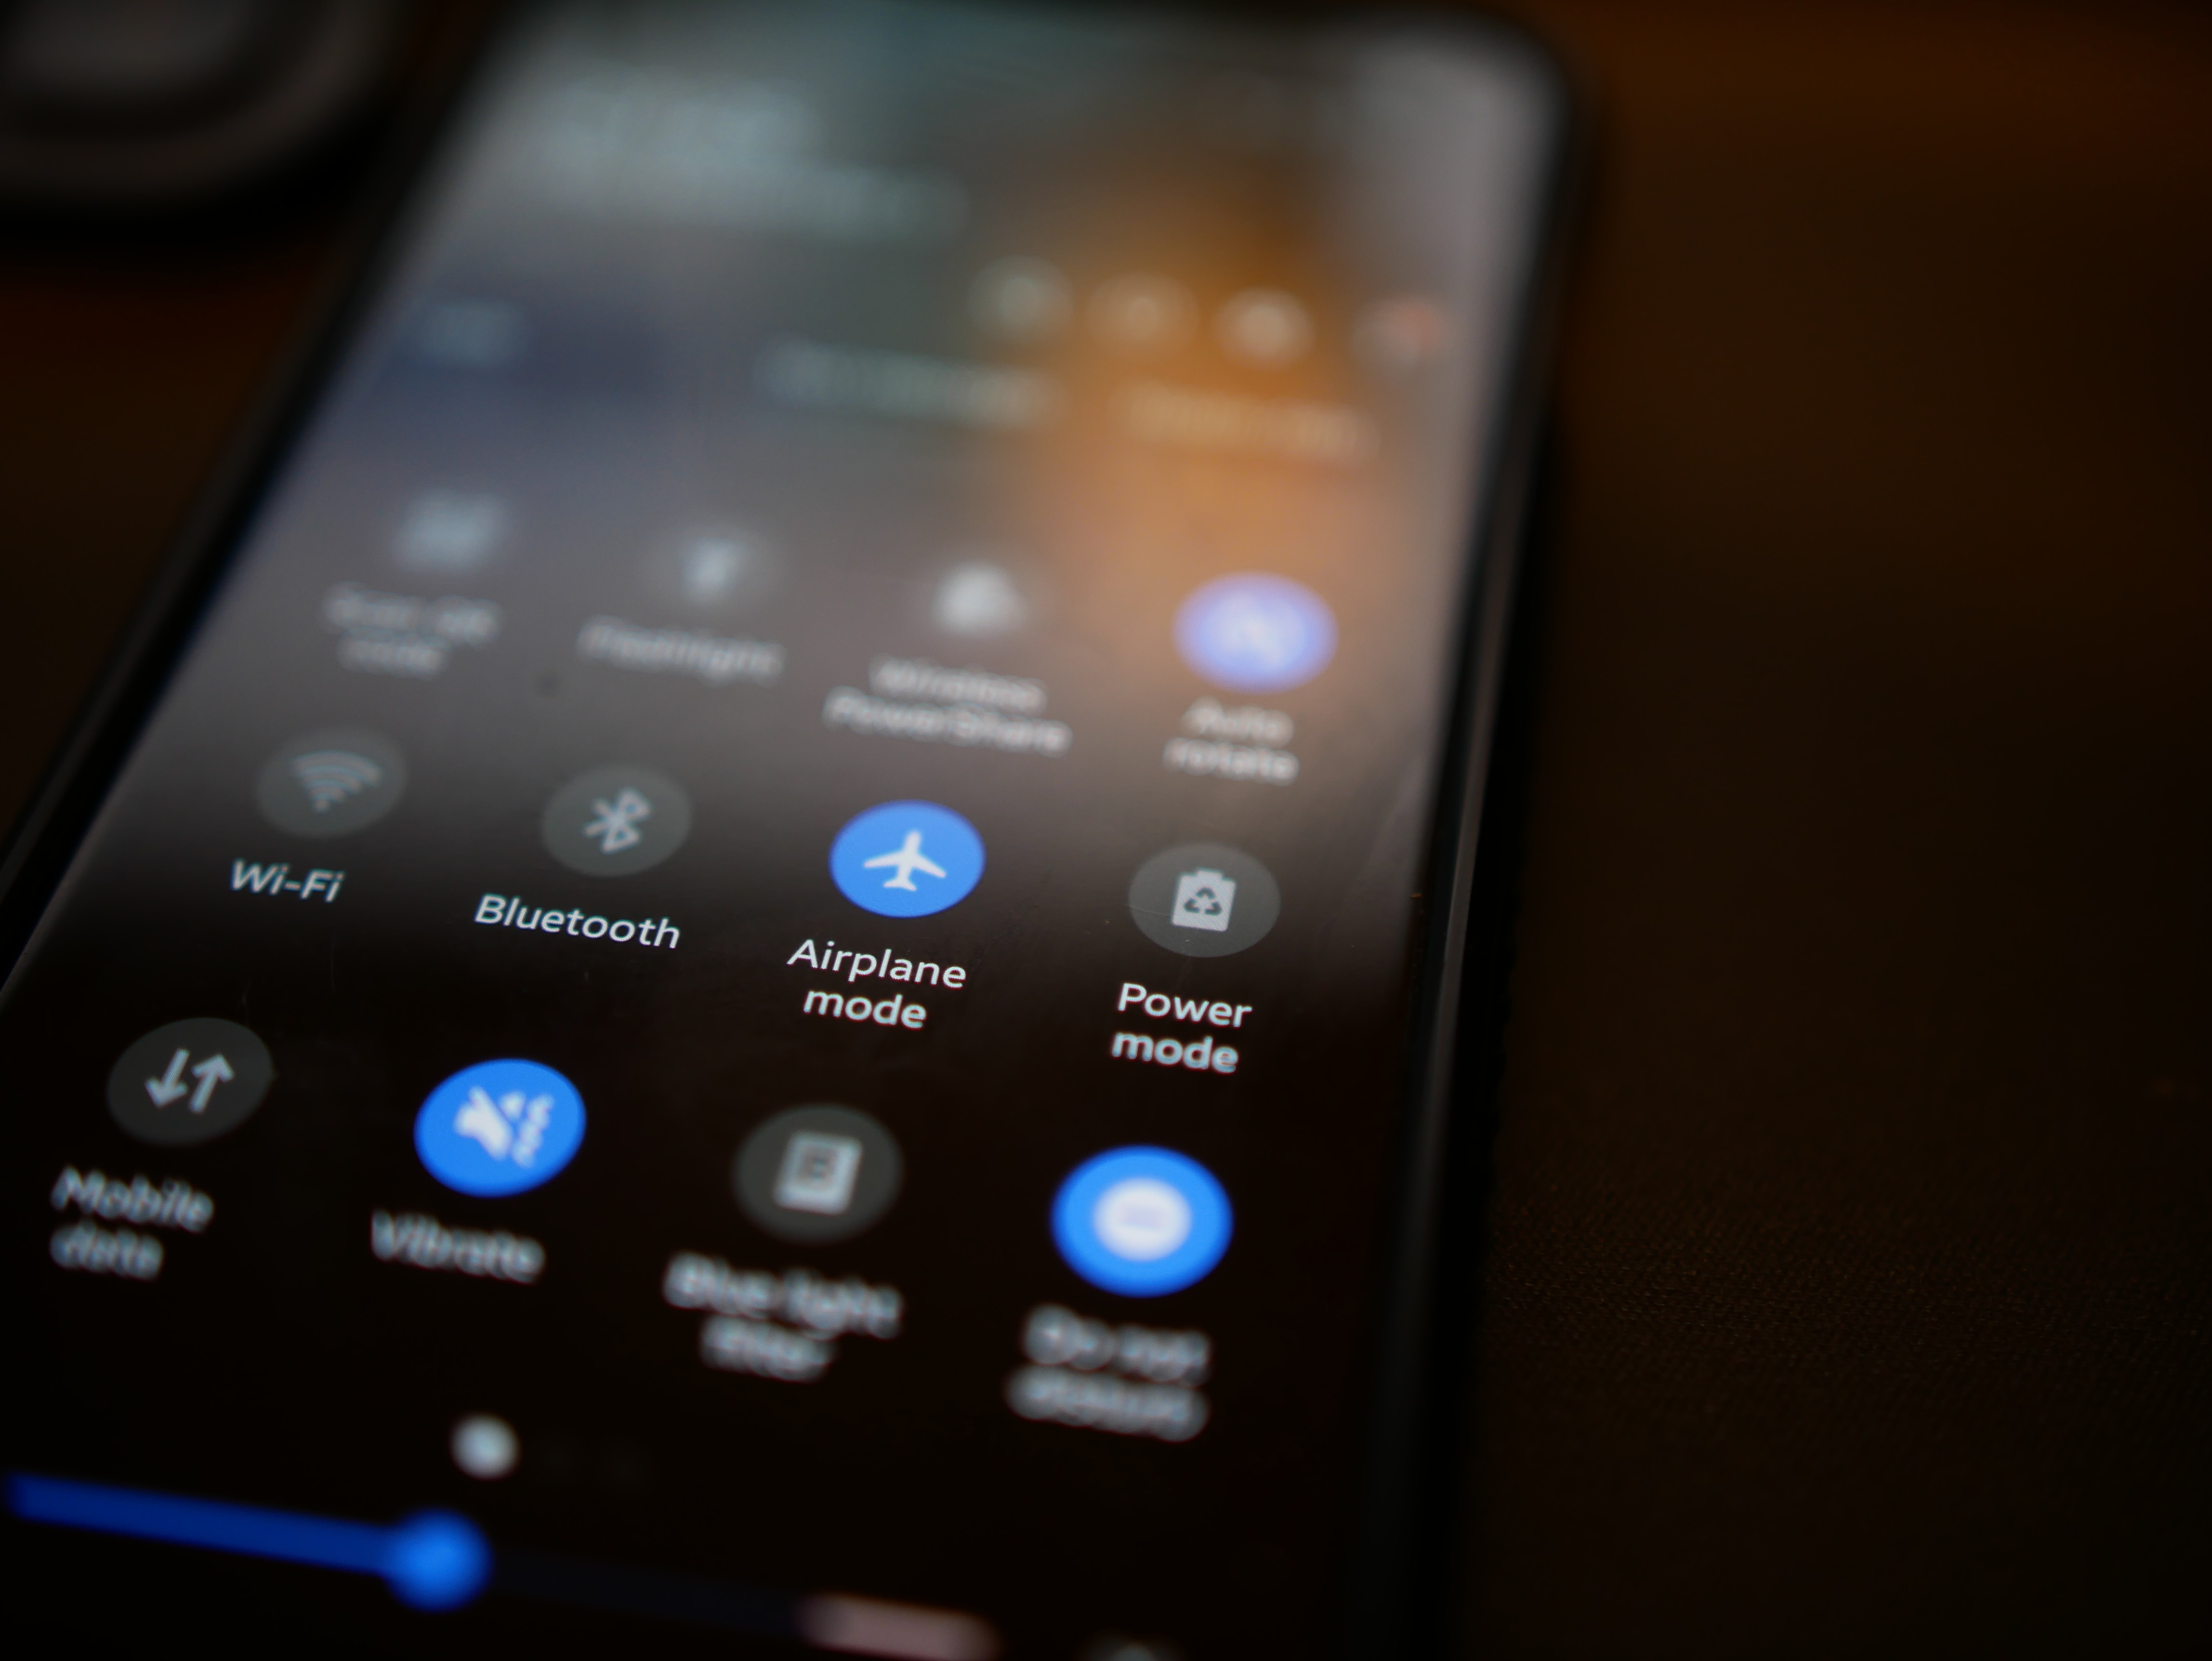
Make sure that you turn the Airplane mode off and your Wi-Fi on. Check the connection and test your internet speed to see if everything works properly.
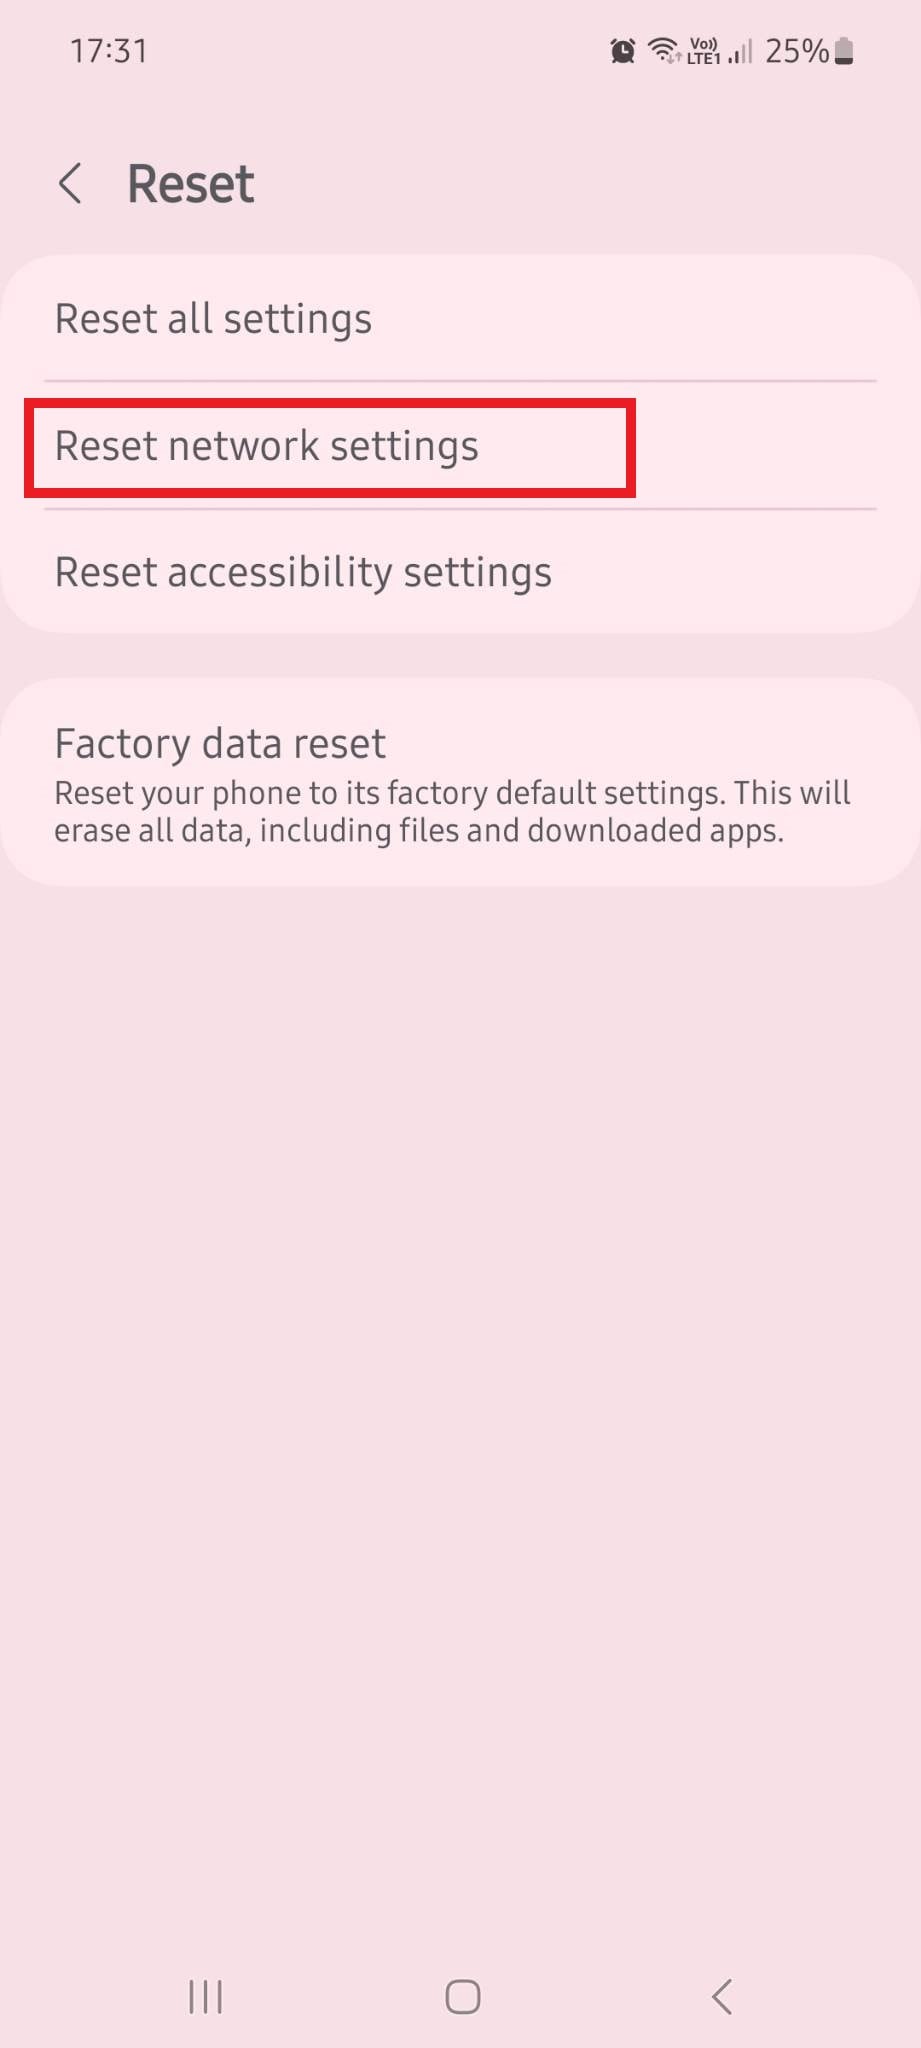
You might need a network reset if your phone can’t connect to a Wi-Fi network. The path might differ between Android devices, but you should be able to find the option for a network reset at the exact location of your factory reset. Go to Settings > General Management > Reset > Reset Network settings > Reset settings.

5. Clear the Cache
The cache stores a copy of your most commonly used data, helping decrease loading time and improve your phone’s performance. However, too much cache data can take up too much space and cause data corruption, preventing you from accessing some of your apps.
On average, you should clear your phone’s cache every few months to ensure that everything runs smoothly. If you encounter issues with your videos not playing on Android, clearing the cache could be just the fix you need.
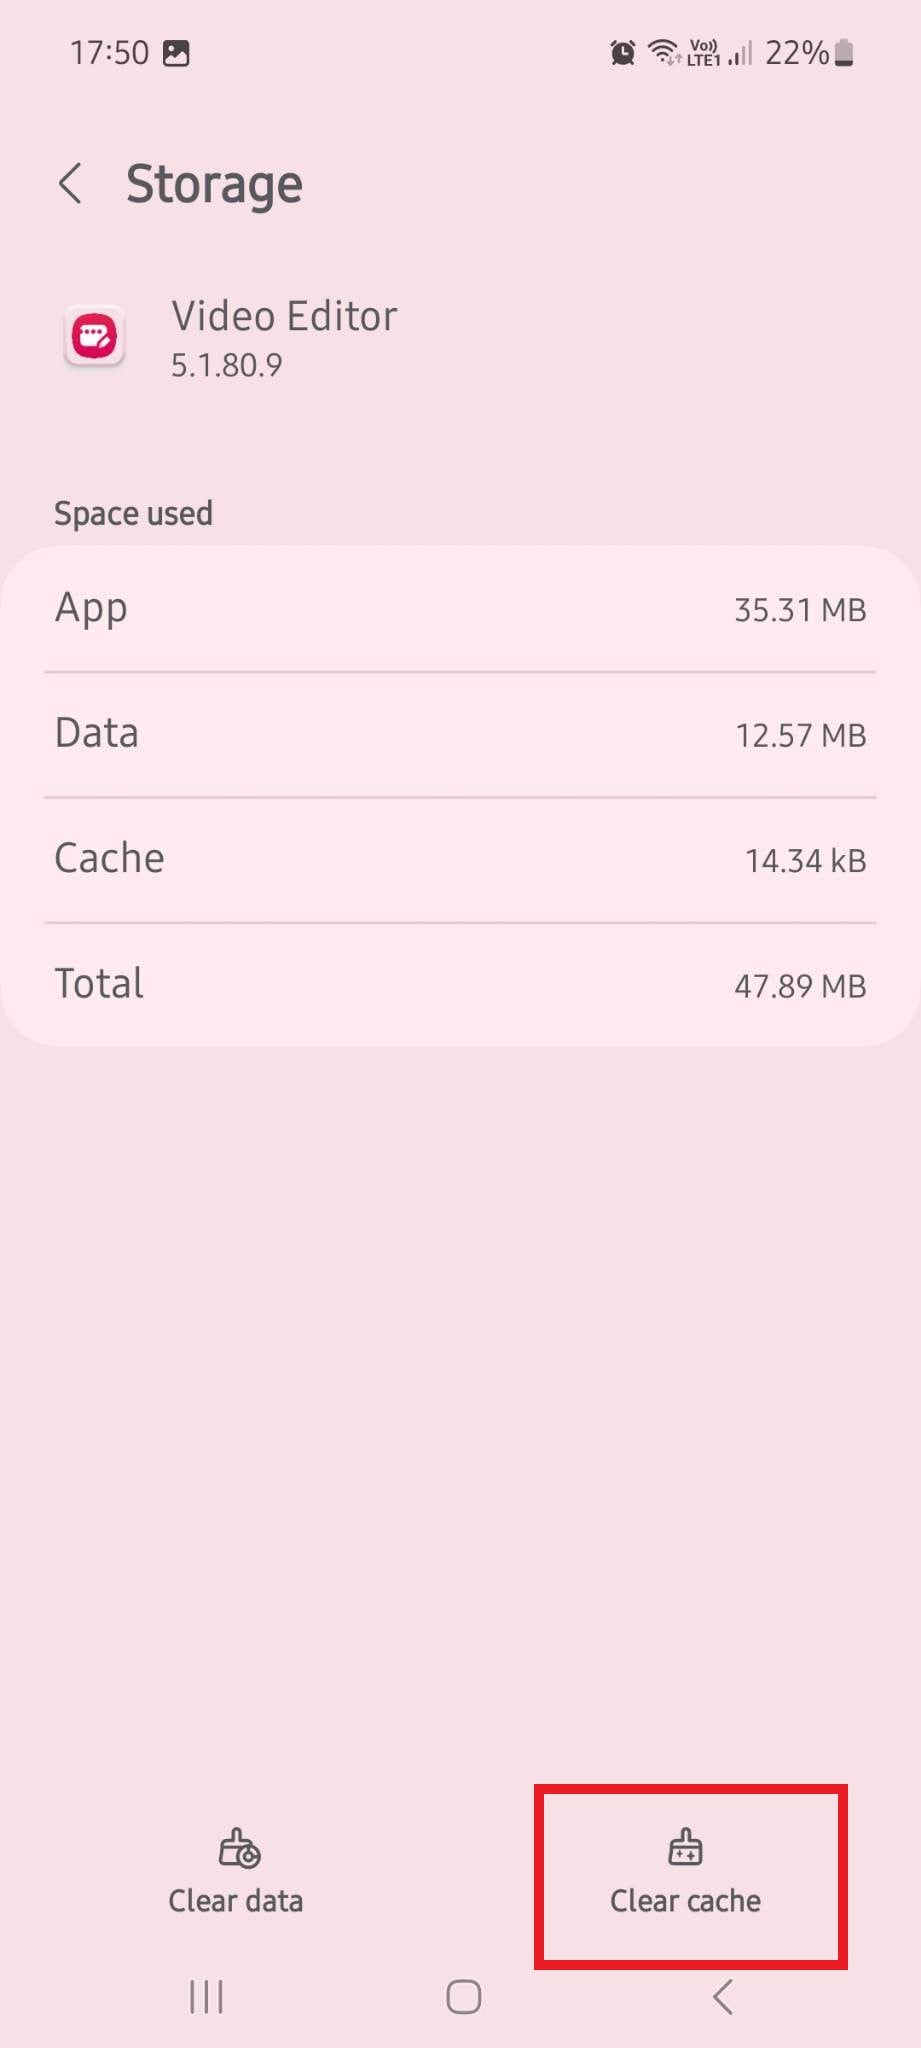
To clear the cache from your apps, you’ll want to go to Settings > Apps. From there, select the app you want to remove the cache from, scroll down to Storage, then choose Clear Cache.
6. Update Android OS
An outdated Android OS is usually the culprit behind many bugs and glitches you may encounter on your phone. It can prevent you from playing video files, accessing apps, taking photos, and more. It can lead to data corruption and loss, expose you to malware and cyberattacks, and compromise phone performance.
Regularly updating your OS to its latest version is always in your best interest. It can solve the problem of your videos not playing and protect you and your sensitive data.
7. Repair Your Android OS

You might already have the latest version of Android OS, but that still doesn’t mean your OS is functioning as it should. Maybe your phone was interrupted while downloading or installing the new OS version. Maybe your phone had underlying OS issues, or you accidentally downloaded files you shouldn’t have. Whatever the case is, if your videos don’t play due to an OS problem, you’ll need to repair your OS.
The best way to do it is with a reliable Android OS repair solution like Wondershare Dr.Fone.
Fast, efficient, and powerful, Wondershare Dr.Fone can repair your Realme 11 Pro+ in several simple steps:
- Step 1: Download and launch Wondershare Dr.Fone on your PC.
- Step 2: Go to Toolbox, then use a cable to connect your Realme 11 Pro+ to your PC.
- Step 3: Select System Repair > Android.
- Step 4: In the new window, select Start.
- Step 5: Fill in information about your phone’s Brand, Name, Model, Country, and Carrier.
- Step 6: Agree with the warning and select Next.
- Step 7: Follow the on-screen instructions to put your device in Download Mode.
- Step 8: Wondershare Dr.Fone will automatically start downloading the necessary firmware, so wait for the process to finish.

- Step 9: When the download is complete, select Fix Now to install it.
- Step 10: Type 000000, then select Confirmto continue fixing your device.

- Step 11: Wait for the Repairing Nowprocess to finish.
- Step 12: Once the process is complete, click Done.
If the reason your videos wouldn’t play on your Realme 11 Pro+ was a fault in the OS, everything should be functioning well after repairing your phone with Wondershare Dr.Fone.
Remember that repairing your device with Wondershare Dr.Fone might result in data loss. Back up all your essential data before fixing your OS using this software to stay safe.
8. Update the Video App
Sometimes, it’s not the outdated OS version causing issues but rather the out-of-date video app. Like OS updates, app and other software updates often contain fixes for common problems and security patches. Not every update is there simply to introduce new features.
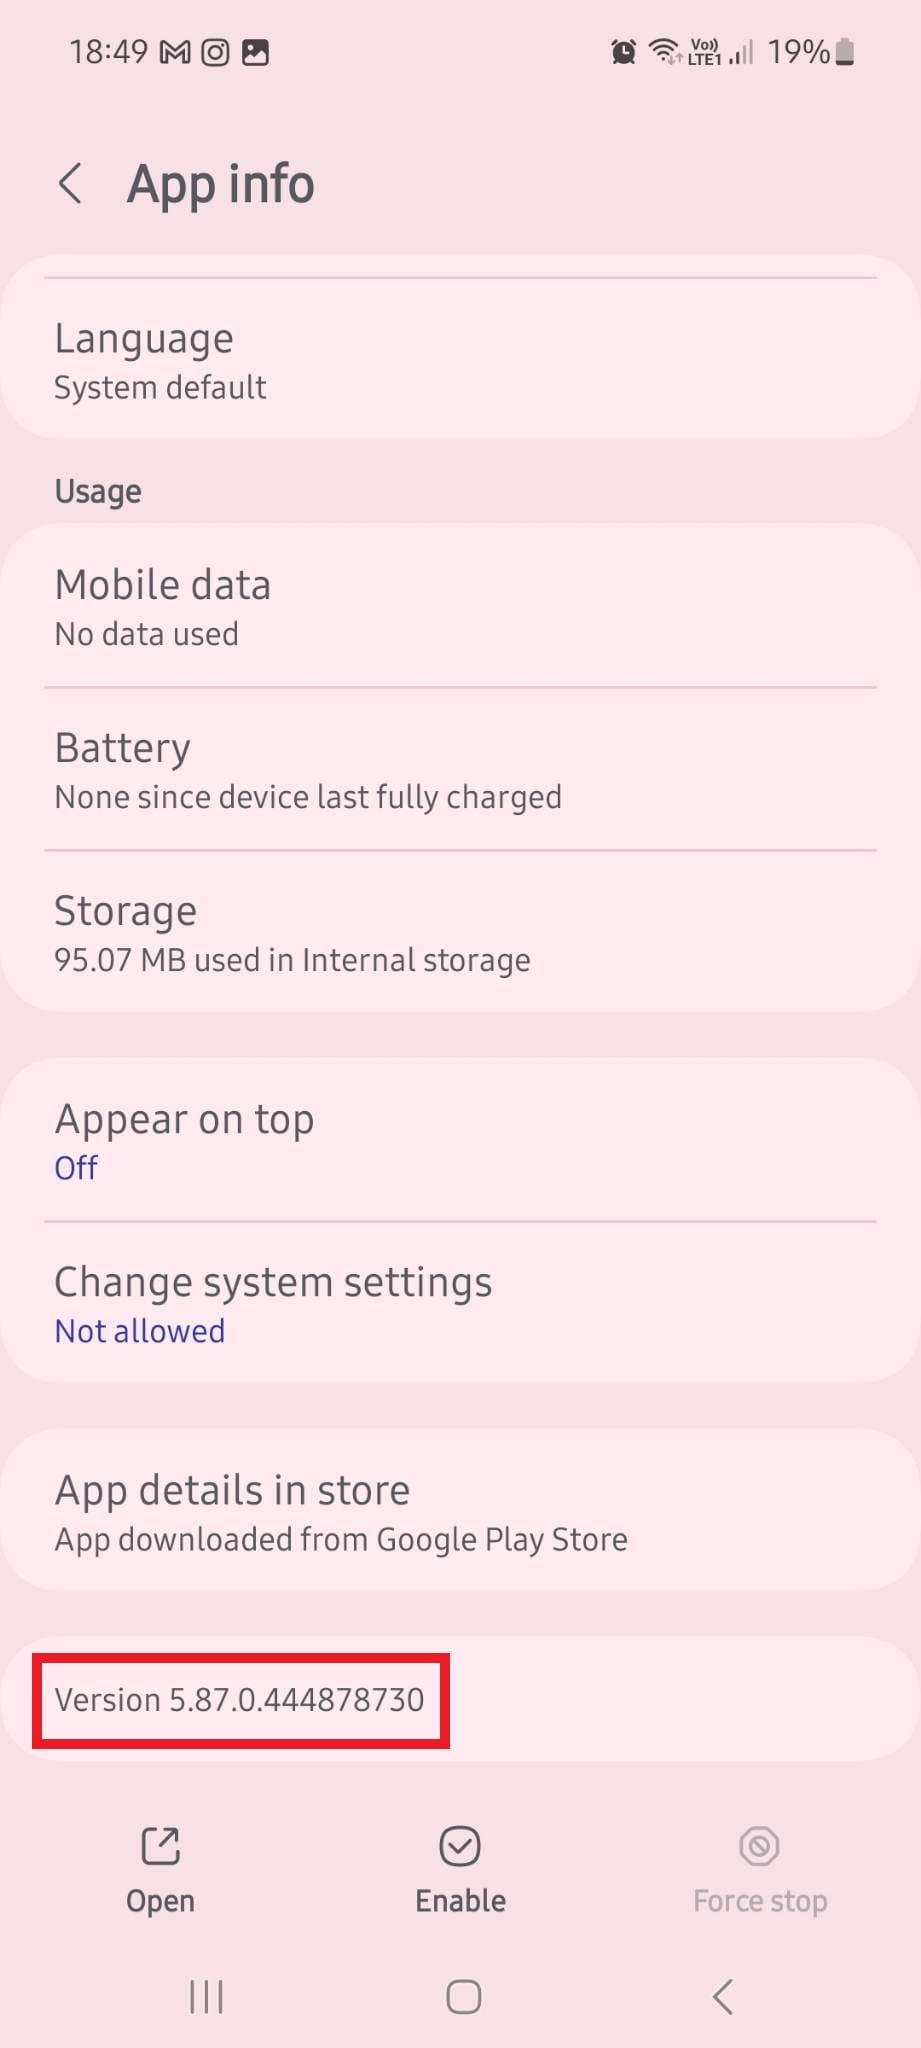
To check whether you’re using the latest version of your video player, go to Settings > Apps. Find your video player app, tap it, and scroll down to the bottom of the page to see the version installed on your phone.

9. Clear Cookies and Browsing Data
If online videos are causing problems, not your recorded or downloaded ones, you might be due for a quick cookie and browsing data clearing.
Cookies are usually there to improve the user experience, allowing you to load websites faster and enjoy improved performance. However, if your cookies and browsing data occupy too much space, they could pose problems.
You’ll first need to launch your mobile browser to clear cookies and browsing data. If you’re using Google Chrome, the process is simple and streamlined. Tap the three dots in the upper right corner and go to Settings. From there, go to Privacy and security > Clear browsing data > Clear data.
10. Reinstall Video Apps
If you still have issues with videos not playing on your Realme 11 Pro+, you could try deleting and reinstalling your video apps. Sometimes, simply updating the video app might still retain the glitch causing problems. However, if you delete it in its entirety and then install it again, the issue should be gone.
To uninstall the video app on your Android, go to Settings > Apps. Locate the app you want to delete, then tap Uninstall at the bottom of your screen.
To reinstall it again, go to the Google Play Store, search for the video app you want to have, then click Install.

 safe & secure
4,974,400 people have downloaded it
Conclusion
Like other smartphones, Android devices occasionally encounter glitches when playing video files. In most instances, the solution can be as simple as restarting your device. In others, you might have to perform a full factory reset or use software like Wondershare Dr.Fone to repair your Android OS.
Whatever the case is, don’t despair. There’s usually a solution that can fix the problem and ensure your device works as expected.
How to Fix It: Realme 11 Pro+ Won’t Turn On
Did your Realme 11 Pro+ decide to go on vacation and refuses to turn on? If your Realme 11 Pro+ won’t turn on for no apparent reason, finding why it failed to power on and the solution for it is not a fun process.
Here, we hope we are able to give you a checklist of reasons behind this issue and the possible steps you can take to rectify it.
Part 1: Common Reasons That Your Realme 11 Pro+ Won’t Turn On
If you cannot find any reason why your Realme 11 Pro+ will not switch on, here are some possible reasons:
- Your Android phone is simply frozen in power-off or sleep mode. In which case, it fails to switch itself on or wake itself up when you initiate it.
- Your phone’s battery may be out of charge.
- The operating system or installed software is corrupted. The tell-tale sign if this is that if you manage to switch on your Realme 11 Pro+, it freezes or crash soon after.
- Your device is clogged up with dust and lint causing the hardware to not work properly.
- Your power button is broken , which caused it to not be able to trigger the necessary action needed to power up the Android phone. Check to also see if your connectors have no carbon build-up which will cause your phone to not be charged properly.
Part 2: Rescue Data on Android Phone That Will Not Turn On
If you need some help rescuing data from an Android phone that will not turn on, the Dr.Fone - Data Recovery (Android) will be your best friend in your data recovery attempt. With the help of this data recovery solution, you will be able to intuitively recover lost, deleted or corrupted data on any Android devices. Its flexibility and efficiency in rescuing data make it one of the best software out there.
Note: For now, the tool can rescue data from broken Android only if your phone is earlier than Android 8.0, or rooted.
Dr.Fone - Data Recovery (Android)
World’s 1st data retrieval software for broken Android devices.
- It can also be used to recover data from broken devices or devices that are damaged in any other way such as those stuck in a reboot loop.
- Highest retrieval rate in the industry.
- Recover photos, videos, contacts, messages, call logs, and more.
- Compatible with Realme 11 Pro+ devices.
3981454 people have downloaded it
If your Realme 11 Pro+ won’t turn on, here is how you can use the software to recover data:
Step 1: Launch Wondershare Dr.Fone
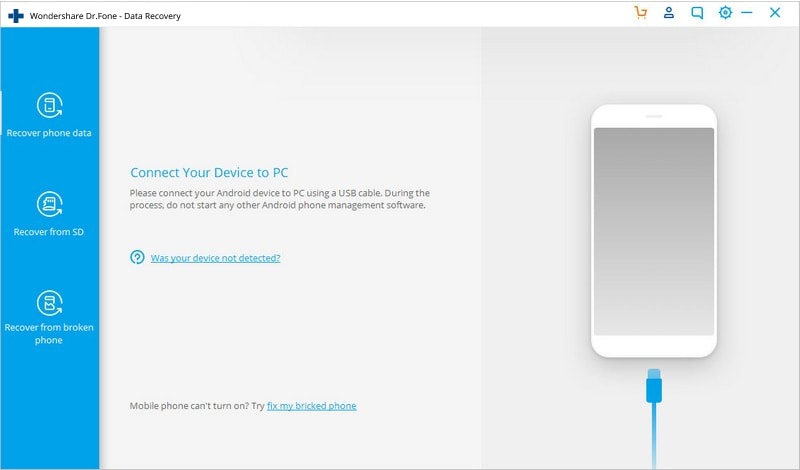
On your desktop computer or laptop, open Wondershare Dr.Fone. Click on Data Recovery on the left column. Connect your Realme 11 Pro+ to the computer using a USB cable.
Step 2: Decide which file types to recover
On the next window, you will need to check the boxes corresponding to the type of files you can recover from a list. You can get back Contacts, Messages, Call History, WhatsApp messages & attachments, Photos, Audio and more.

Step 3: Select the problem with your phone
Opt for “Touch screen not responsive or cannot access the phone” or “Black/broken screen”. Click Next to continue.

Look up for your device – pick the Realme 11 Pro+ device Name and Device Model. Advance by clicking on the Next button.

WPS Office Premium ( File Recovery, Photo Scanning, Convert PDF)–Yearly

Step 4: Go into your Realme 11 Pro+’s Download Mode.
The data recovery tool will guide you on how you can go into your Realme 11 Pro+’s Download Mode. You should be getting a step-by-step guide on your computer.

Step 5: Scan the Android Phone.
Using the provided USB cable, attach your Realme 11 Pro+ to your computer – the data recovery tool should be able to discover your device automatically and scan it for recoverable data.

Step 6: Review and Retrieve the Data from Broken Android Phone.
Wait for the program to finish scanning the phone – once completed, you will be able to get a list of recoverable files. You can have a preview of the file by highlighting them. Tick the box next to the file name and click on Recover to start retrieving the files and save them in the destination of your choosing.

 PCDJ Karaoki is the complete professional karaoke software designed for KJs and karaoke venues. Karaoki includes an advanced automatic singer rotation list with singer history, key control, news ticker, next singers screen, a song book exporter and printer, a jukebox background music player and many other features designed so you can host karaoke shows faster and easier!
Part 3: Android Phone Won’t Turn On: One Click Fix
After repeated attempts, when your Android mobile/tablet stops buzzing, what options do you have to revive it?
Well, we would recommend picking Dr.Fone - System Repair (Android) to fix an Android phone will not switch problem. This one-click Android system repair tool resolves every Android system issue without any fuss including Android Phone won’t turn on issue.
Dr.Fone - System Repair (Android)
The real fix to issues like “Android phone will not switch on”
- This tool is aptly effective for all the latest Realme 11 Pro+ devices.
- With a high success rate for fixing Android devices, Dr.Fone - System Repair (Android) ranks at the top.
- This is a single click application to fix all Android system issues effortlessly.
- It is the first tool to repair all Android system issues in the industry.
- It is intuitive and requires no tech expertise to work with.
3981454 people have downloaded it
Prior to fixing the Android phone will not switch and getting things back in action. You need to make sure that you have backed up the Android device . It is recommended that rescuing data from an Android phone by backing up is better than recovering it post the process.
Phase 1: Get the Realme 11 Pro+ device ready and connect it
Step 1: Run Dr.Fone on your computer once the installation is complete and tap the ‘Repair’ option form the interface. Now, connect your Android mobile with the computer.
Step 2: You will find a range of options, tap on the ‘Android Repair’ one. Hit the ‘Start’ button so that you can proceed to fix Android Phone won’t turn on hassle.
Step 3: Now, over the Realme 11 Pro+ device information window, ensure to feed your exact device details. Press the ‘Next’ button then on.
Phase 2: Enter ‘Download’ mode for fixing your Realme 11 Pro+
Step 1: You need to put your Realme 11 Pro+ in Download mode for resolving the Android phone will not switch on.
- For the Realme 11 Pro+ device having ‘Home’ button, you got to switch it off and press ‘Volume Down’, ‘Home’, and ‘Power’ keys for 5-10 seconds at once. Let them go and click on the ‘Volume Up’ button to put your phone in ‘Download’ mode.

- For ‘Home’ button-less device, turn the phone/tablet down first. For 5 – 10 seconds, hold down the ‘Volume Down’, ‘Bixby’, and ‘Power’ buttons. Tap on the ‘Volume Up’ button to get into the ‘Download’ mode, after releasing the 3 buttons.
Step 2: Hitting the ‘Next’ key will allow you to download firmware and proceed with the next step.
 Software Update Pro - Check and update software installed on your computer.
Step 3: Dr.Fone - System Repair (Android) would verify your firmware download and then take a while to rectify and resolve Android Phone won’t turn on issue.
Part 4: Android Phone Won’t Turn On: Common Fix
To try fixing an Android Phone that won’t turn on, follow these steps:
- For any Android devices, remove the battery (considering the battery of your Realme 11 Pro+ can be removed) and leave it out for at least 30 minutes. Put back the battery in and try to turn it on.
- Press and hold down the Power and Volume Down buttons at the same time for 15-30 minutes to reboot the Realme 11 Pro+ device.
- Should the first two steps do not work, charge your Realme 11 Pro+ to get it out of the start-up loop. You can also opt to use a different battery, just in case your current battery is the source of the problem.
- If there are any connected hardware e.g. SD card, remove them from the Realme 11 Pro+ device.
- Start your Realme 11 Pro+ in Safe Mode by pressing and holding down the Menu or Volume Down button on your device.
- Should the first five steps do not work for you, perform a hard reset. Do take note that each device will have a different way to do so and that data that is stored locally on the phone will be deleted.
- Send your Realme 11 Pro+ to the repair shop should none of these steps work.
Part 5: Useful Tips to Protect Your Realme 11 Pro+
There are several reasons as to why your Realme 11 Pro+ won’t turn on. The problem could be a hardware or software issue which could be prevented. Here are some useful tips to protect your Realme 11 Pro+.
I. Hardware
- Remember that the components that make your Realme 11 Pro+ is sensitive. To protect these components from being damaged, use a good guard casing.
- Take apart your Realme 11 Pro+ and clean it routinely to avoid dust and lint from clogging the phone and overheating it.
II. Software
- It is recommended to download apps from Google Play Store. This way, you can be sure that your app comes from a trusted source.
- Read the app’s permission to see which part of the operating system and your personal information that you are giving access to.
- Install reliable anti-virus and anti-malware software to safeguard your Realme 11 Pro+ from malicious attacks.
- Make sure you update your operating system, software and apps to make sure you have the latest version – the developer may have fixed the bugs that have caused problems on Android phones.
It is important to note that your phone contains some important data. Therefore, when your Realme 11 Pro+ won’t turn on do not just give up - there are plenty of tools at your disposal to recover back your files and phone.
- Title: Fix Unfortunately Settings Has Stopped on Realme 11 Pro+ Quickly | Dr.fone
- Author: Ariadne
- Created at : 2024-07-30 10:38:11
- Updated at : 2024-07-31 10:38:11
- Link: https://howto.techidaily.com/fix-unfortunately-settings-has-stopped-on-realme-11-proplus-quickly-drfone-by-drfone-fix-android-problems-fix-android-problems/
- License: This work is licensed under CC BY-NC-SA 4.0.