
Fixing Persistent Pandora Crashes on Honor X9a | Dr.fone
Fixing Persistent Pandora Crashes on Honor X9a
Pandora, an app bringing music to our fingertips, is a beloved platform for streaming tunes on Android devices. Despite its popularity, users might encounter occasional hurdles with the app, such as unexpected hanging, lagging, or even crashing. These interruptions can disrupt our musical journey.
In this article, you’ll explore practical solutions to the problem of “why does Pandora keep stopping.” Following the steps and tips, you can regain smooth and uninterrupted access to your favorite tunes. Have a hassle-free and enjoyable music streaming experience with Pandora on your Honor X9a.


Part 1: Basic Troubleshooting and Fixes
Pandora, the music streaming app cherished by Android users, accompanies you on your musical journey. It offers an array of melodies at our fingertips. However, occasional crashes can disrupt this harmonious experience. This results in an annoying experience where Pandora keeps stopping on Android phones.
Crashes often result from glitches or bugs within the app’s code. These unexpected errors can cause Pandora to freeze, lag, or abruptly shut down, hindering its smooth operation. When faced with intermittent crashes, several basic fixes can help restore Pandora’s functionality:
- Closing the app. Simply closing and reopening Pandora might resolve transient issues.
- Restarting the phone. A reboot of your Honor X9a can clear temporary glitches affecting Pandora.
- Updating the app. Ensure you have the latest version of Pandora installed. Updating the app can rectify bugs from older versions.
- **Reinstalling the app.**If the problem persists, uninstall Pandora and reinstall it from the Google Play Store. This process can refresh the app’s data and settings, potentially resolving persistent issues.
If these basic fixes fail to address the continuous crashing of the Pandora app, or if the crashes persist over an extended period, the next section will provide advanced solutions. These initial troubleshooting steps aim to tackle common and temporary issues that could impede Pandora’s performance. If the problem persists, it might necessitate more intricate resolutions or further investigation into the app’s underlying technicalities.

Part 2: Causes Behind Constant Pandora App Crashes and Solutions
Several underlying factors might be at play when persistent crashes plague your Pandora app. This section explores these.
Poor Internet Connection
A stable internet connection is pivotal for seamless app functionality. Crashes in Pandora can stem from poor connectivity. Check your internet connection . Ensure you’re connected to a reliable network. Restart your router or switch between Wi-Fi and mobile data to troubleshoot connectivity issues.

Corrupted/Broken Devices
If you notice that all other apps are crashing , your device’s system may also have a problem. In this case, simple app reinstalls/restarts can fix the problem.
Thankfully, Wondershare Dr.Fone solves device corruption leading to app crashes. This powerful toolkit addresses deep-seated issues causing app crashes, such as corruption within the Honor X9a device that impacts Pandora’s performance. The Dr.Fone’s System Repair feature acts as a reset button for your Honor X9a, resolving underlying system-level problems that cause app crashes.
Here’s how you can use it to resolve the issue of why the Pandora app keeps crashing on Android. First, of course, ensure that your device is connected.
- Step 1: Launch Dr.Fone on your computer. Access System Repair.

 safe & secure
4,851,928 people have downloaded it
- Step 2: Choose Android on the next page.

- Step 3: Click Start to initiate Android System Repair.

- Step 4: Check if the Honor X9a device details presented onscreen are correct. You may edit them accordingly for any mistakes.

- Step 5: Follow the onscreen instructions to place your phone into Download mode. Then, Dr.Fone will download the firmware.

- Step 6: After downloading, click Fix Now. Then, type in “000000” on the appearing window text box. Click Confirm.

- Step 7: Once finished, click Done. Your Pandora app should not crash once you reinstall it again by now.

Cache Buildup
Accumulated cache data can hamper app performance, leading to frequent crashes. Clear the cache of the Pandora app. Usually, you can see this option under Settings > Apps > Clear Data. Additionally, you can optimize your device’s RAM and storage space by deleting unnecessary files or closing unused apps.

Device Compatibility Issues
Outdated system software can create compatibility issues, causing app instability. Ensure your device’s system software is up-to-date. Check for and install any pending system updates in your device’s settings. Updated software often includes bug fixes and improvements that can rectify compatibility-related crashes.
You can systematically troubleshoot and resolve the issues by addressing the potential culprits behind constant Pandora app crashes, ensuring a smoother and uninterrupted music streaming experience. If the problems persist, contacting Pandora support or seeking professional assistance might be advisable to delve deeper into the technical aspects of the app’s performance issues.
Part 3: What To Do if None of the Fixes Work
If the suggested fixes don’t work, and you still wonder “why does Pandora keeps stopping on Android,” then it might be time to take a look at these alternatives:
- **Consider trying other music streaming apps.**Explore alternative music streaming applications available on the Google Play Store. Several reliable options offer similar services to Pandora, providing an opportunity to continue enjoying music while bypassing the persistent app issues.
- **Contact customer support.**Reach out to Pandora’s customer support for tailored assistance. They may offer specific troubleshooting steps or insights into the app’s technical glitches.
- Consider a new phone. Upgrade to a new phone if the crashes persist despite troubleshooting, and your device is outdated or incompatible. This might help resolve the issue by providing a more stable environment for app usage.
Conclusion
In conclusion, navigating Pandora app crashes on your Honor X9a demands a systematic approach. Keeping regular maintenance, such as clearing cache, optimizing RAM, and ensuring timely device updates, can mitigate app crashes and uphold smooth performance. This way, you can resolve the issue of why Pandora keeps stopping.
When persistent issues arise, especially if other apps are affected similarly, Wondershare Dr.Fone emerges as a reliable solution. Its comprehensive toolkit, including System Repair, can effectively address deep-seated issues. By embracing proactive measures and leveraging Dr. Fone’s prowess, users can enhance their device’s performance and ensure an uninterrupted music streaming experience on Pandora and other apps.
safe & secure
3,362,023 people have downloaded it
How to Fix Android App Not Installed Error on Honor X9a Quickly?
App not installed on Android is no more an unknown Error Code during Application installation as many people experience it on a day-to-day basis. An “Application not installed” error message usually pops up when you are trying to download and install an App with a .apk file extension from somewhere other than the Google Play Store. The error is very confusing at first but makes sense when you realize that this unknown Error Code during Application installation is neither a software issue nor a hardware problem. It is a direct outcome of what you do with your device. Yes, you heard that right. Your faulty actions can cause Android App not installed error.
What to do when trying to install the Android APK it says “app not installed”? It is terrible that you can’t install App on your device. But in this article, you will know more about the causes behind this error and the best ways to fix it, read on, here is all you need to know.

WPS Office Premium ( File Recovery, Photo Scanning, Convert PDF)–Yearly
Part 1: Common reasons for the “Android App not installed” error
You may ask: Why can’t I download apps on my Honor X9a? Understanding the underlying causes of the “Android App Not Installed” error is crucial for resolving the issue effectively. So, what are the reasons for Android App not installed error? Given below are a few reasons:
1. Insufficient storage
Android software and if data such as photos, videos, music, messages, apps, contacts, emails, etc are stored in the internal memory there is not adequate storage left for another App, leading to Android App not installed error.
2. Corrupted/Contaminated App file
When you do not download Apps from the Play Store and choose another platform to do so, App files are usually corrupted and hence cannot be installed on your device smoothly. You should be doubly sure of the source from where you download an App, check its extension name, and make an effort not to install contained files.
3. SD Card not mounted in the Honor X9a device
At times your phone could be connected to your PC or another electronic device that can access the SD Card from your device. In such situations when you install an App and choose to save it to your SD Card, you will see Android App not installed error because the App cannot find the SD card as it is not mounted in your device.
4. Storage location
You must be aware that certain Apps work their best when stored in the Honor X9a device’s internal memory, whereas others need to be located on an SD Card. If you do not save the App in an appropriate location, you will find that the App isn’t installed because of an unknown Error Code.
5. Corrupt storage
Corrupted storage, especially a corrupted SD Card, is known to cause the Android App isn’t installed error. Even the internal storage can get clogged due to unnecessary and unwanted data, some of which might contain an element that disturbs the storage location. Take this issue seriously as a corrupted SD Card and even clogged up internal memory can put your device in danger.
6. Application Permission
Software operations running in the background and App Permission are not new concepts. Such errors can also cause the Unknown Error Code during App installation.
7. Incorrect file
If you already have an App installed but download another variant of it having a distinct signed or unsigned certificate can also make the Android App not installed error pop-up. This sounds technical, but this and all the other reasons listed above can be tackled by you.
The Unknown Error Code during Application installation can occur due to any one or more of the reasons stated above. So read them carefully and understand them well to avoid such glitches in the future.

 vMix Basic HD - Software based live production. vMix Basic HD includes 4 inputs, 3 cameras, streaming, recording, playlist.
Part 2: One-click to fix App not installed on Android error
So App not installed on your Honor X9a or tablet? The most horrible part is that this issue may come out of the corruption in the system files. In this situation, Android apps won’t be installed no matter what measures you take. Android system repair is the only effective solution to deal with this issue.
Android system repair used to require high technical skills. But most of the users know little about technical things. Well, worry not! Dr.Fone - System Repair (Android) allows you to repair Android easily, that is, complete the fix with just one click.
Dr.Fone - System Repair (Android)
A powerful tool to fix the “Android App not installed” error in one click
- Fix all Android system issues like Android App not being installed, the system UI not working, etc.
- One-click to fix Android App not installed. No technical skills are required.
- Support all the new Honor X9a devices, etc.
- On-screen instructions are provided to prevent any misoperation.
3981454 people have downloaded it
Note: Getting your Android system repaired may erase the existing device data. It is recommended that you should back up your Android data before starting the Android repair.
The following steps illustrate how to fix the “Android App not installed” error in one click:
- Install Dr.Fone on your Windows. After that, launch it, and click “System Repair”. Connect your Android to the computer.
- Select the “Android” option and click “Start”.

- Select device information, such as brand, name, model, country, etc., from each field, and type “Next”.
- Follow the on-screen instructions to boot your Android in download mode, and allow the tool to download the firmware to your device.
- After the firmware is downloaded, the tool will start to repair your Android, hereby fixing the “Android App not installed” error.

 safe & secure
We understand that it can be a tricky situation to be in when Android App not installed error pops up, but what if we tell you can get rid of it in easy and simple steps? Yes, there is!
#1. Delete unnecessary files/Apps
Insufficient storage can prevent the app from being installed. Make some storage space on your device by cleaning unwanted data and deleting extra media and other files. You can also get rid of heavy Apps by:
Visiting “Settings” on your device. Then select “Manage apps”, “Application Manager” or “Apps” (varies based on device model or version) from the list of options before you.

Now select the App you wish to uninstall and wait for the App Info screen to open, then click on “Uninstall” as shown in the screenshot.

You can also uninstall the unnecessary application on the home screen, just long-press the app you want to uninstall until you see the “uninstall” icon. Click “Uninstall”, then, you need to click “OK” to confirm the uninstall process.

#2. Use only Google Play Store
As you are all aware, the Play Store is specially designed for Android software and contains only trusted and safe Apps. It is often known as the “Android Market” because it is loaded with different types of Apps to stiffly all your needs so that you don’t have to rely on other third-party sources to purchase/install Apps.


#3. Mount your SD Card
Another remedy for Android App not installed error is to make sure that the SD card inserted in your device is not inaccessible.

To check the same:
First, disconnect your Honor X9a from your PC and then visit “Settings” on your Android and select “Storage” from the options that appear. Finally, click on “Mount SD Card” at the Storage Info screen.
You can now restart your device and try to install the app now, it should work!
#4. Choose App location wisely
It is advisable to not tamper with the App’s location and let the software decide where it needs to be placed. As far as possible, let the Apps be in your device’s internal memory.
 KoolReport Pro is an advanced solution for creating data reports and dashboards in PHP. Equipped with all extended packages , KoolReport Pro is able to connect to various datasources, perform advanced data analysis, construct stunning charts and graphs and export your beautiful work to PDF, Excel, JPG or other formats. Plus, it includes powerful built-in reports such as pivot report and drill-down report which will save your time in building ones.
 It will help you to write dynamic data reports easily, to construct intuitive dashboards or to build a whole business intelligence cockpit.
KoolReport Pro package goes with Full Source Code, Royal Free, ONE (1) Year Priority Support, ONE (1) Year Free Upgrade and 30-Days Money Back Guarantee.
Developer License allows Single Developer to create Unlimited Reports, deploy on Unlimited Servers and able deliver the work to Unlimited Clients.
#5. Format SD Card
The chances of your SD Card being corrupted are very high. You can format it either while it is in your device or externally.
Now to Clean up your SD Card, simply visit “Settings” and select “Storage” and tap on “Format SD Card” and mount it once again to use it smoothly.

#6. App Permissions
You can reset App permissions to combat the Android App not installed error by Visiting “Settings” and then selecting “Apps”. Now access the Apps menu and hit “Reset App Preferences” or “Reset application permissions”. This will allow third-party apps to get installed on your device.
#7. Choose the correct App file
Make sure to always download an App file only from a trusted and safe source to avoid any errors during installation.


#8. Reboot your device
Finally, if nothing else works, restart your device to end all operations which could be causing the said error. To reboot, just press the power button till you see a pop-up. Select “Restart” and wait for your device to reboot.
 LYRX is an easy-to-use karaoke software with the professional features karaoke hosts need to perform with precision. LYRX is karaoke show hosting software that supports all standard karaoke file types as well as HD video formats, and it’s truly fun to use.
Conclusion
Encountering the “App Not Installed” error on Android can be frustrating, but by understanding the causes and implementing the appropriate solutions, you can overcome this issue. We saw that Android App not installed error can be fixed quickly if you keep in mind the tips given in this article. However, please ensure that you follow each instruction carefully to avoid any further goof up.
safe & secure
 EmEditor Professional (Lifetime License, non-store app)
Full Solutions to Fix Error Code 920 In Google Play on Honor X9a
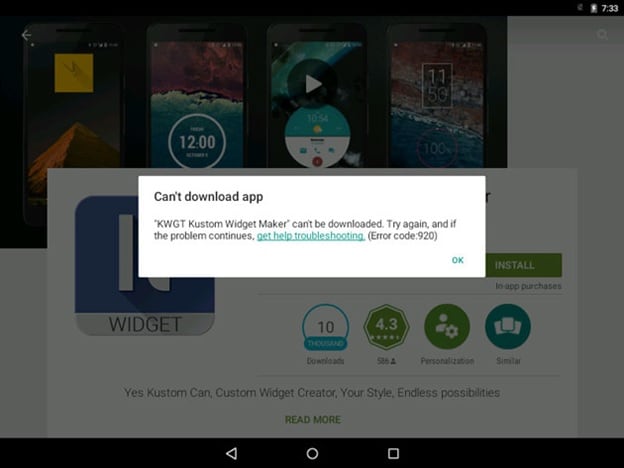
If you are using an Android device, you might have encountered the error code 920 in Google Play Store. This error usually occurs when you are trying to download or update an app from the Google Play Store. The error code 920 can be quite frustrating, as it prevents you from downloading or updating your favorite apps. However, there are several ways to fix this error and get your apps back up and running. In this article, we will show you some of the best solutions to fix error code 920 in Google Play Store on Honor X9a.
Trust me, once you face an error it’s frustrating until you find a solution to it. Almost 90 % of the time we search on the internet for an appropriate solution. But finding a legitimate solution can be hard. Most websites just upload only one method to solve an error. And most times that one single method may not be enough for us. And again we are back to Square one trying to figure out what’s wrong and where we screwed up. Most people face an error 920 on play store. It’s frustrating to get the play store error 920.And not everyone knows what the error 920 is. Rest assured, this article will provide you four methods to get rid of the error 920 problems you face and you will not have to depend on any other further sources for finding out what play store error 920 is or find any other method to get rid of the error 920 on play store.
- (i) Re-installing the application
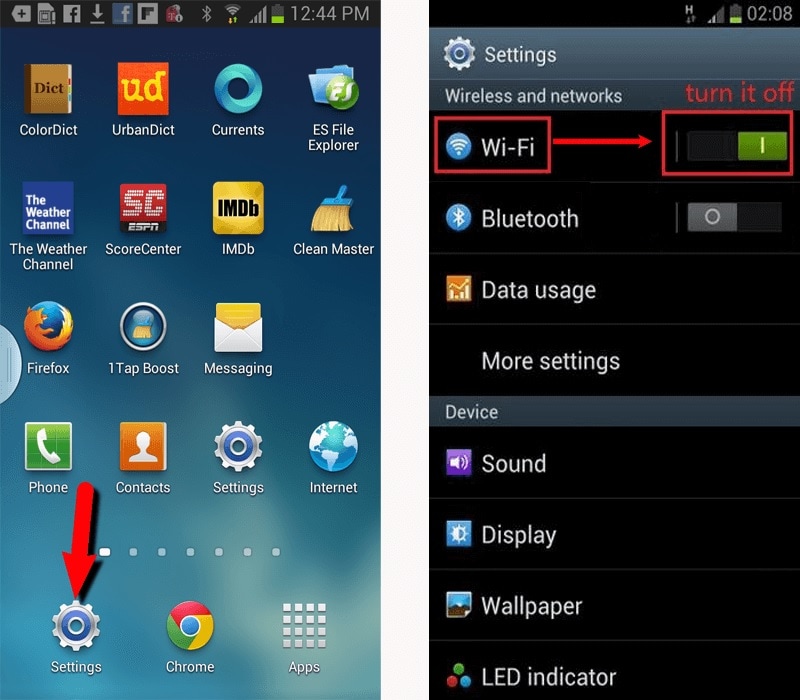
- (ii) Switching off and turning the wifi (cellular data) on
- (iii) Clearing the cache and data of Google Play Store
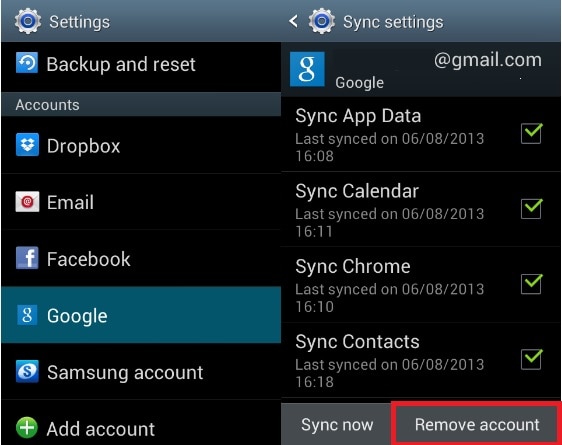
- (iv) Removing and adding back your Google account

Part 1: What is Error Code 920?
Sometimes people think that they have endangered the fate of humanity because of the error that is being displayed (Just Kidding). Don’t worry you haven’t crashed any server or did any damage to your device but you just gave your device a lot of work. Before you got this error you were downloading a lot of apps right. Well, that’s the exact reason why you came up with this error in the first place. There are various reasons behind this error code 920, however, the prominent ones are –

- a. Too much load on your data connection.
- b. The cache is not cleaned. Thus the connection is getting hampered due to overload.
- c. Network connection is not stable.
There are a lot of Android users out there and the error 920 on play store doesn’t have a unique solution. You’ll have to try out a bunch of them and find out what works for your device. So one of the given four methods below is definitely going to work on your device.
 vMix Pro - Software based live production. vMix Pro includes everything in vMix 4K plus 8 channels of Replay and 8 vMix Call
Part 2: 5 Solutions to fix error 920
METHOD 1: Fix Error Code 920 By Android Repair
If you’re writing a lot of data to your device in one go, this can sometimes overload your phone which can cause data corruption. This could have happened if you try the method above and then still encounter the play store error 920.
If this is the case, there’s a solution known as Dr.Fone - System Repair that can help. This is an industry-leading package that has everything you need to get your device running as it should be.
Dr.Fone - System Repair (Android)
Easiest Fix to Error Code 920
- Easy operation with no technical knowledge required
- Simple, one-click play store error 920 fix
- Clean and simple to understand user-interface
- Supports various Honor X9a devices, including the latest Honor X9a S9/S8
- The #1 Android repair software in the world
3,545,081 people have downloaded it
If this is the answer you’re looking for to help you fix your error code 920 problems, here’s a step by step guide on how to use it;
Note: please note that this method may erase all personal data on your device, so make sure you’ve backed up your device before continuing.
Step #1 Head over to the Dr.Fone website and download the Repair software for your Windows computer.
Step #2 Once installed, open the software and select the ‘System Repair’ option from the main menu.
Then connect your Honor X9a using the official cable and select the ‘Android Repair’ option.
 vMix HD - Software based live production. vMix HD includes everything in vMix Basic HD plus 1000 inputs, Video List, 4 Overlay Channels, and 1 vMix Call
Step #3 On the next screen, insert your device information to ensure you’re downloading the correct firmware.
 /a>
/a>
Step #4 Put your phone into Download mode by following the onscreen instructions.
Dr.Fone will now download your firmware and automatically install it onto your device. Your phone will then reset, and you’ll be ready to use it without experiencing that annoying error 920 play store code!
METHOD 2: Re-installing the application
This is the first thing that you want to try before going on to the more advanced one. In fact, this is the first thing I’d recommend you to try if you come up with an Error code 920. Just try this whenever you get any error.
Step 1 - Go to the application that you got the error with.
Step 2 - Open that application download page on the Play store.
Step 3 - Uninstall it or even uninstall all the update (If the error came when you were updating the application).
Step 4 - Now you clear the task manager and try installing it once again. If the play store error 920 doesn’t come then you have solved the problem and now wasn’t that easy. So it’s always best to try this step before doing anything else.
 Any DRM Removal for Mac: Remove DRM from Adobe, Kindle, Sony eReader, Kobo, etc, read your ebooks anywhere.
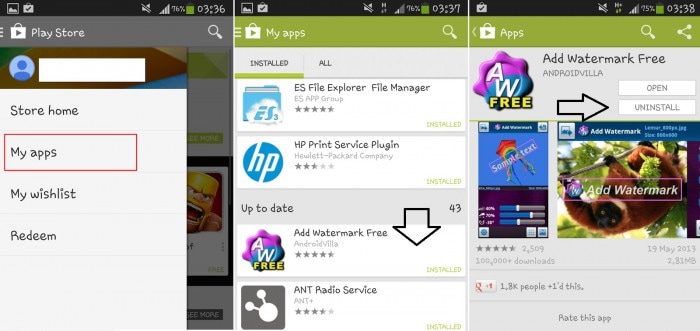
METHOD 3: Switching off and turning the wifi (cellular data) on
This is another basic method in solving the play store error 920. This error comes in when you have given too many tasks to download.
Step 1 - To remove that load Just turn your wifi off and then turn your wifi on (the same goes with your cellular data).
Step 2 - Now after doing this go to your Play Store application and download the application that you were going to download. Now your Play Store Error 920 won’t be bothering you anymore.
METHOD 4: Clearing the cache and data of Google Play Store
This is a little more complicated (complicated as in you will need to do a little more than the previous two methods). What you need to do is clear the cache and clear the data of the play store. This will get rid of the error code 920 the next time you download or update any application from the Google Play store.
Step 1 – Go to settings of your device.
Step 2 – Now find “Applications” option under the settings menu. Here you can find “Google Play Store” option. Open it.
Step 3 – Now, at the bottom, you can find “Clear Cache” option. Tap on it and your all cache will be cleared.
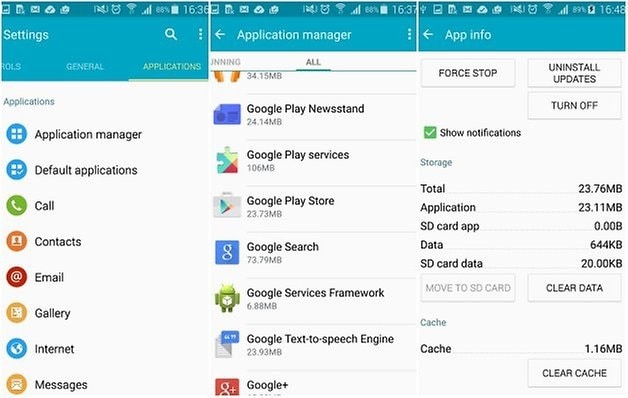
After doing this step clear your task manager (delete all recent applications). Go to play store and resume your download or update.
METHOD 5: Removing and adding back your Google account
It is best if you follow the order of the methods mentioned. Like, try each method in the given order until you get rid of the play store error 920. If you reach here then you truly must be in a desperate position to get rid of this error. The best and guaranteed way is to delete your Google account from your phone. By deleting what is meant here is to temporarily remove your account and the adding it in again. What this does is it kind of resets your play store details and it eradicates the error code 920. To do this you need to
Step 1 - go to Settings of your Mobile.
Step 2- Now, find “Accounts” and then go to “Google Accounts”.
Step 3 - In that section find the account you use for the play store or the account that you were using while the error came in. Once you tap on your specific account you’ll find an option to remove the account. Tap on it.
Step 4 - Now you have successfully removed your account and after that re-add your account. After entering your email id and password and hence adding your account. Go back to the play store and find the application that you were downloading or updating when the error code 920 came in. Now re-install it or update it back again. This time you won’t be faced with the play store error 920.
Again it is best if you follow the methods as illustrated above for removing error code 920 and this might have solved your problem by now. If now, you go for a complete factory reset, do it only at the extreme stage as this will delete all your personal data.
Play Store error 920 is a pretty common error and its solutions are also very easy. Please do ensure that you follow each and every step in sync so that you can get the best result out of these methods and get over with the error code 920 on Google play store.
- Title: Fixing Persistent Pandora Crashes on Honor X9a | Dr.fone
- Author: Ariadne
- Created at : 2024-07-30 10:51:40
- Updated at : 2024-07-31 10:51:40
- Link: https://howto.techidaily.com/fixing-persistent-pandora-crashes-on-honor-x9a-drfone-by-drfone-fix-android-problems-fix-android-problems/
- License: This work is licensed under CC BY-NC-SA 4.0.