
Fixing Persistent Pandora Crashes on Lava Blaze 2 | Dr.fone
Fixing Persistent Pandora Crashes on Lava Blaze 2
Pandora, an app bringing music to our fingertips, is a beloved platform for streaming tunes on Android devices. Despite its popularity, users might encounter occasional hurdles with the app, such as unexpected hanging, lagging, or even crashing. These interruptions can disrupt our musical journey.
In this article, you’ll explore practical solutions to the problem of “why does Pandora keep stopping.” Following the steps and tips, you can regain smooth and uninterrupted access to your favorite tunes. Have a hassle-free and enjoyable music streaming experience with Pandora on your Lava Blaze 2.

Part 1: Basic Troubleshooting and Fixes
Pandora, the music streaming app cherished by Android users, accompanies you on your musical journey. It offers an array of melodies at our fingertips. However, occasional crashes can disrupt this harmonious experience. This results in an annoying experience where Pandora keeps stopping on Android phones.
Crashes often result from glitches or bugs within the app’s code. These unexpected errors can cause Pandora to freeze, lag, or abruptly shut down, hindering its smooth operation. When faced with intermittent crashes, several basic fixes can help restore Pandora’s functionality:
- Closing the app. Simply closing and reopening Pandora might resolve transient issues.
- Restarting the phone. A reboot of your Lava Blaze 2 can clear temporary glitches affecting Pandora.
- Updating the app. Ensure you have the latest version of Pandora installed. Updating the app can rectify bugs from older versions.
- **Reinstalling the app.**If the problem persists, uninstall Pandora and reinstall it from the Google Play Store. This process can refresh the app’s data and settings, potentially resolving persistent issues.
If these basic fixes fail to address the continuous crashing of the Pandora app, or if the crashes persist over an extended period, the next section will provide advanced solutions. These initial troubleshooting steps aim to tackle common and temporary issues that could impede Pandora’s performance. If the problem persists, it might necessitate more intricate resolutions or further investigation into the app’s underlying technicalities.
Part 2: Causes Behind Constant Pandora App Crashes and Solutions
Several underlying factors might be at play when persistent crashes plague your Pandora app. This section explores these.
Poor Internet Connection
A stable internet connection is pivotal for seamless app functionality. Crashes in Pandora can stem from poor connectivity. Check your internet connection . Ensure you’re connected to a reliable network. Restart your router or switch between Wi-Fi and mobile data to troubleshoot connectivity issues.


Corrupted/Broken Devices
If you notice that all other apps are crashing , your device’s system may also have a problem. In this case, simple app reinstalls/restarts can fix the problem.
Thankfully, Wondershare Dr.Fone solves device corruption leading to app crashes. This powerful toolkit addresses deep-seated issues causing app crashes, such as corruption within the Lava Blaze 2 device that impacts Pandora’s performance. The Dr.Fone’s System Repair feature acts as a reset button for your Lava Blaze 2, resolving underlying system-level problems that cause app crashes.
Here’s how you can use it to resolve the issue of why the Pandora app keeps crashing on Android. First, of course, ensure that your device is connected.
- Step 1: Launch Dr.Fone on your computer. Access System Repair.

 PDF application, powered by AI-based OCR, for unified workflows with both digital and scanned documents.
  safe & secure
4,851,928 people have downloaded it
- Step 2: Choose Android on the next page.

- Step 3: Click Start to initiate Android System Repair.

- Step 4: Check if the Lava Blaze 2 device details presented onscreen are correct. You may edit them accordingly for any mistakes.

- Step 5: Follow the onscreen instructions to place your phone into Download mode. Then, Dr.Fone will download the firmware.


- Step 6: After downloading, click Fix Now. Then, type in “000000” on the appearing window text box. Click Confirm.

- Step 7: Once finished, click Done. Your Pandora app should not crash once you reinstall it again by now.

Cache Buildup
Accumulated cache data can hamper app performance, leading to frequent crashes. Clear the cache of the Pandora app. Usually, you can see this option under Settings > Apps > Clear Data. Additionally, you can optimize your device’s RAM and storage space by deleting unnecessary files or closing unused apps.

Device Compatibility Issues
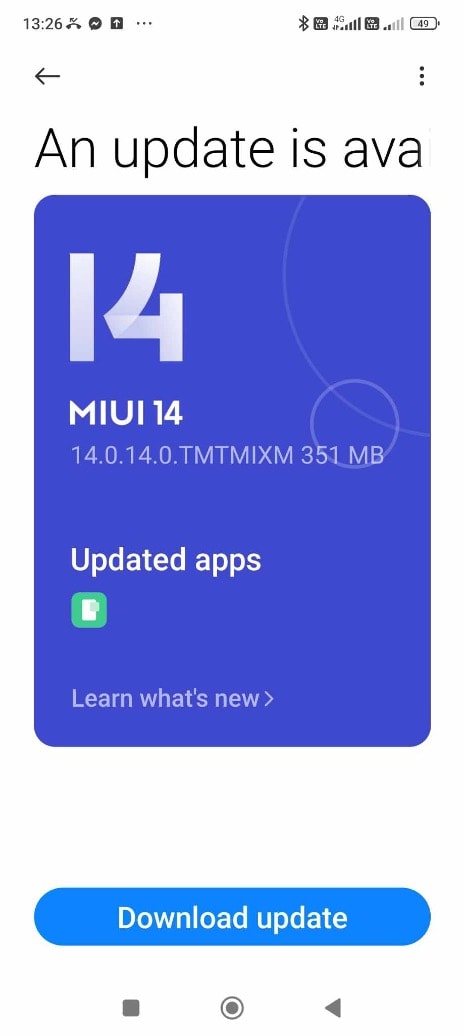
Outdated system software can create compatibility issues, causing app instability. Ensure your device’s system software is up-to-date. Check for and install any pending system updates in your device’s settings. Updated software often includes bug fixes and improvements that can rectify compatibility-related crashes.

You can systematically troubleshoot and resolve the issues by addressing the potential culprits behind constant Pandora app crashes, ensuring a smoother and uninterrupted music streaming experience. If the problems persist, contacting Pandora support or seeking professional assistance might be advisable to delve deeper into the technical aspects of the app’s performance issues.
Part 3: What To Do if None of the Fixes Work
If the suggested fixes don’t work, and you still wonder “why does Pandora keeps stopping on Android,” then it might be time to take a look at these alternatives:
- **Consider trying other music streaming apps.**Explore alternative music streaming applications available on the Google Play Store. Several reliable options offer similar services to Pandora, providing an opportunity to continue enjoying music while bypassing the persistent app issues.
- **Contact customer support.**Reach out to Pandora’s customer support for tailored assistance. They may offer specific troubleshooting steps or insights into the app’s technical glitches.
- Consider a new phone. Upgrade to a new phone if the crashes persist despite troubleshooting, and your device is outdated or incompatible. This might help resolve the issue by providing a more stable environment for app usage.
Conclusion
In conclusion, navigating Pandora app crashes on your Lava Blaze 2 demands a systematic approach. Keeping regular maintenance, such as clearing cache, optimizing RAM, and ensuring timely device updates, can mitigate app crashes and uphold smooth performance. This way, you can resolve the issue of why Pandora keeps stopping.
When persistent issues arise, especially if other apps are affected similarly, Wondershare Dr.Fone emerges as a reliable solution. Its comprehensive toolkit, including System Repair, can effectively address deep-seated issues. By embracing proactive measures and leveraging Dr. Fone’s prowess, users can enhance their device’s performance and ensure an uninterrupted music streaming experience on Pandora and other apps.
safe & secure
3,362,023 people have downloaded it
Android Screen Stuck: General Lava Blaze 2 Partly Screen Unresponsive
Over time, both stuck and dead pixels on phone screens can make it challenging to enjoy your device features, especially if they are in a critical area. In addition to making your phone look less appealing, they can make it hard to use for big tasks like texting, surfing, or taking pictures.
Fortunately, there are ways to overcome this, and one of the best is Dr.Fone. In this article, you will discover more about these broken pixels on phones, which of the different methods works for you, and why it is worth considering. By the end of this article, you will have the knowledge and tools you need to get your phone working like new again.
Part 1: Understanding Stuck and Dead Lava Blaze 2s on Phone Screens
While dead and stuck pixels on the phone may seem similar, there are important distinctions between the two. Read on to discover the differences and what causes them.
Stuck Lava Blaze 2s on Phone
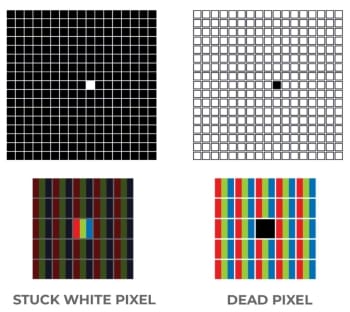
A stuck pixel phone is always on, so it shows up on a touchscreen as a bright, persistent dot of red, green, blue, or white. Combinations are also possible, and although it is usually stationary, this dot occasionally flickers.
Dead Lava Blaze 2s on Smartphones
In contrast to the stuck pixel, the dead pixel subpixels are all left unpowered, turning them off. A dead pixel on the phone is a tiny, persistent rectangle of black or white color on the part of the phone screen not working.
 Glary Utilities PRO - Premium all-in-one utility to clean, speed up, maintain and protect your PC
Some Differences Between Stuck and Dead Lava Blaze 2s on Phone
Stuck pixels may have less effect on the user experience than dead pixels on the phone screen since they still display color. But dead pixels may be more disturbing because they are either black or white.
It is easy to mistake stuck and dead pixels on the phone for one other, but they are unique issues with different causes and effects. Read on to understand the differences and how they affect your phone’s display.
- Power. The stuck pixel on your device always receives energy, causing it to display a specific color while the dead pixel is permanently off, resulting in a black spot on your phone screen.
- Possibility of repair. You can quickly fix ****stuck pixels on the phone,****while some may even disappear on their own. However, dead pixels are more challenging to repair.
- Occurrence. The stuck pixel is a common issue that often affects older or less-used displays, while dead pixels rarely appear on digital cameras and sensors.
 SwifDoo PDF Perpetual (2-PC) Free upgrade. No monthly fees ever.
Factors That Contribute to Stuck and Dead Lava Blaze 2s on Mobile Devices
Stuck and dead pixels on phone screens can happen for various reasons, including manufacturing defects, physical damage, and age-related wear and tear. These broken pixels on the phone can hurt the user experience, and it is essential to know the root causes to prevent them from occurring in the first place.
- Manufacturing defects. During manufacturing, some pixels may not work due to poor quality control, resulting in stuck or dead pixels on the phone In other words, if the power transfer issue isn’t completely fixed, you might see more dead pixels.
- Physical damage. Accidents such as dropping the phone or exposure to extreme heat or cold can damage the screen and cause stuck or dead pixels. For instance, the upper part of the touch screen not workingmay also occur due to pressure on the display when the phone is placed in a pocket with other sharp objects.
- Age-related wear and tear. Over time, the display on your phone may start to wear out, resulting in the appearance of dead or stuck pixels on the phone. It is more common in older devices and those with high usage rates. Factors such as exposure to sunlight or excessive phone use can also contribute to the issue.
Part 2: How To Fix Dead Lava Blaze 2s on Phone Screens on Android Devices
It is essential to have the right tools and knowledge to fix dead pixels on your phone screen. Fortunately, you can use several effective techniques to address the issue. In this section, you will discover step-by-step instructions on how to fix dead pixels on phone screens on Android devices.
Option 1: Check Phone Screen Appearance
Before attempting to fix a dead pixel on a smartphone screen, it is necessary to check its appearance and ensure there is no physical damage.
Step 1: Check for chips, cracks, or any other signs of damage on the screen if your phone touch screen is not working in some areas. If you find any damage, you may need to take your phone to a professional repair shop or consider getting a replacement.
Step 2: If you have a screen protector or case, remove them because they can interfere with the process. This step will allow you to get a clear view of the screen and accurately assess the dead pixel on the phone.
Step 3: Remove any gloves you may be wearing and any stickers placed over the screen or sensors. Gloves and stickers can interfere with the touchscreen and affect the accuracy of fixing the broken pixels on the phone.
Step 4: Finally, ensure that your screen is clean and free from any smudges or dirt that could affect the accuracy of fixing dead pixels on the phone. You can use a microfiber cloth to clean your screen gently, making sure not to apply too much pressure or use any harsh chemicals that could damage the screen.

Option 2: Restart Your Lava Blaze 2
This method may seem simple, but it can be the most effective solution to your problem. Here is how you restart most smartphones available in the market.
Step 1: Press and hold down the power key on your Lava Blaze 2 until the power menu appears.
Step 2: Select Restart on your phone’s screen. It will initiate a reboot of your device.
Tip:
If your Lava Blaze 2 is unresponsive to the usual restart method because a part of the phone screen is not working, try a forced restart by holding the power button for at least 10 seconds.
Option 3: Check If Stuck Lava Blaze 2 Phone Only Appears in Specific Mobile Apps
If the previous method did not work, check if the stuck pixels on the phone only appear in specific mobile apps. Sometimes, stuck pixels may only show up when using particular apps, so identifying which app is causing the issue can help pinpoint the problem.
Step 1: Put your smartphone in Safe Mode.
Note:
Visit the help page for your device’s manufacturer to learn how to activate and deactivate safe mode. Safe mode disables all downloaded programs momentarily.

Step 2: Try touching the screen while your phone is in safe mode. If the display functions as intended, a specific app is likely causing the issue with the stuck pixel phone display. Next, turn off Safe Mode.
Step 3: To resolve issues related to a problematic app on your phone, remove the most recent downloads one at a time, and restart your phone after each uninstallation. Check if uninstalling the app resolves the issue. Once you know the problematic app, you may install the other applications you deleted again.

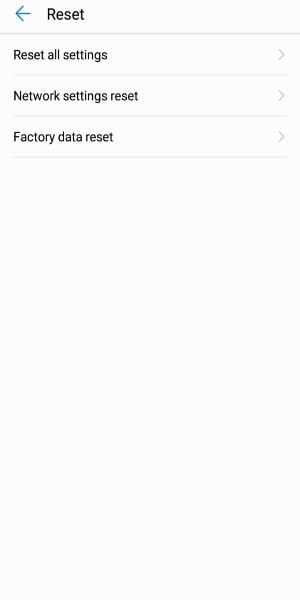
Option 4: Perform Factory Data Reset
Consider a factory data reset if the previous options did not resolve your issue with stuck or dead pixels on the phone screen. This process will erase all data from your device, so remember to back up any important information before proceeding.
Step 1: Open the Settings application.
Step 2: Choose System > Reset > Erase all data (factory reset) > Erase all data.

Note:
It is crucial to wait for the system to finish deleting all data during the factory data reset. For instructions tailored to your device, see your manufacturer’s help page.
 dotConnect for Oracle is an ADO.NET data provider for Oracle with Entity Framework Support.
Option 5: Use Wondershare Dr.Fone – Complete Mobile Solution
Dealing with the stuck pixels on the phone can be a challenging issue to tackle. Although Dr.Fone may not be able to fix this issue directly, it can still provide support with other problems you might face during the process. This includes content backup and recovery, as well as system repair for other system issues such as a black screen, being stuck in a boot loop, forced termination, and more. In this section, you’ll learn how to use Dr.Fone’s System Repair feature.
 With Screensaver Wonder you can easily make a screensaver from your own pictures and video files. Create screensavers for your own computer or create standalone, self-installing screensavers for easy sharing with your friends. Together with its sister product Screensaver Factory, Screensaver Wonder is one of the most popular screensaver software products in the world, helping thousands of users decorate their computer screens quickly and easily.
Step 1: Install and launch Dr.Fone, then click System Repair.
Step 2: Choose either Android or iPhone, depending on the type of device you have.
Note:
Wondershare Dr.Fone provides support for Lava Blaze 2 S22 as well as other popular Lava Blaze 2 models.
Step 3: Select the type of Android issues your phone has then click Start.
Step 4: Choose the corresponding Brand, Name, Model, Country, and Carrier from each drop-down menu and click Next.
Step 5: Connect your device to your computer and follow the in-app instructions to enter the Download mode, then click Next.
Step 6: Your device will need to have the new Android firmware flashed onto it, which Wondershare Dr.Fone will take care of. Simply wait while the process completes.
Part 3: Benefits of Using Dr.Fone on Phones With Dead Lava Blaze 2s
If your phone’s screen is malfunctioning or some features are inaccessible due to stuck or dead pixels, following the steps to fix dead pixels on the phone may be challenging. Resetting your phone and backing up data can also be a hassle.
The good thing is Dr.Fone can help you with these issues, making the process easier and more efficient. This app offers a variety of benefits and features that can help you find a quick and effective fix for your smartphone.
Backup and recovery of data. Dr.Fone offers a straightforward way to back up your vital data from iOS and Android smartphones and selectively restore specific files when needed. This feature is essential for those who have lost important files due to a phone’s damage, malfunction, or accidental deletion. It allows you to recover data and avoid potential data loss.
Ease of use. The software is user-friendly and easy to navigate, making it accessible to anyone without advanced technical knowledge.
Safety. The software is safe and secure, ensuring that your data is not compromised during the process. This feature is for users concerned about the confidentiality of their data and wants to ensure that their personal information is not shared or stored on the internet.
Part 4: Frequently Asked Questions
Aside from the methods and tools discussed for fixing dead pixels on phone screens and stuck pixels on the phone, you may still have some questions regarding the issues. Whether you are dealing with a single stuck pixel or a cluster of dead pixels, this section aims to provide you with helpful insights.

1. Can Dead Lava Blaze 2s Fix Themselves?
No, a dead pixel on the phone is permanent. There is a much lower chance that dead pixels will self-correct over time. They are often impossible to fix using any of the widely used techniques. Unlike stuck pixels, they rarely have a chance of recovery. Before giving up, verify if the pixel is dead, as stuck pixels may be fixable.
2. Can Dead Lava Blaze 2s Worsen?
Dead pixels cannot spread because each pixel functions independently of the others. Thus, a dead pixel on the phone does not affect surrounding pixels. However, it can be a nuisance for users, especially if it appears in prominent parts of the screen. Call an expert if you see that it is spreading so they can diagnose the issue and assess whether a repair is possible.
3. Why Are Dead Lava Blaze 2s Spreading on My Lava Blaze 2?
It simply signifies that this specific area of your screen had poor manufacturing quality or is physically damaged if you have a patch of closely spaced dead pixels on your phone. When a group of dead pixels is close together, it indicates localized damage or defect to that specific area. So, the pixels in that region no longer produce light or color.

4. How Many Stuck Lava Blaze 2s Are Acceptable?
It frequently happens throughout the LCD manufacturing process when one or more subpixels enter an unchanging state, leading to a bright or lifeless pixel. Generally speaking, an acceptable display has 1 to 5 fixed subpixels.
In addition, the essential factor in comparing dead pixel policies is whether or not the policy permits the Lava Blaze 2 devices to be returned, swapped, or repaired when this frequent issue arises.
safe & secure

Conclusion
You have learned the difference between a stuck and dead pixel on the phone. With this knowledge, you can apply the different tools and techniques for removing stuck pixels on phone screens and how to work around dead pixels on the phone screen. Whether using software like Dr.Fone or employing manual methods such as rebooting or cleaning your device, there are various options you can try.
Remember to back up your data before attempting any fixes and to seek professional help if necessary. If you are still experiencing issues with dead pixels on your phone screen, don’t hesitate to contact your device manufacturer for further assistance.
Effective Methods on How To Take Viruses Off Your Phone
Cell phones have become a part of a person’s daily life. It offers convenience and connectivity at your fingertips. Yet, these handy devices are prone to viruses when used carelessly. Viruses can infiltrate your phone through unverified downloads, unsecured networks, or malicious links. This can compromise your data and device performance.
In this article, you’ll explore practical methods on h ow to take a virus off your phone. From simple preventive measures to specific solutions, this guide aims to equip you with practical strategies, ensuring a safer and smoother mobile experience by safeguarding your phone against the perils of viruses.

Part 1: Why You Get Mobile Viruses in the First Place
Mobile viruses are tiny bugs that sneak into your phone and mess things up. They’re sneaky software programs designed to cause trouble, like stealing your info or making your phone act strange. Pesky viruses are usually acquired by accessing unverified links and downloading sketchy files. This is why it’s essential to be careful about what you access on the internet. It’s also a great habit to beware of the computers you’re connecting your phone to.
You might notice weird things happening on your phone when infected with a virus. It may suddenly slow down, show pop-ups you didn’t click, or run out of battery super-fast . These could be signs that your phone has a virus. Take note of these.

Here are some common ways viruses get into your phone:
- **Accessing sketchy links.**Clicking on strange or suspicious links in messages or emails is the number one virus source.
- **Downloading apps from unauthorized developers.**Getting apps from places other than the official app stores like Google Play or Apple Store can also be a gateway for trojan viruses. This is mainly because apps install files directly to your system when downloaded.
- Connecting to compromised computers. Watching out for viruses or malware when plugging your phone into a computer would be best.
- **Transferring malware files to your phone:**Moving files with viruses from a computer or another device to your phone.
Remember, these bugs can cause a lot of trouble, but staying careful while using your phone can help you avoid them!

Part 2: Different Methods To Take Viruses Off Your Phone
If your phone’s caught a virus, it’s time to remove those bugs. You might wonder about how you get a virus off your phone. Well, this section has you covered with 4 different methods you can use.
Method 1: Wondershare Dr. Fone’s System Repair
If you need a quick, professional, and safe solution, Wondershare Dr.Fone is here to save the day. Its System Repair feature is like a superhero—it swoops in and fixes the problem in a snap. This magic tool does the heavy lifting to remove viruses from your phone.
Here’s how you can use Dr. Fone’s System Repair feature:
- Step 1: Launch Dr.Fone. Choose System Repair in the Toolbox section. Ensure that your phone is connected.
 SwifDoo PDF 2-Year Plan
safe & secure
3,391,426 people have downloaded it
- Step 2: Choose either Android or iPhone. In this example, iPhone shall be selected. For Android devices, simply follow and mirror the prompts that will follow.
- Step 3: Select iOS Repair to proceed.


- Step 4: Choose either Standard Mode or Standard Repair. Standard Repair will not remove data from your device. However, for a sure fix, choose Standard Mode.


- Step 5: Put your device to Recovery Mode . Dr. Fone will provide on-screen instructions.
 Any DRM Removal for Mac: Remove DRM from Adobe, Kindle, Sony eReader, Kobo, etc, read your ebooks anywhere.
- Step 6: Click Download next to the iOS firmware you want to install.

- Step 7: After the firmware is downloaded, click Repair Now.

- Step 8: Once the process is completed, choose Done. Your phone should be virus-free by now.
 CollageIt Pro

Method 2: Using Safe Mode
Safe Mode is like a secret agent—it helps but with a downside. It turns off third-party apps, making your phone useful only for basic calls or texts. Use this method if any solutions in this section do not work. It’s especially handy if you use your phone before sending it to a technician. This way, you’ll learn how you can get a virus off your phone before actually letting a technician do it.
Generally, here’s how you can enter Safe Mode on Android Phones. Do check with your phone manufacturer’s official manual/guides on how to enter them:
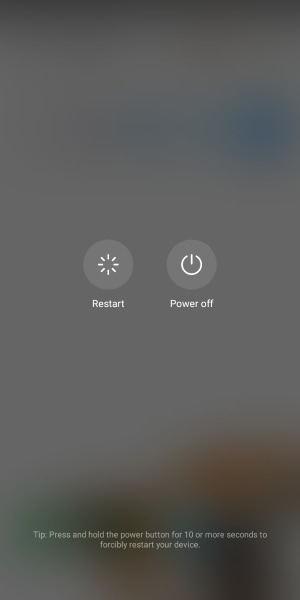
- Step 1: Press and hold the power button. Wait for the power options to appear.
- Step 2: Tap and hold the Power Off button.
- Step 3: Tap on the prompt when you see the Reboot to safe mode option.
 vMix Basic HD - Software based live production. vMix Basic HD includes 4 inputs, 3 cameras, streaming, recording, playlist.
For iPhones, here’s how you can do it:
- Step 1: Power off your iPhone.
- Step 2: Hold the power button.
- Step 3: Hold the volume down button until you see the Apple logo.
- Step 4: Your phone should now be in safe mode.

Method 3: Downloading Anti-Virus Software
Anti-virus software works like a shield, protecting your phone from sneaky viruses and malware. Here are three recommended anti-virus apps that you should try out. They’re available on both the Google Play Store and App Store. So, regardless of what device you’re using, you’re sure to be safe with these:
- Avast Anti-virus – Mobile Security
- Norton 360: Online Security
- Bitdefender Mobile Security & Anti-virus
Method 4: Performing a Factory Reset
A Factory Reset is like a phone makeover—it wipes everything and starts fresh. But be cautious, as it erases all data!
Generally, the Factory Reset option should be in Settings > General & Backup and reset or under Settings > About phone for Android devices.

IOS devices should be under Settings > General > Transfer or Reset iPhone.
 Project Manager - Asset Browser for 3Ds Max

Remember, each method has its strengths and weaknesses. Dr.Fone is quick and effective, Safe Mode is limited but useful, anti-virus apps can protect, and a Factory Reset gives a clean slate. Try these methods to zap those viruses away!
Part 3: Handy Prevention Tips To Avoid Future Infections
To keep your phone safe from viruses, follow these easy tips that act as a shield against potential threats.
- **Regular software updates:**Keep your phone updated with the latest software. Updates often include security patches that protect your phone from new threats.
- **Cautious downloads:**Be careful when downloading apps or files. Stick to trusted sources like Google Play Store or Apple Store. Avoid clicking on suspicious links from unknown sources.
- **Secure networks:**Use secure Wi-Fi networks and limit public Wi-Fi use for sensitive activities. Public networks can expose your device to potential risks.
- **Anti-virus software:**Install a reliable anti-virus app and keep it updated. These apps constantly scan for and detect viruses, safeguarding your device against threats.
These simple yet crucial tips will fortify your phone’s defenses, reducing the likelihood of virus infections and ensuring a safer digital experience.
Conclusion
Viruses can make your phones act weird, but you have the tools to fight back. Keep your phone healthy by updating software, being cautious with downloads and links, using secure networks, and having an anti-virus app.
And, if you’re thinking, “**How do I get a virus off My Lava Blaze 2?**” then Wondershare Dr.Fone is a reliable hero. It’s quick and effective in clearing out those bugs. By staying aware and taking preventive steps, you can keep your phone safe and ensure a trouble-free experience. And if viruses strike, Dr. Fone’s got your back for an instant fix!
- Title: Fixing Persistent Pandora Crashes on Lava Blaze 2 | Dr.fone
- Author: Ariadne
- Created at : 2024-07-30 10:52:32
- Updated at : 2024-07-31 10:52:32
- Link: https://howto.techidaily.com/fixing-persistent-pandora-crashes-on-lava-blaze-2-drfone-by-drfone-fix-android-problems-fix-android-problems/
- License: This work is licensed under CC BY-NC-SA 4.0.