
Fixing Persistent Pandora Crashes on Nokia 105 Classic | Dr.fone
Fixing Persistent Pandora Crashes on Nokia 105 Classic
Pandora, an app bringing music to our fingertips, is a beloved platform for streaming tunes on Android devices. Despite its popularity, users might encounter occasional hurdles with the app, such as unexpected hanging, lagging, or even crashing. These interruptions can disrupt our musical journey.
In this article, you’ll explore practical solutions to the problem of “why does Pandora keep stopping.” Following the steps and tips, you can regain smooth and uninterrupted access to your favorite tunes. Have a hassle-free and enjoyable music streaming experience with Pandora on your Nokia 105 Classic.
 SwifDoo PDF Perpetual (2-PC) Free upgrade. No monthly fees ever.

Part 1: Basic Troubleshooting and Fixes
Pandora, the music streaming app cherished by Android users, accompanies you on your musical journey. It offers an array of melodies at our fingertips. However, occasional crashes can disrupt this harmonious experience. This results in an annoying experience where Pandora keeps stopping on Android phones.
Crashes often result from glitches or bugs within the app’s code. These unexpected errors can cause Pandora to freeze, lag, or abruptly shut down, hindering its smooth operation. When faced with intermittent crashes, several basic fixes can help restore Pandora’s functionality:
- Closing the app. Simply closing and reopening Pandora might resolve transient issues.
- Restarting the phone. A reboot of your Nokia 105 Classic can clear temporary glitches affecting Pandora.
- Updating the app. Ensure you have the latest version of Pandora installed. Updating the app can rectify bugs from older versions.
- **Reinstalling the app.**If the problem persists, uninstall Pandora and reinstall it from the Google Play Store. This process can refresh the app’s data and settings, potentially resolving persistent issues.
If these basic fixes fail to address the continuous crashing of the Pandora app, or if the crashes persist over an extended period, the next section will provide advanced solutions. These initial troubleshooting steps aim to tackle common and temporary issues that could impede Pandora’s performance. If the problem persists, it might necessitate more intricate resolutions or further investigation into the app’s underlying technicalities.
Part 2: Causes Behind Constant Pandora App Crashes and Solutions
Several underlying factors might be at play when persistent crashes plague your Pandora app. This section explores these.

Poor Internet Connection
A stable internet connection is pivotal for seamless app functionality. Crashes in Pandora can stem from poor connectivity. Check your internet connection . Ensure you’re connected to a reliable network. Restart your router or switch between Wi-Fi and mobile data to troubleshoot connectivity issues.

Corrupted/Broken Devices
If you notice that all other apps are crashing , your device’s system may also have a problem. In this case, simple app reinstalls/restarts can fix the problem.
Thankfully, Wondershare Dr.Fone solves device corruption leading to app crashes. This powerful toolkit addresses deep-seated issues causing app crashes, such as corruption within the Nokia 105 Classic device that impacts Pandora’s performance. The Dr.Fone’s System Repair feature acts as a reset button for your Nokia 105 Classic, resolving underlying system-level problems that cause app crashes.
Here’s how you can use it to resolve the issue of why the Pandora app keeps crashing on Android. First, of course, ensure that your device is connected.
- Step 1: Launch Dr.Fone on your computer. Access System Repair.


 safe & secure
4,851,928 people have downloaded it
- Step 2: Choose Android on the next page.


- Step 3: Click Start to initiate Android System Repair.


- Step 4: Check if the Nokia 105 Classic device details presented onscreen are correct. You may edit them accordingly for any mistakes.

- Step 5: Follow the onscreen instructions to place your phone into Download mode. Then, Dr.Fone will download the firmware.

- Step 6: After downloading, click Fix Now. Then, type in “000000” on the appearing window text box. Click Confirm.

- Step 7: Once finished, click Done. Your Pandora app should not crash once you reinstall it again by now.

Cache Buildup
Accumulated cache data can hamper app performance, leading to frequent crashes. Clear the cache of the Pandora app. Usually, you can see this option under Settings > Apps > Clear Data. Additionally, you can optimize your device’s RAM and storage space by deleting unnecessary files or closing unused apps.

Device Compatibility Issues
Outdated system software can create compatibility issues, causing app instability. Ensure your device’s system software is up-to-date. Check for and install any pending system updates in your device’s settings. Updated software often includes bug fixes and improvements that can rectify compatibility-related crashes.

You can systematically troubleshoot and resolve the issues by addressing the potential culprits behind constant Pandora app crashes, ensuring a smoother and uninterrupted music streaming experience. If the problems persist, contacting Pandora support or seeking professional assistance might be advisable to delve deeper into the technical aspects of the app’s performance issues.
Part 3: What To Do if None of the Fixes Work
If the suggested fixes don’t work, and you still wonder “why does Pandora keeps stopping on Android,” then it might be time to take a look at these alternatives:
- **Consider trying other music streaming apps.**Explore alternative music streaming applications available on the Google Play Store. Several reliable options offer similar services to Pandora, providing an opportunity to continue enjoying music while bypassing the persistent app issues.
- **Contact customer support.**Reach out to Pandora’s customer support for tailored assistance. They may offer specific troubleshooting steps or insights into the app’s technical glitches.
- Consider a new phone. Upgrade to a new phone if the crashes persist despite troubleshooting, and your device is outdated or incompatible. This might help resolve the issue by providing a more stable environment for app usage.

Conclusion
In conclusion, navigating Pandora app crashes on your Nokia 105 Classic demands a systematic approach. Keeping regular maintenance, such as clearing cache, optimizing RAM, and ensuring timely device updates, can mitigate app crashes and uphold smooth performance. This way, you can resolve the issue of why Pandora keeps stopping.
When persistent issues arise, especially if other apps are affected similarly, Wondershare Dr.Fone emerges as a reliable solution. Its comprehensive toolkit, including System Repair, can effectively address deep-seated issues. By embracing proactive measures and leveraging Dr. Fone’s prowess, users can enhance their device’s performance and ensure an uninterrupted music streaming experience on Pandora and other apps.
safe & secure
3,362,023 people have downloaded it

Ways to Unbrick Your Android Device: Various Ways for Recovery
When your Nokia 105 Classic becomes unresponsive or frozen after mistakenly flashing a ROM or rooting, you are informed that the phone has been bricked. The most terrifying aspect will not just be gadget loss, but also data erasure. However, what exactly is a bricked phone, and, more importantly, how do you fix a bricked Android phone?
This article will explain what a bricked android phone is, why an Android phone becomes bricked, how to unbrick an Android phone without losing data and a third-party application you can use.
Part 1. Causes of Bricked Phones
In everyday settings, our mobile devices have become our greatest friends, therefore breaking your phone is the last thing you want to do. There are different reasons why devices brick, and we must be familiar with them in order to comprehend the various techniques to repair bricked devices.
Here are some common reasons why your Nokia 105 Classic is bricked:
- **Flashing Stock/Custom ROM:**It is possible that you installed an incompatible ROM in the Android phone, that the phone shuts off during the process, or that you have performed other errors that cause your phone to restart indefinitely or to become stuck at the starting screen.
- **Rooting an Android device:**You are unable to effectively root the Nokia 105 Classic device.
- **Android firmware is being updated:**If the phone is interrupted when updating the Android firmware, it will be bricked.
- **Installing harmful applications:**You installed harmful programs on your Nokia 105 Classic, or the phone was infected with a virus.
Part 2. How to Fix a Bricked Phone
The first step is to establish how badly your device is bricked. In most cases, you will be working with soft bricks that are pretty simple to repair. If your phone is stuck in a boot loop or enters recovery mode every time you turn it on, you may have a soft brick.
To repair bricked Android phones and tablets, you must first thoroughly examine the Nokia 105 Classic device’s state. Before you begin troubleshooting, determine the sort of bricking that your phone is experiencing. However, there is no specific software to unbrick your Nokia 105 Classic; you may need to learn the complexities of this issue or hire a professional to do it for you.
 safe & secure
Here are some simple methods for repairing bricked Android devices:
Method 1. Reboot the Phone in Safe Mode
Trying to reboot your android device in safe mode is the first and easiest thing you should try if your phone is bricked. Here’s how to do it:
- Step 1: Turn off your smartphone and press the Volume Up + Power button to enter recovery mode. Then, using the volume controls, navigate the menu and select Reboot system now.

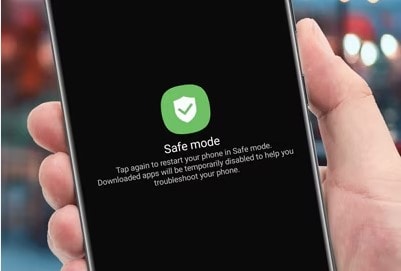
- Step 2: Select the highlighted option by pressing the Power button. After that, wait for your device to reset normally.
- Note: The steps for booting into recovery mode may change based on the manufacturer of your device. For further information, go to the user manual for your phone or tablet.
Method 2. Wipe the Cache Partition
This is the first indication that a user’s phone has gone bricked. The phone turned on automatically, however it became stuck or frozen on the logo screen. The issue might be caused by the undeleting of data and cache, which prevents the phone from displaying the home screen.
This issue, however, may be resolved by wiping the data and cache partitions in recovery mode. You must do the following to do this:
- Step 1: Turn off your smartphone and enter recovery mode by pressing the Power and Volume Down buttons simultaneously. Different devices have various approaches for entering recovery mode, so you may perform better.
- Step 2: After entering recovery mode, you should see the screen below. Remember to pick Advanced and then “Wipe Dalvik Cache” if your device is under Clockwork Mod recovery. Return to the main screen and select “Wipe Cache Partition” once more.
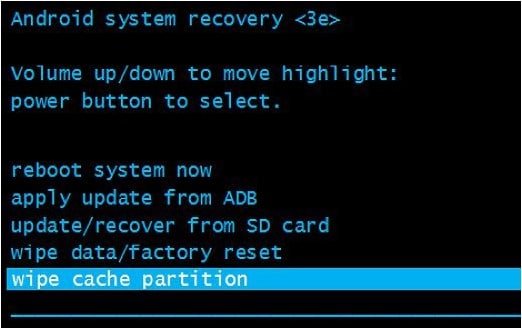
- Step 3: Finally, on your smartphone, choose the Reboot system immediately.
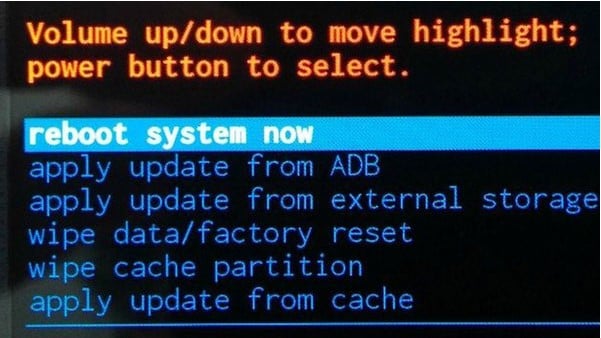
Method 3. Perform a Factory Reset
A factory reset can undo the alterations made to your device that resulted in the brick phone, but you will lose everything you have downloaded and installed in the process. Here’s how to restore a bricked Android phone to factory settings:
- Step 1: Boot your device into recovery mode (turn off your device, then press power button + volume up button).
- Step 2: Select “Wipe Data/“Factory Reset” then confirm the action. When the process is done, you’ll be returned to the recovery mode menu.
- Step 3: Select “Reboot System Now” to restart your device.
Method 4. Flash a Custom ROM
If you boot your phone directly into recovery mode, there’s a problem with the ROM you loaded. Then simply flash the following custom ROM on your phone:
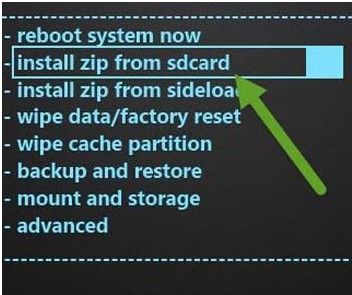
- Step 1: Save the required ROM (in ZIP format) to an SD card. The SD card should then be inserted into your Nokia 105 Classic.
- Step 2: Click the “Install zip from sdcard” button. Then, select the ZIP file that contains the ROM. Finally, click the “reboot system now” button.

Method 5. Using Wondershare Dr.Fone to Fix bricked Android Devices
Wondershare Dr.Fone - Data Recovery is the first data recovery solution for any damaged Android smartphone in the globe. It offers one of the greatest recovery rates and can recover a variety of information like images, videos, contacts, messages, and call logs. The program is most effective with Nokia 105 Classic smartphones.
While it is not an Android unbrick tool, it is a useful tool for retrieving data when your Nokia 105 Classic becomes bricked. It is quite easy to use:
- Step 1: Launch Wondershare Dr.Fone and select “Data Recovery” > “Recover Android Data” from the menu. Then, select “****Recover from Broken Phone”.
 ZoneAlarm Pro Antivirus + Firewall NextGen

- Step 2: Choose the file types you wish to recover. Click “Next” and then select the type of damage your phone is experiencing. Select “Touch screen not responsive, or cannot access the phone” or “Black/broken screen”.

- Step 3: Use the recovery wizard to enter your Android smartphone into Download Mode. Connect your Android handset to the computer after following the instructions to begin automatically analyzing your device.
 WonderFox DVD Ripper Pro
- Step 4: The program will provide a list of all recoverable files, organized by file type. To preview the file, highlight it. Choose the files you wish to recover and then click “Recover” to save all the data you want to restore.

 safe & secure
Part 3. How to Prevent Bricking Your Phone
How to prevent a device from “bricking” itself and how to repair it if it does The delay is set by the MCU, but it should be long enough to allow the debug adapter to connect to the Nokia 105 Classic device and halt it before the Nokia 105 Classic device disables itself.
Here are some things to remember to prevent your device from bricking:
- Avoiding unofficial firmware updates: Installing unapproved OS firmware on your phone will most certainly violate any manufacturer’s warranty you have on it. Read the installation instructions for your unique phone model thoroughly and then carefully follow them, taking time and patience.
- **Being cautious when rooting or jail breaking:**Rooting and Jail breaking disables parts of the operating system’s built-in security mechanisms, which are part of what makes the operating system safe, and your data protected from exposure or damage.
- **Install an antivirus application on your device:**Mobile devices increase the danger of data leaks and breaches. As a result, antiviral software is beneficial on mobile phones. Mobile Device Management is an excellent choice for virus protection on your mobile device.
- Backup your phone data regularly: Backing up your phone safeguards your data in the event that you lose it, it is stolen, or it no longer works. When it comes time to replace your phone, having a backup makes it simple to restore your data to the new device. Furthermore, backing up your phone allows you to organize your data so that it is easier to access.
- Avoid installing apps from untrusted sources: Apps installed from unauthorized sources make your device and personal data more exposed to dangers such as Ransomware. So you should be wary of where you download applications.
 PCDJ Karaoki is the complete professional karaoke software designed for KJs and karaoke venues. Karaoki includes an advanced automatic singer rotation list with singer history, key control, news ticker, next singers screen, a song book exporter and printer, a jukebox background music player and many other features designed so you can host karaoke shows faster and easier!
Conclusion
It is certainly upsetting when your gadget bricks, but you may attempt the solutions listed above to resolve the issue. Meanwhile, if you want to solve the problem quickly and easily, you can try Wondershare Dr.Fone. It can not only help you repair your Android smartphone, but it can also help you extract data from a bricked device, recover data, and many more Android device solutions!

company, user or members of the same household. Action! - screen and game recorder</a>
safe & secure
Bricked Your Nokia 105 Classic? Here’s A Full Solution
A bricked phone is a device that won’t turn on no matter what you do and everything you try to do to fix it doesn’t work. Most people will tell you that there is really nothing you can do to fix a bricked device. But with the right information, the right buttons to push and useful additional software you can actually try to fix a bricked device.
In this article we are going to look at how you can fix your device if you are sure it is bricked, how to rescue the data on your bricked device and even how you can avoid this situation in the future.
 PCDJ DEX 3 for Windows & MAC is the total entertainment DJ software solution, offering audio, video, and karaoke mixing ability. Automatic beat-sync, smart looping, 4 decks, DJ MIDI controller support, Karaoke Streaming and much more.
Part 1: Rescue the data on your Bricked Android Phone
Before we can learn how to fix a bricked device, it is important that you are able to save the data that is on the Nokia 105 Classic device. Having the data saved somewhere else will be the added insurance you need in case anything goes wrong during the process. There are very few software solutions in the market to help you get back data from a bricked device. One of these and the most reliable is Wondershare Dr.Fone - Data Recovery (Android) .
Dr.Fone - Data Recovery (Android)
World’s 1st Android smartphone and tablet recovery software.
- Recover data from broken Android in different situations.
- Scan and preview files before starting the retrieval process.
- SD card recovery on any Android devices.
- Recover contacts, messages, photos, call logs, etc.
- It works great with any Android devices.
- 100% safe to use.
4,771,974 people have downloaded it
How to Use Dr.Fone - Data Recovery (Android) to Rescue Data from a Bricked Android
If your device is completely unresponsive, don’t worry Dr.Fone can help you get all the data back. Simply follow these steps to gain access to the Nokia 105 Classic device and recover all your data.
Step 1: Download and install Wondershare Dr.Fone to your PC. Launch the program and then click on Data Recovery. Select the data types you would like to recover and then click on Next.

Step 2. Select the issue type for your phone. Choose from “Touch screen not responsive or cannot access the phone” or “Black/broken screen”.
Step 3: In the next step, you need to select your device model. If you don’t know the model of your device click on “How to check the Nokia 105 Classic device model” to get help.
Step 4: The next screen will provide instructions on how to enter “Download mode.” Connect the Nokia 105 Classic device to your PC once it is in “Download Mode”

Step 5: The program will begin an analysis of your device and then download the recovery package.


Step 6: Then Dr.Fone will display all the recoverable file types. You can click on the files to preview them. Select the ones you need and click on “Recover to Computer” to save them to your computer.
Part 2: How to Fix Your Bricked Android Phone
Android devices are usually very flexible in allowing users to flash ROM but sometimes an incorrect process can result in a bricked device. While there are few solutions to this problem, here are a few things you can do;
When the Nokia 105 Classic device Boots Straight into Recovery
If the Nokia 105 Classic device can boot to the recovery screen, you can find an alternative ROM to install and copy it your device. Installation can then be done in the recovery menu. If the Nokia 105 Classic device is booting to recovery mode there is a chance that it can be fixed.
Step 1: Load up Clockworkmod or any other recovery tool that you have been using.
Step 2: Once you are in, navigate to the “Reboot system now.” If you are using Clockworkmod, this should be your first option. Hopefully everything will work just right if you do this, If it doesn’t you may need to download and re-flash the ROM again.

When the Nokia 105 Classic device won’t stop rebooting
Here’s what to do if the Nokia 105 Classic device wont stop rebooting.
Step 1: Turn off the Nokia 105 Classic device and then reboot in recovery mode.
Step 2: Go to “Advanced” which will bring up a number of options to choose from.
Step 3: One of the options should be “Wipe Dalvik cache” select this option and then follow the instructions. When finished select “Go Back” to return to the main menu.

WPS Office Premium ( File Recovery, Photo Scanning, Convert PDF)–Yearly

Step 4: Go to the “Wipe Cache Partition” and select it.
Step 5: Go to “Wipe data/ factory reset.”

Step 6: Finally reboot the Nokia 105 Classic device by selecting “Reboot system now.” This should fix the problem. You may also want to flash the same ROM or try a new one.
If the above methods don’t work, try one of the following options.
You can return to resource where you found the flash tools and search or ask for advice
Sometimes these errors can be caused if the ROM installation was performed via SD card. In this case reformatting the SD card might help.
If all else fails, it is time to returning the Nokia 105 Classic device to the vendor if your warranty is still applicable.
Part 3: Useful Tips to avoid Bricking your Android Phone
If you are planning on installing custom ROM you need to install Custom Recovery. This will enable you restore the Nokia 105 Classic device to its original settings should anything go wrong and hopefully help you avoid bricking your device.
- Ensure that you are familiar with the Fastboot or ADB commands before doing anything. You should know how to recover your device by flashing a command line and also manually transfer important files to your device.
- Make a backup of your device. This is obvious but most people fail to adhere to it. At the very least you can get back all your files and settings to transfer to a new phone.
- Keep a full Nandroid backup on your phone
- Keep another backup on your PC which you can access should anything go wrong with the Custom ROM installation
- Know how to hard reset your device. It may come in handy when your device freezes on you.
- You should also consider enabling USB debugging. This is because many solutions for a Bricked device rely on USB debugging.
- Ensure the Custom ROM you choose can actually be used on your device model.
While installing Custom ROM can actually be a great way to customize your device, it is also the leading reason for bricked devices. Therefore ensure that you understand what you are doing when you decide to customize your device. Learn as much as you can about the process before attempting everything.
- Title: Fixing Persistent Pandora Crashes on Nokia 105 Classic | Dr.fone
- Author: Ariadne
- Created at : 2024-07-30 10:53:10
- Updated at : 2024-07-31 10:53:10
- Link: https://howto.techidaily.com/fixing-persistent-pandora-crashes-on-nokia-105-classic-drfone-by-drfone-fix-android-problems-fix-android-problems/
- License: This work is licensed under CC BY-NC-SA 4.0.