
Full Guide How To Fix Connection Is Not Private on Lava Yuva 2 | Dr.fone
Full Guide: How To Fix Connection Is Not Private on Lava Yuva 2
Are you encountering the “your connection is not private” issue on your phone? We found many Android users have increasingly expressed their frustrations with this recurring problem while browsing on the internet.
Usually, you can just reload the page to fix the error. But in case it doesn’t help, you may need to look for more advanced solutions. In the following discussion, we will delve into why this “your connection is not private” on Android happens and explore solutions that work for you.

Part 1: Addressing Your Connection Is Not Private on Android
First of all, what does “your connection is not private” on Android mean? To answer this question, it’s essential to understand that this error is often associated with Secure Socket Layer (SSL) protocol issues.
SSL is a cryptographic protocol created to establish a secure communication channel over the internet. Its primary purpose is to ensure the confidentiality and integrity of data exchanged between a user’s device and a website’s server.
The error message appears when there’s a problem with the SSL/TLS (Transport Layer Security) certificate of the website you are trying to access. This certificate is a digital document that authenticates the website and encrypts the data transmitted between the user’s device and the server.

Some common factors that could trigger the “your connection is not private” on Chrome Android error:
- Expired or invalid SSL certificate of the website;
Certificates are issued for a specific period, and if the website owner fails to renew it in time, your browser will detect it as not secure.
- There is a mismatch between the domain on the certificate and the actual domain you are trying to visit;
This discrepancy might occur due to a misconfiguration on the website or, in some cases, due to a man-in-the-middle attack where a third party intercepts the communication between your device and the server.
- No HTTPS enforcement;
Another reason for the issue is if the installed SSL certificate doesn’t turn on the “force HTTPS” option. This means visitors might be using the non-secure HTTP version of the site instead of the safe URL.
So, the error serves as a warning to users, indicating that the connection may not be secure and sensitive information could be at risk.
Browsers, including those on Android devices, prioritize user safety and privacy. They will block access to potentially compromised websites to prevent data theft or unauthorized access. That’s why when you get the “your connection is not private” message on Android, you can’t access the website.
Part 2: What The Error Codes in “Your Connection Is Not Private” Mean
When “your connection is not private” on Chrome Android error shows up, it often comes along with specific error codes that can indicate the root cause of the issue. Understanding these error codes is crucial for troubleshooting and resolving the problem effectively.
- ERR_CERT_SYMANTEC_LEGACY: Unsupported Symantec-issued certificate
This error code indicates that the website you are attempting to access is equipped with an unsupported Symantec-issued certificate. Symantec, a prominent Certificate Authority, had faced concerns about the security of its certificate issuance processes.
As a result, major browsers, including Google Chrome, no longer support certificates issued by Symantec. If you encounter this error, it implies that the website’s SSL certificate is outdated and needs to be updated with a certificate from a trusted Certificate Authority.
- NET::ERR_CERT_AUTHORITY_INVALID: Unauthenticated SSL certificate
The presence of this error code suggests that the SSL certificate of the website cannot be authenticated by your browser. This could occur if the certificate is self-signed or issued by an unrecognized Certificate Authority.
- NET::ERR_CERT_DATE_INVALID: Date and time mismatch
This error code points to a discrepancy between your Lava Yuva 2’s date and time settings and the information on the website’s SSL certificate, as they have expiration dates. If the date and time settings on your device are incorrect, it may prevent the certificate from being validated. Correcting your device’s date and time settings should resolve this issue.
- SSL certificate error: Generic or unspecified problem
This is a more generic error message that indicates a problem with the website’s SSL certificate without specifying the exact nature of the issue. It could indicate various issues, such as an expired certificate, a misconfiguration in the certificate chain, or other SSL-related problems.

Part 3: How To Fix Your Connection Is Not Private on Android
Encountering the “your connection is not private” error on Android can be a frustrating experience. Fortunately, there are various methods to address and fix this issue, depending on its underlying cause.
In this section, we will explore some effective solutions to help you regain a secure and private connection.
Method 1: Clear your cache
When you use the internet, web browsers store information about your online activities in cached data and cookies to speed things up. However, having too much of this data can cause problems instead. It might even stop your browser from connecting securely.
So, clearing your browser cache and data can be a quick and simple “your connection is not private” Android fix. Follow the steps here:
- Step 1: Open and launch Chrome.
- Step 2: Access the Menu (the three dots button) to open the Settings. Select Privacy and Security > Clear Browsing Data.
- Step 3: Opt for the “All Time” option and click “Clear Data” to erase your cache.

After successfully clearing your browser cache and data, revisit the website to check if the problem persists.

Method 2: Repair the Android system
Addressing the “your connection is not private” to fix on Android involves examining both the Lava Yuva 2 device and the website. If clearing browser data doesn’t help, there might be an issue with your Android system. One solution is to use the Wondershare Dr.Fone system repair tool to fix the issues safely.
How to perform system repair with Dr.Fone:
- Step 1. Open the Repair Tool
Start by launching Wondershare Dr.Fone on your computer. Go to the Toolbox section and connect your Lava Yuva 2. Choose System Repair and pick Android as your device type.

 safe & secure
4,322,863 people have downloaded it
- Step 2. Begin Repair
Click Start on the new screen to kick off the repair. Since you’re dealing with a connection private issue on Android, select System Damage.

- Step 3. Fill in the Lava Yuva 2 device Details
The platform will detect your Lava Yuva 2’s brand. Confirm the Name, Model, Country, and Carrier. If your device is unlocked, choose OPEN in the Carrier section. Agree to the warning, click Next, and proceed with the repair.

- Step 4. Activate Download Mode
Follow the instructions to put your Lava Yuva 2 into Download Mode. Once in Download Mode, you will start downloading the firmware.

- Step 5. Confirm Installation
Remember, the repair may erase data. It’s advisable to back up your data first before starting the repair. Enter “000000” to confirm the repair process, shown by a progress bar.

When done, click Done if your Android starts properly. If not, click Try Again to repeat the process.
Method 3: Check and fix the date and time on your Android
Since the error code “NET::ERR_CERT_DATE_INVALID” indicates a mismatch between the date and time on your device and your browser, you need to adjust the date and time settings on your Android to fix it.
The specific steps can vary based on your Android model, but the general approach involves locating the “date and time” settings on your phone. How to fix the date and time on Android to bypass “your connection is not private” on Chrome Android:
- Step 1: Go to your Lava Yuva 2’s Settings > Date & Time.
- Step 2: Switch on the “Automatic Date & Time” to sync with the network-provided time.
 Screensaver Factory, Create stunning professional screensavers within minutes. Create screensavers for yourself, for marketing or unlimited royalty-free commercial distribution. Make screensavers from images, video and swf flash, add background music and smooth sprite and transition effects. Screensaver Factory is very easy to use, and it enables you to make self-installing screensaver files and CDs for easy setup and distribution. Screensaver Factory is the most advanced software of its kind.
Method 4: Perform factory reset
If nothing else works, there might be malware on your phone causing trouble. It’s crucial to eliminate this threat before further damage occurs. The recommended action is to perform a factory reset on your phone.
However, keep in mind that this process can result in data loss, so it’s essential to back up your data beforehand. Follow the steps to perform a factory reset on Android:
- Step 1: Go to your Android Settings.
- Step 2: Select Backup and Reset > Factory data reset. Then, opt to erase all data.


Most of the time, you won’t need to go to the extreme of a factory reset. The simpler solutions mentioned earlier should take care of the Security Certificate Error on your Android.
Conclusion
By now, you should have a good grasp of the “Your Connection Is Not Private” problem on Android. This issue typically arises from complications with the SSL certificate of the website, designed to ensure a secure connection.
When you see the error message, it often comes with specific codes that indicate the underlying problem. Several methods can be employed to fix the “Your Connection Is Not Private” on Android. Clearing the browser cache, repairing the Android system using tools like Dr.Fone, checking and fixing date and time settings, and performing a factory reset as a last resort are among the solutions.
By prioritizing user safety and following the step-by-step approach in this guide, you can navigate and resolve this common internet browsing challenge on your Lava Yuva 2s.
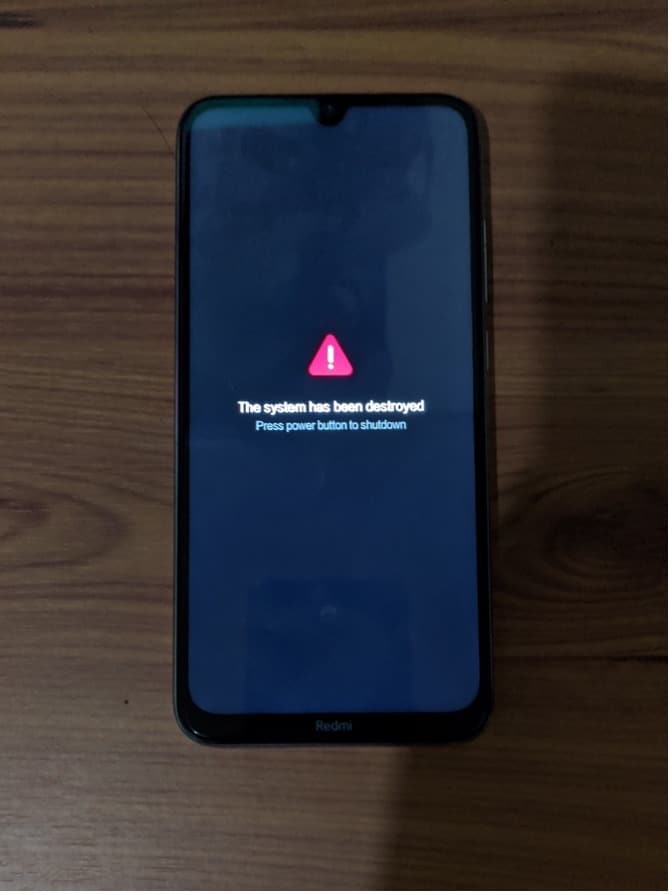
## Guide: How To Unbrick a Bricked Lava Yuva 2 PhoneLava Yuva 2 phones are super popular thanks to their excellent features and affordable prices. But being so popular means people try to customize them with custom software. If you’re not careful, you might have a “bricked” Lava Yuva 2 phone. It won’t work at all. It will be more like a brick than a smartphone.
Don’t worry, though. This guide is here to help. It will show you how to unbrick your phone step by step. You’ll learn to bring your phone back to life and make it work again. So, get started on fixing your bricked Lava Yuva 2 phone by reading this article.
Part 1. Common Reasons Why Lava Yuva 2 Phones Get Bricked
A bricked phone might sound like a techy term, but it’s pretty simple – when your Lava Yuva 2 phone turns into a lifeless block that won’t do anything. In this section, you’ll learn all about why this happens, so you can avoid these issues and keep your phone alive as long as possible.
- Trying to flash incompatible ROMs. Sometimes, people want their Lava Yuva 2 phones to run different software like a custom version of Android called a ROM. But if you use the correct ROM for your specific phone, it can mess things up nicely. Also, inexperience with ROM flashing can hard brickyour Lava Yuva 2 Be sure to follow guides and ask for community help online.
- Rooting mishaps/failures.“Rooting” means giving your phone superpowers, but if you mess up, it can go wrong. Your phone might not boot up, leaving you with a brick. Like the previous bullet, follow guides carefully, especially if inexperienced.
- Failed Firmware Updates. When your phone asks you to update its software, following the instructions carefully is essential. If you interrupt the process or something goes wrong, your phone could be bricked.
Now, you must know about soft and hard-bricking to learn how to diagnose your phone. Soft bricking is like a phone’s bad day – it might not start up. However, with the right help, you can fix it. Hard bricking is worse. It’s when your phone is a paperweight – it won’t turn on, respond, or do anything useful.
 Power Tools add-on for Google Sheets, 12-month subscription
Part 2. Method 1: Use the Lava Yuva 2 Flash Tool To Recover Bricked Lava Yuva 2 Phones
Say you’ve accidentally bricked your Lava Yuva 2 phone due to rooting or ROM flashing. You might feel scared, but imagine having a magic wand that can fix your bricked phone. That’s what the Lava Yuva 2 Flash Tool is –a dedicated Lava Yuva 2 unbricking tool. It lets you install or flash different software onto your phone, giving it a fresh start. Most of the time, a simple firmware flash will unbrick your Lava Yuva 2.
The Lava Yuva 2 Flash Tool is a superhero for various situations. Here are some scenarios where it can save the day:
- **Device Recovery.**If your phone is bricked or acting strange, the Flash Tool can help bring it back to life.
- Firmware Updates. You can use it to install official updates released by Lava Yuva 2, ensuring your phone runs smoothly.
- **Device Customization.**Want a different look for your phone? The Flash Tool can help you install custom ROMs or themes.
- **Bug Fixes.**Got pesky bugs or glitches? The Flash Tool can replace corrupted software to make your phone behave.
- Performance Enhancement. If your phone feels sluggish, the Flash Tool can boost its speed by flashing a new OS.

How To Use the Lava Yuva 2 Flash Tool To Unbrick a Lava Yuva 2 Phone
Now that you know what the Lava Yuva 2 Flash Tool is all about, it’s time to learn how to use it. If you’ve bricked your Lava Yuva 2 phone, follow the steps below:
- Step 1. Download the Lava Yuva 2 Flash Tool and the stock firmware of your device on your computer.
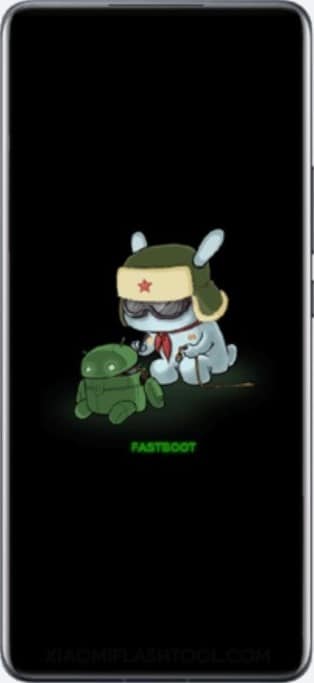
- Step 2. Turn off your phone. Then, press and hold the Volume Down + Power Key simultaneously for 6-8 seconds. This will force your phone to enter the Fastboot mode.

- Step 3. Connect your phone to your computer using a cable when you see this screen flash.

- Step 4. Using the Lava Yuva 2 Flash Tool, click Select. Then, locate the firmware files you downloaded earlier.
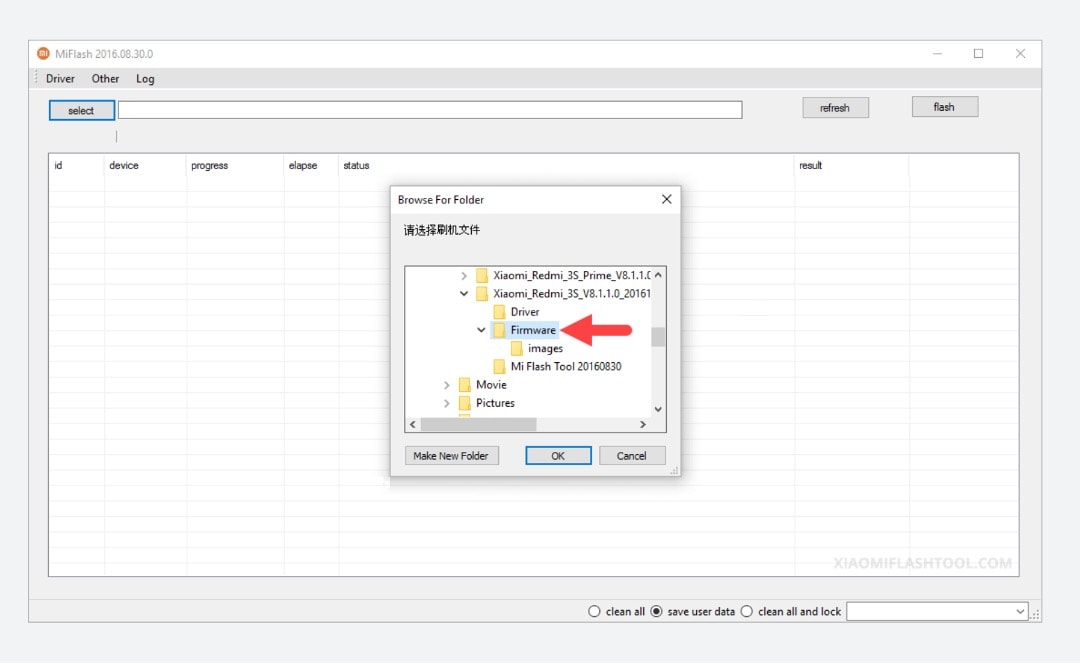
- Step 5. Click the refresh button until the flash tool recognizes your device. Then, click flash to replace the firmware. A text saying “success” should appear under the result column.
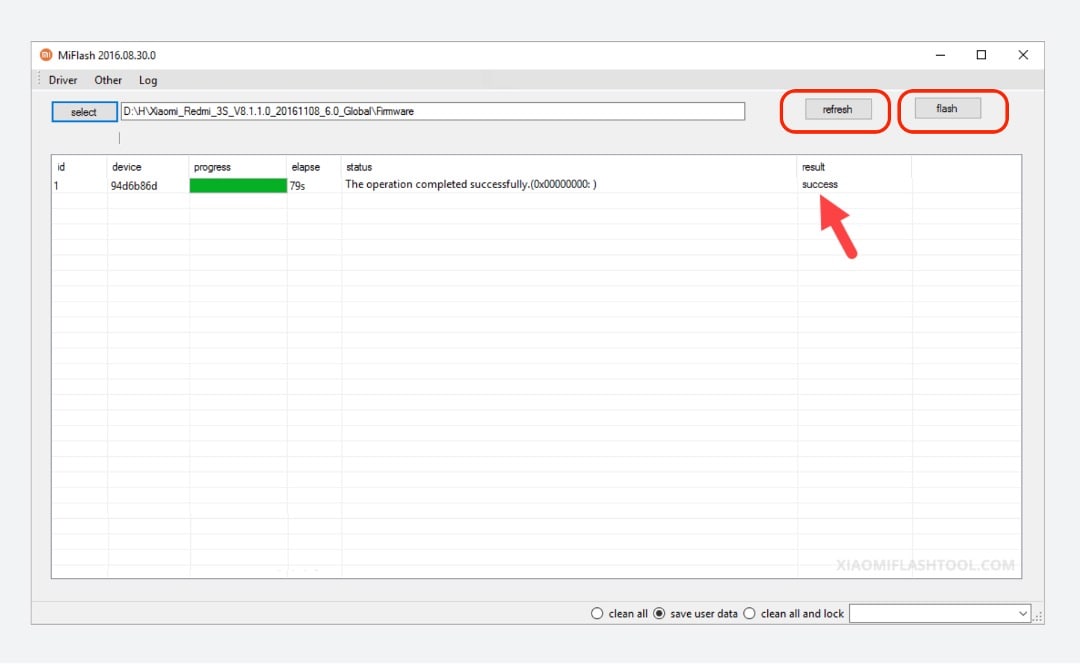
Congratulations! Your phone should be up and working after following these steps.

Part 3. Method 2: Wondershare Dr.Fone System Repair – Your One-Stop Shop for Unbricking Your Lava Yuva 2 Phone
If you gave the Lava Yuva 2 Flash Tool a shot and your phone is still not cooperating, don’t lose hope. Sometimes, the magic touch needs a slight variation. That’s where Dr.Fone comes into play. This dedicated software can work wonders when fixing various phone problems. It can even help in cases of bricked Lava Yuva 2 phones involving software or firmware issues.
![]()
Dr.Fone - System Repair (Android)
Repair Android System Errors without Any Trouble.
- Fix your Android to normal, no skills required.
- Fix various Android system issues, stuck in boot loop , black screen , or won’t turn on , looping on start, etc.
- The high success rate in resolving Android system issues.
- Compatible with a wide range of Android devices and OS versions
- User-friendly interface with easy-to-follow steps.
3981454 people have downloaded it
One of Dr.Fone’s most astonishing powers is its “System Repair” feature. This is where the real magic happens. If your Lava Yuva 2 phone is bricked, it can help repair the underlying software glitches that caused the issue. Moreover, Dr.Fone brings a toolbox of features to the table, making it more than just a one-trick pony. Here are its key features:
- **Data Recovery:**If you’ve lost precious data, Dr.Fone can help recover it, even from a bricked phone.
- **Data Transfer:**You can quickly move data between devices, even if one is unresponsive.
- **System Backup & Restore:**Fone can help you create a backup of your phone’s system and restore it when needed.
- **Unlocking Tools:**If you’re locked out of your phone, Dr.Fone can help you regain access.
How To Use Dr.Fone System Recovery Feature To Unbrick a Lava Yuva 2 Phone
Now that you know about Dr.Fone, it’s time to understand how to use it. Hopefully, it can save your bricked Lava Yuva 2 phone from its problems. Follow the steps below:
- Step 1. DownloadDr.Fone from its official website , and launch it on your computer. After entering the Toolbox menu from the left panel, click System Repair. Make sure that your Lava Yuva 2 phone is connected.
- Step 2. Select Android on the next screen.


- Step 3. Initiate the Android System Repair by clicking Start.
- Step 4. Confirm your device details. You can edit any details that might be wrong.
- Step 5. Put your phone into Download mode. Follow the guidelines for phones with or without home buttons. Your phone will begin downloading the dedicated firmware.

- Step 6. After downloading the firmware, verify and proceed with the installation by clicking Fix Now. Confirm firmware installation by typing “000000” into the text box in the appearing window. Click Confirm afterward.
 Software Update Pro - Check and update software installed on your computer.
- Step 7. After the process is finished, your phone should now be okay. Click Done.


Part 4. Best Practices/Tips Before Unbricking Your Phone
Before diving into the unbricking process, you must arm yourself with some tips and precautions to ensure your recovery journey is as smooth as possible. Here’s what you need to know:
- Backing Up Data: An Ounce of Prevention. Remember the golden rule: always back up your data before attempting any phone recovery. Unbricking might save your phone, but being safe is better than sorry.
- **Authentic Tools and Software: Stay on the Safe Side.**Using genuine and trustworthy tools is crucial when unbricking your Lava Yuva 2 This applies especially to Dr.Fone, which you should only download from the official website. Additionally, when recovering your phone’s software, use authentic Lava Yuva 2 ROMs (the operating system’s files).
- **Learning from Online Guides and Communities: Seek Guidance.**Navigating the unbricking process might seem daunting, but you’re not alone. There are many online guides, tutorials, and communities where people share their experiences and solutions.
Conclusion
So, there you have it – your guide to fixing a bricked Lava Yuva 2 phone. Remember, bricking happens when your phone stops working. You won’t be afraid when that happens, as you learned about the Lava Yuva 2 Flash Tool and Dr.Fone. They are your phone-saving superheroes that can unbrick even a hard-bricked Lava Yuva 2 phone.
As a parting reminder, always keep a tool ready for emergencies. For this, choose Dr.Fone. It’s a super tool for all your phone problems. Give it a shot and be confident with your phone wherever you go and whatever you do with it.

safe & secure
3,052,835 people have downloaded it
How to Fix It: Lava Yuva 2 Won’t Turn On
Did your Lava Yuva 2 decide to go on vacation and refuses to turn on? If your Lava Yuva 2 won’t turn on for no apparent reason, finding why it failed to power on and the solution for it is not a fun process.
Here, we hope we are able to give you a checklist of reasons behind this issue and the possible steps you can take to rectify it.
Part 1: Common Reasons That Your Lava Yuva 2 Won’t Turn On
If you cannot find any reason why your Lava Yuva 2 will not switch on, here are some possible reasons:
- Your Android phone is simply frozen in power-off or sleep mode. In which case, it fails to switch itself on or wake itself up when you initiate it.
- Your phone’s battery may be out of charge.
- The operating system or installed software is corrupted. The tell-tale sign if this is that if you manage to switch on your Lava Yuva 2, it freezes or crash soon after.
- Your device is clogged up with dust and lint causing the hardware to not work properly.
- Your power button is broken , which caused it to not be able to trigger the necessary action needed to power up the Android phone. Check to also see if your connectors have no carbon build-up which will cause your phone to not be charged properly.
Part 2: Rescue Data on Android Phone That Will Not Turn On
If you need some help rescuing data from an Android phone that will not turn on, the Dr.Fone - Data Recovery (Android) will be your best friend in your data recovery attempt. With the help of this data recovery solution, you will be able to intuitively recover lost, deleted or corrupted data on any Android devices. Its flexibility and efficiency in rescuing data make it one of the best software out there.
Note: For now, the tool can rescue data from broken Android only if your phone is earlier than Android 8.0, or rooted.
Dr.Fone - Data Recovery (Android)
World’s 1st data retrieval software for broken Android devices.
- It can also be used to recover data from broken devices or devices that are damaged in any other way such as those stuck in a reboot loop.
- Highest retrieval rate in the industry.
- Recover photos, videos, contacts, messages, call logs, and more.
- Compatible with Lava Yuva 2 devices.
3981454 people have downloaded it
If your Lava Yuva 2 won’t turn on, here is how you can use the software to recover data:
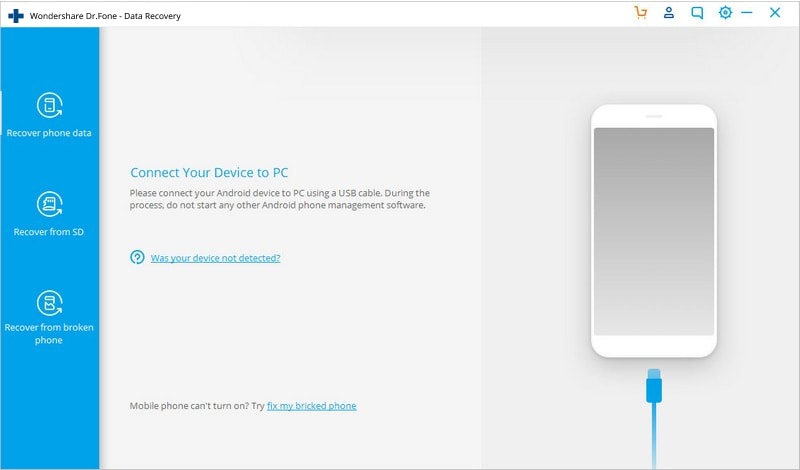
Step 1: Launch Wondershare Dr.Fone
On your desktop computer or laptop, open Wondershare Dr.Fone. Click on Data Recovery on the left column. Connect your Lava Yuva 2 to the computer using a USB cable.
Step 2: Decide which file types to recover
On the next window, you will need to check the boxes corresponding to the type of files you can recover from a list. You can get back Contacts, Messages, Call History, WhatsApp messages & attachments, Photos, Audio and more.

Step 3: Select the problem with your phone
Opt for “Touch screen not responsive or cannot access the phone” or “Black/broken screen”. Click Next to continue.

Look up for your device – pick the Lava Yuva 2 device Name and Device Model. Advance by clicking on the Next button.

Step 4: Go into your Lava Yuva 2’s Download Mode.
The data recovery tool will guide you on how you can go into your Lava Yuva 2’s Download Mode. You should be getting a step-by-step guide on your computer.
 PaperScan Professional: PaperScan Scanner Software is a powerful TWAIN & WIA scanning application centered on one idea: making document acquisition an unparalleled easy task for anyone.
Step 5: Scan the Android Phone.
Using the provided USB cable, attach your Lava Yuva 2 to your computer – the data recovery tool should be able to discover your device automatically and scan it for recoverable data.

Step 6: Review and Retrieve the Data from Broken Android Phone.
Wait for the program to finish scanning the phone – once completed, you will be able to get a list of recoverable files. You can have a preview of the file by highlighting them. Tick the box next to the file name and click on Recover to start retrieving the files and save them in the destination of your choosing.

Part 3: Android Phone Won’t Turn On: One Click Fix
After repeated attempts, when your Android mobile/tablet stops buzzing, what options do you have to revive it?
Well, we would recommend picking Dr.Fone - System Repair (Android) to fix an Android phone will not switch problem. This one-click Android system repair tool resolves every Android system issue without any fuss including Android Phone won’t turn on issue.
Dr.Fone - System Repair (Android)
The real fix to issues like “Android phone will not switch on”
- This tool is aptly effective for all the latest Lava Yuva 2 devices.
- With a high success rate for fixing Android devices, Dr.Fone - System Repair (Android) ranks at the top.
- This is a single click application to fix all Android system issues effortlessly.
- It is the first tool to repair all Android system issues in the industry.
- It is intuitive and requires no tech expertise to work with.
3981454 people have downloaded it
Prior to fixing the Android phone will not switch and getting things back in action. You need to make sure that you have backed up the Android device . It is recommended that rescuing data from an Android phone by backing up is better than recovering it post the process.
Phase 1: Get the Lava Yuva 2 device ready and connect it
Step 1: Run Dr.Fone on your computer once the installation is complete and tap the ‘Repair’ option form the interface. Now, connect your Android mobile with the computer.
Step 2: You will find a range of options, tap on the ‘Android Repair’ one. Hit the ‘Start’ button so that you can proceed to fix Android Phone won’t turn on hassle.
Step 3: Now, over the Lava Yuva 2 device information window, ensure to feed your exact device details. Press the ‘Next’ button then on.
Phase 2: Enter ‘Download’ mode for fixing your Lava Yuva 2
Step 1: You need to put your Lava Yuva 2 in Download mode for resolving the Android phone will not switch on.
- For the Lava Yuva 2 device having ‘Home’ button, you got to switch it off and press ‘Volume Down’, ‘Home’, and ‘Power’ keys for 5-10 seconds at once. Let them go and click on the ‘Volume Up’ button to put your phone in ‘Download’ mode.
- For ‘Home’ button-less device, turn the phone/tablet down first. For 5 – 10 seconds, hold down the ‘Volume Down’, ‘Bixby’, and ‘Power’ buttons. Tap on the ‘Volume Up’ button to get into the ‘Download’ mode, after releasing the 3 buttons.

Step 2: Hitting the ‘Next’ key will allow you to download firmware and proceed with the next step.
 Epubor Audible Converter for Win: Download and convert Audible AAXC/AA/AAX to MP3 with 100% original quality preserved.
Step 3: Dr.Fone - System Repair (Android) would verify your firmware download and then take a while to rectify and resolve Android Phone won’t turn on issue.
Part 4: Android Phone Won’t Turn On: Common Fix
To try fixing an Android Phone that won’t turn on, follow these steps:
- For any Android devices, remove the battery (considering the battery of your Lava Yuva 2 can be removed) and leave it out for at least 30 minutes. Put back the battery in and try to turn it on.
- Press and hold down the Power and Volume Down buttons at the same time for 15-30 minutes to reboot the Lava Yuva 2 device.
- Should the first two steps do not work, charge your Lava Yuva 2 to get it out of the start-up loop. You can also opt to use a different battery, just in case your current battery is the source of the problem.
- If there are any connected hardware e.g. SD card, remove them from the Lava Yuva 2 device.
- Start your Lava Yuva 2 in Safe Mode by pressing and holding down the Menu or Volume Down button on your device.
- Should the first five steps do not work for you, perform a hard reset. Do take note that each device will have a different way to do so and that data that is stored locally on the phone will be deleted.
- Send your Lava Yuva 2 to the repair shop should none of these steps work.

Part 5: Useful Tips to Protect Your Lava Yuva 2
There are several reasons as to why your Lava Yuva 2 won’t turn on. The problem could be a hardware or software issue which could be prevented. Here are some useful tips to protect your Lava Yuva 2.
I. Hardware
- Remember that the components that make your Lava Yuva 2 is sensitive. To protect these components from being damaged, use a good guard casing.
- Take apart your Lava Yuva 2 and clean it routinely to avoid dust and lint from clogging the phone and overheating it.
II. Software
- It is recommended to download apps from Google Play Store. This way, you can be sure that your app comes from a trusted source.
- Read the app’s permission to see which part of the operating system and your personal information that you are giving access to.
- Install reliable anti-virus and anti-malware software to safeguard your Lava Yuva 2 from malicious attacks.
- Make sure you update your operating system, software and apps to make sure you have the latest version – the developer may have fixed the bugs that have caused problems on Android phones.
It is important to note that your phone contains some important data. Therefore, when your Lava Yuva 2 won’t turn on do not just give up - there are plenty of tools at your disposal to recover back your files and phone.
- Title: Full Guide How To Fix Connection Is Not Private on Lava Yuva 2 | Dr.fone
- Author: Ariadne
- Created at : 2024-07-30 11:00:11
- Updated at : 2024-07-31 11:00:11
- Link: https://howto.techidaily.com/full-guide-how-to-fix-connection-is-not-private-on-lava-yuva-2-drfone-by-drfone-fix-android-problems-fix-android-problems/
- License: This work is licensed under CC BY-NC-SA 4.0.