
Google Play Services Wont Update? 12 Fixes are Here on Vivo S18 Pro | Dr.fone
Google Play Services Won’t Update? 12 Fixes are Here on Vivo S18 Pro
Google Play Services is a crucial component of any Android device, responsible for supporting various Google apps and services. However, at times, users may encounter issues with updating Google Play Services, preventing them from accessing the latest features and security updates.
It’s pretty much annoying when you try to launch Google Play Services but it isn’t able to operate correctly. You get some of the notifications like Google Play Services won’t run unless you update Google Play Services. On the other hand, when you start to update Google Play Services, you stuck again with the error pop-ups, and Google Play Services won’t update. This can create a lot of chaos in one’s life. So, what action should one need to take in such a situation? Well! You needn’t rankle more as we will explore some of the causes and tips to fix the issue. Keep reading!
Part 1: Causes for Google Play Services Won’t Update Issue
Before diving into the solutions, it’s essential to understand the potential causes of the Google Play Services update problem. Let’s talk about the causes without further ado.
- 1. Incompatibility with Custom ROMs: Using a custom ROM on your Vivo S18 Pro can cause compatibility issues and prevent the installation of Google Play Services updates.
- 2. Network connectivity issues: Poor or unstable internet connection can prevent the download and installation of updates.
- 3. Insufficient storage space: When your device doesn’t have enough free space, it can hinder the installation of updates for Google Play Services.
- 4. Excessive Installed Apps: a large number of installed apps on your device can exacerbate the update problem with Google Play Services.
- 5. Cache Conflicts: Accumulated cache can lead to conflicts and cause issues with the updating process of “Google Play Services”.
- 6. Outdated version of Google Play Store: If your device has an outdated version of the Google Play Store app, it may interfere with the update process for Google Play Services.
- 7. Google Play Components: If certain components of Google Play Services are corrupted, it can contribute to update issues.
Part 2: One-Click Fix When Google Play Services Won’t Update
For those seeking a quick and effortless solution, several third-party tools offer one-click fixes for the Google Play Services update problem. These tools automate the update process, ensuring that you have the latest version of Google Play Services installed. However, it is crucial to use reputable and trusted tools to avoid potential security risks.
If you cannot update Google play services by the reason of custom ROM incompatibility or Google Play component corruption, there is a serious need of repairing firmware then. And to repair Android firmware, one of the expert ways is Dr.Fone - System Repair (Android) . This professional tool vows to bring your Vivo S18 Pros back to normal by fixing the issues with ease. Here are the advantages of this tool.

Dr.Fone - System Repair (Android)
Android repair tool to fix Google Play Services not updating
- A completely user-friendly tool where no technical skills are needed.
- All Android models are easily supported.
- Any kind of Android issue like black screen , stuck in boot loop , Google play services won’t update, or app crashing can easily be resolved with these.
- Full security is promised with the tool so there’s no need to worry about harmful activities like viruses or malware.
- Trusted by a lot of users and carries a high success rate.
3,485,019 people have downloaded it
How to Fix Google Play Services can’t be installed using Dr.Fone - System Repair (Android)
- Step 1: Install the Software
Initiate the process of downloading the software on your computer. Now, click on “Install” button and go along with the installation procedure. Click on “System Repair” option from the Toolbox window.

- Step 2: Device Connection
Now, taking the assistance of an original USB cable, connect your Vivo S18 Pro to the PC. Then hit on “Start”.

- Step 3: Check the Information
You will notice the next screen which asks for some information. Please ensure to choose the correct device brand, name, model, career, and other needed details. Click on “Next” after this.

- Step 4: Download Mode
You will now see some instructions on your PC screen. Just follow those according to your device. And then your device will boot in Download mode. Once done, hit on “Next”. The program will now download the firmware.

- Step 5: Repair the Problem
When the firmware is downloaded completely, the program will automatically start getting fixed the issue. Wait for a while until you get the notification of the process completion.

 safe & secure
Part 3: 10 Common Fixes When Google Play Services Won’t Update
Method 1. Restart your Android and try to update again
In most cases, restarting the Vivo S18 Pro device can simply do the trick. When you restart the Vivo S18 Pro device, most of the issues get eliminated making the Vivo S18 Pro device perform better than before. Also, it is all about RAM. While you restart your device, the RAM gets cleared. As a result, the apps work properly. So, in the first place, we would like you to restart your Vivo S18 Pro when you cannot update Google Play Services. Once restarted, try to update again and see if the results are positive.
Method 2. Uninstall Google Play Services Updates and Reattempt the Update
Uninstalling previous Google Play Services updates resolves conflicts and errors, often addressing the issue of updates. This process clears potential obstacles, enabling a successful update of Google Play Services. Here’s how you can do it:
- Open your device’s “Settings.”
- Scroll down and select “Apps” or “App Manager.”
- Locate and tap on “Google Play Services.”
- Depending on your device and Android version, you might need to tap on “App info” or “Storage.”
- Look for the option to “Uninstall updates.” This will revert Google Play Services to its original version.
- Confirm the action when prompted.
- Once the updates are uninstalled, go back to the Google Play Store.
- Search for “Google Play Services” using the search bar at the top.
- If an update is available, you’ll see the option to “Update.” Tap on it to start the update process.
- After the update is complete, restart your device to ensure the changes take effect.
Method 3. Update Google Play Store
Ensure that you have the latest version of the Google Play Store app installed on your device. Open the Play Store, go to Settings, and check for updates. Updating the Play Store can often resolve compatibility issues with Google Play Services updates.
Method 4. Google account and re-add it
Go to your device’s Settings, select Accounts or Users, and remove your Google account. Restart your device and add the account again. This process can refresh the connection and resolve update issues.
Method 5. Uninstall unnecessary apps
As we mentioned above, due to a lot of apps being installed at the same time, the issue can crop up. And hence, if the above solution didn’t help, you can try to uninstall the apps that you don’t need currently. We hope this works. But if not, you can go to the next fix.
Method 6. Clear Google Play Services cache
If still you cannot update Google Play Services, clearing cache can solve your problem. We also stated this in the beginning as the reason. If you don’t know, cache holds the app’s data temporarily so that it can remember the information when you next open the app. Many times, old cache files get corrupted. And clearing cache can also help in saving storage space on your device. For these reasons, you need to clear cache of Google Play Services to get rid of the problem.
Here is how to clear Google Play Services cache:

- Launch “Settings” on your phone and go to “Apps & Notifications” or “Application” or “Application Manager”.
- Now, from all the apps’ list, choose “Google Play Services”.
- On opening it, tap “Storage” followed by “Clear Cache”.
Method 7. Boot into download mode to clear cache of whole phone
If unfortunately, things are still the same, we would like to recommend you wipe the cache of the whole device to fix the issue. This is an advanced method to solve issues and is helpful when the Vivo S18 Pro device is facing any flaws or malfunctions. For this, you need to go to the download mode or recovery mode of your device. Every device has its own steps for this. Like in some, you need to simultaneously press the “Power” and “Volume Down” keys. While in some, the “Power” and both “Volume” keys work.
This is how it works when Google Play Services can’t be installed on your device:
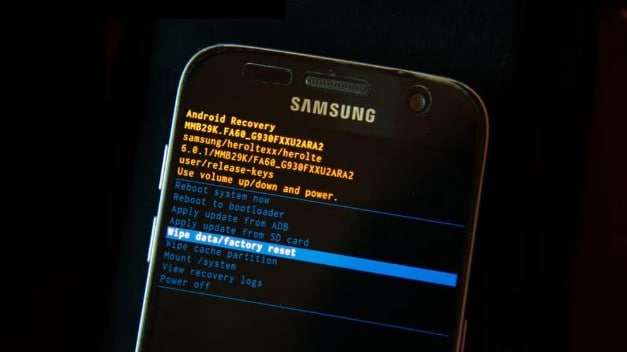
- Turn off the Vivo S18 Pro device to begin with and then follow the steps for recovery mode.
- On the recovery screen, use the “Volume” buttons for scrolling up and down and go to “Wipe cache partition”.
- To confirm, press the “Power” button. Now, the Vivo S18 Pro device will begin to wipe the cache.
- Hit reboot when asked and the Vivo S18 Pro device will now be rebooted finishing the issue.
Method 8. Check your Android storage
Generally speaking, Google Play Services can update automatically in the background. But if there is not enough storage on your Android, the automatic update may fail, so check your android space.
Method 9. battery optimization
Some devices aggressively optimize battery usage, which can interfere with the background processes required for updating Google Play Services. Disable battery optimization for Google Play Services in the Vivo S18 Pro device’s Settings to ensure uninterrupted updates.
Method 10. Check date and time settings
Sometimes, incorrect date and time settings on your device can cause conflicts with Google Play Services updates. Ensure that your device’s date and time are set correctly and set to automatic. Follow the steps below to set the date and time on your android correctly.

- Open “Settings” and go to “General Management”.
- Click “Date & time” and then enable “Automatic date & time”. Or you can disable and re-enable it.
Method 11. Factory Reset your Android
As a final measure, if everything went in vain, you can perform a factory reset on your device. This method will wipe away all your data while performing and make the Vivo S18 Pro device go to factory state. Please ensure to keep backing up your important data if you are going to take the help of this method.
The steps are:
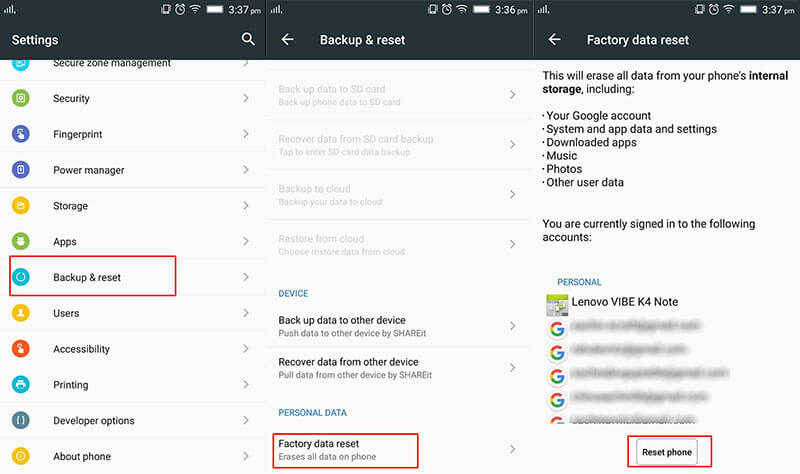
- Open “Settings” and go to “Backup & Reset”.
- Choose “Factory Reset” followed by “Reset Phone”.
FAQs about Google Play Services
To provide further clarity, here are some frequently asked questions about Google Play Services:
1. What is Google Play Services?
Google Play Services is a background service on Android devices that provides essential functionality and support for various Google apps and services. It includes features like authentication, push notifications, location services, and more, enabling seamless integration and enhanced performance for Google apps.
2. Why is it important to keep Google Play Services updated?
Keeping Google Play Services updated is crucial for several reasons. It ensures compatibility with the latest versions of Google apps, improves app performance, and enhances security. Updates often introduce new features, bug fixes, and optimizations, providing a better user experience and access to the latest advancements offered by Google.
3. Can I uninstall Google Play Services?
No, Google Play Services cannot be uninstalled as it is a core system component required for the proper functioning of Google apps and services. Removing or disabling it can lead to malfunctions and render many Google apps non-functional. However, you can disable specific permissions or clear its cache and data if troubleshooting issues related to Google Play Services.
4. How can I check the version of Google Play Services on my device?
To check the version of Google Play Services on your Vivo S18 Pro, follow these steps:
- Step 1. Open the Google Play Store app.
- Step 2. Tap on the menu icon (three horizontal lines) in the upper-left corner.
- Step 3. Scroll down and select “Settings.”
- Step 4. Scroll to the bottom and find the “Play Store version” or “Play Services version”. The number displayed indicates the version of Google Play Services installed on your device.
5. Why is my device not compatible with the latest version of Google Play Services?
There can be several reasons why a device is not compatible with the latest version of Google Play Services. It could be due to hardware limitations, an outdated Android operating system version, or the Vivo S18 Pro device no longer receiving official software updates. Compatibility requirements can change with newer versions of Google Play Services, and older devices may not meet the necessary criteria to support the latest updates.
Conclusion
Encountering difficulties when updating Google Play Services can be frustrating, but with the right approach, these issues can be resolved. By understanding the causes and implementing the suggested fixes outlined in this guide, you can overcome the Google Play Services update problem. Remember to prioritize storage space, ensure a stable internet connection, and keep your apps and system components up to date. By doing so, you can enjoy the full functionality of Google Play Services and benefit from the latest features and security enhancements.
Restore Missing App Icon on Vivo S18 Pro: Step-by-Step Solutions
The growing conversation around the missing app icons on Android issue has caught our attention. While it seems confusing, it’s a problem that some Android users have encountered.
After all, the presence of app icons on our Android device’s home screen is important for convenient access to our frequently used applications. When your Vivo S18 Pro’s icons suddenly disappear, it can leave you feeling lost about how to use and access your apps.
No worries, though. We’ve got you covered with a simple guide in this article. Just follow the steps, and you’ll get those missing app icons back on your Vivo S18 Pro.
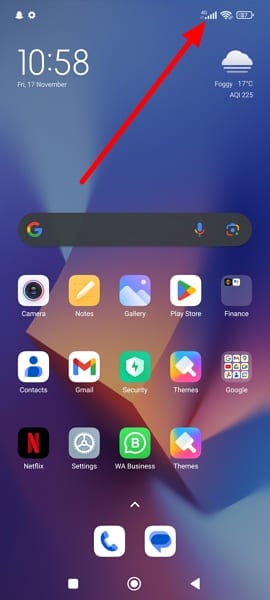
Part 1: Make Sure if the Missing App Is Installed
Before proceeding with troubleshooting the missing app icon on your Android device, it’s essential to confirm whether the app is still installed or if it has been accidentally deleted. To do it, you can have a quick check on Google Play:
- Step 1: Go to the Play Store.
- Step 2: Tap your Google profile at the top right and find Manage apps and devices.
- Step 3: Open Manage and select the “Installed” tab.
![]()
Now, see whether you can find the app icon that disappeared on your Android. If you can’t find it, it means the app has been accidentally deleted, and you can install it back on your device. However, if it’s confirmed to be installed on your Android but remains missing from your home screen, you can continue the following practice.
Part 2: How To Find the Missing App Icon on Android
“All my apps disappeared from my home Android screen. What should I do?”
If you’ve confirmed that the missing app is installed, but its icon is nowhere to be found on your home screen, don’t fret—there are several solutions you can take to locate and restore the missing app icon on Android.
1. Check hidden apps
How could the Android phone icon be missing? Well, app icons can disappear from your home screen for different reasons. One of the common reasons is you might have accidentally hidden it in your phone. To find and check whether the app is hidden, the steps can be different depending on the phone model you are using.
However, as a general guide, you can follow these steps:
- Step 1. Go to your phone’s Settings.
- Step 2. Use the search bar to look for “Hidden app.”
- Step 3. Once you find the “Hidden app” settings, watch the list to see if the missing app is there. If it is, you can toggle off the switch to unhide it.
![]()
2. Move the app to the home screen from the App Drawer
If your app icon disappeared on your Android, you can also easily restore it by adding the app to the home screen from the app drawer. Follow the step-by-step guide below:
- Step 1. Open the App Drawer on your Android. To do this, swipe from the bottom to the top, starting from your home screen. The App Drawer is where all your installed apps are neatly listed.
- Step 2. Once you open the App drawer, locate the app icon that has disappeared from your home screen. For example, you lost the phone icon on Android. Then, look for the phone icon from the App Drawer.
- Step 3. Long-press the Icon of the missing app and move it to the desired location on your home screen. You can drag it to an empty space or a specific folder.
- Step 4. Release to drop the app icon onto the home screen.
![]()
3. Re-enable disabled app
App icons can also disappear on the Android home screen if you unintentionally or intentionally disable them. Certain phone models even offer a functionality known as ‘Freezer,’ allowing users to temporarily halt the apps. While in a frozen state, the app remains inactive and doesn’t appear on the home screen until you unfrozen it.
To re-enable the disabled app, you can follow the steps here:
- Step 1. Open the Apps & Notifications on the Settings.
- Step 2. Select the app which icon is missing on your home screen. For example, tap the phone app if the phone icon disappears on your Android.
- Step 3: In the App Info, tap Enable.
4. Reset Android to factory settings
If the previous methods don’t work, you might need to do a factory reset on your Vivo S18 Pro. But before doing that, it’s important to back up your data first because a factory reset will clear all your data and cache when you press the reset button.
How to reset Android to factory setting:
- Step 1: Go to your Android Settings.
- Step 2: Select Backup and Reset > Factory data reset. Then, choose to erase all data.
Please be mindful that performing a factory reset on Android will reset your Android completely to its initial state.
![]()
Part 3: How to Fix System Error on Android Easily with Reliable Software
Missing app icons on Android can sometimes be a result of errors in your Android system launcher, causing inconvenience and potential disruptions to your device’s operation. To address this issue effectively, you can turn to Dr.Fone’s advanced system repair tool. This tool is designed to handle various system issues, providing an easy and reliable solution.
How to fix the Android system using Dr.Fone’s system repair tool:
- Step 1. Open the Repair Tool
Start by launching Wondershare Dr.Fone on your computer. Go to the Toolbox section and connect your Vivo S18 Pro. Choose System Repair and pick Android as your device type.
safe & secure
4,136,839 people have downloaded it
- Step 2. Begin Repair
Click Start on the new screen to kick off the repair. Since you’re dealing with the Android system, select System Damage.
- Step 3. Fill in the Vivo S18 Pro device Details
The platform will detect your Vivo S18 Pro’s brand. Confirm the Name, Model, Country, and Carrier. If your device is unlocked, choose OPEN in the Carrier section. Agree to the warning, click Next, and proceed with the repair.
- Step 4. Activate Download de
Follow the instructions to put your Vivo S18 Pro into Download Mode. Once you are in Download Mode, the firmware will be downloaded automatically.
- Step 5. Confirm Installation
Remember, the repair may erase data. It’s advisable to back up your data first before starting the repair. Enter “000000” to confirm the repair process, shown by a progress bar. Once finished, click Done and see if your phone has returned to normal.

More Articles About Android System:
9 Solutions for Android Process System isn’t Responding Error
How to Fix Android App Not Installed Error Quickly?
Authentication Error Occurred? Here Are 10 Proven Fixes
Conclusion
When the app disappears from the home screen of your Android, it can hinder your ability to access and use the app efficiently. There are several reasons why an app might disappear from your Android home screen, and addressing the issue depends on the specific circumstances.
Whether it’s due to accidental deletion or a system glitch, we have discussed various methods to recover the missing app and ensure smooth functionality in this article. In cases of system-related issues on your Vivo S18 Pro, it’s advisable to rely on trustworthy software such as Dr. Fone’s system repair tool for a comprehensive resolution.
Cellular Network Not Available for Voice Calls On Vivo S18 Pro
The “Cellular Network Not Available for Voice Calls“ error is a common experience for many Android users. In our contemporary world, communication stands as the fundamental pillar of our existence. Yet, the malfunctioning of our devices hinders this connectivity. It often gives rise to numerous complications. Fortunately, your concerns are now a thing of the past.
This article serves as your guide for troubleshooting and overcoming this frustrating dilemma. It has compiled expert perspectives, valuable tips, and detailed, systematic solutions. The article will go through the underlying causes behind this issue and explore potential fixes. By the conclusion of this article, you’ll be armed with the necessary knowledge to tackle this problem.

Part 1. Preliminary Reasons For Cellular Network Not Available For Voice Calls
Facing the “Cellular Network Not Available for Voice Calls Android“ error can be overwhelming. Thus, it becomes evident that specific reasons underlie this issue. Solutions indeed exist to tackle this problem. Yet, comprehending the underlying reasons is equally crucial to resolve the issue:
1. Internet Access
One primary reason behind cellular network unavailability glitches lies in unstable internet access. Voice calls over cellular networks often require a stable internet connection. When this connection fluctuates or drops, it can result in the dreaded error message.
2. Terrain Coverage
Another contributing factor is the geographical terrain. In remote or sparsely populated areas, cellular tower coverage might be limited. It causes a signal disturbance or complete loss of the network.
3. Network Congestion
During peak usage hours or in densely populated areas, network congestion can also be a cause. It leads to temporary unavailability of the cellular network for voice calls. When the network is overloaded with traffic, it might struggle to accommodate more voice calls. That results in connectivity issues.
4. Technical Glitches
Furthermore, technical glitches within the Vivo S18 Pro device or network infrastructure can cause this issue. These glitches could range from software bugs to hardware malfunctions.
5. Battery or Power Issues
In some instances, insufficient battery power or power-saving modes on devices can cause this issue. They affect the Vivo S18 Pro device’s capacity to sustain a consistent connection with the cellular network. This consequently causes voice call unavailability.
Part 2. Prominent Solutions For Cellular Network Not Available For Voice Calls Android
A myriad of purposeful solutions exists to resolve the TracFone cellular network not available for voice calls issue. These solutions are specifically designed to address various underlying causes. The aim of these solutions is to restore smooth connectivity for voice calls. Described below are the top 8 solutions to fix the “Cellular Network Not Available” error:
| Method | Efficiency | Difficulty | Duration (Minutes) |
|---|---|---|---|
| Check Network Availability | Moderate | Easy | 5-10 |
| Check Airplane Mode | Low | Easy | 2-5 |
| Select Network Operator | Moderate | Moderate | 5-10 |
| Restart Device | Low to Moderate | Easy | 3-5 |
| Enable Roaming Settings | Moderate | Easy | 3-7 |
| Update Android Smartphone | Moderate | Moderate | 15-30 |
| Performing Factory Reset | High (Last Resort) | Difficult | 30-60+ |
| Contact Carrier Provider | High (Specialized Help) | Moderate | Varies (Depends on Carrier Provider) |
| Wondershare Dr.Fone - System Repair | Highest (Complex Issues) | Easiest | 5-10 |
Solution 1. Check the Availability of Cellular Networks
Before diving into complex fixes, the first thing to do is to check if nearby cell networks are available and how strong their signals are. It is an essential step when trying to fix the “Cellular Network Not Available“ error. This basic check ensures your phone is close enough to a working network tower, which matters for staying connected. It allows you to find out the availability of nearby cellular networks.
Moreover, with it, you can ensure your device is connected to a reliable network. This preliminary check sets the foundation for further troubleshooting.
Solution 2. Check the Airplane Mode of the Smartphone
Another crucial step in resolving this error involves ensuring that the Airplane Mode is disabled. This mode, when activated, disables all wireless connections. It also includes cellular networks, which could lead to connectivity issues. Follow these simple steps to check and disable Airplane Mode on your device:
Instructions: Swipe down on your phone’s screen from the top to access the Notification Panel, unveiling the Quick Settings tiles. Search for the airplane-shaped icon; if Airplane Mode is active, the icon will be highlighted or shown in a distinct color. Tap the Airplane Mode to turn off the Airplane Mode on your Android.

Solution 3. Selecting the Network Operator of the Vivo S18 Pro device
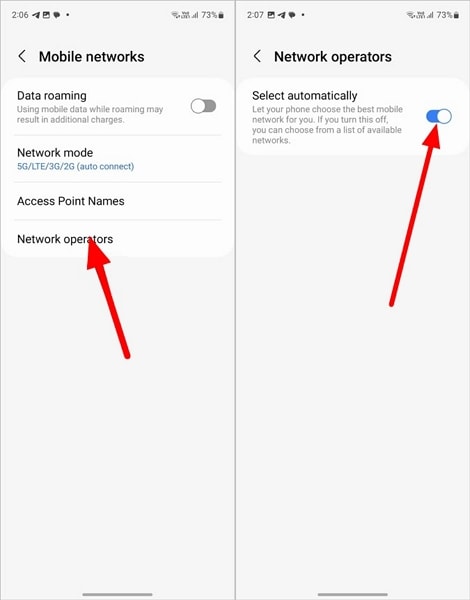
In certain instances, manually selecting your network operator can help. It effectively resolves the “Cellular Network Not Available for Voice Calls Android“ error on your Vivo S18 Pro. By choosing the network operator manually, you ensure a deliberate connection to a specific carrier. This potentially bypasses issues related to automatic network selection. Follow these steps to select your network operator manually:
- Step 1. Access “Settings” on your Vivo S18 Pro, then tap on “Connections.” From there, navigate to “Mobile Networks” and proceed by selecting “Network Operators.”

- Step 2. Look for the “Automatically Select” toggle, which will be turned on. Toggle it off to see available networks and choose the one best suited to your device.
Solution 4. Restart Your Device
Sometimes, resolving the “Cellular Network Not Available for Voice Calls“ error on your Vivo S18 Pro can be as simple as performing a restart. This basic troubleshooting step helps refresh the Vivo S18 Pro device’s software. It clears temporary glitches and reestablishes essential connections, potentially resolving network-related issues. Follow these straightforward steps to restart your Vivo S18 Pro:
Instructions: Hold down the “Power” button until the Power menu emerges on the display. From there, select “Restart” to initiate the Vivo S18 Pro device’s reboot process.

Solution 5. Enable Roaming Settings
There are situations where you’re in an area with weak or no coverage from your primary network provider. In such a case, enabling roaming settings on your Vivo S18 Pro can sometimes resolve the issue at hand. Enabling roaming allows your device to connect to partner networks. This extends your coverage beyond your home network’s reach. Follow these steps to enable roaming settings on your Vivo S18 Pro:
- Step 1. Start by accessing your device’s Settings and tapping the “Connections” option. Here, scroll downward to press “Mobile Networks.”

- Step 2. Presently, you will encounter the “Data Roaming” option. Toggle this option on to enable data roaming on your device and resolve the issue.

Solution 6. Update Android Smartphone
Updating your Vivo S18 Pro’s OS to the latest version can often resolve performance issues. It can also fix network connectivity issues, including the “Cellular Network Not Available” error. Manufacturers regularly release system updates containing bug fixes and security patches. It also includes enhancements that can address underlying software-related problems. Follow these steps to update your Android smartphone:
- Step 1. In your device’s Settings, scroll through to find the “Software Update” option. Select it, and on the subsequent screen, verify the availability of any updates.

- Step 2. If an update is accessible, select the ‘Download and Install’ choice. Then, proceed by following the prompts displayed on the screen to finalize the process.

Solution 7. Performing Factory Reset
Performing a factory reset is a drastic but effective measure. It can resolve persistent software-related issues, including the “Cellular Network Not Available” error. Be aware that initiating a factory reset results in the deletion of all data and settings stored on your device. Hence, it is crucial to back up any vital information before proceeding with this action. Here is how to fix the Verizon cellular network not available for voice calls:
- Step 1. To access your device’s “General Management” section, navigate through Settings. There, tap on “Reset,” and select “Factory Data Reset” from the subsequent screen.

- Step 2. You will need to tap “Reset” to confirm your choice. Then, follow the on-screen guidelines carefully to complete the reset process.

Solution 8. Contact Carrier Provider
If you’ve exhausted all options and the issue persists, reaching out to your carrier provider for assistance is a viable solution. Carrier providers can offer specific insights and guidance regarding network-related issues. When connected to customer service, explain the issue you’re experiencing in detail. Contacting your carrier provider enables you to tap into their expertise and resources.

You May Also Like:
Top 5 DFU Tools for iPhone to Enter DFU Mode
9 Ways to Fix iPhone Error 4013 or iTunes Error 4013
Vivo S18 Pro ROM Download & Install: The Definitive Guide
Part 3. [100% Resolvable] Resolve Cellular Network Not Available For Calls Issues
Despite all your attempts, the cellular network not available for voice calls remains unresolved. It might state a more complex software-related issue or glitch within the Vivo S18 Pro device. However, there’s a solution designed explicitly for addressing such complex issues. That software is Wondershare Dr.Fone, a comprehensive toolkit for Android devices. It stands out as the world’s first one-click Android repair tool.
Dr.Fone specializes in resolving a wide array of Android system issues, including the notorious black screen of death. With this tool, users can effortlessly restore their Android system to normal functionality.
Key Features of Wondershare Dr.Fone
- Fone’s advanced repairing mechanism has the ability to repair even the bricked Android devices.
- This tool supports more than 1000 models of Android devices across different brands for system repair.
- It boasts the highest success rate when it comes to fixing Android devices.
![]()
Dr.Fone - System Repair (Android)
Repair Android System Errors without Any Trouble.
- Fix your Android to normal, no skills required.
- Fix various Android system issues, stuck in boot loop , black screen , or won’t turn on , looping on start, etc.
- The high success rate in resolving Android system issues.
- Compatible with a wide range of Android devices and OS versions
- User-friendly interface with easy-to-follow steps.
3981454 people have downloaded it
Steps Needed To Fix the Cellular Network Not Available for Calls Issue via Wondershare Dr.Fone
The following are the steps to resolve the Tracfone cellular network not available for voice calls using Wondershare Dr.Fone:
- Step 1. Open Wondershare Dr.Fone and Opt for System Repair
Launch the software. Then, navigate to the “Toolbox” section located in the left panel. Connect your Vivo S18 Pro and proceed by choosing “System Repair.” Then, opt for “Android” to specify the Vivo S18 Pro device type. On the subsequent screen, click “Start” to commence the repair procedure.
- Step 2. Provide Details of Your Android Device
The system automatically identifies the brand of the Android device undergoing repair. Afterward, choose the “Name,” “Model,” “Country,” and “Carrier” from the provided list options. If the Vivo S18 Pro device is already unlocked, you can choose OPEN in the Carrier section. Then, confirm by checking the warning box indicating agreement and readiness to proceed. Click on “Next” to initiate the repair process for your Vivo S18 Pro.
- Step 3. Complete the Android Repair Process Successfully
Follow the guidance displayed on your device’s screen to access Download Mode. Once in, the firmware download begins automatically. During this process, the platform verifies and presents the firmware details. Select “Fix Now” to proceed with the installation of the firmware onto your Vivo S18 Pro. Since Android repair will result in the deletion of all data, input “000000” to confirm. This action initiates the system repair process.
safe & secure
3,336,459 people have downloaded it
Conclusion
In conclusion, facing the “Cellular Network Not Available for Voice Calls“ problem on your Vivo S18 Pro can be frustrating. This article has explored many ways to fix this issue. These include simple checks like turning off Airplane Mode to solutions like contacting your carrier. However, when facing persistent network problems, a tool like Wondershare Dr.Fone becomes the only hope.
Among the various methods discussed, Dr.Fone stands out as a top choice. Its thorough system repair function targets and removes complex software glitches. The tool’s easy interface, broad compatibility, and secure repair process make it perfect. It is ideal for users looking for a reliable solution beyond regular troubleshooting.
![]() Why isn’t My Vivo S18 Pro establishing a connection with the cellular network?
Why isn’t My Vivo S18 Pro establishing a connection with the cellular network?
![]() What steps can I take when the mobile network isn’t available?
What steps can I take when the mobile network isn’t available?
![]() What might be causing my SIM card to not display a network?
What might be causing my SIM card to not display a network?
Also read:
- [New] 2024 Approved Mastering Instagram Video Streaming Quickness
- [Updated] 2024 Approved Boosting Your Content A Guide to Instagram Video Fame
- [Updated] 2024 Approved PixelPilot Expert Tips for Screen Snagging
- 8 Quick Fixes Unfortunately, Snapchat has Stopped on Xiaomi Redmi 13C 5G | Dr.fone
- Calls on Realme 11 Pro+ Go Straight to Voicemail? 12 Fixes | Dr.fone
- Easy Guide: Installing the AV1 Video Codec on Windows 10 and 11
- Infinix Note 30 5G Not Receiving Texts? 10 Hassle-Free Solutions Here | Dr.fone
- Swift Switcheroo Rearranging YT Lists in a Minute for 2024
- Why Does My Oppo Reno 11 5G Keep Turning Off By Itself? 6 Fixes Are Here | Dr.fone
- Title: Google Play Services Wont Update? 12 Fixes are Here on Vivo S18 Pro | Dr.fone
- Author: Ariadne
- Created at : 2024-11-10 04:59:46
- Updated at : 2024-11-12 08:13:57
- Link: https://howto.techidaily.com/google-play-services-wont-update-12-fixes-are-here-on-vivo-s18-pro-drfone-by-drfone-fix-android-problems-fix-android-problems/
- License: This work is licensed under CC BY-NC-SA 4.0.