
How to Fix the Soft Bricked Tecno Pova 6 Pro 5G? | Dr.fone
How to Fix the Soft Bricked Tecno Pova 6 Pro 5G?
Bricked phone is a serious problem, as your brick smartphone could be suffering from a soft brick or hard brick problem, and must be dealt with carefully. It is very common to see a brick smartphone these days. If you are wondering what exactly is a bricked phone, here is your answer.
A bricked phone, hard brick or soft brick, is a smartphone which refuses to start or boot all the way up the home/main screen of the Tecno Pova 6 Pro 5G device. This issue is observed within most Android phones because users have a tendency to tamper with the Tecno Pova 6 Pro 5G device settings, flashing new and customized ROMs and tweaking with the essential files. Playing around with the phone’s internal set-up leads to such errors, worst of them being a brick smartphone. Usually, a bricked phone does not switch on and stays frozen at the Tecno Pova 6 Pro 5G device logo, a blank screen or even worse, doesn’t respond to any command, even the power on command.
If you are confused about the soft brick and hard brick problems and looking for solutions to fix your priced phone, then here is all you need to know.
Read on to find out more.
Part 1: What is the difference between soft brick and hard brick?
To begin with, let us understand the basic difference between a soft brick and hard brick issue. Both versions of a bricked phone prevent it from booting but differ in their causes and gravity of the problem.
A soft-brick problem is caused merely by a software error/crash and makes your device switch on automatically every time you manually turn it off. This phenomenon is referred to as Boot Loop. Soft bricked Android phones are not as difficult to fix as the hard bricked Android phones. It is convenient to say that a soft bricked phone only boots up half-way and not fully, whereas a hard bricked device does not switch on at all. A hard brick error is thus caused when the kernel, which is nothing but an interface for the software to communicate with the hardware, is tampered with. A hard bricked phone is not recognized by your PC when plugged in and is a serious problem. It requires troubleshooting techniques and cannot be easily fixed as the soft brick problem.

Hard bricked phones are a rare sight, but the soft brick is very common. Given below are ways to fix a soft brick Android phone. The techniques listed here are the best and the most efficient ways to get your phone back to its normal working conditions without losing your important data or damaging your device or its software.
Part 2: Stuck at the Boot Loop
This is the first sign of a soft bricked Android phone. Boot Loop is nothing but when your phone does not remain switched off and turns itself on automatically, and freezes at the logo screen or blank screen, every time you manually try to power it off.
Stuck at boot loop problem can be fixed by clearing your Cache partitions. These partitions are nothing but storage locations for your modem, kernels, system files, drivers and built-in Apps data.
It is advisable to clear Cache partitions regularly to keep your phone free from such glitches.
Since the phone refuses to boot, Cache can be cleared from entering into the Recovery Mode. Different Android devices have different ways to put it in recovery mode. Normally pressing the power key and volume down key helps, but you may refer to your phone’s guide for better understanding and then follow the steps given below to clear the cache partition:
Once you are the recovery mode screen, you will see a number of options as shown in the screenshot.

Use the volume down key to scroll down and select ”Wipe cache partition” as shown below.
 >
>
After the process is completed, select “Reboot System” which is the first option in the recovery mode screen.
This method will help you erase all the clogged up and unwanted files. You may loose some App related data, but that is a small price to pay to fix your bricked phone.
If this method does not boot up your brick smartphone and the problem still persists, there are two more things you can try. Read ahead to find out about them.
Part 3: Booting straight into recovery mode
If your bricked phone does not boot up to your Home Screen or Lock screen and instead boots directly into Recovery Mode, there is not much left to do. Booting straight into recovery mode is undoubtedly a soft brick error but it also indicates a possible problem with your current ROM. The only option you have to flash a new ROM to reboot your bricked phone back to its normal functioning.
To flash a new ROM:
Firstly, you must root your phone and unlock the Bootloader. Every phone’s mechanism to unlock the bootloader is different, thus, we suggest to refer to your user manual.
Once the Bootloader is unlocked, take a backup of all your data by selecting “Backup” or “Android” back in recovery mode. The process should not take long and all you need to do is tap “OK” to config backup.

In this step, download a ROM of your choice and store it in your SD Card. Insert the SD Card in your phone to begin the flashing process.
Once at the recovery mode, select “Install Zip from SD Card” from the options.

Scroll down using the volume key and use the power key to select the downloaded ROM.


This might take a few minutes of your time, but once the process is complete, reboot your phone.
Hopefully, your bricked phone will not boot normally and work smoothly.
Part 4: Booting straight into Bootloader
If your bricked phone boots straight into Bootloader, then this a serious issue and must not be taken lightly. Flashing a new ROM or clearing cache partitions are of little help in such a brick smartphone situation. Booting straight into Bootloader is a peculiar soft bricked Android phone feature and can be tackled only by downloading and flashing your original ROM from the manufacturer. In order to do so, a detailed study about your manufacturer’s ROM, ways to download and flash must be carried out. Since different Android phones come with different types of ROMs, it difficult to cover all the aspects about the different types of ROMs.
Brick smartphone problem has become more prominent than phone freezing or hanging issue. Android users are often seen looking for solutions to fix their soft brick and hard brick phones. Android phones are prone to get bricked and thus, it is important for us to know about the three techniques given above. These methods have been tried, tested and recommended by ay affected bricked phone users. Therefore, these tips are reliable and worth a try. So if your phone acts stubborn and refuses to boot normally, examine the problem carefully and adopt one of the solutions given above which best suits your situation.
Tecno Pova 6 Pro 5G Screen Unresponsive? Here’s How to Fix It
Tecno Pova 6 Pro 5G phones have become increasingly popular due to their advanced features, sleek designs, and affordable prices. These phones offer many benefits, including high-quality cameras, long battery life, and fast processing speeds. However, sometimes users may encounter problems such as a Tecno Pova 6 Pro 5G touch screen not working, which can be frustrating and difficult.
This article aims to provide solutions for Tecno Pova 6 Pro 5G phone users experiencing screen unresponsiveness. We will explore various reasons this issue may occur and discuss step-by-step instructions for fixing the problem. So, if your Tecno Pova 6 Pro 5G touchscreen is not working, don’t worry – we’ve got you covered!
What Causes A Tecno Pova 6 Pro 5G Screen Unresponsive?
There are several reasons why a Tecno Pova 6 Pro 5G phone’s screen may become unresponsive. Some common causes include software issues, hardware problems, or issues with the touchscreen itself. It’s essential to identify the root cause of the problem to fix it properly.
Below are some possible causes of Tecno Pova 6 Pro 5G screen unresponsiveness, along with explanations of each.
Soft-bricked software: Soft-bricking refers to the state where the phone is stuck in an infinite boot loop or unable to boot. It can occur due to corrupt system files, outdated firmware, or unsuccessful updates. For example, some Tecno Pova 6 Pro 5G Y2 and 5A users have reported their screens getting stuck on the boot logo after a software update, rendering the Tecno Pova 6 Pro 5G device unusable.
Equipment is worn out: Hardware problems can also cause Tecno Pova 6 Pro 5G screens to become unresponsive. It can be due to worn-out equipment, such as a damaged LCD screen, malfunctioning touch sensor, or loose ribbon cables. These issues can also occur in any Tecno Pova 6 Pro 5G model, including the Y2 and 5A.
**Touchscreen problems:**Sometimes, the touchscreen itself can become unresponsive for various reasons. For instance, Tecno Pova 6 Pro 5G Y2 and 5A users may face this issue if they have accidentally dropped their phone, exposed it to water, or used an incompatible screen protector. It can result in a damaged or malfunctioning touchscreen, making it difficult or impossible to operate the phone.
The Common Solutions To Solve A Tecno Pova 6 Pro 5G Screen Unresponsive
In the previous section, we identified the possible causes of Tecno Pova 6 Pro 5G screen unresponsiveness, including soft-bricked software, hardware problems, and touchscreen issues. While the underlying reasons for screen unresponsiveness can be varied and complex, some common solutions can help resolve the issue. Here are three of the most common solutions to address tablet screen unresponsiveness, no matter the Tecno Pova 6 Pro 5G model.
1. Restart The Device
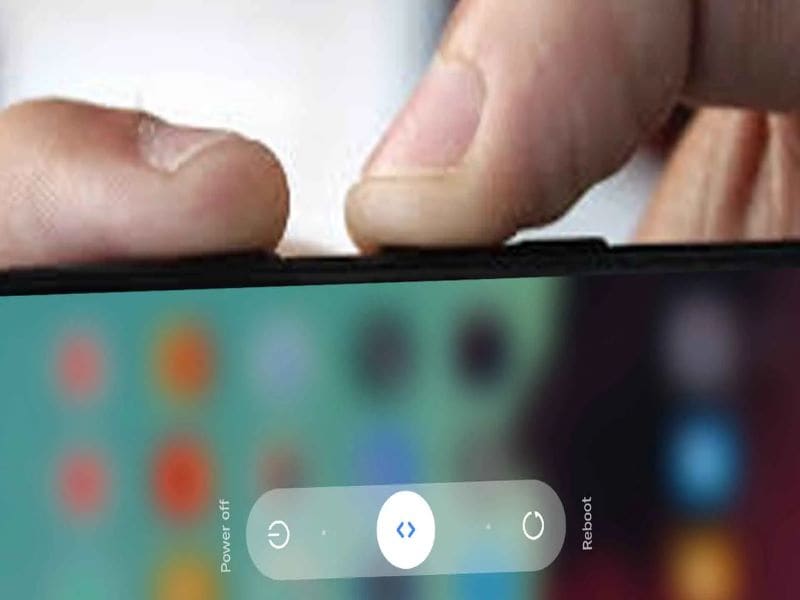
Restarting the phone is typically the initial solution that comes to mind when we encounter the Tecno Pova 6 Pro 5G black screen problem. It’s a simple and widely used method to address the issue, as the black screen problem could be caused by a software glitch, which can often be resolved by freeing up the phone’s memory.
It is the most commonly used method to fix Tecno Pova 6 Pro 5G’s touch screen and power button issues, such as unresponsiveness. By restarting the Tecno Pova 6 Pro 5G device, background processes are disabled, and memory is freed up, allowing programs to run smoothly and potentially resolve the problem. To restart a Tecno Pova 6 Pro 5G device, press the Power and Volume Up buttons simultaneously, and release the Power button once the Tecno Pova 6 Pro 5Glogo appears.
2. Leave The Phone And Let The Battery Drain Completely
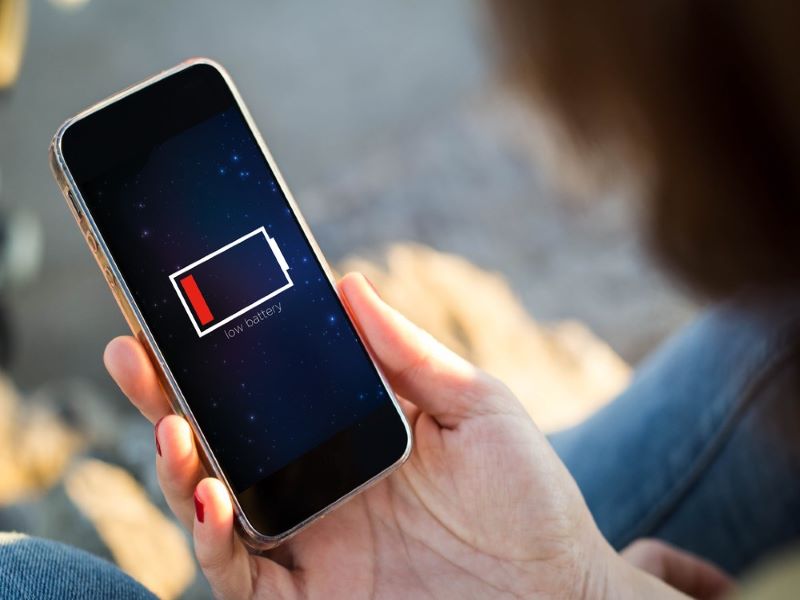
Sometimes, the tablet screen may become unresponsive due to a software issue preventing the Tecno Pova 6 Pro 5G device from functioning correctly. Leaving the Tecno Pova 6 Pro 5G device unused and draining the battery helps resolve these issues. After fully discharging the battery, the Tecno Pova 6 Pro 5G device can be recharged and turned back on, potentially resolving the issue.
3. Contact Custom Service
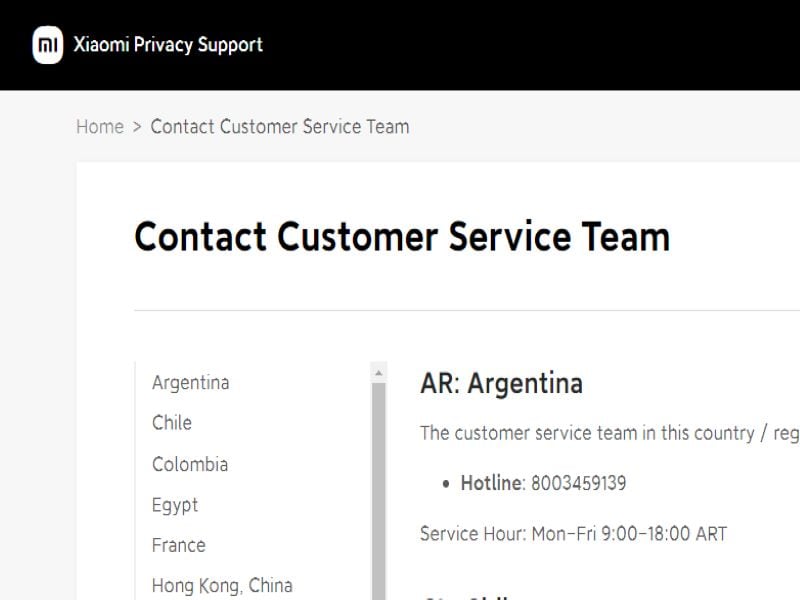
If restarting the Tecno Pova 6 Pro 5G device or allowing the battery to drain doesn’t resolve the issue, seeking professional assistance is recommended. The manufacturer may provide additional troubleshooting steps or recommend sending the Tecno Pova 6 Pro 5G device in for repair or replacement. It’s important to check the warranty before contacting customer service, which may affect repair or replacement options.
In addition to the common solutions we discussed earlier, some model-specific solutions can help resolve the screen unresponsiveness issue on Tecno Pova 6 Pro 5G Y2 and Tecno Pova 6 Pro 5G 5A.

4. Optimize Device Performance
One solution is to optimize the Tecno Pova 6 Pro 5G device performance by clearing the cache, removing unwanted apps, and disabling unnecessary features. This method can help free up memory and resolve the issue.
You can clear your cached data using the default settings.
- Select Settings> Storage > Cached Data.
- To clear the cache, select Clear Cache.

5. Back Up And Factory Reset
Another solution is to back up the Tecno Pova 6 Pro 5G device and perform a factory reset, which can help reset the Tecno Pova 6 Pro 5G device to its original state and remove any software glitches that may be causing the screen unresponsiveness. The factory settings on your phone will restore any data saved by third-party applications and some of the phone’s settings when it was first built. Note that this method erases all data from the Tecno Pova 6 Pro 5G device, so it should only be considered a last resort.
In the following steps, we will show you how to format the Tecno Pova 6 Pro 5G Redmi 5A to erase all your data and restore it to its factory state.
- Open the Settings.
- Navigate to the Additional settings section of the Tecno Pova 6 Pro 5G Redmi 5A settings.
- Please scroll down the screen until you reach the Backup & reset option, then click to access it.
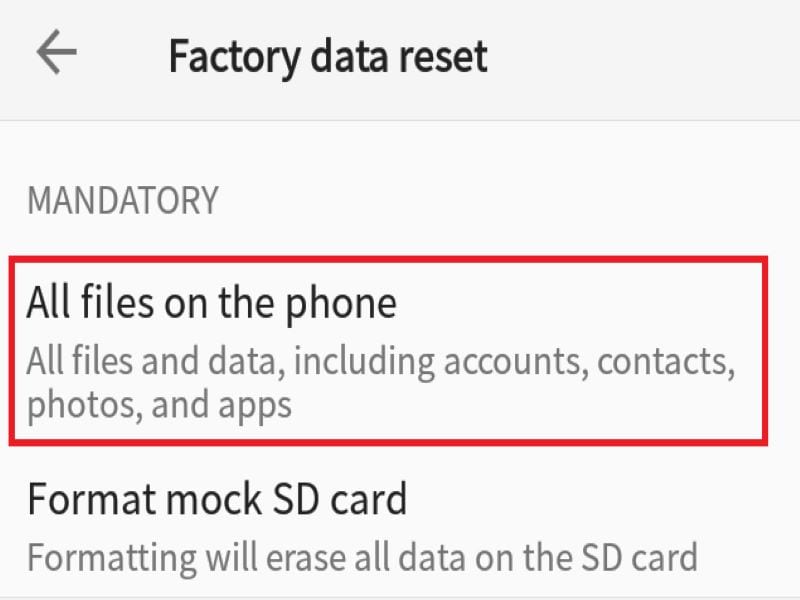
- ClickErase all data (factory reset) to restore the network settings and applications, or completely reset the Tecno Pova 6 Pro 5G Redmi 5A.
- Select All files on the phoneto make a complete format of the Tecno Pova 6 Pro 5G Redmi 5A.
6. Using Dr. Fone Repair
If none of the above solutions worked, you can try using Dr. Fone Repair. This software is designed to fix various software issues on Android phones, including Tecno Pova 6 Pro 5G devices. It can fix issues such as screen stuck on boot, black screen, and other software-related problems. Dr. Fone Repair is easy to use and can protect your data and files on your phone.
Here’s how to fix repair screen unresponsiveness or any software-related issues on Tecno Pova 6 Pro 5G Y2 and Tecno Pova 6 Pro 5G 5A using Dr. Fone Repair:
- Begin by installing and opening Dr.Foneon your PC.
- Once opened, select the ‘System Repair’ option and connect your Android smartphone to your PC via USB cable.
- On the next screen, choose “Android****Repair“ from the list of available options.
- Click on the “Start“ button to initiate the repair process.
- You will then be prompted to enter the required device information such as the Tecno Pova 6 Pro 5G device name, model number, and firmware version.
- Once you have entered the necessary information, click on the ‘Next’ button to proceed.
- Follow the on-screen instructions carefully to repair your Tecno Pova 6 Pro 5G.

How To Avoid A Tecno Pova 6 Pro 5G Screen Unresponsive?
To avoid facing a Tecno Pova 6 Pro 5G screen unresponsive issue, users can take several preventative measures. One important step is to update the Tecno Pova 6 Pro 5G phone regularly to ensure the software is up to date and all bugs and glitches are fixed. Users can also use tools like Dr. Fone to regularly manage and repair data, including clearing cache and removing unwanted apps. It is also important to use quality charging cables and avoid exposing the Tecno Pova 6 Pro 5G device to extreme temperatures or humidity, which can damage the internal components and potentially cause screen unresponsiveness. Finally, users can avoid dropping or mishandling the Tecno Pova 6 Pro 5G device, leading to physical damage and causing the screen to become unresponsive. Users can help prevent screen unresponsiveness by taking these steps and ensuring their Tecno Pova 6 Pro 5G device runs smoothly and reliably.
 safe & secure
Conclusion
Encountering a Tecno Pova 6 Pro 5G screen unresponsive issue can be a common problem for some Tecno Pova 6 Pro 5G phone users. However, with the solutions we have provided in this article, you can effectively solve the problem and get your phone back up and running in no time. It’s important to remember to regularly back up your data and take preventative measures, such as avoiding harmful malware and keeping your phone updated, to avoid experiencing this issue in the future.
By using reliable software, like Dr.Fone Repair, you can ensure that your Tecno Pova 6 Pro 5G phone is well-maintained and operating smoothly. With these solutions and tips, you can enjoy the benefits of your Tecno Pova 6 Pro 5G phone without any interruptions.
6 Solutions to Fix Error 505 in Google Play Store on Tecno Pova 6 Pro 5G
In case you are receiving the error code 505 while downloading an application from Google play store and have no clue what is it, then this is the right article for you. In this article we are covering the reasons behind the occurrence of Google play error 505. Not only that, we are also providing 6 solutions to fix the error code 505. Usually, this error is seen with Android 5.0 Lollipop version and occurs at the time when you try to install the already downloaded application making it hard to run the app.
Such an error is a kind of permission error. That is, in case you have two similar kinds of applications such as banking apps and both looking for similar kind of permission, causes conflict error named as error 505.
The occurrence chance is more in the old operating systems, 4 KitKat, Android version 4. Let us then proceed to know more about this error 505.
Part 1: Reasons for Google Play error 505

As per the report by some users, error 505 occurs in certain apps such as Weather App, SBI, ITV, Adobe Air 15, We Chat etc.
To have the right idea about the problem, we have listed all the reasons of it occurrence below:
- Google play store is not updated or refreshed (Causes the error during the downloading process)
- Due to installation of an outdated version (In case your Android version is outdated may result in error in the installation process)
- Cache memory(Is the redundant data occurs due to search history)
- Application is not compatible with the Android OS (If the app you are downloading is not the updated may cause error)
- Adobe air app
- Data crash (Many time app or Google play store crashed crashes after downloading it, reason may be some bugs, so many apps are open, less memory etc.)
Now that we know the reasons, let us also learn about the solutions that will guide you to resolve the error code 505.
Part 2: 6 Solutions to fix error code 505
Any error that occurs during downloading or installation process not only hinders with the new app but also takes a large amount of our time to solve the issue. To check that, let us go through the 6 solutions one by one.
Solution 1: One click to make error code 505 disappear
The most common cause for error code 505 pop-up is that Android system files that underpin the Google Play module are corrupted. To make error code 505 disappear in this condition, you should have your Android system repaired.
Dr.Fone - System Repair (Android)
One click to repair Android system and make error code 505 disappear
- Fix all Android system issues like error code 505, error code 495, error code 963, etc.
- One click to fix error code 505. No technical skills required.
- Supports all the new Tecno Pova 6 Pro 5G devices like Galaxy S8, S9, etc.
- Easy-to-understand instructions provided on each screen.
4,999,459 people have downloaded it
Now, you just need to follow these Android repair steps to fix error code 505:
Note: Android repair needs to flash the system firmware, which may erase existing Android data. To prevent data loss, back up all the important data from Android to PC .
Step1: Download the Dr.Fone - System Repair (Android) program , install and launch it. The following interface will pop up.

Step2: Select the “Android Repair” among the 3 tabs, connect your Android to PC, and click “Start”.

Step3: Choose the correct device details from each field, confirm them and continue.

Step4: Boot your Android in download mode, then start downloading the firmware of your device.

Step5: After the Tecno Pova 6 Pro 5G device firmware is downloaded, the tool will start repairing your Android.

Step6: When your Android is repaired, the error code 505 will disappear.

Solution 2: Check whether Download Manger is ON or not
Many times download manager is set to disable due to which you are not able to download or install the app. So, it is required to make a check whether the download manager is set on or off. So that your installation process will work properly. The process to enable the download manager is as follows.
>Go to Settings
>Select the Application Manger or App (Option depends upon the Tecno Pova 6 Pro 5G device)
At the top, an option will appear
>Swipe right till you locate Download manager at top of the screen of the Tecno Pova 6 Pro 5G device
>Then Select Enable

Enabling download manager to give permission to the Tecno Pova 6 Pro 5G device to start the download or installation process.
Solution 3: Updating to the latest version of OS of your Tecno Pova 6 Pro 5G
Working with an old operating system is ok, but many times old version also creates some problem and is the main reason behind the occurrence of any bug or error. So, updating the older version act like a rescue to get rid of any such issue or bug. The Process of updation is quite simple; you just need to follow the below steps and your device is ready to get updated to the latest version. Steps are:
- >Go to Settings
- >Select about Phone
- >Click on System Update
- >Check for updates
- >Click on Update
- >Need to click on Install (if any update is available)

Solution 4: Clearing the cache memory from Google services Framework and Google play store
While browsing data online or through Google play store some cache memory get stored for the fast access to the pages. Below mentioned simple steps will help you in clearing out the cache memory from Google services framework and Google play store.
Process to clear the Cache memory for Google Services Framework
- >Go to Settings
- >Select Applications
- >Click on Manage Applications
- >Click to select ‘ALL’
- >Click on Google services framework
- >Select ‘Clear data and clear cache’
That will remove the cache memory of your Google services framework
Steps to Cache memory of Google Play Store
- >Go to Settings
- >Applications
- >Manage Applications
- >Click to select ‘ALL’
- >Select Google Play store
- >Clear data and clear cache
It will clear the cache of Google play store

Clearing the cache memory remove the extra temporary memory, thus free up space for the further installation process.
Solution 5: Reinstalling play store Updates
The reason behind the installation error code 505 might be Google play store updates.
Due to continuous updation of new apps and services Google Play store used to be flooded with so many updates or sometimes does not updated properly. That sometimes caused the problem in dealing with app installation. Resolving the issue is important to make your play store ready for future updation and installation.

- >Go to Settings
- >Visit Application Manager or Apps
- >Select Google Play Store
- >Click on Uninstalling Updates
- >A Message will appear ‘Change play store app to factory version’- Accept it
- >Now Open Google play store>It will refresh the updates within 5 to 10 minutes(So you need to keep your internet connection on while Google play store is updating its store for new updates.)

Solution 6: Third party App
In the case, error 505 occur due to the installation of two or more apps with duplicate permission of data, as many times we use to install two similar kind of app that creates the situation where both seeking out for somewhat similar permissions for the installation. The manual finding is a long and tiring process. Then you can take the assistance of ‘Lucky Patcher App’ to find out which app is creating the conflict. This app will assist you in finding out the duplicity if any and then modifying it. Through this app, once you will find out which particular app is causing the conflict, then you can delete that conflicting app from your phone so that problem of error code 505 gets sort out.
Download link: https://www.luckypatchers.com/download/

Note: If still, you are in the state of trouble to solve the issue of error code 505 then Google Play help center is here to look out all troubles related to app store and its service. You can check out the details by visiting the following link:
https://support.google.com/googleplay/?hl=en-IN#topic=3364260
Or call them at their call center number regarding the issue.

Bonus FAQ about Google Play error
Q1: What is a 505 error code?
The HyperText Transfer Protocol (HTTP) error 505: HTTP Version Not Supported response status code means that the HTTP version used in the request is not supported by the server.
Q2: What is a 506 error?
The 506 error code is a frequent error when operating the Google Play Store. You will sometimes see this error code when you are downloading an app. The app may seem to be downloading just fine when suddenly, near the end of the installation, an error occurs, and a message pops up saying, “App could not be downloaded due to an error 506.”
Q3: How to fix the 506?
Solution 1: Restart your device which can help solve most problems.
Solution 2: Remove the SD card safely.
Solution 3: Correct date and time if it is wrong.
Solution 4: Add your Google Account again.
Solution 5: Clear Google Play Store data and cache.
However, sometimes the five simple couldn’t work anymore. A system repair software can be helpful quickly. We really recommend the Dr.Fone - System Repair (Android) , only a few minutes, the error will be fixed.
Conclusion
Not being able to download or install the app is very frustrating and time-consuming also. Therefore, in this article, we went through the reasons behind the occurrence error code 505 as well as resolving the issue by following five effective methods. I hope that you would be able to sort out the error 505 by following above methods thus would be able to install the application without further delay.
Also read:
- [New] 2024 Approved Mastering the Art of Zoom Filters for Premium Sessions
- [New] 2024 Approved Smooth & Swift Designing Your Best Thumbnails
- [New] Top 10 Budget-Friendly JPEG to GIF Conversion Tools Online
- [Updated] 2024 Approved Tutorial Posting Restricted YouTube to Gmail Accounts
- [Updated] Step-by-Step Adding Snapchat to Your Mac
- Android Safe Mode - How to Turn off Safe Mode on Oppo Reno 11 5G? | Dr.fone
- Authentication Error Occurred on Vivo Y27s? Here Are 10 Proven Fixes | Dr.fone
- Fix Cant Take Screenshot Due to Security Policy on Samsung Galaxy F14 5G | Dr.fone
- Gmail Not Working on Xiaomi Redmi Note 12 Pro+ 5G 7 Common Problems & Fixes | Dr.fone
- In 2024, How to Transfer Photos From Vivo Y100 to Samsung Galaxy S21 Ultra | Dr.fone
- In 2024, Top 5 from Realme 11 5G to iPhone Contacts Transfer Apps and Software | Dr.fone
- Optimal List of 16 Shared Screening Experiences on XBox
- What is the best Pokemon for pokemon pvp ranking On Oppo Reno 10 Pro+ 5G? | Dr.fone
- Why Is My Realme 10T 5G Offline? Troubleshooting Guide | Dr.fone
- Title: How to Fix the Soft Bricked Tecno Pova 6 Pro 5G? | Dr.fone
- Author: Ariadne
- Created at : 2024-10-27 05:05:32
- Updated at : 2024-11-03 07:00:40
- Link: https://howto.techidaily.com/how-to-fix-the-soft-bricked-tecno-pova-6-pro-5g-drfone-by-drfone-fix-android-problems-fix-android-problems/
- License: This work is licensed under CC BY-NC-SA 4.0.