How To Fix Unresponsive Phone Touchscreen Of Nokia G42 5G | Dr.fone
How To Fix Unresponsive Phone Touchscreen Of Nokia G42 5G
Smartphones nowadays contribute to our daily workflow, whether you’re a student or a professional. They get more sophisticated and add new features every year, making them more attractive with each new release. However, users sometimes deal with their screen touch not working on Android, raising various concerns.

If you are facing a similar issue, this page has all the solutions to teach you what to do if your phone screen is not working. By exploring the different methods below, you will be able to know how to fix a frozen phone touch screen as an Android user. Read on for more information.
Part 1: Top Causes of an Unresponsive Touchscreen
Android has been the best-selling OS since 2011, with over three billion active users. With the release of Android 13, complaints over touch issues on certain Android phones have popped up over the internet. Meanwhile, software updates over the years can sometimes make their phones stuck on the loading screen, causing worry among Android users.
Here are some of the top causes why your phone screen stopped working, mainly for Android.
- Physical Damage
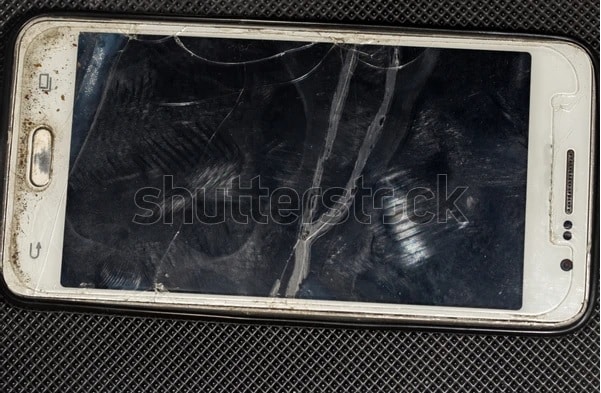
If your Android phone is not responding to touch, it can be due to a cracked LCD causing temperature variants or magnetic fields to malfunction on your Nokia G42 5G.

For iOS users, your iPhone will temporarily stop working if it detects extreme temperatures such as a too-hot or too-cold reading. You should turn off your iPhone and let it cool down or warm to a normal temperature.
- Faulty Applications
Certain apps can sometimes make your phone experience touch issues. Your Android screen may work everywhere except a particular app. In this case, the fault is likely on the app, not your smartphone. It’s recommended to download the latest apps with frequent software updates to prevent malicious apps from corrupting or crashing your phone.
- iOS/Android Software Issues
Your phone screen not responding can also be due to software glitches that your smartphone picks up during regular use. Your iOS/Android device will sometimes freeze or hang if you run too many intensive apps simultaneously. The situation can lead to touch issues when using the phone.
- Dirty Screen or Bad Peripherals
It may not respond properly when an Android device is dirty due to water, sweat, or body oils. It will not be able to take inputs, causing your phone to not respond to touch. A poor screen protector and a tightly pressed phone case will also negatively impact your smartphone.

Part 2: What To Do When Your Smartphone Is Not Responding to Touch
Here is a list of things you should do how to fix a frozen phone touch screen, whether you’re using an iPhone or an Android smartphone.
1. Clean Your Smartphone
Your screen touch not working can sometimes get fixed by simply cleaning the screen on your smartphone. Use a soft dry cloth, gently clean your iPhone or Android device, and ensure water, oils, dirt, or other debris are no longer on your display. If you recently dropped your device in water, turn it off and leave it untouched for the next few hours.

2. Remove Extra Peripherals
Unplug any external device connected to your iPhone’s Lightning port or USB-C if your phone screen stops working. For Android users, meanwhile, disconnect any accessories like chargers or wireless headphones. After that, try using the touchscreen. If it works, the outcome proves that the fault appeared due to the external device.
3. Force Restart Your Device
If your phone screen is still unresponsive,maybe it is overloaded. You should force restart your Nokia G42 5G. It doesn’t delete any data. Here’s how.
Example 1: For Nokia G42 5G Smart Phones
Here’s how to force restart your smartphone to fix your phone screen that’s not responding.
- Press and hold the Powerand Volume Down buttons simultaneously for more than 7 seconds to force a reboot.

E****xample 2: For Nokia G42 5G Redmi
If your Nokia G42 5G Redmi phone is stuck on loading screen or “thinking” for a long time without responding, reboot it in just two steps.
Step 1: Press and hold the power button on the right side of the screen, then a screen showing several options appears.
Step 2: Choose Restart, then Accept if a confirmation message spears. Then wait a few seconds or minutes when your device is performing the reboot.

4. Update Your Software
Your smartphone may behave erratically due to software bugs. While these are out of your control, you can quickly fix your phone not responding to touch by simply updating your OS to the latest version. Here’s how.
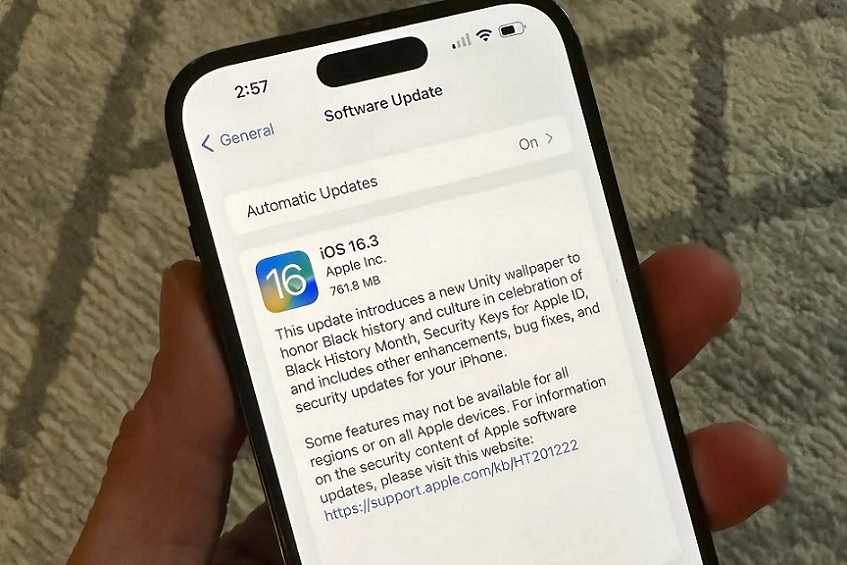
- For iOS users, go to your iPhone Settings> General > Software Update > Download and Install.
- For Android owners, go to Settings > Software Update. Tap the Check for software updatesto see if a new update is available.
5. Perform a Factory Reset
If nothing helps, your remaining option is to try completing a Factory Reset. Doing this will erase all your data, but this is arguably the quickest way to restore your screen-frozen phone to its factory default settings. Factory Reset is available on Android devices with almost similar steps. Here’s how.
For Android, Nokia G42 5G Series
Step 1: Search and tap the Settings option, and open General management.
S****tep 2: Swipe the options, find and tap Reset > Factory data reset, and check the information below. Then swipe and press the Reset button.
Note:
You might be asked to enter the pin of the security lock on the phone if you’ve set one.
S****tep 3: You may need to enter your Nokia G42 5G account password if you have bounded an account to your phone after taping Delete all. Then your Nokia G42 5G phone will reset. You’ll see its initial setup screen when it turns back on.
Part 3: How to Fix Unresponsive Touchscreen With an Alternative
The methods outlined above usually solve issues on your smartphone not responding to touch. If all else fails, Wondershare Dr.Fone for iOS and Android can fix various smartphone issues within less than 10 minutes. The program enables you to fix common scenarios such as black screen, boot loop, bricked iOS or Android, and much more without any required skills.

Key Features
The key features of Wondershare Dr.Fone for iOS and Android are listed below.
- Fix all iOS and Android Problems in Minutes
Wondershare Dr.Fone for Android and iOS allows you to fix your smartphone within less than 10 minutes. For iPhone owners, common issues such as a black screen, white screen of death, iPhone frozen, stuck on a restart loop, or recovery mode can easily be repaired with Dr.Fone. For Android users, meanwhile, problems, including unresponsive screen, black screen of death, boot loop, and more, are done within minutes.
- Supports up to 1000+ Android Models and iOS 16
The program supports all iOS versions, including the latest iOS 16 and iOS 16 beta. Compared to the iTunes store or other methods, the app can quickly fix any iPhone issues without data loss. For Android users, meanwhile, Dr.Fone supports up to 1000+ Android smartphones making it highly versatile even if you’re using an older Android device or the latest models.
Tech Specs
Here are the minimum system requirements of Wondershare Dr.Fone (iOS) for your computer.
| Computer OS | iOS |
|---|---|
| Windows: 7, 8, 8.1, 10, 11 | Support all iOS versions, including the latest iOS 16 & iOS 16 beta |
| macOS: 12, 11, 10.15, 10.14, 10.13, 10.12, 10.11, 10.10, 10.9, or 10.8 |
Meanwhile, here are the tech specs for Wondershare Dr.Fone (Android)’s minimum system requirements.
| Computer OS | Android |
|---|---|
| Windows 7, 8, 8.1, 10, 11 | Android 2.1 and up |
Pros and Cons
Here are the pros and cons of using Wondershare Dr.Fone (Android)
Pros
- Fone – System Repair’s UI for iOS and Android is clutter free and beginner-friendly. You can start repairing your phone right away after installation.
- Repairing your iOS or Android smartphone within less than 10 minutes saves you precious time.
Cons
- The iOS and Android versions of Wondershare Dr.Fone are sold separately. You’ll have to get each version of the program if you own a smartphone for both iOS and Android.
Pricing
The iOS and Android versions of Wondershare Dr.Fone has different price plans. See them below.
Wondershare Dr.Fone (iOS) offers a quarterly, 1-year, and perpetual license, depending on your budget. Here’s the pricing below.
- Quarterly License (1-5 Mobile Devices) - $6.65/Month – With Auto Renew
- 1 Quarter License (1-5 Mobile Devices) - $7.32/Month – No Auto Renew
- 1-Year License (1-5 Mobile Devices) - $4.99/Month – No Auto Renew
- Perpetual License (1-5 Mobile Devices) - $79.95
Wondershare Dr.Fone (Android) price plans are available for a 1-Year or Perpetual License, depending on your budget.
- 1-Year License (1-5 Mobile Devices) - $39.95
- Perpetual License (1-5 Mobile Devices) - $49.95
- 1-Year Business License (Unlimited Devices) - $399.00
How To Fix Unresponsive Touchscreen With Wondershare Dr.Fone
In this step-by-step guide below, you can fix your unresponsive phone screen using Wondershare Dr.Fone on iOS and Android.
Step 1: Download and install Wondershare Dr.Fone for iOS or Android on your computer. Launch the app afterward and connect your smartphone.

Step 2A (For iOS): Choose the correct model of your iPhone to download the appropriate firmware package.
Step 2B (For Android): Choose the correct Brand, Name, Model, Country, as well as Carrier, then click Next.

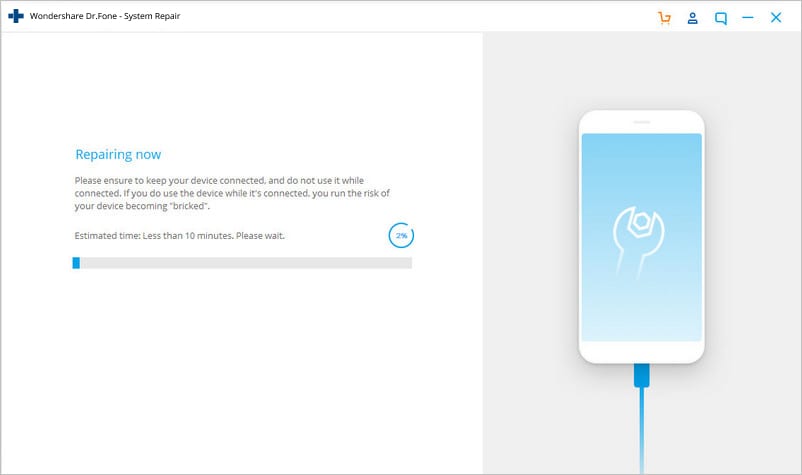
Step 3: Follow the on-screen instructions provided on the main program window and wait for the repair process to complete.
Part 4: People Also Ask
Some common questions you should know when taking care of an unresponsive phone touchscreen are listed below.
1. Why Did My iPhone Screen Go Black After Not Responding to Touch?
Your iPhone screen with a touch issue will sometimes go black after not responding to touch due to several issues. It could be hardware, software, issues with a particular app, software crash, or you have a low battery. If it’s a drained battery, you’re in luck; all you have to do is charge it. Otherwise, you’ll have to perform a force restart on your iPhone to try to reboot it.
2. How Do I Keep My Android From Crashing?
Keeping your apps updated should help you solve app crashing issues that can impact your Android OS. These apps build up large caches throughout your normal usage. Clearing cached data from time to time can drastically improve your smartphone’s performance and prevent touch issues. To remove your app cache, go to Settings > Storage and tap Cached Data.
3. Can I Use Dr.Fone for Free?
Wondershare Dr.Fone for iOS and Android is free to download and install. You can also test the first few steps and see if the program supports your device. However, when you click the Fix Now button to start the repair process, you will be required to enter a valid license to activate the program.
 safe & secure
Conclusion
Knowing the common causes of an unresponsive phone touchscreen is the first step to preventing it from happening to your smartphone. While there are ways to fix it when it does happen, prevention is better than cure, as most experts say. However, if the methods outlined above don’t work, your best bet is to use a dedicated program such as Wondershare Dr.Fone for Android and iOS.
Wondershare Dr.Fone works on almost all modern smartphones today and can fix a stop-working phone screen within less than 10 minutes. It’s beginner-friendly and doesn’t require advanced technical know-how to use right away.
Nokia G42 5G Bootloop Problem, How to Fix it Without Data Loss
Have you, like many other users, faced the bootloop Android problem and wondered what exactly is Android boot loop. Well, Android boot loop is nothing but an error that makes your phone switch on itself every time you manually turn it off. To be precise, when your Nokia G42 5G does not remain switched off or powered off and starts to boot up automatically after a few seconds, it might be stuck in the boot loop Android.
An Android boot loop is a very common problem and is one of the first symptoms of a soft-bricked device. Also, when your device is experiencing Android boot loop issue, it does not start normally to reach the Home or Locked Screen and remains frozen at the Nokia G42 5G device’s logo, Recovery Mode or a lit-up screen. Many people fear losing their data and other files due to this error and thus, it is a very confusing situation to be in.
We understand the inconvenience caused, therefore, here are ways to tell you how to fix the bootloop problem in Android devices without losing any important data.
However, before moving on, let us learn a little about the causes for the Android boot loop error.
Part 1: What might cause the bootloop issue on Android?
Android boot loop error might seem weird and unexplainable but it occurs because of some specific reasons.
Firstly, please understand that it is a misnomer that boot loop error occurs only in a rooted device. Boot loop Android error can also occur in a stock device with the original software, ROM, and firmware.
In a rooted device, changes made, such as flashing a new ROM or customized firmware which are not compatible with the Nokia G42 5G device’s hardware or existing software, can be blamed for the boot loop problem.
Moving on, when your device’s software is unable to communicate with the system files during the start-up process, Android boot loop problem may arise. Such a glitch is caused if you have recently updated the Android version.
Also, corrupt App update files may also cause the bootloop Android issue. Apps and programs downloaded from unknown sources bring in a particular type of virus that prevents you from using your device smoothly.
All-in-all, Android boot loop error is a direct outcome of when you try to tamper with your device’s internal settings.
Hence, if you are looking for ways to guide you about how to fix boot loop issue, you will have to revamp the Nokia G42 5G device internally by either resetting it or adopting a recovery method.
Read on to know more about how to fix the bootloop error without any data loss when your device suffers from the bootloop Android problem.
Part 2: One click to Fix Android Bootloop without factory reset
If you are trying to figure out how to fix boot loop, the first option you have is the one-click fix to Android Bootloop which involves using the Dr.Fone - System Repair software.
This is designed to repair any data corruption on your device and restores your firmware to its usual working condition.
Dr.Fone - System Repair (Android)
One click to fix boot loop of Android
- #1 Android repair solution from your PC, can fix a wide range of Android system issues, such as boot loop, black screen, etc.
- The software requires no technical expertise, and anybody can use it
- A one-click solution when learning how to fix Android boot loop
- Not require root Android phones.
- Works with most Nokia G42 5G devices, including the latest Nokia G42 5G phones like S22
- Simple and easy-to-use user interface
4,689,059 people have downloaded it
To help you get started, here’s a step-by-step guide on how to use Dr.Fone - System Repair.
Note: This method can erase data on your device, including your personal files, so make sure you’ve backed up your device before proceeding.
Step #1 Download the Dr.Fone - System Repair software from the website and install it onto your computer.
Open the software and select the System Repair option from the main menu to fix the Android bootloop error.
Step #2 Connect your Nokia G42 5G to your computer using the official cable and select the “Android” option from the three menu items. Click “Start” to confirm.
You’ll then need to input the Nokia G42 5G device information, such as your carrier info, device name, model, and country/region in order to ensure you’re downloading and repairing the correct firmware to your phone.

Step #3 Now you’ll need to put your phone into Download Mode to remove the Android bootloop.
For this, you can simply follow the onscreen instructions for both phones with and without home buttons.

Click “Next”, and the software will begin downloading the firmware repair files.

Step #4 Now you can sit back and watch the magic happen!
Make sure your computer stays connected to the internet, and your device stays connected to your computer throughout the entire process. Once the firmware has been downloaded, it will be automatically installed onto your mobile device, removing the boot loop Android error.

You’ll be notified when the process is done and when you can remove your device and start using free from the boot loop Android error!
safe & secure
Part 3: Soft reset to fix Android bootloop issue
When your device is stuck in Android boot loop, it does not necessarily mean that it is bricked. Boot loop might be occurring due to a simpler problem which can be fixed by turning off your device. This sounds like a home remedy for a serious problem but it works and resolves the problem most of the time.
Follow the steps given below to soft reset your device:
Turn the Nokia G42 5G device off and take out its battery.

If you cannot take the battery out, let the phone be off for about 3 to 5 minutes, and then turn it back on.
Simply performing a soft reset on your device can help you if you are looking for solutions for how to fix the bootloop issue. This a very useful method as it does not result in any kind of loss in data and protects all your media files, documents, settings, etc.
In case the Nokia G42 5G device does not turn on normally and is still stuck in the bootloop Android problem, be prepared to use the troubleshooting techniques given and explained below.
Part 4: Boot into Safe Mode to fix Android boot loop

Booting your Nokia G42 5G into Safe Mode is a useful troubleshooting step to fix boot loop issues caused by third-party apps. When in Safe Mode, the Nokia G42 5G device will start up with only essential system apps, and any downloaded apps that might be causing conflicts won’t run. Here’s how you can boot your Nokia G42 5G into Safe Mode to address the boot loop problem:
Step 1: Power Off Your Device
Hold down the power button until it turns off completely.
Step 2: Access Safe Mode
To enter Safe Mode, follow these steps based on your device model:
- For most Android devices: Press and hold the power button to turn on your device. As soon as the manufacturer’s logo appears, press and hold the Volume Down button until the Nokia G42 5G device finishes booting. You should see “Safe Mode” displayed in the bottom left or right corner of the screen.
- Some devices might require slightly different key combinations. Refer to your device’s user manual or perform an online search for the specific method to enter Safe Mode for your model.
Step 3: Observe the Nokia G42 5G device
Once your device has booted into Safe Mode, use it for a while to see if the boot loop issue persists. If the boot loop doesn’t occur in Safe Mode, it indicates that the problem is likely caused by a third-party app.
Step 4: Identify and Uninstall Problematic Apps
Now that you’re in Safe Mode, it’s time to identify the troublesome app. Start by uninstalling recently installed apps one by one until the boot loop problem is resolved. After each uninstallation, restart your device normally to check if the boot loop still occurs. Continue this process until you find the problematic app.
Step 5: Restart Normally
Once you’ve identified and uninstalled the problematic app, restart your device normally to exit Safe Mode. Your Android device should now start up without getting stuck in a boot loop.
By following these steps and using Safe Mode to isolate problematic apps, you can effectively troubleshoot and resolve boot loop issues on your Nokia G42 5G.
Part 4: Factory reset to fix Android bootloop issue
Factory reset, also known as Hard Reset, is a one-stop solution for all your software resulting in issues. Android boot loop being such problem, can be easily overcome by performing a factory reset.
Please note that all your device’s data and settings will be deleted by adopting this method. However, if you have a Google account signed in on your Nokia G42 5G, you will be able to retrieve most of your data once the Nokia G42 5G device turns on.
To factory reset your Android boot loop device, you must first boot into the Recovery Mode screen.
To do this:
Press the volume down button and power button together until you see a screen with multiple options before you.

When you are at the Recovery Mode screen, scroll down using the volume down key, and from the options given, select “Factory Reset” using the power key.

Wait for your device to perform the task and then:
Reboot the phone in Recovery Mode by selecting the first option.

This solution is known to fix the boot loop error 9 out of 10 times, but if you still can’t start your Nokia G42 5G normally, consider using a CWM Recovery to resolve the Android boot loop issue.
Part 5: Use CWM Recovery to fix bootloop on rooted Android
CWM stands for ClockworkMod and it is a very popular custom recovery system. To use this system to solve the boot loop Android error, your Nokia G42 5G must be rooted with CWM Recovery System which basically means CWM must be downloaded and installed on your device.
Furthermore, to use CWM Recovery to fix boot loop on rooted Android devices, follow the steps given below:
Press the home, power, and volume up buttons to launch the CWM Recovery screen.
Note: you might have to use a different combination of keys to enter into Recovery Mode, depending on your device’s model.

Scroll down using” the volume key to select “Advanced”.

Now select “Wipe” and choose to wipe “Dalvik Cache”.

In this step, select “Mounts and Storage” to click on “Wipe” or “Cache”.
Once this is done, make sure to reboot your Nokia G42 5G.
This process with successfully fix the Android boot loop error and not cause any loss of data stored on your device stuck in boot loop.
So the bottom line is that boot loop Android issue may seem like an irreparable error but it can be resolved by carefully following the techniques explained above. These methods not only tell you how to fix the bootloop problem but also prevent it from occurring in the future.
An Android boot loop is a common phenomenon with all Android devices because we tend to tamper with our device’s internal settings. Once the ROM, firmware, kernel, etc are damaged or rendered incompatible with the Nokia G42 5G device’s software, you cannot expect it to function smoothly, hence, the boot loop error occurs. Since you are not the only one suffering from the Android boot loop problem, be rest assured that the ways, given above, to combat it are recommended by users facing similar troubles. So, don’t hesitate and go ahead to try them on.
safe & secure
How to Fix the Soft Bricked Nokia G42 5G?
Bricked phone is a serious problem, as your brick smartphone could be suffering from a soft brick or hard brick problem, and must be dealt with carefully. It is very common to see a brick smartphone these days. If you are wondering what exactly is a bricked phone, here is your answer.
A bricked phone, hard brick or soft brick, is a smartphone which refuses to start or boot all the way up the home/main screen of the Nokia G42 5G device. This issue is observed within most Android phones because users have a tendency to tamper with the Nokia G42 5G device settings, flashing new and customized ROMs and tweaking with the essential files. Playing around with the phone’s internal set-up leads to such errors, worst of them being a brick smartphone. Usually, a bricked phone does not switch on and stays frozen at the Nokia G42 5G device logo, a blank screen or even worse, doesn’t respond to any command, even the power on command.
If you are confused about the soft brick and hard brick problems and looking for solutions to fix your priced phone, then here is all you need to know.
Read on to find out more.
Part 1: What is the difference between soft brick and hard brick?
To begin with, let us understand the basic difference between a soft brick and hard brick issue. Both versions of a bricked phone prevent it from booting but differ in their causes and gravity of the problem.
A soft-brick problem is caused merely by a software error/crash and makes your device switch on automatically every time you manually turn it off. This phenomenon is referred to as Boot Loop. Soft bricked Android phones are not as difficult to fix as the hard bricked Android phones. It is convenient to say that a soft bricked phone only boots up half-way and not fully, whereas a hard bricked device does not switch on at all. A hard brick error is thus caused when the kernel, which is nothing but an interface for the software to communicate with the hardware, is tampered with. A hard bricked phone is not recognized by your PC when plugged in and is a serious problem. It requires troubleshooting techniques and cannot be easily fixed as the soft brick problem.

Hard bricked phones are a rare sight, but the soft brick is very common. Given below are ways to fix a soft brick Android phone. The techniques listed here are the best and the most efficient ways to get your phone back to its normal working conditions without losing your important data or damaging your device or its software.
Part 2: Stuck at the Boot Loop
This is the first sign of a soft bricked Android phone. Boot Loop is nothing but when your phone does not remain switched off and turns itself on automatically, and freezes at the logo screen or blank screen, every time you manually try to power it off.
Stuck at boot loop problem can be fixed by clearing your Cache partitions. These partitions are nothing but storage locations for your modem, kernels, system files, drivers and built-in Apps data.
It is advisable to clear Cache partitions regularly to keep your phone free from such glitches.
Since the phone refuses to boot, Cache can be cleared from entering into the Recovery Mode. Different Android devices have different ways to put it in recovery mode. Normally pressing the power key and volume down key helps, but you may refer to your phone’s guide for better understanding and then follow the steps given below to clear the cache partition:
Once you are the recovery mode screen, you will see a number of options as shown in the screenshot.

Use the volume down key to scroll down and select ”Wipe cache partition” as shown below.
 >
>
After the process is completed, select “Reboot System” which is the first option in the recovery mode screen.
This method will help you erase all the clogged up and unwanted files. You may loose some App related data, but that is a small price to pay to fix your bricked phone.
If this method does not boot up your brick smartphone and the problem still persists, there are two more things you can try. Read ahead to find out about them.
Part 3: Booting straight into recovery mode
If your bricked phone does not boot up to your Home Screen or Lock screen and instead boots directly into Recovery Mode, there is not much left to do. Booting straight into recovery mode is undoubtedly a soft brick error but it also indicates a possible problem with your current ROM. The only option you have to flash a new ROM to reboot your bricked phone back to its normal functioning.
To flash a new ROM:
Firstly, you must root your phone and unlock the Bootloader. Every phone’s mechanism to unlock the bootloader is different, thus, we suggest to refer to your user manual.
Once the Bootloader is unlocked, take a backup of all your data by selecting “Backup” or “Android” back in recovery mode. The process should not take long and all you need to do is tap “OK” to config backup.

In this step, download a ROM of your choice and store it in your SD Card. Insert the SD Card in your phone to begin the flashing process.
Once at the recovery mode, select “Install Zip from SD Card” from the options.

Scroll down using the volume key and use the power key to select the downloaded ROM.


This might take a few minutes of your time, but once the process is complete, reboot your phone.
Hopefully, your bricked phone will not boot normally and work smoothly.
Part 4: Booting straight into Bootloader
If your bricked phone boots straight into Bootloader, then this a serious issue and must not be taken lightly. Flashing a new ROM or clearing cache partitions are of little help in such a brick smartphone situation. Booting straight into Bootloader is a peculiar soft bricked Android phone feature and can be tackled only by downloading and flashing your original ROM from the manufacturer. In order to do so, a detailed study about your manufacturer’s ROM, ways to download and flash must be carried out. Since different Android phones come with different types of ROMs, it difficult to cover all the aspects about the different types of ROMs.
Brick smartphone problem has become more prominent than phone freezing or hanging issue. Android users are often seen looking for solutions to fix their soft brick and hard brick phones. Android phones are prone to get bricked and thus, it is important for us to know about the three techniques given above. These methods have been tried, tested and recommended by ay affected bricked phone users. Therefore, these tips are reliable and worth a try. So if your phone acts stubborn and refuses to boot normally, examine the problem carefully and adopt one of the solutions given above which best suits your situation.
Also read:
- [New] 2024 Approved Capture YouTube's Iconic Icons Online Tools, Desktop Software & Commands
- [Updated] In 2024, Optimal TwitVid Saves Mastering Tweeted Media Downloads
- 2024 Approved Essential Watchers The #1-#10 FB Apps
- 3 Ways to Unlock iPhone 8 without Passcode or Face ID | Dr.fone
- 9 Quick Fixes to Unfortunately TouchWiz has stopped Of Tecno Camon 30 Pro 5G | Dr.fone
- Android Screen Stuck General Realme 10T 5G Partly Screen Unresponsive | Dr.fone
- Download Entertainment On-the-Go – Secure Your Favorite Media for Offline Viewing
- Fix the Error of Unfortunately the Process.com.android.phone Has Stopped on Samsung Galaxy F04 | Dr.fone
- Mastering Lock Screen Settings How to Enable and Disable on Xiaomi Redmi Note 12 4G
- Solved Video Driver Issue #43 Quickly
- Top 10 Fixes for Phone Keep Disconnecting from Wi-Fi On OnePlus 12R | Dr.fone
- Top 10 Fixes for Phone Keep Disconnecting from Wi-Fi On Vivo Y28 5G | Dr.fone
- Want to Uninstall Google Play Service from Honor Play 8T? Here is How | Dr.fone
- Title: How To Fix Unresponsive Phone Touchscreen Of Nokia G42 5G | Dr.fone
- Author: Ariadne
- Created at : 2024-10-25 18:51:35
- Updated at : 2024-10-28 18:16:15
- Link: https://howto.techidaily.com/how-to-fix-unresponsive-phone-touchscreen-of-nokia-g42-5g-drfone-by-drfone-fix-android-problems-fix-android-problems/
- License: This work is licensed under CC BY-NC-SA 4.0.