
How To Restore a Bricked Vivo T2x 5G Back to Operation | Dr.fone
How To Restore a Bricked Vivo T2x 5G Back to Operation
In moments of lag or freezing on your Android, you might brick Your Vivo T2x 5G, which can be unsettling. This is more than just the loss of a device. A bricked cell phone also involves potential data erasure. Yet, it’s crucial to understand the true implications of a bricked phone. This page tackles how to address the issue of a bricked Android phone.
This comprehensive guide aims to the reasons behind Android phones becoming bricked. By reading below, you’ll learn effective methods to unbrick a mobile phone without the risk of data loss.

Part 1. What are Brick Phones: At a Glance
The term “bricked phone“ is used when a device becomes non-functional. This is typically due to a critical software or firmware error. There are two distinct scenarios for encountering a bricked phone: a soft brick and a hard brick.
- Soft Brick. A soft brick entails a phone that’s not operational due to software glitches or conflicts but is not irreparable.
- Hard Brick.A hard brick signifies a more dire situation. This is where the phone becomes inoperable, resembling an actual brick in terms of functionality.
The Common Causes of a Cell Phone Bricking
Below are the common causes why a cell phone bricks.
Failed Updates
When a firmware or system update fails, it can lead to a bricked phone. Updates involve intricate changes to the phone’s software. If interrupted or incompatible, the Vivo T2x 5G device may get stuck in a state of partial functionality. This can result in a soft brick.
Failed Flashing
Flashing involves installing custom firmware or software onto a device. If the flashing process is interrupted or if the firmware used is not compatible with the Vivo T2x 5G device’s hardware, it can cause a hard brick. The device’s essential software components may become corrupted, rendering the phone unusable.
Rooting
Rooting, which grants users superuser access to their device’s OS, can lead to bricking if not done right. Rooting often involves making deep system changes, and errors can disrupt the phone’s core functionality.
Installing Bad Apps
Installing malicious, incompatible, or poorly coded apps can lead to a soft brick situation. In severe cases, they can trigger a boot loop or render the phone unresponsive.
Others
Several less common factors can also contribute to bricking. Overclocking, attempting to modify the bootloader, or tampering with system files can lead to disastrous consequences. Hardware issues, such as faulty memory or battery problems, might also manifest as bricked devices.
Part 2. Unbricking Methods and Tools
Below are solutions that you can employ to fix various brick phone scenarios.
Reverting Android Device to Factory Defaults (Soft Brick)
A universal approach to trying to recover a brick phone exists for all Android phones. This is, consider restoring your device to its factory settings. You can find instructions specific to your phone model online. Although this procedure erases all your data, it’s possible to regain the use of your brick phone.
Get in Touch With the Manufacturer (Hard Brick and Soft Brick)
Normally, smartphone warranties span from 1 to 2 years. If your phone remains unrooted and falls within that coverage period, consider reaching out to the manufacturer. This direct approach could lead to your phone being repaired or replaced with a new one at no cost to you.
Seek Professional Assistance (Hard Brick and Soft Brick)
When your phone falls outside the warranty coverage, consider seeking help from a reputable repair shop. However, be aware that any lost data cannot be attributed to their efforts. Fortunately, you can recover lost data using reliable data recovery software once your phone is operational again.
Use a Dedicated App To Fix Bricked Mobile Phones (Hard Brick and Soft Brick)
Among the array of tools designed for unbricking and recovery, one standout is Wondershare Dr.Fone - System Repair (Android). With an exceptional recovery rate, it stands out as one of the top contenders for data retrieval. Its performance is notable when applied to modern brick phones, making it a highly effective choice for these devices.
Part 3. Unbricking Mobile Phones With Dr.Fone - System Repair (Android)
Dr.Fone - System Repair (Android) empowers you to resolve a range of prevalent Android problems. This Android repair tool eliminates the need to hunt for suitable firmware to flash your phone. By utilizing Dr.Fone – System Repair (Android), you can recover data on Your Vivo T2x 5G with a few clicks.


 safe & secure
4,039,461 people have downloaded it
Key Features
Below are some of the standout features of Dr.Fone - System Repair (Android)
Address Android Challenges Like a Professional
From common scenarios like black screens and boot loops to even bricked Android devices, this tool has you covered. Dr.Fone has simplified the process so that anyone can fix Android problems.
Support for Over 1000 Android Models
This software is designed to fix glitches including most modern Android devices. Whether your Vivo T2x 5G is an unlocked variant or tied to carriers, you can restore it back to normal in just a matter of minutes.
Trial Access at No Cost
Dr.Fone - System Repair (Android) offers free access for you to test the initial steps and verify device compatibility. This cost-effective feature ensures value for money every step of the way.
Main Advantages of Using Dr.Fone – System Repair (Android)
Dr. Fone – System Repair (Android) is a great solution with numerous tools to help you manage your Vivo T2x 5G in various ways. Here are some of the advantages of using the app for fixing bricked phones.
- Fone – System Repair (Android) comes with a clean UI making navigation and usage easy. The user-friendly design offers a seamless experience for beginners and professionals alike.
- Utilizing the app for system repair is an effortless and speedy process. It doesn’t take up much time to revive your bricked phoneso you can use it right away.
- The System Repair toolkit only needs you to click on a few buttons. Combined with its clean UI and speedy process, using the app is a breeze.
Part 4. How To Revive a Bricked Phone Using Dr.Fone – System Repair (Android)
Below are the steps to recover data on a bricked mobile phone.
- Step 1: Download and install Dr.Fone – System Repair (Android) on your computer. Launch the app and select System Repair. Next, choose Select Android as the Vivo T2x 5G device type. Then, connect to your Vivo T2x 5G. Choose Phone Brick as the Android problem and click Start.

- Step 2: Select the correct device information. Choose the Brand, Name, Model, Country, and Carrier. Tick the box next to I agree button and click Next to proceed to the next step.

- Step 3: Click on the Phone with Home button or Phone without Home button depending on your device. Follow the on-screen instructions and click Next to proceed with reviving your brick phone.

- Step 4: Once the Vivo T2x 5G device enters Download Mode, the firmware will automatically start downloading. Follow the on-screen prompts and wait for the system to initiate the repair process. Once it concludes, the completion message will appear on the main window. Click Done to close the tool or click Try again to repeat the process.

safe & secure
4,311,328 people have downloaded it
Conclusion
Fixing a bricked phone may seem daunting, but solutions are within reach. This page explained the distinctions between soft and hard brick scenarios. It also identified common causes and revealed effective methods for unbricking.
Among these, Dr.Fone – System Repair (Android) emerges as a dependable ally. The tool offers a comprehensive toolkit for recovery and data rescue. The power to reclaim lost data lies in your hands. Act, follow the methods outlined, and recover your brick phone.
Full Guide: How To Fix Connection Is Not Private on Vivo T2x 5G
Are you encountering the “your connection is not private” issue on your phone? We found many Android users have increasingly expressed their frustrations with this recurring problem while browsing on the internet.
Usually, you can just reload the page to fix the error. But in case it doesn’t help, you may need to look for more advanced solutions. In the following discussion, we will delve into why this “your connection is not private” on Android happens and explore solutions that work for you.
Part 1: Addressing Your Connection Is Not Private on Android
First of all, what does “your connection is not private” on Android mean? To answer this question, it’s essential to understand that this error is often associated with Secure Socket Layer (SSL) protocol issues.
SSL is a cryptographic protocol created to establish a secure communication channel over the internet. Its primary purpose is to ensure the confidentiality and integrity of data exchanged between a user’s device and a website’s server.
The error message appears when there’s a problem with the SSL/TLS (Transport Layer Security) certificate of the website you are trying to access. This certificate is a digital document that authenticates the website and encrypts the data transmitted between the user’s device and the server.

Some common factors that could trigger the “your connection is not private” on Chrome Android error:
- Expired or invalid SSL certificate of the website;
Certificates are issued for a specific period, and if the website owner fails to renew it in time, your browser will detect it as not secure.
- There is a mismatch between the domain on the certificate and the actual domain you are trying to visit;
This discrepancy might occur due to a misconfiguration on the website or, in some cases, due to a man-in-the-middle attack where a third party intercepts the communication between your device and the server.
- No HTTPS enforcement;
Another reason for the issue is if the installed SSL certificate doesn’t turn on the “force HTTPS” option. This means visitors might be using the non-secure HTTP version of the site instead of the safe URL.
So, the error serves as a warning to users, indicating that the connection may not be secure and sensitive information could be at risk.
Browsers, including those on Android devices, prioritize user safety and privacy. They will block access to potentially compromised websites to prevent data theft or unauthorized access. That’s why when you get the “your connection is not private” message on Android, you can’t access the website.
Part 2: What The Error Codes in “Your Connection Is Not Private” Mean
When “your connection is not private” on Chrome Android error shows up, it often comes along with specific error codes that can indicate the root cause of the issue. Understanding these error codes is crucial for troubleshooting and resolving the problem effectively.
- ERR_CERT_SYMANTEC_LEGACY: Unsupported Symantec-issued certificate
This error code indicates that the website you are attempting to access is equipped with an unsupported Symantec-issued certificate. Symantec, a prominent Certificate Authority, had faced concerns about the security of its certificate issuance processes.
As a result, major browsers, including Google Chrome, no longer support certificates issued by Symantec. If you encounter this error, it implies that the website’s SSL certificate is outdated and needs to be updated with a certificate from a trusted Certificate Authority.
- NET::ERR_CERT_AUTHORITY_INVALID: Unauthenticated SSL certificate
The presence of this error code suggests that the SSL certificate of the website cannot be authenticated by your browser. This could occur if the certificate is self-signed or issued by an unrecognized Certificate Authority.
- NET::ERR_CERT_DATE_INVALID: Date and time mismatch
This error code points to a discrepancy between your Vivo T2x 5G’s date and time settings and the information on the website’s SSL certificate, as they have expiration dates. If the date and time settings on your device are incorrect, it may prevent the certificate from being validated. Correcting your device’s date and time settings should resolve this issue.
- SSL certificate error: Generic or unspecified problem
This is a more generic error message that indicates a problem with the website’s SSL certificate without specifying the exact nature of the issue. It could indicate various issues, such as an expired certificate, a misconfiguration in the certificate chain, or other SSL-related problems.
Part 3: How To Fix Your Connection Is Not Private on Android
Encountering the “your connection is not private” error on Android can be a frustrating experience. Fortunately, there are various methods to address and fix this issue, depending on its underlying cause.
In this section, we will explore some effective solutions to help you regain a secure and private connection.
Method 1: Clear your cache
When you use the internet, web browsers store information about your online activities in cached data and cookies to speed things up. However, having too much of this data can cause problems instead. It might even stop your browser from connecting securely.
So, clearing your browser cache and data can be a quick and simple “your connection is not private” Android fix. Follow the steps here:
- Step 1: Open and launch Chrome.
- Step 2: Access the Menu (the three dots button) to open the Settings. Select Privacy and Security > Clear Browsing Data.
- Step 3: Opt for the “All Time” option and click “Clear Data” to erase your cache.

After successfully clearing your browser cache and data, revisit the website to check if the problem persists.
Method 2: Repair the Android system
Addressing the “your connection is not private” to fix on Android involves examining both the Vivo T2x 5G device and the website. If clearing browser data doesn’t help, there might be an issue with your Android system. One solution is to use the Wondershare Dr.Fone system repair tool to fix the issues safely.
How to perform system repair with Dr.Fone:
- Step 1. Open the Repair Tool
Start by launching Wondershare Dr.Fone on your computer. Go to the Toolbox section and connect your Vivo T2x 5G. Choose System Repair and pick Android as your device type.

safe & secure
4,322,863 people have downloaded it
- Step 2. Begin Repair
Click Start on the new screen to kick off the repair. Since you’re dealing with a connection private issue on Android, select System Damage.
- Step 3. Fill in the Vivo T2x 5G device Details
The platform will detect your Vivo T2x 5G’s brand. Confirm the Name, Model, Country, and Carrier. If your device is unlocked, choose OPEN in the Carrier section. Agree to the warning, click Next, and proceed with the repair.
- Step 4. Activate Download Mode
Follow the instructions to put your Vivo T2x 5G into Download Mode. Once in Download Mode, you will start downloading the firmware.

- Step 5. Confirm Installation
Remember, the repair may erase data. It’s advisable to back up your data first before starting the repair. Enter “000000” to confirm the repair process, shown by a progress bar.

When done, click Done if your Android starts properly. If not, click Try Again to repeat the process.
Method 3: Check and fix the date and time on your Android
Since the error code “NET::ERR_CERT_DATE_INVALID” indicates a mismatch between the date and time on your device and your browser, you need to adjust the date and time settings on your Android to fix it.
The specific steps can vary based on your Android model, but the general approach involves locating the “date and time” settings on your phone. How to fix the date and time on Android to bypass “your connection is not private” on Chrome Android:
- Step 1: Go to your Vivo T2x 5G’s Settings > Date & Time.
- Step 2: Switch on the “Automatic Date & Time” to sync with the network-provided time.

Method 4: Perform factory reset
If nothing else works, there might be malware on your phone causing trouble. It’s crucial to eliminate this threat before further damage occurs. The recommended action is to perform a factory reset on your phone.
However, keep in mind that this process can result in data loss, so it’s essential to back up your data beforehand. Follow the steps to perform a factory reset on Android:
- Step 1: Go to your Android Settings.
- Step 2: Select Backup and Reset > Factory data reset. Then, opt to erase all data.

Most of the time, you won’t need to go to the extreme of a factory reset. The simpler solutions mentioned earlier should take care of the Security Certificate Error on your Android.
Conclusion
By now, you should have a good grasp of the “Your Connection Is Not Private” problem on Android. This issue typically arises from complications with the SSL certificate of the website, designed to ensure a secure connection.
When you see the error message, it often comes with specific codes that indicate the underlying problem. Several methods can be employed to fix the “Your Connection Is Not Private” on Android. Clearing the browser cache, repairing the Android system using tools like Dr.Fone, checking and fixing date and time settings, and performing a factory reset as a last resort are among the solutions.
By prioritizing user safety and following the step-by-step approach in this guide, you can navigate and resolve this common internet browsing challenge on your Vivo T2x 5Gs.
Home Button Not Working on Vivo T2x 5G? Here Are Real Fixes
There is no doubt that it is quite frustrating when your device buttons, such as home and back don’t work properly. The reasons can be software as well as hardware issues. If you are wondering whether there is any solution to fix this problem, then you’ve come to the right place. Firstly, yes some methods can probably help you to come out of this issue. Here, in this guide, we have covered various solutions you can try to resolve the “home button not working Android” problem no matter whether it is due to software or hardware reason.
Part 1: 4 Common Measures to Fix Home Button Not Working Android
Here, we are going to mention four common methods that you can try to resolve the home button problem on your Vivo T2x 5G with ease.
1.1 One click to fix Android Home Button Not Working
[Try It Free](https://download.wondershare.com/drfone_repair_full3371.exe)When it comes to the home button not working Vivo T2x 5G problem, the most common reason is the unknown system issues. In such a scenario, the best solution is using Dr.Fone - System Repair (Android) software to repair your Android system to normal in one click. This tool is powerful enough to resolve various Android issues within a few minutes.
Dr.Fone - System Repair (Android)
Android repair tool to fix home button not working on Android
- The tool can help you to fix the Android operating system in a wide range of scenarios.
- It is compatible with all Vivo T2x 5G devices.
- There is no need for technical skills to use the software.
- The software comes with a high success rate for fixing the Android system.
- It provides easy steps to resolve Android issues.
3981454 people have downloaded it
To learn how to fix home button not working problem, download and install the Dr.Fone - System Repair (Android) software on your computer, follow the below step-by-step guide:
Step 1: To begin with the process, launch the software on your computer and select the “System Repair” option from the software main window.
Step 2: Thereafter, connect your Vivo T2x 5G to the computer using a USB cable and select the “Android Repair” tab from the left menu.
Step 3: Next, you will navigate to a device information page where you have to provide your device information.
Step 4: After that, the software will download the appropriate firmware to repair your Android system.
Step 5: After downloading the firmware, the software will start the repair process. Wait for a few seconds, the problem should get fixed and your phone will get back to its normal state.
1.2 Force Restart your Android
Whenever you encounter with Android virtual soft keys, not working problem, the first thing you should try is to force restart your phone . If the problem is due to a software issue, then it can be probably fixed by simply force restarting your Android.
Here are simple steps on how to force restart on Android:
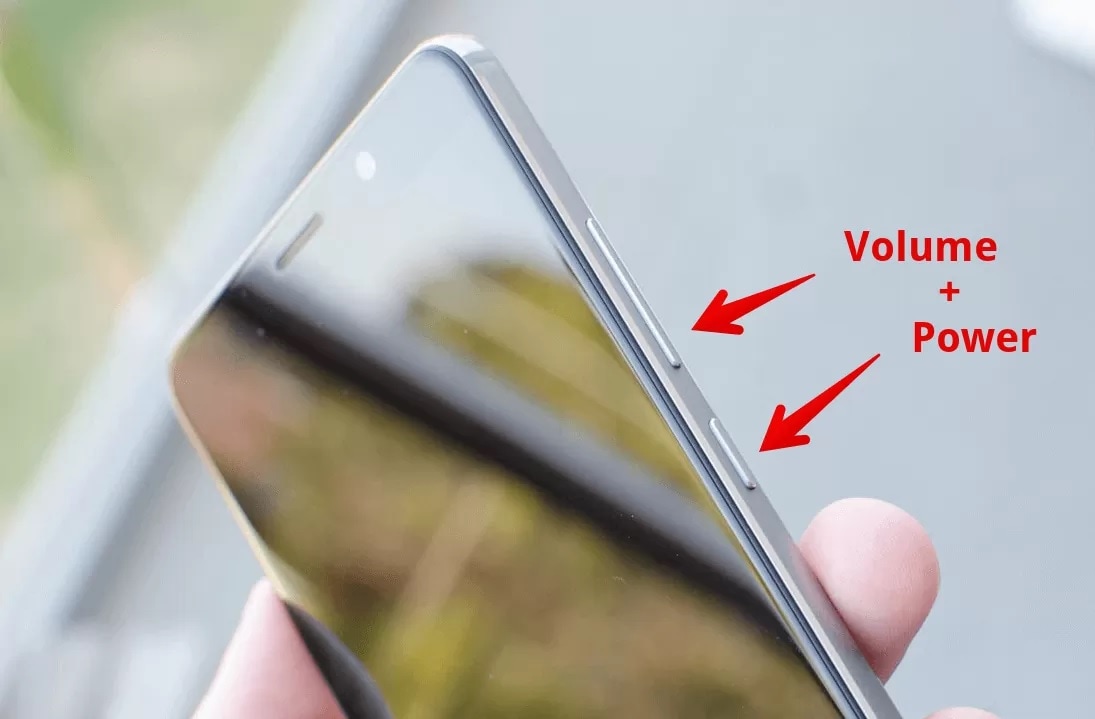
Step 1: To begin with, press and hold the power button and either volume up or down button at the same time until your device screen goes off.
Step 2: Next, press the power button for a few moments to force restart your device.

1.3 Restore Factory Settings
If force restarting won’t help you to fix the problem you are facing, it’s time to reset your Vivo T2x 5G to factory settings. The factory reset on an Android device will erase all of your phone settings, third-party apps, user data, and other app data to restore your device to its original manufacturer condition or settings. It means that this can bring back your device to its normal state.
To learn how to restore factory settings, follow the below steps:
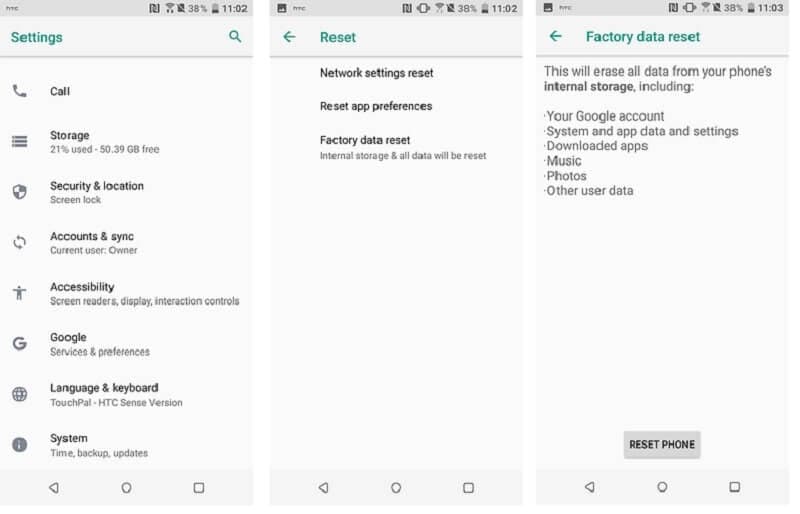
Step 1: Go to your ‘Settings” and then, go to “System”>” Advanced”>” Reset options”.
Step 2: Next, tap on “Erase all data”>” Reset phone” to factory reset on your phone. Here, you may need to enter the password or pin or pattern.
Once you are done with the above steps, restart your phone and restore your data and this might be fixed the problem for you. If not, then try the next solution.
1.4 Update Android Firmware
It might be the case that your Android firmware is not updated and that’s why you are experiencing the home button not working Android problem. Sometimes, not updating your Android firmware can cause various issues and problems while using your device. So, you should update it, and here are steps on how to do it:
Step 1: Open the Settings and then, go to “About device”. Next, click “System updates”.
Step 2: After that, click “Check for updates” and if updates are available, then download and install it to update your Android version.

Part 2: What if the Home Button fails due to hardware reasons?
When your Android home and back button not working because of hardware reasons, you can’t get the problem resolved by simply rebooting your device. In such cases, you have to use alternative apps to replace the home button.
2.1 Simple Control app
The Simple Control app is the first and foremost solution to fix the Android home button not working issue. With the help of this app, you can fix many soft keys of your device. It is specially designed for Android users facing trouble using home, volume, back, and camera buttons. Plus, the app utilizes Accessibility service, but it doesn’t get access to your sensitive and personal information.
Pros:
- It can easily replace broken and failed buttons.
- The app is quite easy to use.
Cons:
- It is not as much efficient as other similar apps available out there.
URL: https://play.google.com/store/apps/details?id=ace.jun.simplecontrol&hl=en_US
2.2 Button Savior app
Button Savior app is one of the ultimate apps that can help you to fix the Android home button not working problem with ease. For this app, root and no root versions are available on the Google Play store. To fix the Home button not working issue, no root version is the right one. But, if you want to fix the Back button or other buttons, then you need to go for the root version.
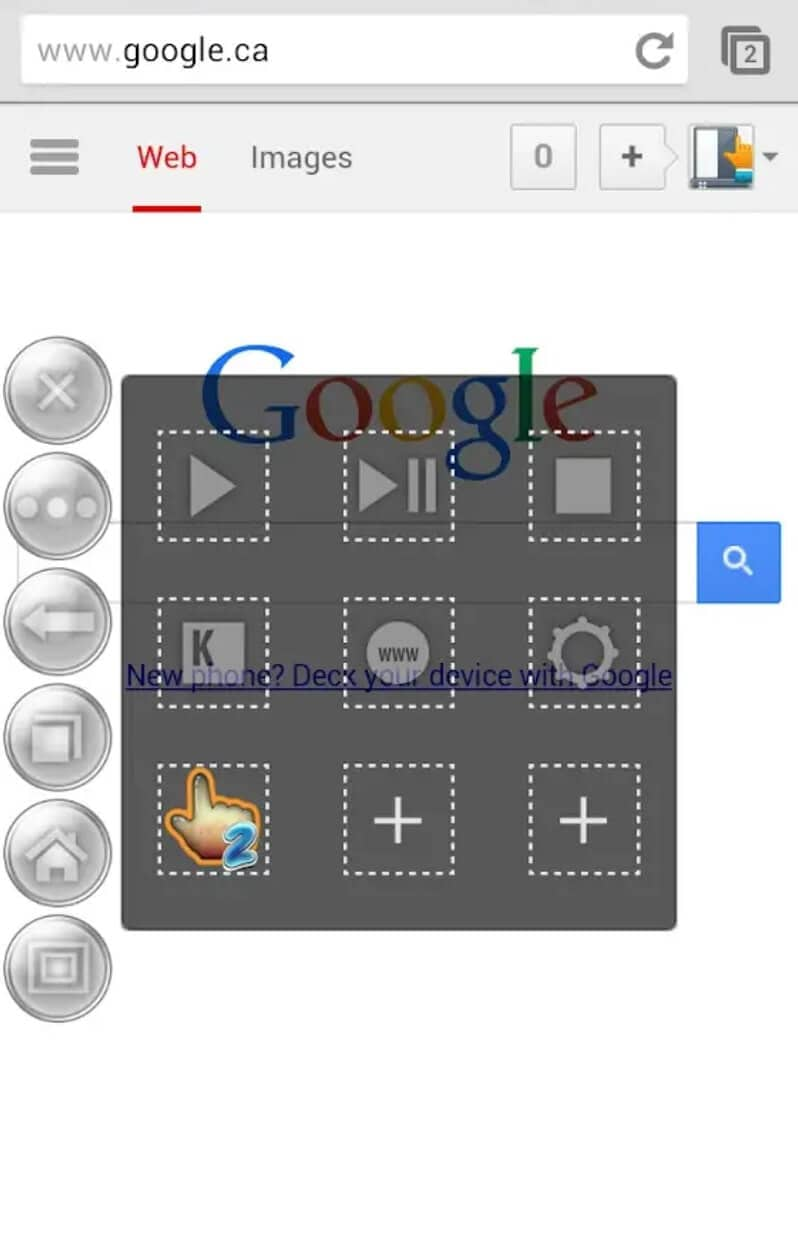
Pros:
- It comes with a root as well as no root version.
- The app is powerful enough to fix a wide range of buttons.
- It shows information regarding the date and time and battery.
Cons:
- The root version of the app can cause data loss.
URL: https://play.google.com/store/apps/details?id=com.smart.swkey" target="_blank” rel=”nofollow
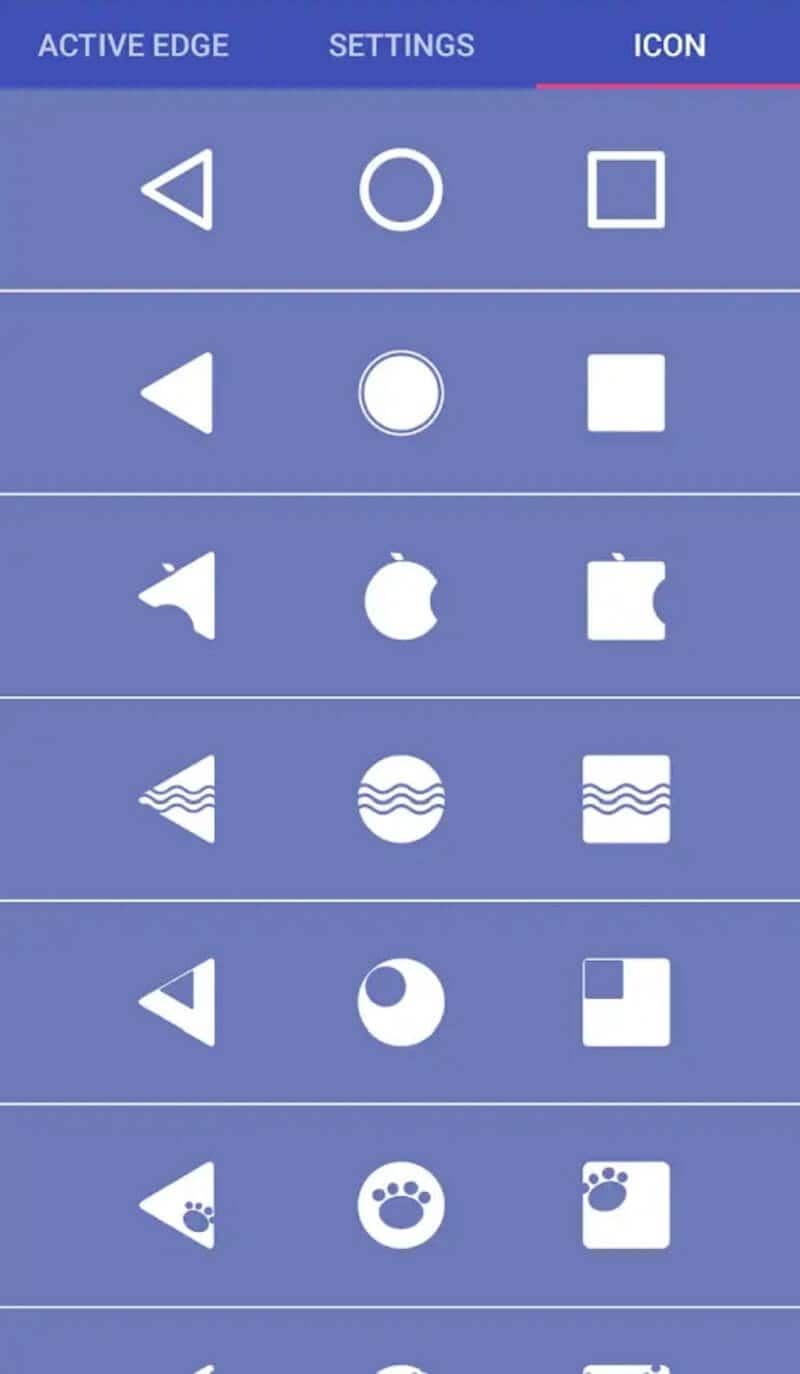
2.3 Navigation Bar (Back, Home, Recent Button) app
Navigation Bar app is another great solution to fix the home button not responding problem. It can replace broken and failed button for users who are facing difficulty using navigation bar panel or buttons not working properly. The app offers numerous features, and it is easy to use.
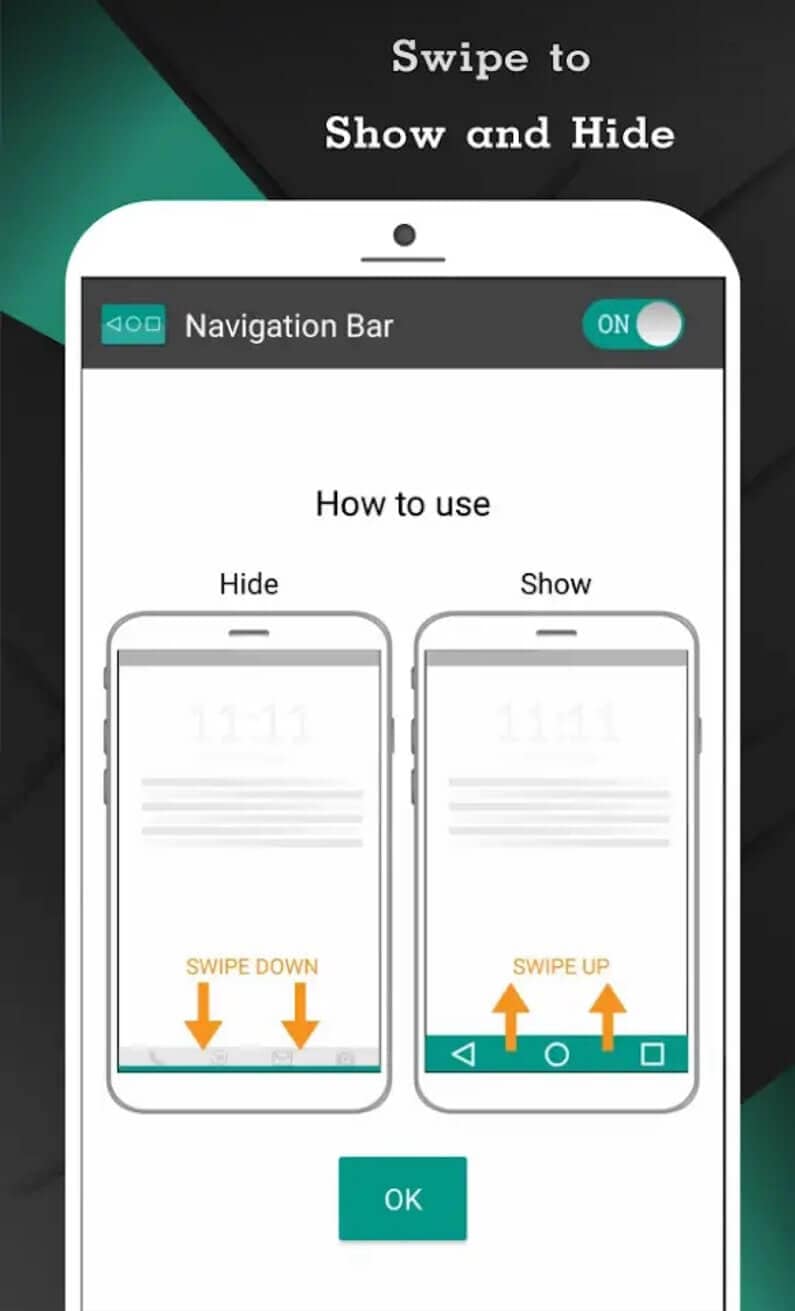
Pros:
- It offers many colors to make an incredible navigation bar.
- The app provides 15 themes for customization.
- It comes with the ability to change the size of the navigation bar.
Cons:
- Sometimes, the navigation bar stopped working.
- It comes with ads.
URL: https://play.google.com/store/apps/details?id=nu.nav.bar
2.4 Home Button app
Home button app is another remarkable solution to replace broken and failed home buttons for users having trouble while using buttons. With this app, it is quite easy to press or even long press on the home button as assistive touch.
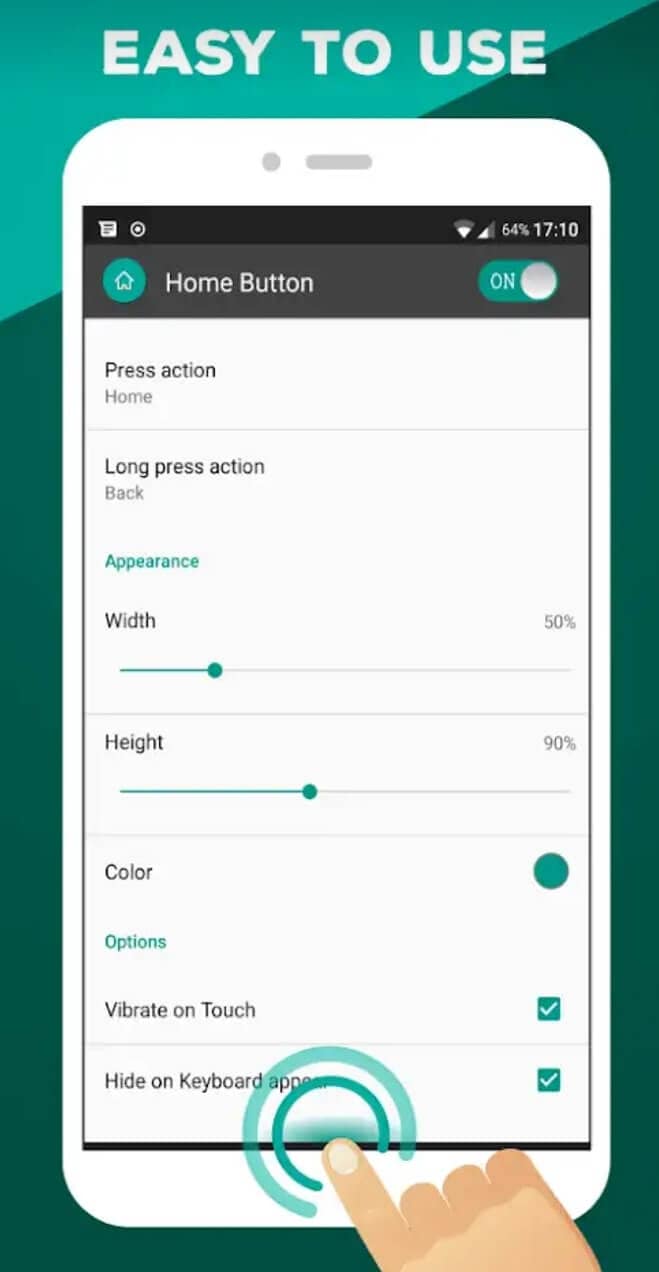
Pros:
- You can change the button of color using the app.
- With the help of it, you can set a vibrate setting on touch.
- It provides support for many press actions, such as home, back, power menu, etc.
Cons:
- It doesn’t come with a lot of features, unlike other apps.
- Sometimes, it shuts down automatically.
URL: https://play.google.com/store/apps/details?id=nu.home.button
2.5 Multi-action Home Button app
Is your Android physical home button is broken or dead? If yes, then the Multi-action Home Button app can help you to fix it with ease. With the help of it, you can create a button in centre-bottom of your device screen, and you can also add numerous actions to that button.
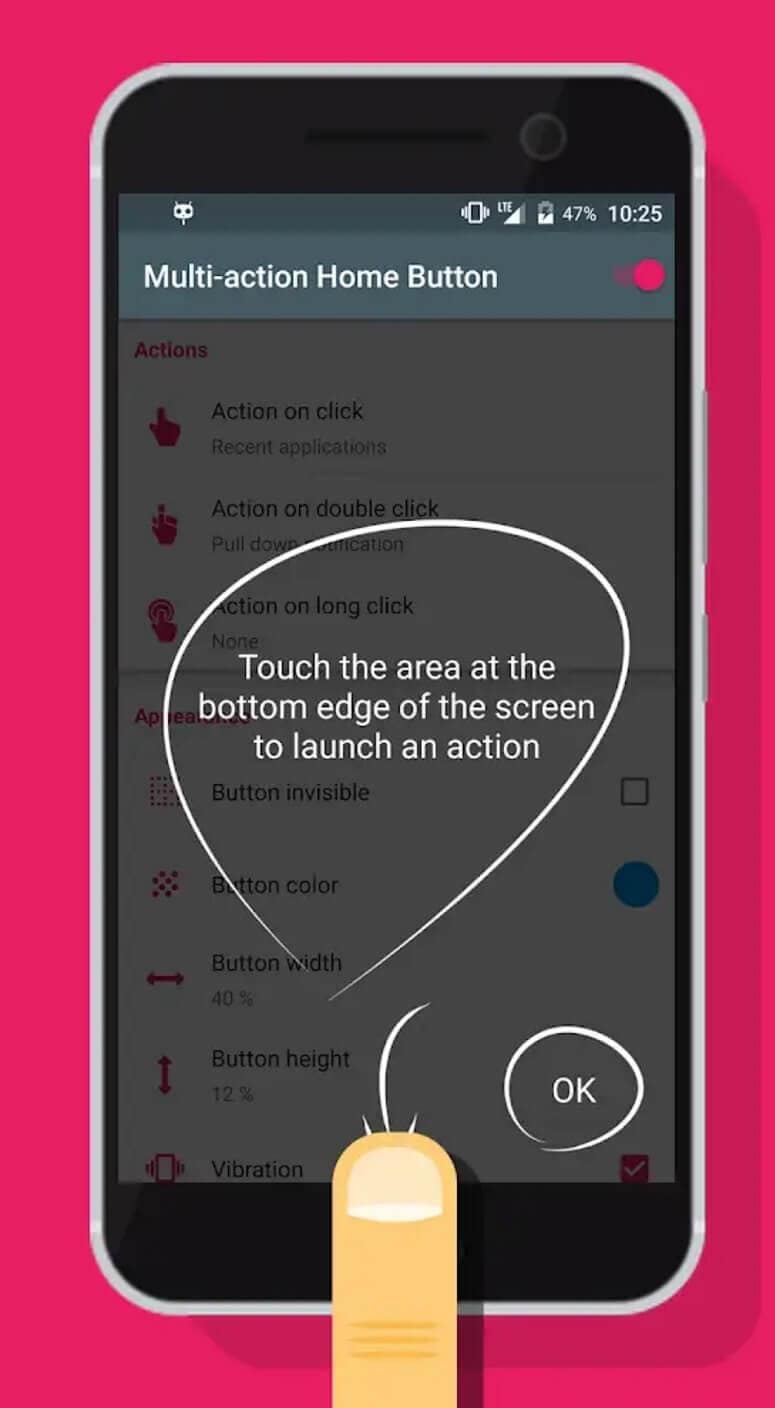
Pros:
- It provides various actions with the button.
- It is very simple and easy to use.
Cons:
- The app’s very useful feature comes with its pro version.
URL: https://play.google.com/store/apps/details?id=com.home.button.bottom
Conclusion
Hopefully, the methods covered in this post helps you to fix Android home and back button not working problem for you. If it is a system issue, then the best thing you can do is to take advantage of Dr.Fone - System Repair (Android) software. It can surely help you to fix your Android system to normal within a few minutes.
Also read:
- [New] High-Resolution Revelations – Top 15 Cameras of 2024
- [New] In 2024, Enhancing Zoom's Video Clarity Tips and Tricks
- [Updated] 2024 Approved Free Tribe 50 Branding Banners Ready to Unleash
- [Updated] Gimbal Guide for Smooth Flights for 2024
- AMD Raises Projected Revenue for Instinct MI1300 Series to $4B, But Still Shadows Nvidia's Staggering $40B Estimate
- Exploring LLM Technology: Insights Into Operation & Mechanisms of Advanced Language Systems
- How to Overcome Steam Account Access Problems - Solutions Inside!
- In 2024, Top 15 Augmented Reality Games Like Pokémon GO To Play On Oppo F23 5G | Dr.fone
- Norwegian Mastery Unlocked in Brief Bursts
- Process of Screen Sharing Vivo X100 to PC- Detailed Steps | Dr.fone
- Restore Missing App Icon on Oppo A58 4G Step-by-Step Solutions | Dr.fone
- Samsung Galaxy A34 5G Not Connecting to Wi-Fi? 12 Quick Ways to Fix | Dr.fone
- Strategies for Apps That Wont Download From Play Store On Itel S23 | Dr.fone
- Strategies for Apps That Wont Download From Play Store On OnePlus 12 | Dr.fone
- Stuck at Android System Recovery Of Huawei Nova Y71 ? Fix It Easily | Dr.fone
- Title: How To Restore a Bricked Vivo T2x 5G Back to Operation | Dr.fone
- Author: Ariadne
- Created at : 2024-10-21 17:59:59
- Updated at : 2024-10-22 22:44:59
- Link: https://howto.techidaily.com/how-to-restore-a-bricked-vivo-t2x-5g-back-to-operation-drfone-by-drfone-fix-android-problems-fix-android-problems/
- License: This work is licensed under CC BY-NC-SA 4.0.