
How To Unbrick a Dead Vivo G2 | Dr.fone
How To Unbrick a Dead Vivo G2

Discovering your phone died, especially among Vivo G2 models, can be disheartening. Looking online for ways to unbrick your Oneplus 8T can take up so much of your time. The unavailability of your device can disrupt your routine and connectivity. However, unbricking is the crucial solution to regain the functionality of your Vivo G2 device.
This guide teaches effective methods to unbrick your Vivo G2. The page will also discuss the early warning signs and healthy habits to prolong your Vivo G2. Read below to learn more.
Part 1. Early Warning Signs of a Hard-bricked One Plus Device
When a phone “bricks,” the Vivo G2 device becomes completely unusable and non-functional. It essentially turns into a “brick.” A bricked Vivo G2 device can be preceded by certain warning signs that you should be attentive to. Here are some of them below.
- **Corrupted Device and Boot Failures.**If your Vivo G2 freezes or fails to boot up properly, it can indicate underlying software issues that might lead to bricking.
- **Inability to Enter Fastboot Mode.**If you find it increasingly challenging to access the fastboot mode, it could signify impending trouble.
- **Consistent Black Screens.**Experiencing recurring black screens could indicate problems within the operating system. In the long run, this might escalate to bricking.
- **Unexpected Reboots and Crashes.**Frequent and unprovoked reboots, app crashes, and system instability might point toward software inconsistencies. Similar to consistent black screens, this could eventually lead to bricking.
Common Reasons for Your Vivo G2 Phone To Be Bricked
Understanding the factors that can trigger bricking in Vivo G2 devices is essential for preventing such scenarios.
Failed Updates or Interrupted Installations
When a firmware update is interrupted due to power loss, sudden device shutdown, or other disruptions, it can result in incomplete software installation and potential bricking.
Unauthorized User Modifications
Engaging in root access, flashing custom ROMs, or applying unsupported system modifications can destabilize the Vivo G2 device’s software, paving the way for bricking.
Incorrect Bootloader Unlocking
Mishandling the process of unlocking the bootloader, a crucial step for customization can lead to system inconsistencies and eventual bricking.
Compatibility Issues With Custom Software
Installing unofficial custom software, such as custom recoveries or third-party kernels, might not be compatible with the Vivo G2 device’s hardware or official software. That can cause conflicts that can lead to bricking.
Malware or Virus Infiltration
The presence of malicious software can cause significant disruptions to the Vivo G2 device’s functioning. It can lead to bricking if left unchecked.
Part 2. How To Unbrick One Plus Device Using Various Methods
The solutions below to unbrick your Oneplus are helpful methods to revive your device. Here’s an overview of these methods.
Method 1. Restore With Recovery Mode
Restoring using Recovery Mode can solve most problems that cannot be solved with a normal phone restart. Here’s how.
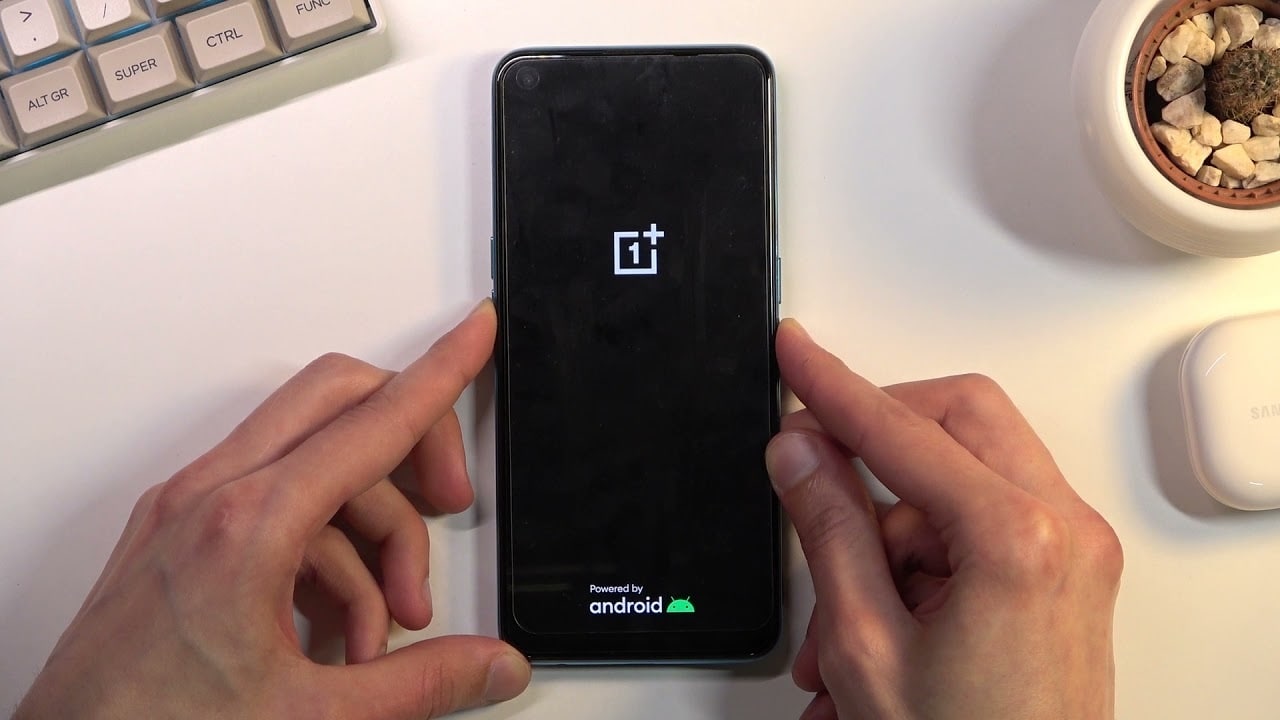
- Step 1: Turn off your Vivo G2 device. Press and hold the Power button and Volume Down until the Vivo G2 logo is displayed.
- Step 2: Move through the menu using the Volume Up and Volume Down buttons until you reach Recovery Mode. Press the Power button to choose it.
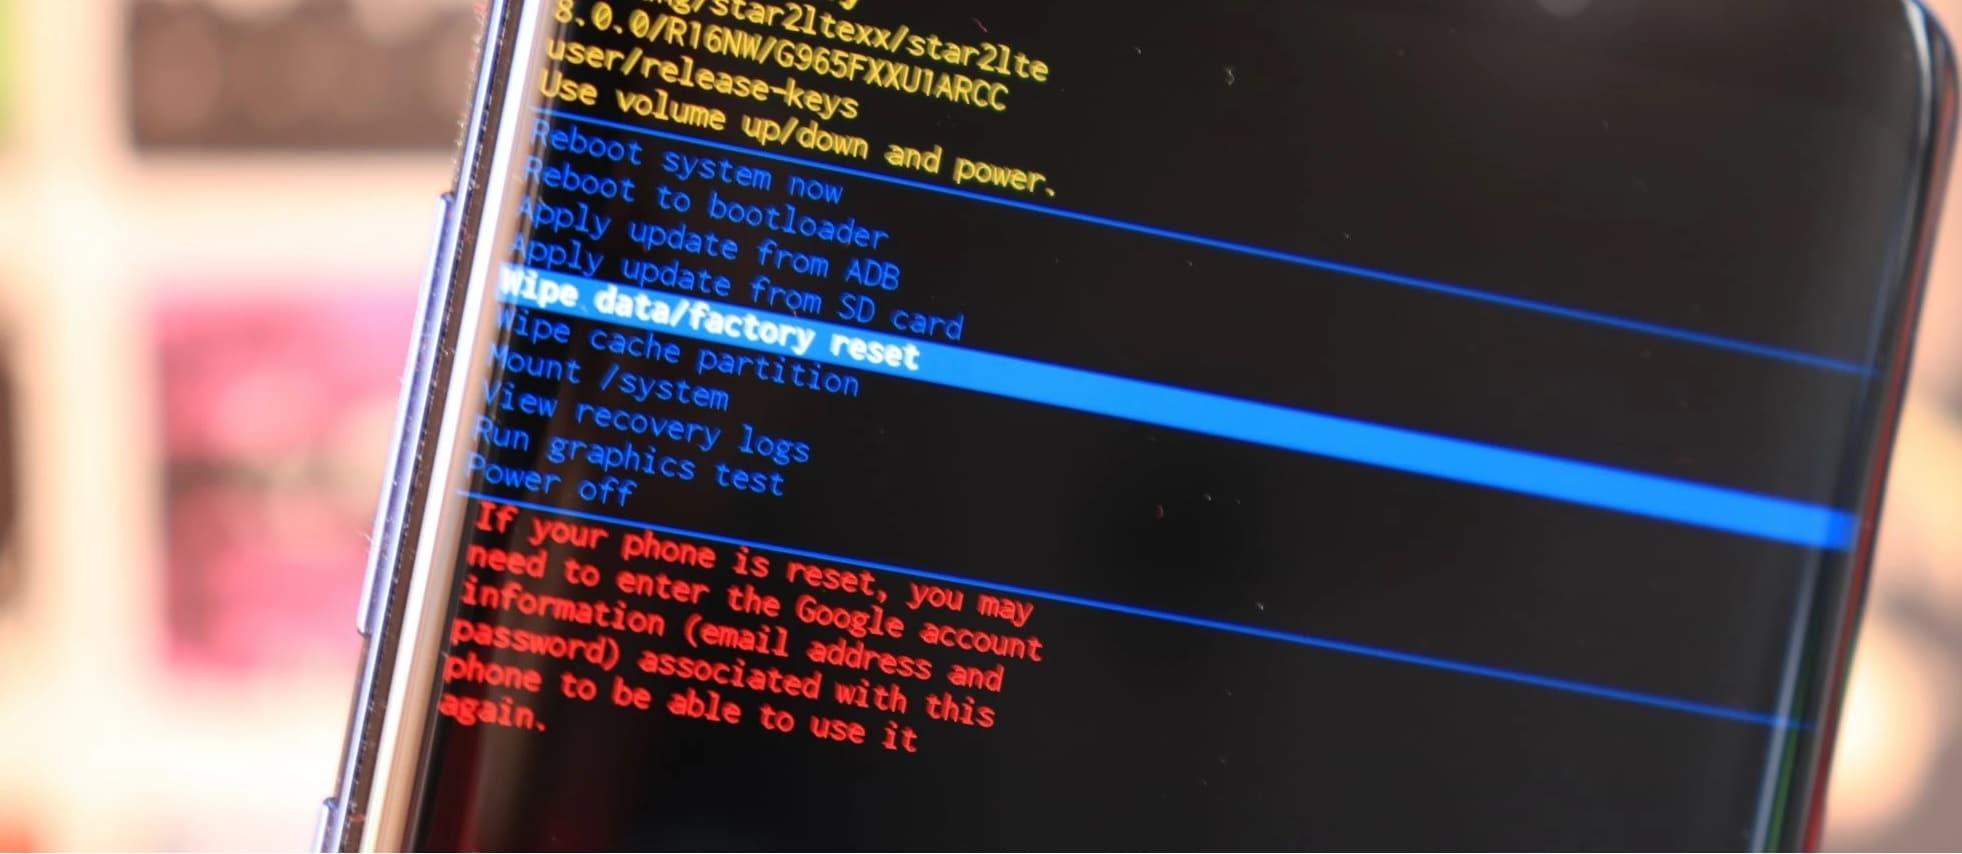
- Step 3: Select the Wipe data/factory reset option. Choose Yes to proceed and wait for the process to finish. Choose Reboot system now to see the results.
Method 2. Contact the Manufacturer
Engaging Vivo G2’s official support can provide insights and potential solutions. This is advantageous if your device is under warranty.
Method 3. Professional Repair Shops
Certified repair shops have the expertise to diagnose and address bricking issues, offering tailored solutions.
Method 4. Software Tools
Leveraging specialized software tools like Wondershare Dr.Fone - System Repair (Android) simplifies the process, even for non-technical users.

Part 3. Healthy Habits To Consider To Prolong Your One Plus
Maintaining the longevity of your Vivo G2 device requires adopting proactive habits. Here are vital tips to consider.
- **Regular Software Updates.**Keep your Vivo G2 up to date with the latest firmware releases. These updates often include security patches, bug fixes, and feature enhancements contributing to overall device stability.
- **Battery Care.**Avoid frequent deep discharges and overcharging. Use original charging accessories and refrain from exposing the Vivo G2 device to extreme temperatures.
- **App Management.**Review and uninstall apps you no longer use. This reduces clutter and conserves system resources, promoting smoother device operation.
- **Cache and Storage Cleanup.**Clear app caches and delete unnecessary files from your device. It optimizes storage space and prevents sluggishness caused by excessive data accumulation.
- **Screen Protection.**Apply a screen protector and sturdy phone case to shield your device from scratches, cracks, and impacts. This safeguards the physical integrity of your Vivo G2.
- **Safe Charging Practices.**Avoid using your device while charging, as this generates excess heat. Also, refrain from using non-certified chargers, which can harm the battery and device components.
- **Avoid Overloading the Vivo G2 device.**Limit multitasking and avoid running too many apps simultaneously. This minimizes strain on the Vivo G2 device’s RAM and processor, ensuring smoother performance.
- **Privacy and Security.**Implement robust, unique passwords and enable biometric authentication methods. Regularly review app permissions to enhance data privacy.

Tips: Unlock Your One Plus 6, 8T, or 10 Pro With Dr.Fone - Screen Unlock (Android)
Dr.Fone - Screen Unlock (Android) is powerful software designed to unlock Vivo G2 devices quickly. This tool is compatible with various Vivo G2 models, including the Vivo G2 6, Vivo G2, and Vivo G2 10 Pro, ensuring a wide support reach.
![]()
Dr.Fone - Screen Unlock (Android)
Unlock Vivo G2 Without Password
- Unlock your Vivo G2 quickly and securely
- Easily remove passwords and screen locks of all types
- Enjoy a streamlined experience with no technical background required
- Feel confident with solutions backed by a high success rate
3,016,652 people have downloaded it
How To Unlock Your One Plus With Dr.Fone - Screen Unlock (Android)
Below is a guide on unbricking the Vivo G2 models using Dr.Fone - Screen Unlock (Android).
Step 1: Access Screen Unlock > Android
Navigate to the Screen Unlock section and select Android. Proceed by clicking on the Unlock Android Screen option.

Step 2: Choose Your Device Brand and Initiate Data Wipe
Identify your device brand for unlocking the screen. After selecting your device brand, you will be prompted to enter a specific mode. Once in this mode, Dr.Fone will commence the Android screen unlock process.

Step 3: Successful Screen Unlock
Allow the unlock process to run its course. If unsuccessful, click ‘Try Again’ for a second attempt. Upon successful screen unlock, click ‘Done’.

 safe & secure
You May Also Like:
How To Fix iPhone Bricked After iOS 17/iOS 16/iOS 15 Update
iPhone Got Bricked? Here Is The Real Fix To Unbrick It!
How to Fix It If Your Vivo G2 Phone Got Bricked?
How to Fix the Soft Bricked Android Phone?
Conclusion
For Vivo G2 owners, your device’s revival rests in your hands. By embracing the abovementioned methods, you can reclaim your device from its bricked state. Act decisively to unbrick your Vivo G2 device and relish its seamless performance again.
For those who find themselves locked out of their Vivo G2 devices, there’s a reliable solution at your fingertips. Try Dr.Fone - Screen Unlock (Android) to regain access to your device swiftly and securely.
safe & secure
Ways to Unbrick Your Android Device: Various Ways for Recovery
When your Vivo G2 becomes unresponsive or frozen after mistakenly flashing a ROM or rooting, you are informed that the phone has been bricked. The most terrifying aspect will not just be gadget loss, but also data erasure. However, what exactly is a bricked phone, and, more importantly, how do you fix a bricked Android phone?
This article will explain what a bricked android phone is, why an Android phone becomes bricked, how to unbrick an Android phone without losing data and a third-party application you can use.
Part 1. Causes of Bricked Phones
In everyday settings, our mobile devices have become our greatest friends, therefore breaking your phone is the last thing you want to do. There are different reasons why devices brick, and we must be familiar with them in order to comprehend the various techniques to repair bricked devices.
Here are some common reasons why your Vivo G2 is bricked:
- **Flashing Stock/Custom ROM:**It is possible that you installed an incompatible ROM in the Android phone, that the phone shuts off during the process, or that you have performed other errors that cause your phone to restart indefinitely or to become stuck at the starting screen.
- **Rooting an Android device:**You are unable to effectively root the Vivo G2 device.
- **Android firmware is being updated:**If the phone is interrupted when updating the Android firmware, it will be bricked.
- **Installing harmful applications:**You installed harmful programs on your Vivo G2, or the phone was infected with a virus.
Part 2. How to Fix a Bricked Phone
The first step is to establish how badly your device is bricked. In most cases, you will be working with soft bricks that are pretty simple to repair. If your phone is stuck in a boot loop or enters recovery mode every time you turn it on, you may have a soft brick.
To repair bricked Android phones and tablets, you must first thoroughly examine the Vivo G2 device’s state. Before you begin troubleshooting, determine the sort of bricking that your phone is experiencing. However, there is no specific software to unbrick your Vivo G2; you may need to learn the complexities of this issue or hire a professional to do it for you.
 safe & secure
Here are some simple methods for repairing bricked Android devices:
Method 1. Reboot the Phone in Safe Mode
Trying to reboot your android device in safe mode is the first and easiest thing you should try if your phone is bricked. Here’s how to do it:
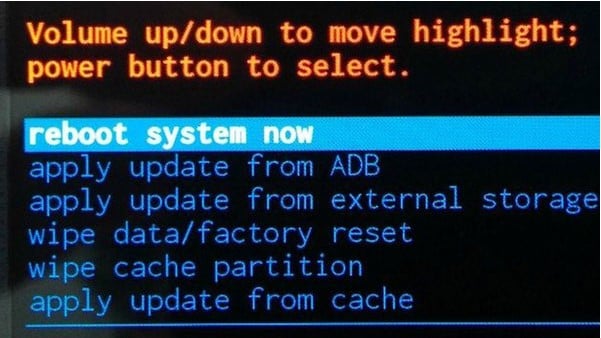
- Step 1: Turn off your smartphone and press the Volume Up + Power button to enter recovery mode. Then, using the volume controls, navigate the menu and select Reboot system now.
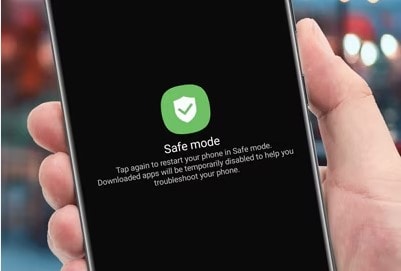
- Step 2: Select the highlighted option by pressing the Power button. After that, wait for your device to reset normally.
- Note: The steps for booting into recovery mode may change based on the manufacturer of your device. For further information, go to the user manual for your phone or tablet.
Method 2. Wipe the Cache Partition
This is the first indication that a user’s phone has gone bricked. The phone turned on automatically, however it became stuck or frozen on the logo screen. The issue might be caused by the undeleting of data and cache, which prevents the phone from displaying the home screen.
This issue, however, may be resolved by wiping the data and cache partitions in recovery mode. You must do the following to do this:
- Step 1: Turn off your smartphone and enter recovery mode by pressing the Power and Volume Down buttons simultaneously. Different devices have various approaches for entering recovery mode, so you may perform better.
- Step 2: After entering recovery mode, you should see the screen below. Remember to pick Advanced and then “Wipe Dalvik Cache” if your device is under Clockwork Mod recovery. Return to the main screen and select “Wipe Cache Partition” once more.
- Step 3: Finally, on your smartphone, choose the Reboot system immediately.
Method 3. Perform a Factory Reset
A factory reset can undo the alterations made to your device that resulted in the brick phone, but you will lose everything you have downloaded and installed in the process. Here’s how to restore a bricked Android phone to factory settings:
- Step 1: Boot your device into recovery mode (turn off your device, then press power button + volume up button).
- Step 2: Select “Wipe Data/“Factory Reset” then confirm the action. When the process is done, you’ll be returned to the recovery mode menu.
- Step 3: Select “Reboot System Now” to restart your device.
Method 4. Flash a Custom ROM
If you boot your phone directly into recovery mode, there’s a problem with the ROM you loaded. Then simply flash the following custom ROM on your phone:
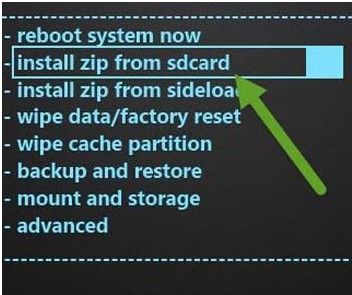
- Step 1: Save the required ROM (in ZIP format) to an SD card. The SD card should then be inserted into your Vivo G2.
- Step 2: Click the “Install zip from sdcard” button. Then, select the ZIP file that contains the ROM. Finally, click the “reboot system now” button.
Method 5. Using Wondershare Dr.Fone
Wondershare Dr.Fone - Data Recovery is the first data recovery solution for any damaged Android smartphone in the globe. It offers one of the greatest recovery rates and can recover a variety of information like images, videos, contacts, messages, and call logs. The program is most effective with Vivo G2 smartphones.
While it is not an Android unbrick tool, it is a useful tool for retrieving data when your Vivo G2 becomes bricked. It is quite easy to use:
- Step 1: Launch Wondershare Dr.Fone and select “Data Recovery” > “Recover Android Data” from the menu. Then, select “****Recover from Broken Phone”.

- Step 2: Choose the file types you wish to recover. Click “Next” and then select the type of damage your phone is experiencing. Select “Touch screen not responsive, or cannot access the phone” or “Black/broken screen”.

- Step 3: Use the recovery wizard to enter your Android smartphone into Download Mode. Connect your Android handset to the computer after following the instructions to begin automatically analyzing your device.

- Step 4: The program will provide a list of all recoverable files, organized by file type. To preview the file, highlight it. Choose the files you wish to recover and then click “Recover” to save all the data you want to restore.

safe & secure
Part 3. How to Prevent Bricking Your Phone
How to prevent a device from “bricking” itself and how to repair it if it does The delay is set by the MCU, but it should be long enough to allow the debug adapter to connect to the Vivo G2 device and halt it before the Vivo G2 device disables itself.
Here are some things to remember to prevent your device from bricking:
- Avoiding unofficial firmware updates: Installing unapproved OS firmware on your phone will most certainly violate any manufacturer’s warranty you have on it. Read the installation instructions for your unique phone model thoroughly and then carefully follow them, taking time and patience.
- **Being cautious when rooting or jail breaking:**Rooting and Jail breaking disables parts of the operating system’s built-in security mechanisms, which are part of what makes the operating system safe, and your data protected from exposure or damage.
- **Install an antivirus application on your device:**Mobile devices increase the danger of data leaks and breaches. As a result, antiviral software is beneficial on mobile phones. Mobile Device Management is an excellent choice for virus protection on your mobile device.
- Backup your phone data regularly: Backing up your phone safeguards your data in the event that you lose it, it is stolen, or it no longer works. When it comes time to replace your phone, having a backup makes it simple to restore your data to the new device. Furthermore, backing up your phone allows you to organize your data so that it is easier to access.
- Avoid installing apps from untrusted sources: Apps installed from unauthorized sources make your device and personal data more exposed to dangers such as Ransomware. So you should be wary of where you download applications.
Conclusion
It is certainly upsetting when your gadget bricks, but you may attempt the solutions listed above to resolve the issue. Meanwhile, if you want to solve the problem quickly and easily, you can try Wondershare Dr.Fone. It can not only help you repair your Android smartphone, but it can also help you extract data from a bricked device, recover data, and many more Android device solutions!
safe & secure
Simple Solutions to Fix Android SystemUI Has Stopped Error For Vivo G2
In this article, you will learn possible causes of Android SystemUI stopping error and 4 methods to fix this issue. Get Dr.Fone - System Repair (Android) to fix Android SystemUI stopping more easily.
Android SystemUI isn’t responding or Android, unfortunately, the process com.android.systemui has stopped is a not a rare error and is observed in all Android devices these days. The error usually pops up on your device while you are using it with a message on the screen saying Android. Unfortunately, the process com.android.systemui has stopped.
The Android SystemUI isn’t responding error message may also read as “Unfortunately, SystemUI has stopped”.
Android SystemUI error can be very confusing as it leaves affected users with only one option, i.e., “OK”, as shown in the images above. If you click on “OK” you will continue to use your device smoothly, but only until the SystemUI isn’t responding error pops-up on your main screen again. You may restart your device, but the Android SystemUI has stopped the problem continues to annoy you until you find a permanent solution for it.
If you are also among the various users who see Android, unfortunately, the process com.android.systemui has stopped error, then do not worry. SystemUI isn’t responding. Error is not a serious issue and can be tackled easily by carefully examining the reasons behind the problem.
Looking for suitable solutions to fix Android SystemUI has stopped error? Then read on to find out all about Android SystemUI isn’t responding error and the most effective ways to fix it.
Part 1: Why Android SystemUI Has stopped happens?

Android device owners would agree that OS updates are very helpful as they fix the bug problem and improve the overall working of your device. However, sometimes these updates may be infected due to which they do not download and install properly. A corrupted OS update may cause Android; unfortunately, the process com.android.systemui has stopped error. All Android updates are directly designed around the Google App, and thus, the problem will persist until the Google App is also updated. Sometimes, even the Google App update may cause such a glitch if it is not successfully downloaded and installed.
Another reason for the Android SystemUI isn’t responding error to occur, maybe because of flashing a new ROM or due to improper firmware update installation. Even when you restore the backed up data from cloud or your Google Account, such Android, unfortunately, the process com.android.systemui has stopped error may show up.
It is not possible to say for sure which one of the above-mentioned reasons is causing your device to show Android SystemUI is not responding error. But what we can do is move on to fixing the Android SystemUI by following any one of the three methods given the following segments.
Part 2: How to fix “com.android.systemui has stopped” in one click
As we’ve learned that Android system UI isn’t responding issue is primarily because of the Android OS updates not installed properly or were corrupted. Hence, there comes the need for a powerful Android system repair tool that can help you rectify such annoying errors.
To serve the purpose, we would like to introduce, Dr.Fone - System Repair (Android) . It is one of its kind of applications and is highly recommended as it has a proven success rate to resolve almost all Android system issues.
It’s now time to understand how to fix Android ‘unfortunately, the process com.android.systemui has stopped’ or in simple words, Android system UI isn’t responding.
Note: Before we proceed to Android repair, please ensure to make a backup of all your data . This is because the Android repair process may wipe out all the data on your device to fix the Android OS issues.
Phase 1: Connect and prepare your Vivo G2
Step 1 – Download the Dr.Fone toolkit over your PC. Install it and launch it over. Opt for the “System Repair” tab from the main screen and get your Vivo G2 connected to the PC.

Step 2 – You need to select “Android Repair” from the left panel and then hit the ‘Start’ button.

Step 3 – Next, you need to select the correct information about your device (i.e., brand, name, model, country/region, and carrier details). Check the warning down below and hit “Next”.

Phase 2: Boot Android in ‘Download’ mode to perform the repair.
Step 1 –You’re now required to boot your Android in Download mode. Here’s what you need to do to put your Android in DFU mode.
If your Android has a Home button:
- Turn off your device. Hold down “Volume Down + Home + Power” buttons altogether for about 10seconds. Let go of the buttons afterward and hit the Volume Up to boot in download mode.

In case your Android has no Home button:
- Turn off your device. Hold down “Volume Down + Bixby + Power” buttons altogether for about 10seconds. Let go of the buttons afterward and hit the Volume Up to boot in download mode.

Step 2 – Once done, hit “Next” to initiate the downloading of the firmware.

Step 3 – As soon as the download completes, the Android repair will automatically be started by the program.

Step 4 – In a just a matter of a few minutes, your Android system UI isn’t responding issue will be resolved.

Part 3: Uninstall Google updates to fix Android SystemUI issue
All Android SystemUI isn’t responding errors are circled the Google App as the Android platform is heavily dependent on it. If you have recently updated your Google App and the Android, unfortunately, the process com.android.systemui has stopped error keeps popping up at regular intervals, make sure you uninstall Google App updates as soon as possible.
Follow the steps given below to fix the Android SystemUI has stopped issue by rolling back the Google App updates:
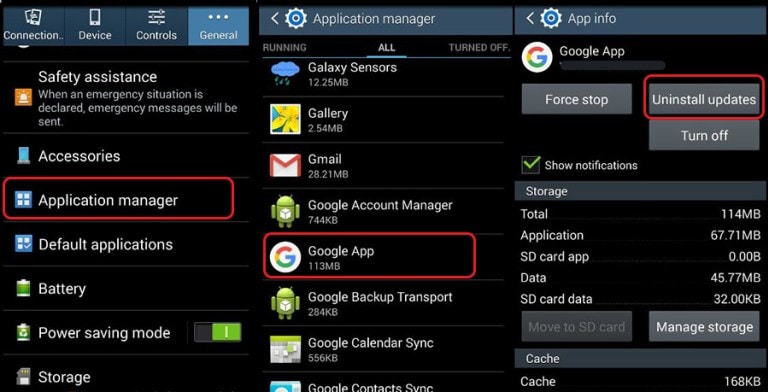
- Visit “Settings” and select “Apps” or “Application Manager”.
- Now swipe to view “All” Apps.
- From the list of Apps, select “Google App”.
- Finally, tap on “Uninstall Updates” as shown hereunder.
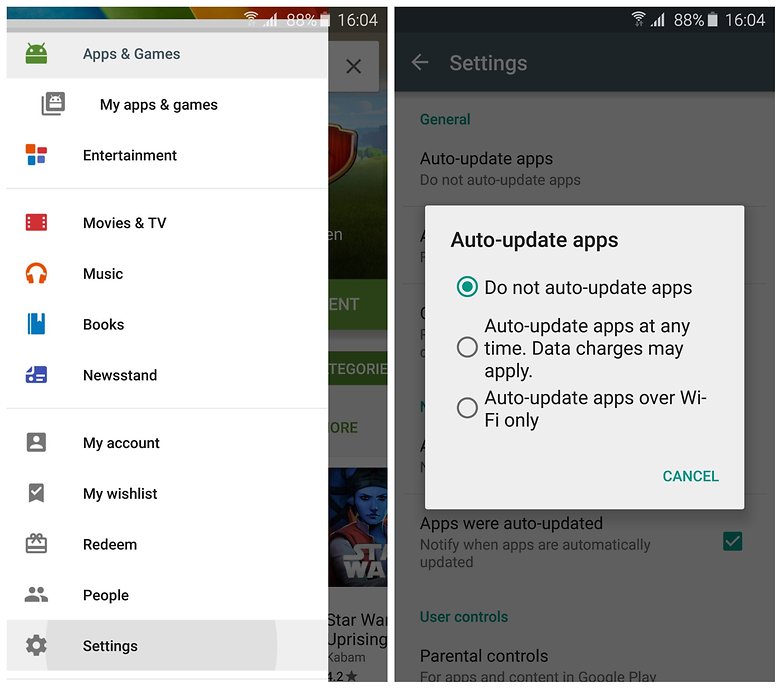
Note: To prevent the Android SystemUI isn’t responding error to occur in the future, do not forget to change your Google Play Store settings to “Do Not Auto-Update Apps”.
Part 4: Wipe Cache partition to fix Android SystemUI error
Android, unfortunately, the process com.android.systemui has stopped error can also be fixed by clearing your cache partitions. These partitions are nothing but storage locations for your modem, kernels, system files, drivers, and built-in Apps data.
It is advisable to clear Cache portions regularly to keep your UI clean and free of glitches.
Android SystemUI isn’t responding error can be overcome by clearing the cache in recovery mode.
Different Android devices have different ways to put it in recovery mode. Refer to your device’s manual to enter the recovery mode screen on your device and then follow the steps given below to fix Android; unfortunately, the process com.android.systemui has stopped error by clearing the cache partition:
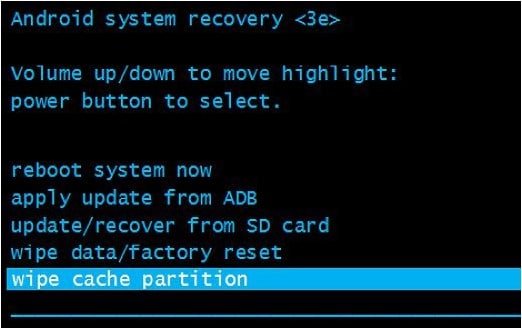
- Once you are the recovery mode screen, you will see several options as shown in the screenshot.

- Use the volume down key to scroll down and select ”Wipe cache partition” as shown below.

- After the process is completed, select “Reboot System” which is the first option in the recovery mode screen.
This method will help you de-clutter your device and erase all the clogged up unwanted files. You may lose App related data too, but that is a small price to pay to fix the Android SystemUI isn’t responding error.
If the Android SystemUI has stopped the problem persists, there is only one way out. Read on to find out about it.
Part 5: Fix Android SystemUI error by factory reset
Factory Resetting your device to fix Android; unfortunately, the process com.android.systemui has stopped error is a desperate measure and should be the last thing to do on your list. Take this step only when the above mentored two techniques fail to work.
Also, make sure you take a back-up of all your data and contents stored in your Vivo G2 on the cloud, Google Account or an external memory device because once you perform a factory reset on your device, all media, contents, data and other files are wiped out, including your device settings.
Follow the steps given below to factory reset your device to solve the Android SystemUI isn’t responding problem:
- Visit “Settings” by clicking the settings icon as shown below.

- Now select “Backup and Reset”.

- In this step, select “Factory data reset” and then “Reset Device”.
- Finally, tap on “ERASE EVERYTHING” as shown below to Factory Reset your device.

After the factory reset process is completed, your device will automatically restart, and you will have to set it up once again.
The whole process of factory resetting your Vivo G2 might sound tedious, risky, and cumbersome, but it helps to fix the Android SystemUI has stopped error 9 out of 10 times. So, think carefully before using this remedy.
Android SystemUI isn’t responding or Android, unfortunately, the process com.android.systemui has stopped error is commonly seen by users on their devices. It is not a random error and is linked to either the software, Google App, cache partition, or data stored in the Vivo G2 device. It is fairly simple to deal with this issue as all you need to do is install or roll back your Android OS update, uninstall Google App updates, clear cache partition, or factory reset your device to clear all data, files, and settings stored in it. The methods listed and explained above are the best ways to fight the problem and to prevent it from troubling you in the future. These methods have been adopted by affected users all over the world who recommend them because they are safe and involve minimum risks as compared to other tools to solve the Android SystemUI has stopped error. So go ahead and try them now!
Also read:
- [New] Crafting Cinematic Experiences in W11 Interface
- [New] The Art of Combining Multiple iPhone Photos
- [Updated] Action Sequence Showdown New Era GoPro Hero5 Black Vs Old Guard Hero4 Silver
- 8 Solutions to Solve YouTube App Crashing on Xiaomi 13T | Dr.fone
- Calls on Vivo Y27 4G Go Straight to Voicemail? 12 Fixes | Dr.fone
- Efficient Techniques for Converting AIFF Files Into MP3 Format
- Fix Unfortunately Settings Has Stopped on Google Pixel Fold Quickly | Dr.fone
- Fixes for Apps Keep Crashing on Realme GT 5 Pro | Dr.fone
- In 2024, How to Change Location on TikTok to See More Content On your Huawei P60 | Dr.fone
- Troubleshooting Steps for Successful Age of Empires IV Setup via Microsoft Marketplace
- Why Your Poco X6 Pro Screen Might be Unresponsive and How to Fix It | Dr.fone
- Title: How To Unbrick a Dead Vivo G2 | Dr.fone
- Author: Ariadne
- Created at : 2024-10-18 17:36:43
- Updated at : 2024-10-22 17:10:50
- Link: https://howto.techidaily.com/how-to-unbrick-a-dead-vivo-g2-drfone-by-drfone-fix-android-problems-fix-android-problems/
- License: This work is licensed under CC BY-NC-SA 4.0.