
Motorola Moto G13 Not Receiving Texts? 10 Hassle-Free Solutions Here | Dr.fone
Motorola Moto G13 Not Receiving Texts? 10 Hassle-Free Solutions Here
If you are using an Motorola Moto G13, you might have encountered the issue of not receiving texts. This issue can be quite frustrating, as it prevents you from staying connected with your friends and family. However, there are several ways to fix this issue and get your texts back up and running. In this article, we will show you some of the best solutions to fix the issue of not receiving texts on Motorola Moto G13.
It is very common that the Android messaging app is not working on many devices especially broken devices . People often encounter this issue in Motorola Moto G13 phones, even the latest ones.
You might find lots of people online stating I can’t receive text messages on Android. And usually, people don’t find a legit solution for this issue. If you are also experiencing this sort of issue on your Motorola Moto G13s, then don’t panic. We have a series of methods that can supposedly fix the problem. But at first, we will learn what the main reasons this problem arises are and how do you know that it is consistent not some random error.
Take a look at the sections below, and you will learn all possible things regarding the messaging application on your phone.
Part 0. Symptoms and Causes of Android Not Receiving Texts
The most common symptoms that would clarify that your Android messaging service is not working right are given below:
- You will stop receiving any texts all of a sudden.
- You can’t send or receive a text message.
- Whenever you try to text someone, the message sent failed notification pop up on the screen.
The reasons why your Android is not receiving texts are given below:
- Network issue
- Insufficient memory
- Mis-configuration of device settings
- Switching of devices
- A glitch in the messaging app
- Software issue
- Carrier problem with the registered network.
Apart from all these reasons, some additional causes are also there that can lead to this issue.
Part 1: One-click to Fix Android not Receiving Texts by Android System Repair
If you are not willing to waste your precious time fixing the message problem, then you can switch to the top-rated Android repair tool, i.e., Dr.Fone - System Repair (Android) . With this software, you can easily fix issues like the black screen of death, crashing apps, can’t receive text messages on Android, or failed download. If you have no idea what is causing the message app problem, you can simply think of repairing the whole Android system.
You surely need to try the software as it can perform the following tasks:
Dr.Fone - System Repair (Android)
Android repair tool to fix Android Not Receiving Texts
- Fix the Android system without technical knowledge.
- Complete Android repair tool for all brands and models.
- Simple and Easy Repair procedure
- 100% guarantee that the problem will be fixed.
- Also available for iOS devices.
3981454 people have downloaded it
You can download and install the software on your system and use it to fix any issue. Then follow the steps given below:
Step 1: Launch the application and choose the System Repair option from the main interface. Connect your Motorola Moto G13 to the computer and choose the Android Repair mode, and hit the Start button to begin.

Step 2: You will have to provide information about your device, including the brand, name, model, country, and carrier. In between, you will be notified that your device repair might erase the existing data of your device.

Step 3: Agree with the conditions and hit the Next button. The software will download the firmware package automatically. It might take a while to finish the download, and when it is finished, the repair process will be initiated automatically.

It won’t take long, and your Motorola Moto G13 will be repaired. Now you will be able to receive and send text messages without any hassle.
Part 2: Remove and Insert the SIM
The easiest thing that you can try if your Motorola Moto G13 is not receiving any text messages is because the SIM is not inserted right. If your SIM card is inserted wrong, then it is obvious you can’t receive text messages on Android. Simply take out the SIM card, see how it must be inserted, and do it correctly. Once the SIM is inserted in the right way, you will receive the pending text messages immediately unless there is another issue preventing it.
Part 3: Check Network Connection
Another simple method that you can try if you are not receiving text messages on Motorola Moto G13 phone is to check your network connection. Usually, you can see the bar on the top of the screen. Maybe the problem exists because you have no signal strength at the moment.

Part 4: Consult your Carrier about the Data Plan
Maybe you are unable to get messages on your Motorola Moto G13s because your existing data plan has expired. You can directly contact your Carrier about the issues where your Motorola Moto G13 is not receiving texts. If your plan has expired, then you might have to renew it immediately. If not, then try out other fixes to resolve this issue.
Part 5: Try the SIM card in Another Phone or Slot
Sometimes, people complain that Motorola Moto G13 is not receiving texts from iPhone, and it might be because of the SIM card issue. So, the best thing you can try is to remove the SIM from your current phone and insert it into another phone.
When you are offline the message is saved on the server and just about when you get online, the text messages are delivered. If it is the SIM issue, then you will not get the message unless you contact your network operator.
Part 6: Clear the Cache of Messaging App
In smartphones, the memory space often gets filled up with cache. And not everyone remembers that they have to clear the cache from time to time. The accumulated cache can also lead to this issue. So, if your Android messaging app is not working, you have to clear the cache memory.
Step 1: Open the Settings and go to Apps. Find the Messages app from the list and tap to open it. There you will see the storage occupied by the app along with the cache.
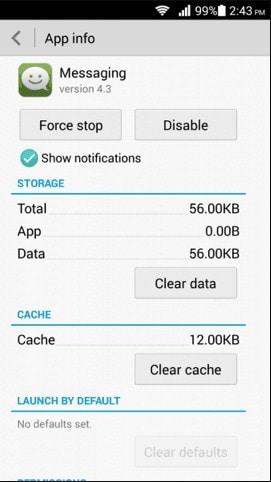
Step 2: Click on the Clear Cache button and wait as the Motorola Moto G13 device free up the memory of your device.
Once the cache is cleared, you can also clear the data if you want to and you’ll instantly receive the text messages on your phone.
Part 7: Delete Useless Messages to Free Up Space
Sometimes, if you are not receiving text messages on Motorola Moto G13, it means that you need to clean up the clutter of useless messages from your phone and SIM both. The phone messages can be deleted directly from your phone. But the SIM card messages needed to be deleted separately. The SIM cards don’t have enough memory to hold plenty of messages. Therefore, once the storage is full, you will stop receiving messages entirely.
Step 1: Open the messages app and open settings. Look for an option that says “Manage SIM Card Messages”. Sometimes, you can find this option under Advanced Settings.
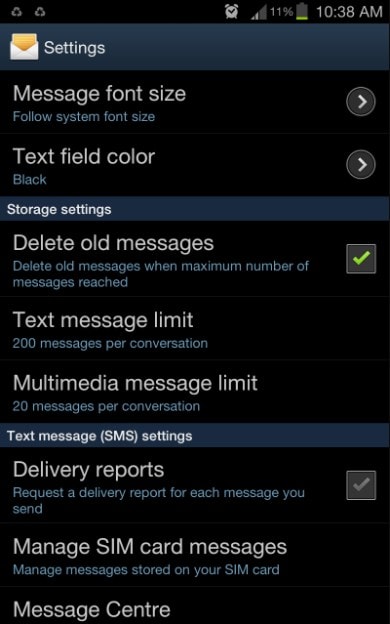
Step 2: There, you will see the existing messages on the SIM. You can either delete all the messages or perform a selective deletion to free up space.
Part 8: Try a Third-party Messaging App
If you can’t receive messages on your default app, then you can try installing a third-party messaging app. Nowadays, most people use social media messaging apps like WhatsApp, Skype, etc. for messaging. So, if somehow, the Android is not receiving texts, then the new apps can help you to send and receive messages with a non-native network.
Further Reading: 15 Best Free Chat Apps in 2022. Chat Now!
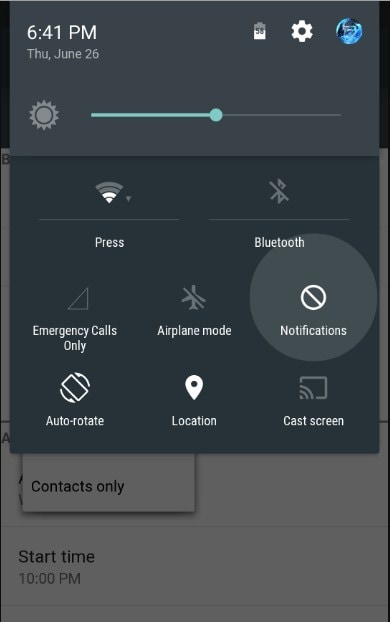
Part 9: Ensure your Phone is Fully Charged
Another possible fix to this problem might be your phone’s battery percentage. Sometimes, when the Android is in power saving mode, it disables the default apps too. As a result, you can’t even receive text messages on Android. So, when you plug in the charger, the power saving mode will be disabled, and you will get your text messages.
Part 10: Ensure It’s Not An iMessage From iPhone
If the Motorola Moto G13 phone is not receiving texts from iPhone, then this might be a different issue. Usually, there is an option on the iPhone where they can send texts as iMessage and simple messages. If the iPhone user sends the text as iMessage, then it will not show up on the Android device. To resolve this, you have to follow the steps below:
Taking the iPhone in hand makes sure that you are connected to a network. Open settings and scroll to look for the Message option. Toggle the bar next to the iMessage option to turn it off.
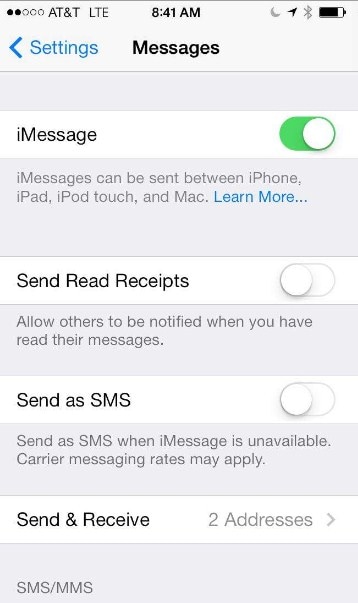
If the FaceTime option is also on, you might have to deactivate that too to send messages and calls as regular ones.
Part 11: Update Your Android
Updating the operating system to the latest Android version can fix some system errors which may cause the “Android not receiving texts” issue because the latest version always brings a better user experience and fix the know bugs.
Conclusion
Now you know several methods that can work if the Android messaging app is not working. If you experience this kind of issue with your Motorola Moto G13, then you are most likely to resolve them with these fixes. If none of the solutions seem to fix the issue, then you can take the help of Dr. Fone - System Repair (Android) feature. With this tool, you can resolve all kinds of working issues on your device.
Fix the Error of Unfortunately the Process.com.android.phone Has Stopped on Motorola Moto G13
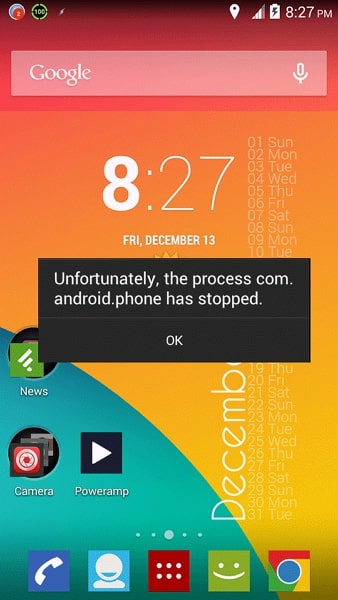
Nowadays, smartphones are integral to life. They serve as your communication lifeline and powerful personal assistant. However, it can be frustrating when a sudden error disrupts our phone’s functionality. One common error Android users encounter is the “Unfortunately, The process.com.android.phone has stopped” error. Fear not if you have come across this error message on your Motorola Moto G13.
This beginner’s guide is here to help you understand the causes of this problem. It will also provide you with practical “unfortunately the phone has stopped solutions.”
Part 1: Learn Why Unfortunately the process.com.android.phone Has Stopped
The error message “Unfortunately, the process com.android.phone has stopped“ typically appears on Android devices when there is an issue with the Phone app. Issues with underlying processes responsible for handling phone-related functions are also a cause.
It can prevent you from making or receiving phone calls, accessing contacts, or using other phone-related features. Following are some of the possible reasons why you may encounter this error:
App or System Update
When you update your device’s OS or the Phone app itself, it is possible to encounter bugs or compatibility issues. These issues can lead to the Phone app crashing and displaying this error message. Sometimes, the updated software may not work with the existing configurations of the Phone app. It results in instability which causes this error.
App Cache/Data Corruption
The Phone app relies on cached data and stored settings to function properly. If the cache or data of the app becomes corrupted, it can cause the Phone app to malfunction. The reasons include interrupted app installations or updates, improper shutdowns, or software conflicts. As a result, you may see the error message indicating that the process com.android.phone has stopped.
Insufficient System Resources
Android devices need sufficient memory (RAM) and processing power to run apps smoothly. If your device is running low on memory or processing capacity, it may struggle to handle the Phone app and its processes. It can lead to crashes and the error message. Running many resource-intensive apps at the same time also causes this issue. Other reasons include too many background processes that contribute to this error.
Conflicting Third-Party Apps
Third-party apps installed on your device can sometimes conflict with the Phone app. These conflicts can occur for various reasons, such as incompatible app versions. The software bugs within the third-party apps or configurations can also clash with the Phone app. Such conflicts can disrupt the normal operation of the Phone app. The result of all this trigger the error message.
Software or Firmware Glitches
Software glitches or firmware issues can occasionally occur in Android devices. These glitches can affect the functioning of system processes, including the Phone app. They may arise from programming errors and system inconsistencies. Sometimes unexpected interactions between different OS components can also lead to this error.
Part 2: 100% Working Fixes To Fix Unfortunately the process.com.android.phone Has Stopped
Having been denied access to your Phone can cause a lot of issues. Luckily, many simple fixes to the “process.com.android.phone has stopped“ error exist. These solutions have worked for many users, and by following them, you may be able to resolve the issue too. Given below are the top 8 fixes to resolve this error and restore your device’s phone functions:
Fix 1: Restart/Reboot your Android Device
One of the simplest yet effective solutions to tackle the “Unfortunately, the process com.android.phone has stopped“ error is to reboot your Motorola Moto G13. Restarting your device can often resolve temporary software glitches or conflicts. This fix requires no technical expertise.
So, it is worth trying before moving on to more complex solutions. Follow the guide below to restart your Motorola Moto G13 and potentially fix the error:
- Step: Long-press your Motorola Moto G13’s “Side” key and wait for the power menu to appear. Here, select “Restart” to initiate the reboot of your phone.

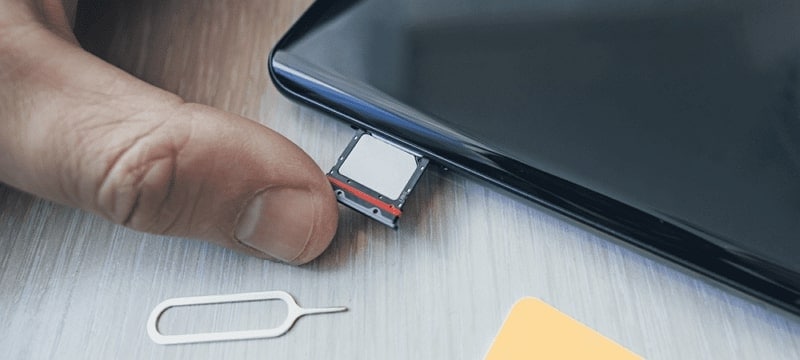
Fix 2: Re-insert the SIM Card
There is also a chance that the reason you are seeing this error message relates to the SIM card. A loose or improperly inserted SIM card can cause disruptions in the phone’s communication functions. As a result, you see the “Unfortunately, the process com.android.phone has stopped“ error.
To fix this error, you can remove the SIM card and then re-insert it. If the issue is actually related to a SIM card, the issue will get resolved after you resolve the problem.
Fix 3: Clear the Cache and Data of the Phone App
The “Unfortunately, the process com.android.phone has stopped“ error is connected to the Phone app. In this situation, clearing the cache and data of the Phone app itself can often resolve the issue. This fix focuses on removing any corrupted or conflicting data within the app.
Once the corrupted data is gone, it will restore the Phone app to proper functioning. Here is how to clear the cache and data of the Phone app on an Android device:
- Step 1: Find the Phone app on your Motorola Moto G13 and long-press its icon. A small menu will pop up where you need to select “App Info.”

- Step 2: It will lead you to detailed information about the Phone app. Here, press “Storage,” and following that, you will see the “Clear Cache” and “Clear Data” options. Use them in the same order to clear the cache and data of the Phone app.

Fix 4: Disable Automatic Updates Feature
In some cases, this error may occur due to conflicts or compatibility issues with the automatic app updates feature. The automatic update on your Motorola Moto G13 keeps your apps updated. Disabling this feature temporarily can help resolve the problem.
As a result, you will be able to use the Phone app without interruptions. To disable the automatic updates option on the Google Play Store, you can use the following steps:
- Step 1: Navigate to the Google Play Store app on your Motorola Moto G13 and launch it. Next, tap on the profile icon in the screen’s top right corner. From the options presented, select “Settings.”
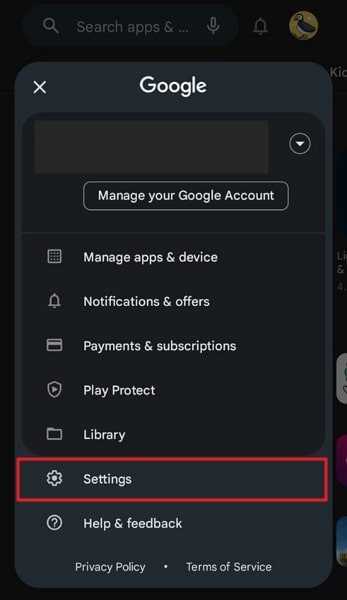
- Step 2: In Settings, press “Network Preferences” to expand the option. Now, open the “Auto-update apps” settings and enable the “Don’t auto-update apps” option.

Fix 5: Clear All Apps Cache and Data
When dealing with this error, clearing the cache and data of all apps on your Motorola Moto G13 can also help. Doing this will remove any corrupt or conflicting data that might be causing the issue. This fix targets the overall app ecosystem on your device.
It intends to ensure a clean slate and potentially resolve the error. Use the following guide to clear the cache and data of all apps:
- Step 1: Access your Motorola Moto G13’s Settings and tap the “Apps” option. It will lead you to all the apps running on your phone. Here, select an app to see detailed app info.

- Step 2: On the app info screen, scroll down and press “Storage.” Now use “Clear Cache” to clean the app’s cache and “Clear Data” to erase the app’s data. Repeat the same process for all the apps installed on your device.

Fix 6: Clear SIM Toolkit Cache and Data
It is worth considering the SIM Toolkit is a potential source of the problem. The SIM Toolkit is an app that provides functionality related to your SIM card. Its functions include accessing value-added services and managing mobile network settings. Clearing the cache and data of the SIM Toolkit app can help resolve this issue. The steps you need to clear the cache and data of this app are the following:
- Step 1: On your Motorola Moto G13, find the SIM Toolkit app. After finding it, press and hold its icon until a short menu appears. Choose “App Info” from the available options to access its settings.
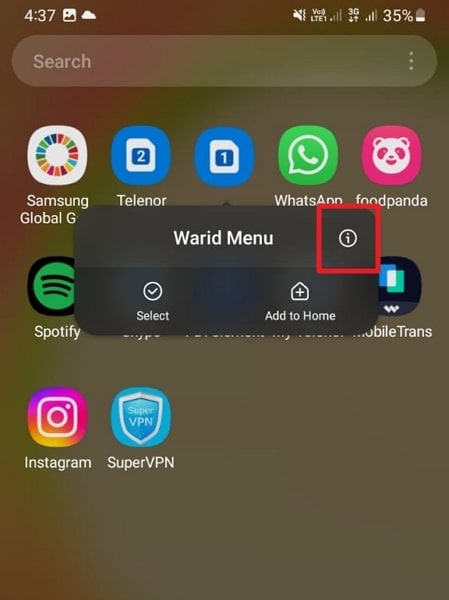
- Step 2: Now, you need to tap “Storage” to proceed. On the next screen, first, tap “Clear Cache” to clean the cache, and later press “Clear Data.”

Fix 7: Perform Factory Reset
If all previous fixes have been unsuccessful, performing a factory reset is also an option to resolve this issue. It is a drastic measure that can potentially address underlying software issues. However, it’s important to note that a factory reset will erase the entire data and settings of your device.
So, it’s crucial to back up your important files before proceeding with this fix. By doing so, you can restore your device to its original state and eliminate the error. Use the detailed guide described below to factory reset your Motorola Moto G13:
- Step 1: Start by launching the Settings app and selecting “General Management.” Here, choose “Reset,” and following that on the next screen, tap “Factory data reset.”

- Step 2: After tapping “Factory data reset,” hit the “Reset” option. Next, enter your Motorola Moto G13 PIN to confirm the process, and use “Delete All” to start the factory reset process.

Fix 8: Try Wondershare Dr.Fone - The Best and Most Reliable Android System Repair Tool
It must be a frustrating experience to try one solution after the next and not be able to resolve the issue. In such situations, the best thing you can do is find a tool that can resolve all Android system problems. While there are many options available online, not all are great. The best Android system repair tool currently available is Wondershare Dr.Fone.
Using Wondershare Dr.Fone, you can fix issues like “Unfortunately, the process.com.android.phone has stopped,” Play Store not working, frozen phone, and many more. It is a specialized tool for resolving Android system issues in Motorola Moto G13 devices with support for all modern Motorola Moto G13 phones.
Key Features of Wondershare Dr.Fone
- You do not need any technical skills to fix your Android system issues when using Dr.Fone.
- It has the highest success rate in fixing complex software issues related to Android OS.
- Wondershare Dr.Fone supports over 1000 Android models for system repair and can fix most issues within minutes.
Steps To Fix the process.com.android.phone Has Stopped via Wondershare Dr.Fone
All you need to fix your Motorola Moto G13’s system issues is a computer with Wondershare Dr.Fone installed and your device connected to it. Here is the simplified process of resolving most Android system issues in a matter of minutes:
- Step 1: Link Your Android Device with Wondershare Dr.Fone
To start, connect your Motorola Moto G13 to your computer. Launch Wondershare Dr.Fone on your computer screen and click on “Toolbox,” located in the left sidebar. From the options available, select “System Repair” and follow it by clicking “Android” on the next screen.
- Step 2: Enter the Required Details of Your Motorola Moto G13
Click on “Start” to initiate the process, and following that, you will be prompted to provide specific details about your Motorola Moto G13. These details include the “Brand,” “Name,” “Model,” “Country,” and “Carrier.” Afterward, tick the box that says, “I agree with the warning, and I am ready to proceed,” and click “Next.”

- Step 3: Resolve The process.com.android.phone Has Stopped Issue
The subsequent step involves entering Download Mode on your device, following the on-screen instructions provided by the software. Once your device is in Download Mode, this Android repair toolkit will proceed to download and install the relevant firmware. Now, select “Fix Now” and confirm the repair of your Motorola Moto G13 by entering the code “000000.”

 safe & secure
3,595,007 people have downloaded it
Conclusion
To sum the article up, encountering the frustrating error message “Unfortunately, the process com.android.phone has stopped“ can be daunting. However, with the right knowledge and tools, resolving this issue becomes achievable. Throughout this guide, we have explored various troubleshooting methods. These included clearing the cache, rebooting the Motorola Moto G13 device, and even performing a factory reset.
While there are many options to fix this error, only one is an excellent choice: Wondershare Dr.Fone. With its powerful Android system repair feature, Wondershare Dr.Fone is a reliable solution to resolve this error.
6 Solutions to Fix Error 505 in Google Play Store on Motorola Moto G13
In case you are receiving the error code 505 while downloading an application from Google play store and have no clue what is it, then this is the right article for you. In this article we are covering the reasons behind the occurrence of Google play error 505. Not only that, we are also providing 6 solutions to fix the error code 505. Usually, this error is seen with Android 5.0 Lollipop version and occurs at the time when you try to install the already downloaded application making it hard to run the app.
Such an error is a kind of permission error. That is, in case you have two similar kinds of applications such as banking apps and both looking for similar kind of permission, causes conflict error named as error 505.
The occurrence chance is more in the old operating systems, 4 KitKat, Android version 4. Let us then proceed to know more about this error 505.
Part 1: Reasons for Google Play error 505

As per the report by some users, error 505 occurs in certain apps such as Weather App, SBI, ITV, Adobe Air 15, We Chat etc.
To have the right idea about the problem, we have listed all the reasons of it occurrence below:
- Google play store is not updated or refreshed (Causes the error during the downloading process)
- Due to installation of an outdated version (In case your Android version is outdated may result in error in the installation process)
- Cache memory(Is the redundant data occurs due to search history)
- Application is not compatible with the Android OS (If the app you are downloading is not the updated may cause error)
- Adobe air app
- Data crash (Many time app or Google play store crashed crashes after downloading it, reason may be some bugs, so many apps are open, less memory etc.)
Now that we know the reasons, let us also learn about the solutions that will guide you to resolve the error code 505.
Part 2: 6 Solutions to fix error code 505
Any error that occurs during downloading or installation process not only hinders with the new app but also takes a large amount of our time to solve the issue. To check that, let us go through the 6 solutions one by one.
Solution 1: One click to make error code 505 disappear
The most common cause for error code 505 pop-up is that Android system files that underpin the Google Play module are corrupted. To make error code 505 disappear in this condition, you should have your Android system repaired.
Dr.Fone - System Repair (Android)
One click to repair Android system and make error code 505 disappear
- Fix all Android system issues like error code 505, error code 495, error code 963, etc.
- One click to fix error code 505. No technical skills required.
- Supports all the new Motorola Moto G13 devices like Galaxy S8, S9, etc.
- Easy-to-understand instructions provided on each screen.
4,999,459 people have downloaded it
Now, you just need to follow these Android repair steps to fix error code 505:
Note: Android repair needs to flash the system firmware, which may erase existing Android data. To prevent data loss, back up all the important data from Android to PC .
Step1: Download the Dr.Fone - System Repair (Android) program , install and launch it. The following interface will pop up.
Step2: Select the “Android Repair” among the 3 tabs, connect your Android to PC, and click “Start”.
Step3: Choose the correct device details from each field, confirm them and continue.
Step4: Boot your Android in download mode, then start downloading the firmware of your device.

Step5: After the Motorola Moto G13 device firmware is downloaded, the tool will start repairing your Android.
Step6: When your Android is repaired, the error code 505 will disappear.

Solution 2: Check whether Download Manger is ON or not
Many times download manager is set to disable due to which you are not able to download or install the app. So, it is required to make a check whether the download manager is set on or off. So that your installation process will work properly. The process to enable the download manager is as follows.
>Go to Settings
>Select the Application Manger or App (Option depends upon the Motorola Moto G13 device)
At the top, an option will appear
>Swipe right till you locate Download manager at top of the screen of the Motorola Moto G13 device
>Then Select Enable

Enabling download manager to give permission to the Motorola Moto G13 device to start the download or installation process.
Solution 3: Updating to the latest version of OS of your Motorola Moto G13
Working with an old operating system is ok, but many times old version also creates some problem and is the main reason behind the occurrence of any bug or error. So, updating the older version act like a rescue to get rid of any such issue or bug. The Process of updation is quite simple; you just need to follow the below steps and your device is ready to get updated to the latest version. Steps are:
- >Go to Settings
- >Select about Phone
- >Click on System Update
- >Check for updates
- >Click on Update
- >Need to click on Install (if any update is available)

Solution 4: Clearing the cache memory from Google services Framework and Google play store
While browsing data online or through Google play store some cache memory get stored for the fast access to the pages. Below mentioned simple steps will help you in clearing out the cache memory from Google services framework and Google play store.
Process to clear the Cache memory for Google Services Framework
- >Go to Settings
- >Select Applications
- >Click on Manage Applications
- >Click to select ‘ALL’
- >Click on Google services framework
- >Select ‘Clear data and clear cache’
That will remove the cache memory of your Google services framework
Steps to Cache memory of Google Play Store
- >Go to Settings
- >Applications
- >Manage Applications
- >Click to select ‘ALL’
- >Select Google Play store
- >Clear data and clear cache
It will clear the cache of Google play store

Clearing the cache memory remove the extra temporary memory, thus free up space for the further installation process.
Solution 5: Reinstalling play store Updates
The reason behind the installation error code 505 might be Google play store updates.
Due to continuous updation of new apps and services Google Play store used to be flooded with so many updates or sometimes does not updated properly. That sometimes caused the problem in dealing with app installation. Resolving the issue is important to make your play store ready for future updation and installation.

- >Go to Settings
- >Visit Application Manager or Apps
- >Select Google Play Store
- >Click on Uninstalling Updates
- >A Message will appear ‘Change play store app to factory version’- Accept it
- >Now Open Google play store>It will refresh the updates within 5 to 10 minutes(So you need to keep your internet connection on while Google play store is updating its store for new updates.)

Solution 6: Third party App
In the case, error 505 occur due to the installation of two or more apps with duplicate permission of data, as many times we use to install two similar kind of app that creates the situation where both seeking out for somewhat similar permissions for the installation. The manual finding is a long and tiring process. Then you can take the assistance of ‘Lucky Patcher App’ to find out which app is creating the conflict. This app will assist you in finding out the duplicity if any and then modifying it. Through this app, once you will find out which particular app is causing the conflict, then you can delete that conflicting app from your phone so that problem of error code 505 gets sort out.
Download link: https://www.luckypatchers.com/download/

Note: If still, you are in the state of trouble to solve the issue of error code 505 then Google Play help center is here to look out all troubles related to app store and its service. You can check out the details by visiting the following link:
https://support.google.com/googleplay/?hl=en-IN#topic=3364260
Or call them at their call center number regarding the issue.

Bonus FAQ about Google Play error
Q1: What is a 505 error code?
The HyperText Transfer Protocol (HTTP) error 505: HTTP Version Not Supported response status code means that the HTTP version used in the request is not supported by the server.
Q2: What is a 506 error?
The 506 error code is a frequent error when operating the Google Play Store. You will sometimes see this error code when you are downloading an app. The app may seem to be downloading just fine when suddenly, near the end of the installation, an error occurs, and a message pops up saying, “App could not be downloaded due to an error 506.”
Q3: How to fix the 506?
Solution 1: Restart your device which can help solve most problems.
Solution 2: Remove the SD card safely.
Solution 3: Correct date and time if it is wrong.
Solution 4: Add your Google Account again.
Solution 5: Clear Google Play Store data and cache.
However, sometimes the five simple couldn’t work anymore. A system repair software can be helpful quickly. We really recommend the Dr.Fone - System Repair (Android) , only a few minutes, the error will be fixed.
Conclusion
Not being able to download or install the app is very frustrating and time-consuming also. Therefore, in this article, we went through the reasons behind the occurrence error code 505 as well as resolving the issue by following five effective methods. I hope that you would be able to sort out the error 505 by following above methods thus would be able to install the application without further delay.
Also read:
- [New] Minimalist OBS Adjustments for Under-$500 PCs
- 2024 Approved Perfect Your YouTube Clips Essential Editing Techniques Unveiled
- Automate Daily Incremental File Backups: A Step-by-Step Guide
- Cellular Network Not Available for Voice Calls On Honor Magic V2 | Dr.fone
- Full Solutions to Fix Error Code 920 In Google Play on Realme 10T 5G | Dr.fone
- How do I play MKV movies on Samsung Galaxy XCover 6 Pro Tactical Edition?
- How to Bypass FRP on Meizu 21 Pro?
- Quick Download: Installing Thrustmaster T150 Racing Wheel – Driver Setup Guide
- Top 4 Android System Repair Software for Honor X7b Bricked Devices | Dr.fone
- What To Do When Infinix Hot 40 Has Black Screen of Death? | Dr.fone
- Title: Motorola Moto G13 Not Receiving Texts? 10 Hassle-Free Solutions Here | Dr.fone
- Author: Ariadne
- Created at : 2024-10-19 19:55:01
- Updated at : 2024-10-22 20:29:17
- Link: https://howto.techidaily.com/motorola-moto-g13-not-receiving-texts-10-hassle-free-solutions-here-drfone-by-drfone-fix-android-problems-fix-android-problems/
- License: This work is licensed under CC BY-NC-SA 4.0.