
Nokia C12 Pro Screen Unresponsive? Heres How to Fix It | Dr.fone
Nokia C12 Pro Screen Unresponsive? Here’s How to Fix It
Nokia C12 Pro phones have become increasingly popular due to their advanced features, sleek designs, and affordable prices. These phones offer many benefits, including high-quality cameras, long battery life, and fast processing speeds. However, sometimes users may encounter problems such as a Nokia C12 Pro touch screen not working, which can be frustrating and difficult.
This article aims to provide solutions for Nokia C12 Pro phone users experiencing screen unresponsiveness. We will explore various reasons this issue may occur and discuss step-by-step instructions for fixing the problem. So, if your Nokia C12 Pro touchscreen is not working, don’t worry – we’ve got you covered!
What Causes A Nokia C12 Pro Screen Unresponsive?
There are several reasons why a Nokia C12 Pro phone’s screen may become unresponsive. Some common causes include software issues, hardware problems, or issues with the touchscreen itself. It’s essential to identify the root cause of the problem to fix it properly.
Below are some possible causes of Nokia C12 Pro screen unresponsiveness, along with explanations of each.
Soft-bricked software: Soft-bricking refers to the state where the phone is stuck in an infinite boot loop or unable to boot. It can occur due to corrupt system files, outdated firmware, or unsuccessful updates. For example, some Nokia C12 Pro Y2 and 5A users have reported their screens getting stuck on the boot logo after a software update, rendering the Nokia C12 Pro device unusable.
Equipment is worn out: Hardware problems can also cause Nokia C12 Pro screens to become unresponsive. It can be due to worn-out equipment, such as a damaged LCD screen, malfunctioning touch sensor, or loose ribbon cables. These issues can also occur in any Nokia C12 Pro model, including the Y2 and 5A.
**Touchscreen problems:**Sometimes, the touchscreen itself can become unresponsive for various reasons. For instance, Nokia C12 Pro Y2 and 5A users may face this issue if they have accidentally dropped their phone, exposed it to water, or used an incompatible screen protector. It can result in a damaged or malfunctioning touchscreen, making it difficult or impossible to operate the phone.
The Common Solutions To Solve A Nokia C12 Pro Screen Unresponsive
In the previous section, we identified the possible causes of Nokia C12 Pro screen unresponsiveness, including soft-bricked software, hardware problems, and touchscreen issues. While the underlying reasons for screen unresponsiveness can be varied and complex, some common solutions can help resolve the issue. Here are three of the most common solutions to address tablet screen unresponsiveness, no matter the Nokia C12 Pro model.
1. Restart The Device
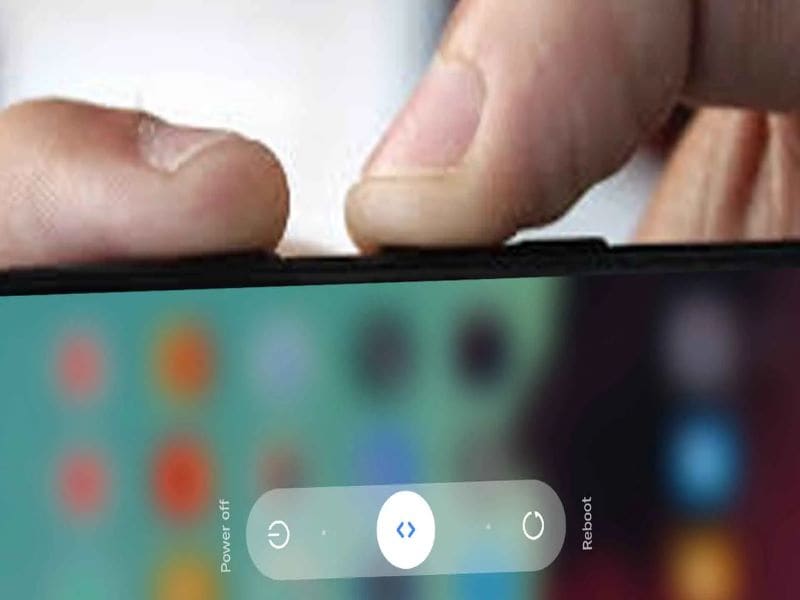
Restarting the phone is typically the initial solution that comes to mind when we encounter the Nokia C12 Pro black screen problem. It’s a simple and widely used method to address the issue, as the black screen problem could be caused by a software glitch, which can often be resolved by freeing up the phone’s memory.
It is the most commonly used method to fix Nokia C12 Pro’s touch screen and power button issues, such as unresponsiveness. By restarting the Nokia C12 Pro device, background processes are disabled, and memory is freed up, allowing programs to run smoothly and potentially resolve the problem. To restart a Nokia C12 Pro device, press the Power and Volume Up buttons simultaneously, and release the Power button once the Nokia C12 Prologo appears.
2. Leave The Phone And Let The Battery Drain Completely
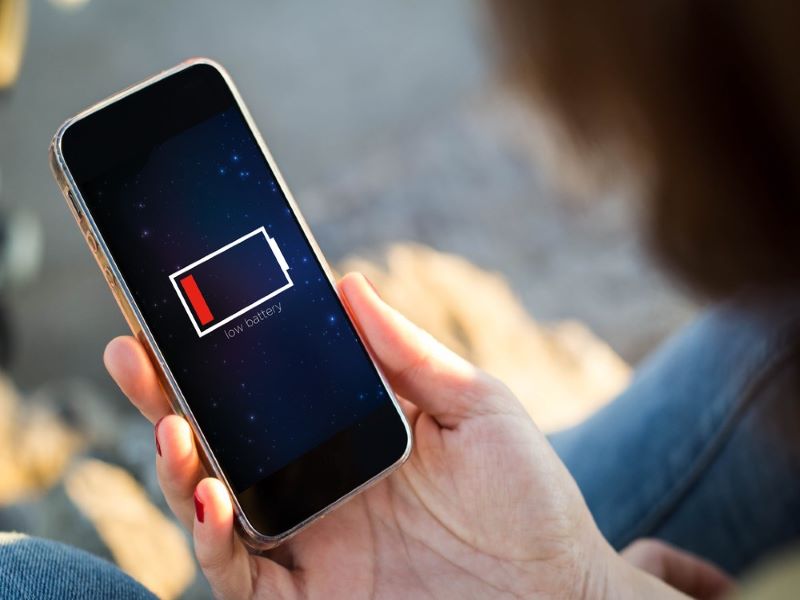
Sometimes, the tablet screen may become unresponsive due to a software issue preventing the Nokia C12 Pro device from functioning correctly. Leaving the Nokia C12 Pro device unused and draining the battery helps resolve these issues. After fully discharging the battery, the Nokia C12 Pro device can be recharged and turned back on, potentially resolving the issue.
3. Contact Custom Service
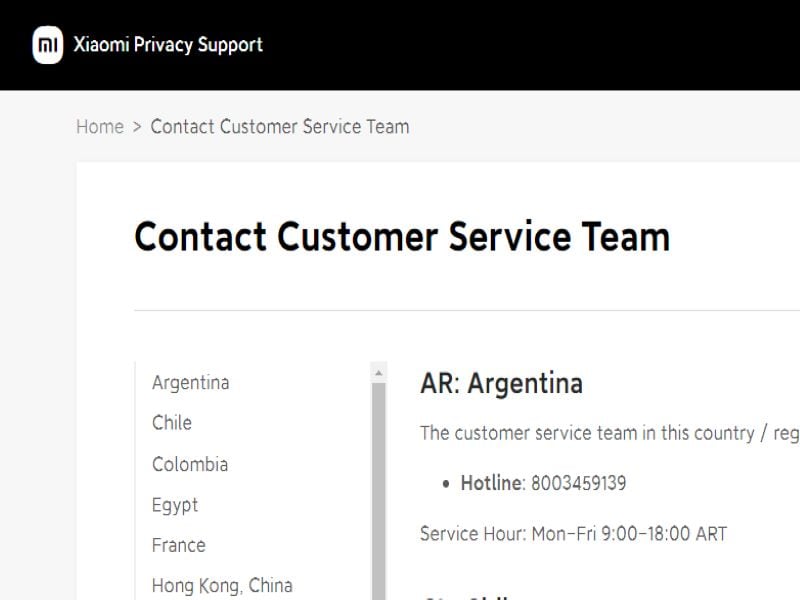
If restarting the Nokia C12 Pro device or allowing the battery to drain doesn’t resolve the issue, seeking professional assistance is recommended. The manufacturer may provide additional troubleshooting steps or recommend sending the Nokia C12 Pro device in for repair or replacement. It’s important to check the warranty before contacting customer service, which may affect repair or replacement options.
In addition to the common solutions we discussed earlier, some model-specific solutions can help resolve the screen unresponsiveness issue on Nokia C12 Pro Y2 and Nokia C12 Pro 5A.
4. Optimize Device Performance
One solution is to optimize the Nokia C12 Pro device performance by clearing the cache, removing unwanted apps, and disabling unnecessary features. This method can help free up memory and resolve the issue.
You can clear your cached data using the default settings.
- Select Settings> Storage > Cached Data.
- To clear the cache, select Clear Cache.

5. Back Up And Factory Reset
Another solution is to back up the Nokia C12 Pro device and perform a factory reset, which can help reset the Nokia C12 Pro device to its original state and remove any software glitches that may be causing the screen unresponsiveness. The factory settings on your phone will restore any data saved by third-party applications and some of the phone’s settings when it was first built. Note that this method erases all data from the Nokia C12 Pro device, so it should only be considered a last resort.
In the following steps, we will show you how to format the Nokia C12 Pro Redmi 5A to erase all your data and restore it to its factory state.
- Open the Settings.
- Navigate to the Additional settings section of the Nokia C12 Pro Redmi 5A settings.
- Please scroll down the screen until you reach the Backup & reset option, then click to access it.
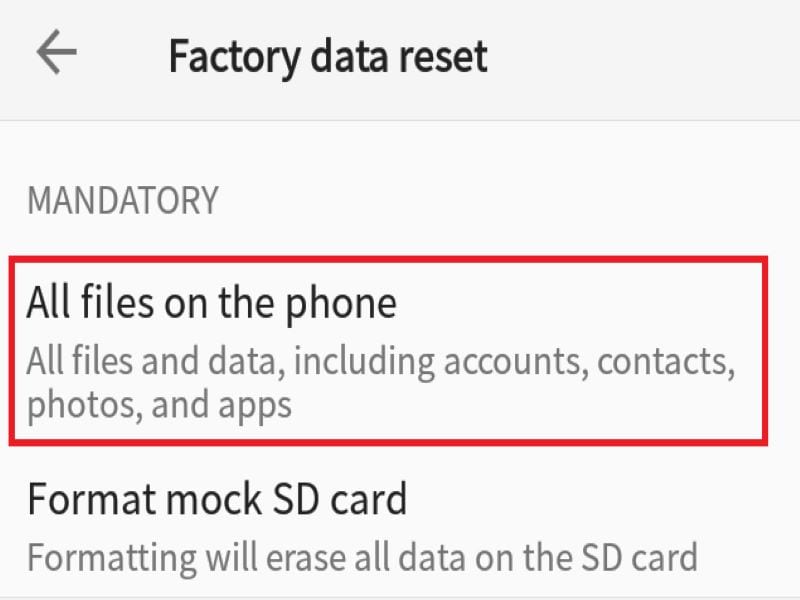
- ClickErase all data (factory reset) to restore the network settings and applications, or completely reset the Nokia C12 Pro Redmi 5A.
- Select All files on the phoneto make a complete format of the Nokia C12 Pro Redmi 5A.
6. Using Dr. Fone Repair
If none of the above solutions worked, you can try using Dr. Fone Repair. This software is designed to fix various software issues on Android phones, including Nokia C12 Pro devices. It can fix issues such as screen stuck on boot, black screen, and other software-related problems. Dr. Fone Repair is easy to use and can protect your data and files on your phone.
Here’s how to fix repair screen unresponsiveness or any software-related issues on Nokia C12 Pro Y2 and Nokia C12 Pro 5A using Dr. Fone Repair:
- Begin by installing and opening Dr.Foneon your PC.
- Once opened, select the ‘System Repair’ option and connect your Android smartphone to your PC via USB cable.
- On the next screen, choose “Android****Repair“ from the list of available options.
- Click on the “Start“ button to initiate the repair process.
- You will then be prompted to enter the required device information such as the Nokia C12 Pro device name, model number, and firmware version.
- Once you have entered the necessary information, click on the ‘Next’ button to proceed.
- Follow the on-screen instructions carefully to repair your Nokia C12 Pro.

How To Avoid A Nokia C12 Pro Screen Unresponsive?
To avoid facing a Nokia C12 Pro screen unresponsive issue, users can take several preventative measures. One important step is to update the Nokia C12 Pro phone regularly to ensure the software is up to date and all bugs and glitches are fixed. Users can also use tools like Dr. Fone to regularly manage and repair data, including clearing cache and removing unwanted apps. It is also important to use quality charging cables and avoid exposing the Nokia C12 Pro device to extreme temperatures or humidity, which can damage the internal components and potentially cause screen unresponsiveness. Finally, users can avoid dropping or mishandling the Nokia C12 Pro device, leading to physical damage and causing the screen to become unresponsive. Users can help prevent screen unresponsiveness by taking these steps and ensuring their Nokia C12 Pro device runs smoothly and reliably.
 safe & secure
Conclusion
Encountering a Nokia C12 Pro screen unresponsive issue can be a common problem for some Nokia C12 Pro phone users. However, with the solutions we have provided in this article, you can effectively solve the problem and get your phone back up and running in no time. It’s important to remember to regularly back up your data and take preventative measures, such as avoiding harmful malware and keeping your phone updated, to avoid experiencing this issue in the future.
By using reliable software, like Dr.Fone Repair, you can ensure that your Nokia C12 Pro phone is well-maintained and operating smoothly. With these solutions and tips, you can enjoy the benefits of your Nokia C12 Pro phone without any interruptions.
How To Deal With the Nokia C12 Pro Screen Black But Still Works?
With the advance of technology over the years, many of us rely on smartphones to communicate, work, and play. As such, it can be pretty concerning when your device begins to act strange like your phone screen suddenly went blank.

Whether you’re using an iPhone or an Android device, you’ll eventually encounter a problematic symptom like this. Therefore, this article will explore what to do when your phone screen goes black. After exploring below, you’ll learn the common causes of why your phone screen went black and how to fix it. Read on below to learn more.
Part 1: Why Did My Nokia C12 Pro Screen Go Black but Still Works? Common Causes
Experiencing a cell phone blank screen is not exclusive to Android or iOS users. A phone screen not turning on happens all the time due to several factors that may or may not be out of your control. While they can be frustrating, here are some common causes you should know as to why your phone screen went black but still works.
A Drained Battery
The first thing that comes to mind when your phone screen suddenly goes black is you have a drained battery. Even though this is obvious, it’s still important to mention, as this is usually what most people encounter. To fix this problem, plug your smartphone into a charger and wait for your device to turn on again. If it works, then you just prevented a rather annoying experience.

App Troubles
If your phone is working, but the screen is black, there’s also a high probability that you are having an isolated issue with a particular application. An app could be loading something, which often happens for streaming apps such as YouTube, Netflix, Prime, and more, especially if you have slow internet connectivity.
Software Issues
A potential reason why your phone screen went black but still works could be because of your smartphone’s software. This problem suggests that your Nokia C12 Pro is crashing, potentially freezing your device if not addressed immediately. If this is the cause, then your device is likely experiencing a critical system error, and you should directly try to reboot your phone.
Hardware Problem
If you dropped your phone, there’s a high chance the LCD connectors went loose due to the physical impact. If this happened to you, the phone might be working, but the screen is black due to the LCD cable dislodging. Another issue could be your phone got exposed to extreme temperatures. This can also cause a black screen but your phone is still on.

Part 2: How To Fix Black Screen on Your Phone
Here are four valuable methods you should know on what to do when your phone screen goes black on your iPhone or Android smartphone to get them working again.
Method 1: Force Restart your Android/iOS Smartphone
If your phone screen is black but still works, force restarting it is the easiest way to fix it. The following are the detailed steps for both Android and iOS devices.
How to Force Restart your Android Device
Here is how you force restart an Android device when your phone screen doesn’t turn on.
Step 1: Press and hold the Power and Volume Down buttons simultaneously.
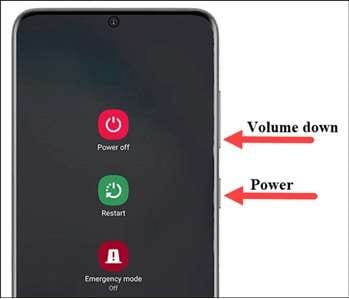
Step 2: Hold the same buttons until your device restarts, and display the phone’s logo.
How to Force Restart your iOS Device
If you own the latest iPhone models, here are the method of restarting it from iPhone 8 up to 14.
Step 1: Press and immediately release Volume Up. Next, press and immediately release Volume Down.

Step 2: Press and hold Sleep/Wake until you see the Apple logo.
Note
If you own an iPhone 7, press and hold the Side button and Volume Down simultaneously until you see the apple logo.
Method 2: Uninstall or Update Outdated Applications
In some cases, your phone screen is black but still works because of installing incompatible apps on your iOS/Android device. If the installed app is frequently crashing, it may be the source of a blank cell phone screen. Uninstall the problem app to see if the black screen disappears or not.
Method 3: Inspect the LCD Connectors
If your phone screen goes black but still works, you should inspect the logic board to the LCD screen to see if it has become disconnected. It is common for smartphones that often get dropped a few times. It’s best to plug the connectors back to regain your screen’s functionality.
However, this requires technical know-how. It’s better to seek help from a professional as you could risk causing more damage to your device if you don’t know what you’re doing.
Method 4: Perform a Factory Reset
If all the methods above did not solve your problem, the last resort you can take is to perform a Factory Reset. This method works on Android and iOS smartphones and erases all your data. It is the quickest way to try to fix why your phone screen went black. Here are the steps.
For Android Users
If you’re on Android, tap Settings > Backup and Reset. Tap on Factory data reset > Delete all to initiate the factory reset.
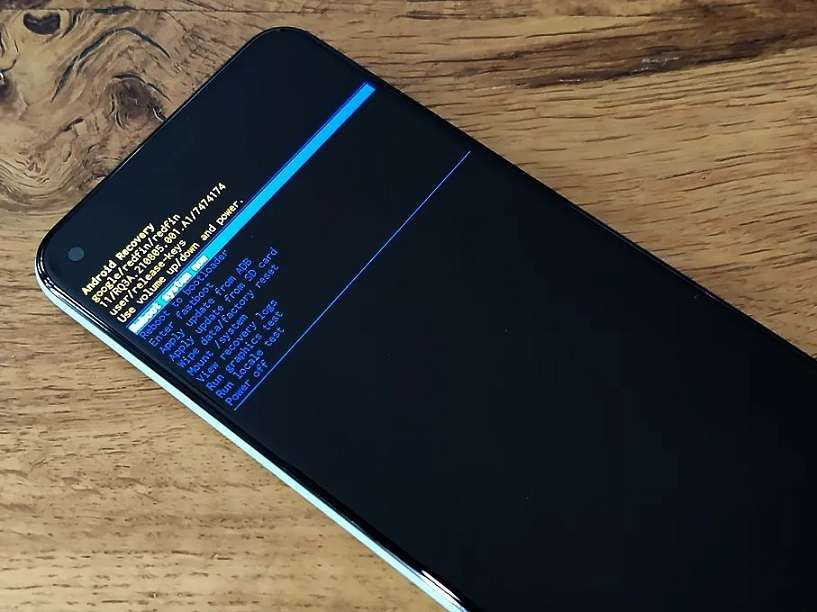
If you cannot do this, here’s how to perform a factory reset manually using Recovery Mode.
Note
The process of booting into Recovery Mode is not the same across all Android devices and depends on the manufacturer and model of your phone. Refer to your owners manual to see which method is the right one for your Nokia C12 Pro.
Step 1A: Press and hold the Power button and Volume Down buttons simultaneously and continue holding until the screen starts.
Step 1B: For Android devices with a Home button, press and hold the Home button and the Power button and continue holding until the screen starts.
Step 1C: Press and hold the Power button as well as the Volume Up and Volume Down buttons simultaneously and continue holding until the screen starts.

Step 2: Use the Volume buttons to navigate the choices and select Wipe data/factory reset and confirm your choice with the Power button.
Step 3: Simply wait for the process to complete and wait for your Nokia C12 Pro to restart automatically.
F****or iOS Users
Step 1: For iOS users, meanwhile, tap Settings > General > Transfer or Reset iPhone.
Step 2: Next, choose Erase All Content and Settings. Check the list of items you want to remove.

Step 3: Tap Continue and enter your iPhone passcode. A message warns you that the process will delete all media and data and reset all settings.
Step 4: Tap Erase iPhone to confirm. You’ll be asked to type in your Apple ID and password if Find My is active. Enter your password and tap Erase.
Part 3: How To Fix Black Screen Phone With an Alternative
If your phone screen went black but still works and doing the methods above did not solve the issue, you can use Wondershare Dr.Fone for iOS and Android as a last resort. It’s one of the most popular smartphone repair tools today, enabling you to fix all kinds of annoying scenarios. These include black screen, boot loop, white screen of death, bricked iOS or Android device, and more.

Key Features
Dr.Fone – System Repair for iOS and Android has fantastic features you can immediately take advantage of. Here are its key features below.
- Fix all Android and iOS Problems in Minutes
Dr.Fone – System Repair can fix all kinds of issues on your Android/iOS, such as a black screen, white screen of death, screen freeze, boot loop, or recovery mode. All of this can be done within less than 10 minutes to save you precious time.
- Supports up to 1000+ Android Smartphones and the latest iOS
All iOS versions, including the latest iOS 16 and iOS 16 beta, are fully supported by Dr.Fone – System Repair. The app handles all your smartphone issues without data loss to secure your info. On the other hand, if you own an Android, the app supports up to 1000+ Android smartphones, making it highly versatile for Android owners.
Tech Specs
Dr.Fone – System Repair (Android)’s minimum system requirements for your computer are listed below.
| Computer OS | Android |
|---|---|
| Windows 11, 10, 8.1, 8, 7 | Android 2.1 and up to the latest |
Meanwhile, here are the system requirements for Dr.Fone – System Repair (iOS).
| Computer OS | iOS |
|---|---|
| Windows 11, 10, 8.1, 8, 7 | Supports all iOS versions, including the latest iOS 16 and iOS 16 beta |
| macOS 12, 11, 10.15, 10.14, 10.13, 10.12, 10.11, 10.10, 10.9, 10.8 |
Pros and Cons
If you’re still undecided about Dr.Fone – System Repair, here are its pros and cons.
Pros
- Fone – System Repair for iOS and Android has a clutter-free and beginner-friendly user interface. It’s easy to understand and use, so you can start immediately.
- Both the iOS and Android versions finish the repair tasks within less than 10 minutes to save you time.
Cons
- Each version for each OS is sold separately.
- The free version works up to your device’s compatibility. Once you start the repair process, the app will ask you for a valid license key.
How to Fix Black Phone Screen With Dr.Fone – System Repair
Here’s how to fix your phone screen with Dr.Fone – System Repair on iOS/Android.
Step 1: Download and install Dr.Fone – System Repair for iOS or Android. Next, open the program and connect your smartphone.
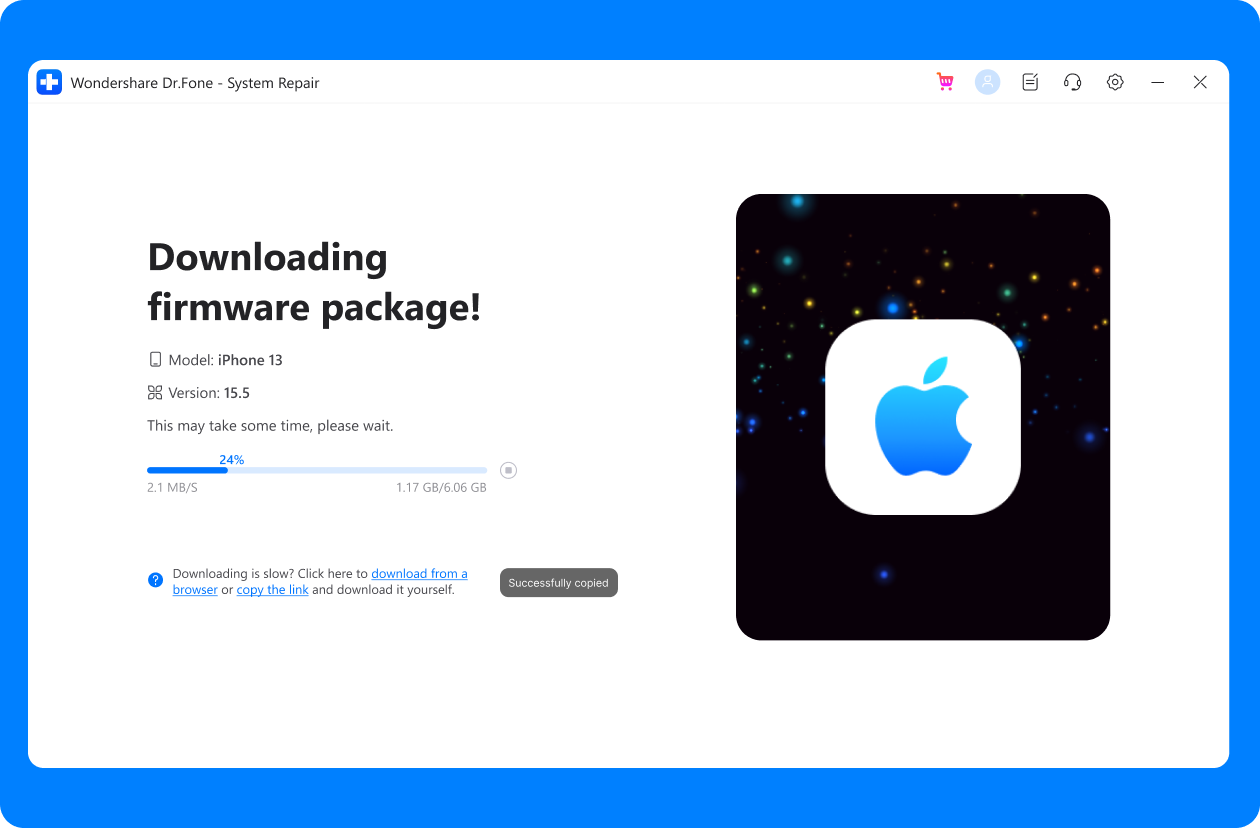
Step 2A (For iOS): Choose the correct model of your iPhone for the program to be able to download the appropriate firmware package.
Step 2B (For Android): Click Start. On the next window, choose the Brand, Name, Model, Country, and Carrier of your smartphone, then click Next.

Step 3: Follow the on-screen instructions provided on the main program window and wait for the repair process to complete.

safe & secure
4,262,204 people have downloaded it
Conclusion
Our increasing reliance on smartphones has led to amazing advancements in new technologies. However, lingering issues such as your phone screen not turning on or your phone screen being black but still working are ongoing problems to many. That’s why learning how to prevent these events is essential to take care of your smartphone.
Doing all the recommended methods above usually solves the case. If the different fixes don’t work for you, Dr.Fone – System Repair for iOS and Android can help resolve all your problems within less than 10 minutes. You can download it for free on Windows and Mac to test it yourself.
Gmail Not Working on Nokia C12 Pro: 7 Common Problems & Fixes
Ever since Android is introduced, it has almost eliminated the need of computers to work through Gmail. Gmail carries much importance especially when you’re a working person. A lot of work is done through mails on daily basis. But maybe today is not your lucky day. Maybe Gmail is giving you a hard time today. Is it? Is your Gmail not responding or keeps stopping you from going further? Well! There is no need to be bothered anymore. We are discussing some of the general Gmail problems along with their fixes. So, if your Gmail is not working on Android, you can go through this article and find the relevant solution.
Problem 1: Gmail App not responding or keeps crashing
First and foremost, the most common situation people meet with is when there Gmail keeps crashing. Or simply, it doesn’t respond at all. When you open it, it stuck for a few seconds and then you have to close it. It seriously is an annoying issue. If your Gmail is also not responding or crashing and you aren’t able to work properly, following are the solution you can follow.
Clear Cache
The first thing you can do to fix Gmail not responding issue is to clear the cache of Gmail. This has higher chance to get the issue resolved. To do this:
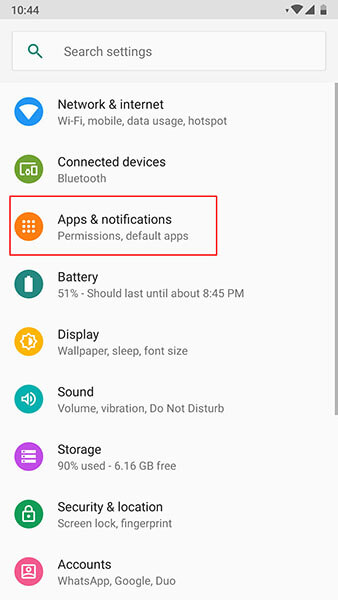
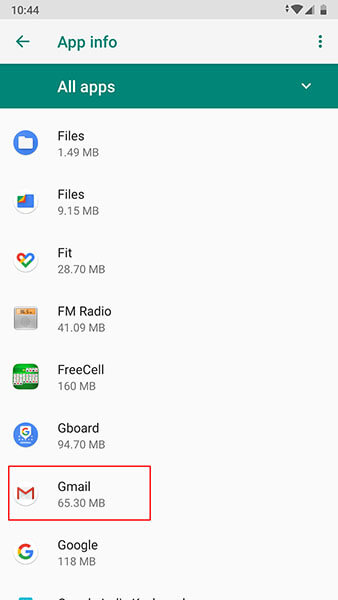
Go to “Settings” and look for “Apps & Notifications”. Please note that the option may vary in some Android phone like it maybe “Application” or “App Manager”. So, don’t panic and look for the option carefully.

Now, from the apps list, search “Gmail” and tap on it.
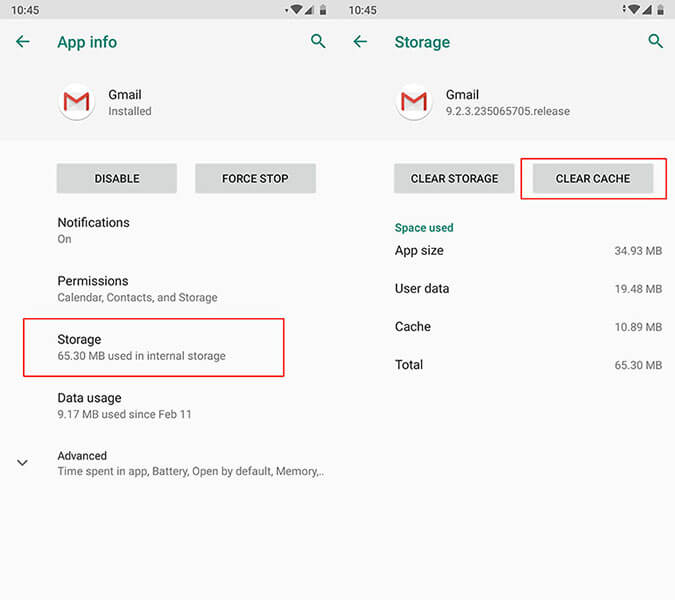
Go to “Storage” followed by “Clear Cache”.
Restart the Nokia C12 Pro device
Restarting the Nokia C12 Pro device in the first place simply resolves many problems and so in the instance when Gmail keeps stopping. Simply long press the power button of your device and restart the Nokia C12 Pro device. See of the problem gets vanished or not.
Factory Reset the Nokia C12 Pro device
The next option that you can try is resetting your device. This will lead to data loss so we suggest you to take backup firstly and then proceed with this method.
Hit on “Settings” and search for “Backup & Reset” option.

- Tap on “Reset” or “Erase all data” (the option name again may vary).
If unfortunately the above solutions don’t work, there is a requirement to flash the stock Android ROM again. Before you wonder how, there is a professional one-click tool that can surely be of assistance. It is Dr.Fone - System Repair (Android) . The tool takes special care of the Android phones and fixes almost every system issues with ease. It takes no special technical skills and performs efficiently.
Problem 2: Gmail won’t sync between all ends
The next most common problem where people get stuck with is when there Gmail won’t sync. Here are the solutions to this particular problem.
Make Space in the Phone
When Gmail stops syncing, one of the things that can save you is clearing the storage. It is the space that maybe the culprit and therefore the syncing don’t work at all. We would like to suggest you removing the unwanted apps to clear the storage or deleting the downloaded files. You can also transfer the important files to your computer and make the space vacant.
Check Gmail Sync Settings
When still the Gmail not working issue persists and you can’t sync, make sure to check the Gmal sync settings. For this, follow the steps below:
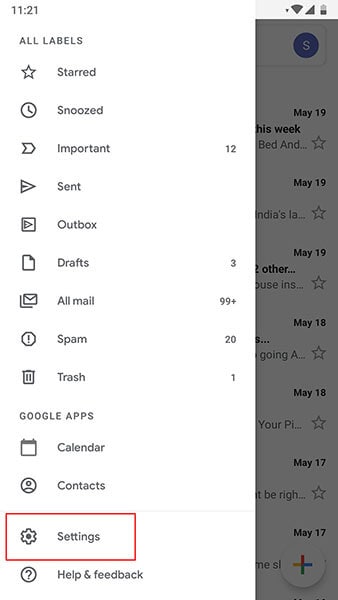
Launch the Gmail app and tap on the menu icon (three horizontal lines).
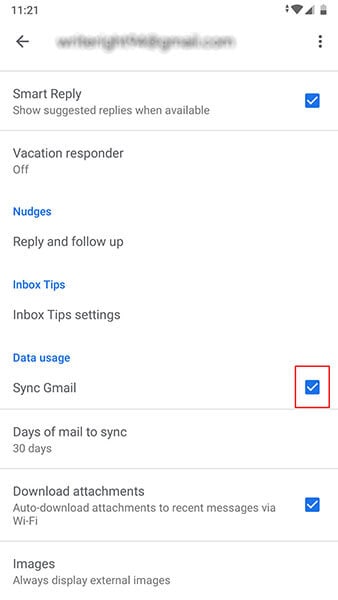
Tap “Settings” and choose your account.
Check the box next to “Sync Gmail” if it’s not checked.
Restart the Nokia C12 Pro device
Again, restarting can also be helpful in this situation. When you boot the Nokia C12 Pro device again, check if your Gmail can sync or not.
Problem 3: Gmail won’t load
In case you are using the Gmail over your web browser and it has tested your patience in loading, here are the solutions that could prove to be fruitful for you. Please check these out.
Ensure to Use Gmail Supported Browser
First of all, you need to make sure that the browser you are using works with Gmail or not. Gmail can smoothly perform in Google Chrome, Firefox, Safari, Internet Explorer and Microsoft Edge. However, the browsers should be updated. So, please make sure that these browsers are running on the latest versions. Moreover, in case you use Chromebook, don’t forget to update the operating system in order to let it support Gmail.
Clear Cache of web browser
If you tried the above method but to no avail, try to clear the cache and cookies of the web browser. But by doing so, the browser history will be removed. As well as, the records of the websites you previously enjoyed will also be lost.
Check browser extensions or add-ons
If not the above one, try this tip. It encourages you to check your browser extensions. Perhaps these are interfering with the Gmail and due to this conflict, Gmail won’t load. You can either turn off these extensions and plug-ins temporarily or make use of the incognito mode of the browser where there are no such things like extensions and plug-ins.
Problem 4: Gmail can’t send or receive
Gmail also gives you problem in sending or receive mails and messages. And to troubleshoot such issue, following are the solutions mentioned.
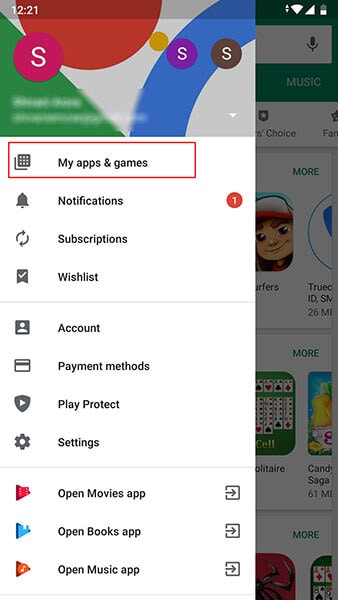
Check the Latest Version of Gmail
This issue is likely to emerge when you are using an outdated version of Gmail. And therefore, the first solution says you to check if the Gmail update is available. You can go to the Play Store and from the “My apps & games” option, you can see if Gmail needs to be updated or not.
Verify Internet Connection
Another thing that carries weight while you can send or receive mails is the internet connection. As we all know that Gmail won’t respond if the Nokia C12 Pro device is not connected to the internet. Therefore, you are advised to turn off Wi-Fi and then enable it again. Also, please ensure to switch to Wi-Fi if you are using the cellular data. This may hamper the process and stop you from receiving or sending mails.
Remove you Account and Add Again
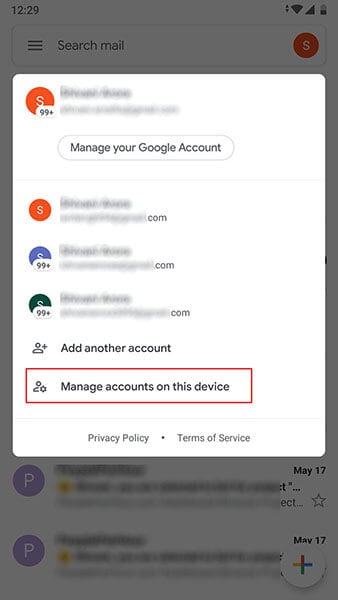
If still Gmail keeps stopping you to go ahead, make sure to once sign out from it. To do this:
Open your Gmail app and go to “Manage accounts on this device”.
Now, tap on the account you are working with. Tap on “REMOVE ACCOUNT” thereafter. After this, you can again sign in and then check if the problem is gone or not.

Problem 5: Stuck in sending
Now, here is another annoying problem that doesn’t let Gmail working on Android properly. This problem addresses the situation where users send a mail but it gets stuck on sending. If this is the problem that you are going through, the following solutions will help you.
Try Alternative Gmail Address
First of all, if Gmail is not working due to stuck in sending issue, we advise you to make use of some other Gmail address to send the mail. If the problem still occurs, jump to the next solution.
Check Network Connection
As already mentioned, be sure of an active internet connection while working with Gmail. When you are not using a stable connection, it may lead to stuck on sending, Gmail crashing and many other issues. You can fix the issue by doing these three things:
- Most importantly, use only Wi-Fi rather than cellular data if you want a smoother process.
- Turn off Wi-Fi and then turn it on again after nearly 5 seconds. Do the same with the router. Plug it out and the plug in.
- Lastly, turn on Airplane mode and after a few seconds, turn it off again.
Now try to send the mail and see if things are still the same or not.
Check Attachments
Large attachments can also be the reason for this issue. We would here like to suggest you to check the attachments you are sending. If these are not so important, you can remove them and send the mail. Or if it is not possible to send the mail without attachments, compressing the files can be a solution.
Problem 6: “Account not synced” issue
Many times, the users get the error that says “Account not synced” while they try to work with Gmail. And this is the 6th problem we are introducing. The ways mentioned below will assist to get out of the trouble.
Make Space in the Phone
When Gmail stops to further the process by prompting “Accounts not synced” issue, be sure that your Nokia C12 Pro has some storage in it. If not, create it straight away. As we also mentioned in one of the above solutions, you can either delete the unnecessary files or transfer the important files to the PC to make the space in the phone. Go along with this tip and see if it works.
Check Gmail Sync Settings
As another solution, check Gmail sync settings to get the issue fixed.
Simply open Gmail and hit the menu icon which is three horizontal lines on the top.
Go to “Settings” and choose your account.
See the tiny box beside “Sync Gmail” and check it if it is not.
Restart the Nokia C12 Pro device
If the above method went futile, simply restart your device. Take help of the Power button on your device. Long press it and from the options, restart it. This will hopefully work for you.
Problem 7: Gmail app running slow
The last problem that you may face is the slow-going Gmail app. In simple words, you may experience that Gmail app is operating extremely slowly. To fix this, following solutions will help you.
Restart the Phone
It is a universal method to fix minor Android system issues. And here too, we would like you to restart your Nokia C12 Pro in the first place when you find that Gmail is not responding due to the sluggish behavior.
Clear Storage of Device
Usually all the apps start running slow when the Nokia C12 Pro device is not having sufficient space. As the apps need space to function quickly and appropriately, having the Nokia C12 Pro device on low storage can prove to be a bad luck for Gmail. So, make sure you wipe out the items you no longer needed on your device and create some room so that the Gmail responds nicely and won’t be running slow anymore.
Update Gmail App
As the last tip that will indeed help you is to update the Gmail app. Until you update the app when required, Gmail keeps stopping you from working and you will definitely get frustrated. Therefore, go to Play Store and look for the Gmail update. If it is available, welcome it with smile and bid farewell to the problem of slow running Gmail.
What if your problem still doesn’t get resolved after following these 3 tips? Well! If that is the case, we will again recommend you to make use of an expert one-click tool to flash the stock Android ROM.
Dr.Fone - System Repair (Android) is going to help you serving the purpose. This mighty tool possesses huge success rate and one can rely on it for its simplicity and security. It is designed to work with numerous problem related to Android system. So, no matter if your Gmail keeps crashing or keeps stopping, it has the solution for everything.
Dr.Fone - System Repair
Fix all Gmail issues caused by Android system:
- Gmail app corruption or not opening
- Gmail app crashing or stopping
- Gmail app not responding
Also read:
- [New] 10 Best Sites to Download Free Slideshow Templates - Filmora
- [Updated] In 2024, Vimeo vs YouTube Dissecting the Streamers' Choices
- [Updated] Unlocking Virtual Potential with KineMaster's Latest Android Release
- 11 Proven Solutions to Fix Google Play Store Not Working Issue on Realme GT 3 | Dr.fone
- 9 Solutions to Fix Vivo Y28 5G System Crash Issue | Dr.fone
- How to Remove a Previously Synced Google Account from Your Huawei Nova Y91
- In 2024, Keep Track Who Dropped Off My Insta Feed?
- Poco F5 5G Not Receiving Texts? 10 Hassle-Free Solutions Here | Dr.fone
- Pro Paper Kit v2 Advanced Bootstrap 4 User Interface Suite by Creatively Timed Solutions
- Resolución De Errores: Inicio Desde Disco Óleodinámico - Métodos Cuatro Para Windows 10
- Reviving the Stand-By Feature on Your iPhone with These 4 Effective Solutions
- Smooth Gaming Ahead: Fast & Efficient Remedies for Login Errors in Fortnite
- Why Is My Tecno Phantom V Fold Offline? Troubleshooting Guide | Dr.fone
- Title: Nokia C12 Pro Screen Unresponsive? Heres How to Fix It | Dr.fone
- Author: Ariadne
- Created at : 2024-10-12 22:38:07
- Updated at : 2024-10-17 04:54:59
- Link: https://howto.techidaily.com/nokia-c12-pro-screen-unresponsive-heres-how-to-fix-it-drfone-by-drfone-fix-android-problems-fix-android-problems/
- License: This work is licensed under CC BY-NC-SA 4.0.