
Proven Ways to Fix There Was A Problem Parsing the Package on Nokia C12 | Dr.fone
Proven Ways to Fix There Was A Problem Parsing the Package on Nokia C12
Unable to install your favorite Apps from Google Play Store because there was a problem parsing the package?
The Parse Error or there was a problem parsing the package error is very common with Android devices. Android is a versatile platform and, therefore, a very popular OS. It is an open software and allows users to download and use various types of apps from the Play store. Android is also a cheaper alternative as compared to other Operating Software.
Since many of us are well versed with most of the Android devices, parse error, or there is a problem parsing the package is an error is not something new and uncommon.
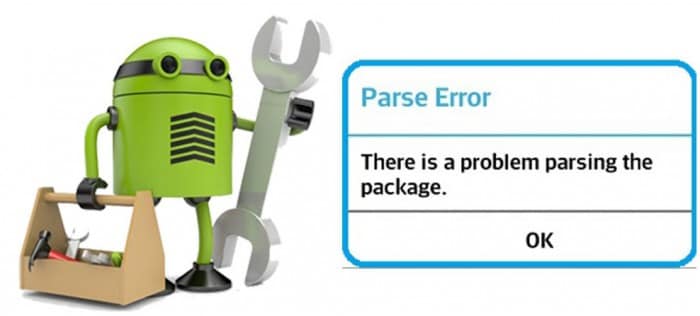
The error message usually pops up on the Nokia C12 device screen when we try to download and install an App, for example, “There is a problem parsing the package Pokémon Go ”.
The error message which appears reads as follows:
“Parse error: There is a problem parsing the package”.
Android users who have experienced this would know that the parse error leaves us with only one option, i.e., “OK” as shown in the image below.
There was a problem parsing the package may occur due to several reasons, most of which are listed and explained below. Furthermore, there is a list of solutions to choose from to eliminate the “there is a problem parsing the package” error.
Read on to find out more.
Part 1: Reasons for the parsing error
Parse Error, better known as “there was a problem parsing the package” error is very common and normally surfaces when we try to download and install new Apps onto our Android devices from Google Play Store.
The reason for the error message to pop-up are many but none of them can be blamed singularly for the “there is a problem parsing the package” error. Given below is a list of the most probable reasons for Parse Error to stop an App from installing. Examine them carefully before moving on to the solutions to fix the “there was a problem parsing the package” error.
• Updating the OS may cause some disturbances in the manifest files of different Apps leading to Parse Error.
• Sometimes, the APK File, i.e., Android Application Package, gets infected due to improper or incomplete App installation causing “there is a problem parking the package” error.
• When Apps are downloaded and installed from unknown sources, due permission is needed. In the absence of such permission, the chances of the Parse Error to occur increase.
• Certain Apps are not compatible or supported by the latest and updated Android versions.
• Anti-virus and other cleaning Apps are also a major reason for the “there was a problem parsing the package” error.
The causes listed above are not App specific. The Parse Error may occur due to any one or more of these reasons, but what is more important is to try to get rid of the problem.
Let us move on to learn ways to fix the there was a problem parsing the package error.
Part 2: 8 Solutions to fix the parsing error
“There is problem parking the package” error can be dealt with easily if only we do not panic and deliberately follows the steps explained in this segment. Here are 7 of the most reliable and trustworthy methods to fix the Parse Error.
They are easy, user-friendly, and do not take much of your time. So don not waste any more of your time and try them now.
2.1 One Click to Fix ‘There is a Problem Parsing the Package
If you’re still encountering the Parsing error, there may be a problem with the Nokia C12 device data on your device, which means you’ll need to repair it. Luckily, there’s a simple, one-click solution you can follow called Dr.Fone - System Repair .
Dr.Fone - System Repair (Android)
Android repair tool to fix all android system issues in one click
- Simple, clean, and user-friendly interface
- No technical knowledge required
- Easy one-click repair to fix ‘there is a problem parsing the package’ error
- Should repair most parsing problems with apps, like ‘there is a problem parsing the package Pokemon Go’ error
- Supports most Nokia C12 devices and all the latest models like Galaxy S9/S8/Note 8
3981454 people have downloaded it
If this sounds like the solution you’re looking for, here’s a step by guide on how to use it yourself;
Note: Please note that this repair process can erase all data on your phone, including your personal information. This is why it’s so important to back up your Nokia C12 before proceeding.
Step #1 Head over to the Dr.Fone website and download the software. Install the downloaded software and open it. From the main menu, select the System Repair option.

Input your device and firmware information to confirm you’re installing the right version of the operating system.

Step #2 Follow the onscreen instructions on how to get into Download Mode to start the Repair process.

Once complete, the firmware will start downloading.

Step #3 Once the firmware has downloaded, it will automatically install it to your device.
When this is completed, you’ll be free to disconnect your Nokia C12 and use it how you please without the ‘there is a problem with the parsing package’ error.

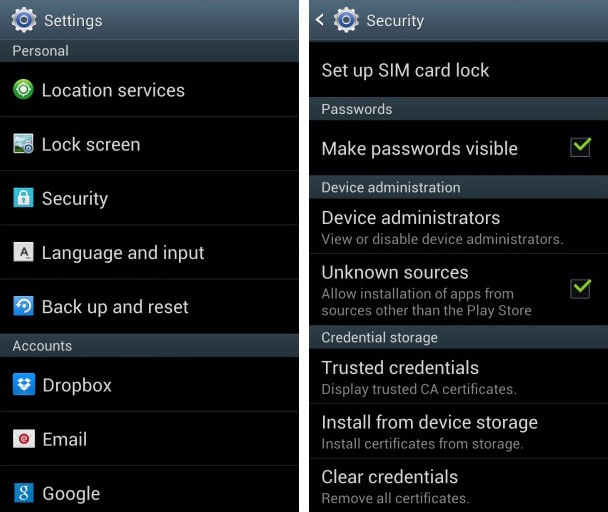
2.2 Allow installation from unknown sources
When we install Apps from other sources and not Google Play Store, there might be a glitch in using such Apps. To overcome this problem, turn on “Allow App installation from other sources”. Follow the steps given below for better understanding:
• Visit “Settings” and select “Applications”.
• Now tick mark on the option saying allow App installation from unknown sources.
2.3 Enable USB debugging
USB debugging is not considered necessary by many users but these methods give you an edge over others while using an Android device as it lets you access things on your phone, etc which you could not earlier.
To enable USB Debugging to fix “There is a problem parsing the package” error, follow these steps:
• Visit “Settings” and select “About Device”.
• Now click on “Build Number” not once but continuously for seven times.

• Once you see a pop-up saying “You are now a developer”, go back to “Settings”.

• In this step, select “Developer Options” and turn on “USB Debugging”.

This should solve the problem. If not, move on to the other techniques.
2.4 Check APK File
An incomplete and irregular App installation may cause the .apk file to get corrupted. Make sure you download the file completely. If need be, delete the existing App or its .apk file and reinstall it from Google Play Store for it to be compatible with your device’s software and to use the App smoothly.
2.5 Check App Manifest File
Manifested App files are nothing but .apk files which are improvised by you. Such changes may cause the Parse Error to occur more frequently. Modifications in the App file can be made by changing its name, App settings, or more advanced customizations. Make sure you roll back all changes and restore the App file to its original state to prevent it from getting corrupted.
2.6 Disable Antivirus and other cleaner Apps
Antivirus software and other cleaning Apps are very helpful in blocking unwanted and harmful Apps from damaging your device. However, sometimes such Apps also prevent you from using other safe Apps.
We do not suggest that you delete the Antivirus App permanently. Temporary uninstallation will be useful here. To do so:
• Visit “Settings” and then select “Apps”.
• Select the antivirus App to click on “Uninstall” and then tap “OK”.
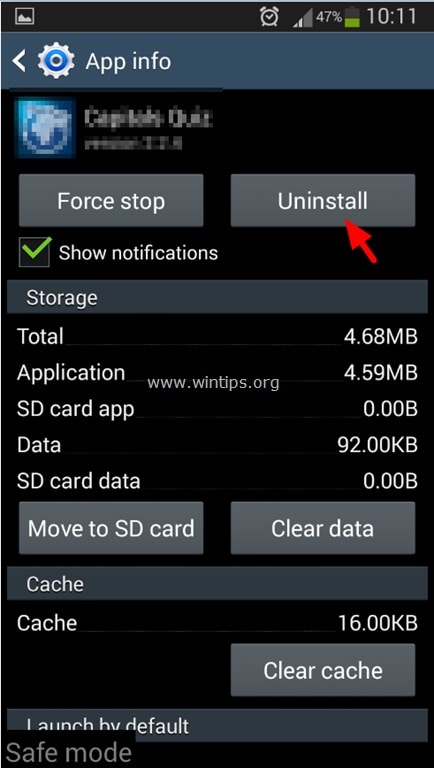
Now download and install the desired App again. Once this is done, do not forget to install the Antivirus App again.
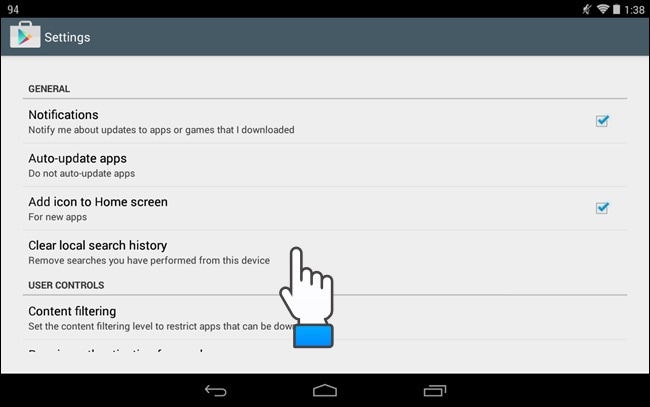
2.7 Clear Cache cookies of Play Store
Clearing Play Store Cache cleans the Android Market platform by deleting all clogged up unwanted data. Follow the steps given below to delete Play Store cache:
• Tap on Google Play Store App.
• Now visit Play Store’s “Settings”.

• Select “General Settings” to “Clear local search history”.
2.8 Factory Reset Android
Factory Resetting your device to fix the Parse Error should be the last thing you try. Make sure you take a back-up of all your data on your Google Account or a Pen Drive because this technique erases all media, contents, data, and other files, including your device settings.
Follow the steps given below to factory reset your device:
• Visit “Settings”.
• Now select “Backup and Reset”.

• In this step, select “Factory data reset” and then “Reset Device” to confirm Factory Reset.
The whole process of factory resetting your Nokia C12 might sound tedious, risky, and cumbersome but it helps to fix the Android SystemUI has stopped error 9 out of 10 times. So, think carefully before using this remedy.
Parse Error: There was a problem parsing the package is an error message that has troubled many Android users. The good part is that the above-stated fixes not only solve the problem but also prevent it from occurring in the future. So, keep them in mind the next time you or anyone you know faces such an issue.
4 Ways to Fix Android Blue Screen of Death On Nokia C12
Android is undoubtedly amongst the best smartphone platforms but comes with its own share of glitches. The Android screen of death is observed by many users all over the world who complain of their device screen turning blue rendering their phone/tablet unresponsive. This is called the Android blue screen of death and it usually occurs when you turn on your device by pressing the Power On button but your device does not boot up normally and remains stuck at a plain blue screen without any error message.
Such an Android screen of death is caused by a temporary software crash but can also occur due to certain hardware issues. We understand the inconvenience caused to you when you see the Android blue screen of death. Here are ways to fix the error and great software to extract all your data to keep it unaltered and safe.
Read on to learn more about the Android screen of death and ways to combat it.
Part 1: How to rescue data on Nokia C12 with blue screen of death?
The Android blue screen of death issue is not a difficult problem to deal with and can be fixed by you by following the easy steps given in this article. We suggest that all readers rescue the data stored on their Android devices to prevent data loss and keep it stored in your PC from where it can be accessed and recovered by you anytime, anywhere. This task might sound tedious, but, we have for you Dr.Fone - Data Recovery (Android) , a software specially designed to retrieve data from broken and damaged Nokia C12 phones and tabs, especially Nokia C12 devices, and keep it safe in your PC without tampering with it or altering its format. It efficiently extracts data from broken or unresponsive Nokia C12 devices, phones/tabs stuck at black/blue screen, or whose system crashed due to a virus attack.
Dr.Fone - Data Recovery (Android)
World’s 1st data retrieval software for broken Android devices.
- It can also be used to recover data from broken devices or devices that are damaged in any other way such as those stuck in a reboot loop.
- Highest retrieval rate in the industry.
- Recover photos, videos, contacts, messages, call logs, and more.
- Compatible with Nokia C12 devices.
3,145,271 people have downloaded it
Follow the steps given below to extract data when you experience an Android screen of death:
1. Download, install, and run the Dr.Fone - Data Recovery (Android) tool on your PC. Connect your device using a USB cable and move on to the main screen of the software.
2. Once you launch the software, you will see many tabs before you. Click on “Data Recovery” > “Android”.

3. And then choose “Recover from Broken Phone” from the program’s screen.

4. In this step, choose from the two options before you the true nature of your device as shown in the screenshot below.

5. You will now be asked to feed in your phone’s model type and name as shown in the screenshot below. Give correct details for the software to identify your device smoothly and hit “Next”.

6. In this step, refer to the instructions in your device manual to enter into Download Mode on your Nokia C12 and hit “Next”. An example of what to do to reach Download Mode is shown below.


7. Finally, let the software recognize your Nokia C12, and start to download the recovery package for your device.

8. Once it does, you will be able to preview all the files on the screen in front of you before you hit “Recover to Computer”.

The process may take up to a few minutes and once it’s done all your files will be extracted and stored on your PC. You can now move on to troubleshooting the problem without the fear of losing all your important data.
 safe & secure
Part 2: One click to fix the Android blue screen of death
We understand how annoying it is to see the Android blue screen of death and fail to access your device data. But, with Dr.Fone - System Repair (Android) , your troubles would burst away.
This software effectively fixes Android screen of death issue along with app crashing, bricked or unresponsive device, stuck on Nokia C12 logo, etc. All Android issues are well taken care of by Dr.Fone - System Repair (Android) with one click.
Dr.Fone - System Repair (Android)
Easy and effective solution to fix the Android blue screen of death!
- Every kind of Android system error and problem is resolved.
- It is the premier Android repair software in the market.
- All the latest Nokia C12 devices are supported by this program.
- Android blue screen of death can be fixed with a single click.
- Easy to use and no technical skills are needed to operate it.
4,750,154 people have downloaded it
Note: Backing up your device is significant before you carry out the Android repair process. The process of fixing the Android blue screen of death issue may erase data from your Nokia C12. So backing up your Android seems a viable option.
Phase 1: Connecting your Android after preparing it
Step 1: Installation and running Dr.Fone - System Repair (Android) on your system takes you to the main screen. Choose the ‘System Repair’ option followed by connecting the Android device.
Step 2: Press the ‘Android Repair’ option before tapping the ‘Start’ button.

Step 3: Over the Nokia C12 device information window, select all relevant data about your device followed by the ‘Next’ button.
Phase 2: Initiate repairing after entering ‘Download’ mode
Step 1: Get the Nokia C12 device in ‘Download’ mode to fix the Android blue screen of death issue. Here is how –
- On a ‘Home’ button-less device – you need to switch off the Nokia C12 device. Now, hold the ‘Volume Down’, ‘Power’, and ‘Bixby’ keys together for about 10 seconds and release. Hit the ‘Volume Up’ key to get into ‘Download’ mode.

- On a ‘Home’ button device – shut down the Android phone/tablet, and then push the ‘Power’, ‘Volume Down’, and ‘Home’ keys for 10 seconds. Let go of the keys and press the ‘Volume Up’ key to enter ‘Download’ mode.
Step 2: Tap the ‘Next’ button to download firmware.
Step 3: Dr.Fone - System Repair (Android) would verify the firmware post-download. It will start repairing the Android system automatically.
safe & secure
Part 3: Force Restart Your Nokia C12
A force restart is a basic step that can clear minor software glitches. It has the potential to resolve the Android blue screen of death issue. Force restarting your device can clear temporary bugs and reset all processes. It is a simple yet often overlooked way to fix the Android blue screen of death issue. Use the following steps to force restart your Nokia C12:
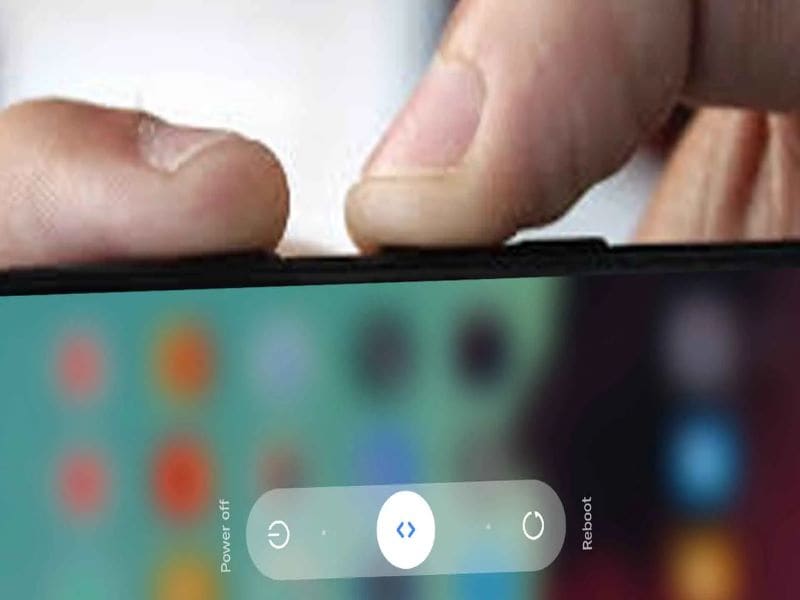
Step: On your Nokia C12, press and hold the “Power” and “Volume Down” keys for around 10 seconds. Release the keys when your device reboots and wait for it to complete rebooting.

Part 4: Remove phone battery to fix blue screen of death
The best home remedy to fix any kind of Android screen of death remove the Nokia C12 device’s battery. This technique might sound too simple, but it has solved the Android blue screen of death issue for many users whose devices started normally after reinserting the battery. Here is what you should do.
1. Open the back cover of your Nokia C12 and carefully remove its battery.

2. Let the battery be out for 5-7 minutes. Meanwhile, long press the power button to drain out any residual charge from your device.
3. Now reinsert the battery and attach the back cover.
4. Turn on your device and see that it boots normally all the way to the Home/Locked Screen without getting stuck at Android blue screen of death.
Note: Not all Android devices allow you to remove their battery. If you own such a device, try the next step as it is your only option to fix the Android blue screen of death problem.
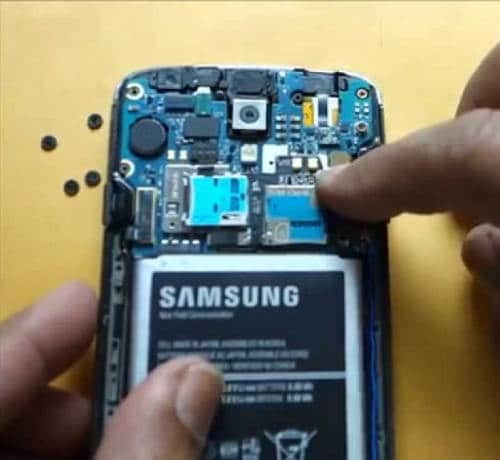
Part 5: Put out your SIM Card/SD card and reinsert
In some cases, issues related to the Android blue screen of death can be caused by problems with the SIM card or SD card. Removing and reinserting these cards can help resolve potential conflicts or glitches. Remember that this method can help resolve issues related to SIM card or SD card conflicts. However, it may not address more complex software or hardware problems causing the blue screen issue.
Part 6: Clean or change the LCD connector
If you’re facing the Android blue screen of death issue, the issue might be related to a hardware problem. The problem can be a loose or damaged LCD connector. In this scenario, you can try cleaning or changing the connector. This method is more advanced and involves disassembling your device. That’s why you need to proceed with caution and only if you’re comfortable with hardware tasks.
Part 7: Update to the latest Android version
Software problems can manifest the Android equivalent of a blue screen of death. It is usually triggered by errors or anomalies within the operating system. To address these concerns, upgrading to the most recent version of the Android OS proves effective. However, updating your device’s software could introduce fresh glitches or compatibility conflicts. These steps outline the process of updating your device to the latest OS:
Step: Open the Settings app on your Nokia C12 by locating and launching it. Proceed by scrolling through the options and selecting “Software Update.” In the ensuing screen, choose “Download and Install” to start a search for any available updates.

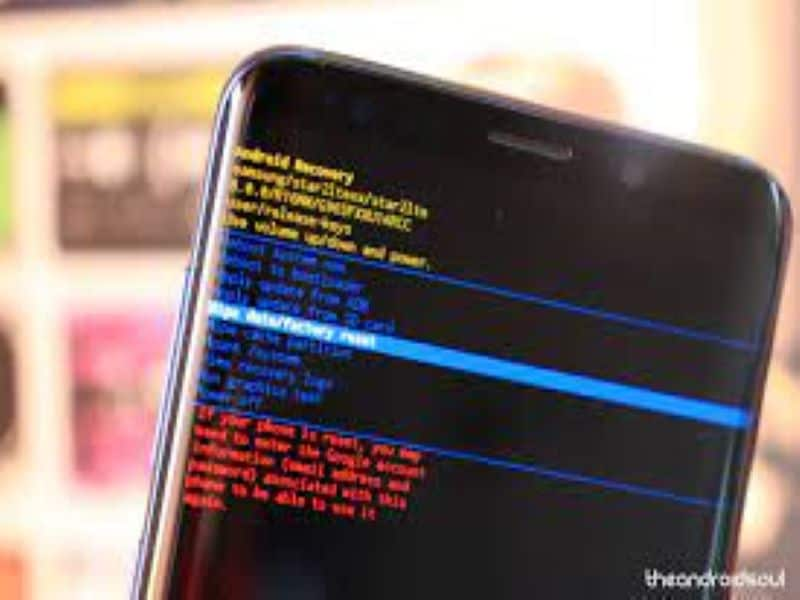
Part 8: How to fix the Android blue screen of death by factory reset?
The Android screen of death is a very confusing issue as it freezes your device at a blue screen with no options to navigate further. In such a situation you may consider performing a Factory Reset, better known as Hard Reset as you will need to enter Recovery Mode to implement this technique. Although resting your device will wipe off all its data but you don’t need to worry as Dr.Fone toolkit Android Data Extraction software can retrieve all your files and keep them safe.
Accessing Recovery Mode differs for different Android devices. Thus, we suggest that you consult your device manual to understand how to boot into Recovery Mode on your particular Android device and then follow the steps given below:
Once you are on the Recovery Screen, you will see a list of options before you, similar to the screenshot below.

Use the Volume Down button to scroll downwards and reach the “Wipe data/Factory reset” option.

Now use the power button to select it and wait for the Nokia C12 device to reboot automatically.
You will notice that the Android device will turn back on without getting stuck at the Android blue screen of death. Now you can set up your device from scratch.
Part 9: What Should You Do if Android Still Stuck on Blue Screen?
Have you tried all the methods, and your Nokia C12 is still stuck on the blue screen of death? In this case, it’s important to consider the possibility of a hardware issue. Remember that hardware issues can be complex. Trying to fix things without the right expertise can result in additional harm. If you’re uncertain about the next steps, it’s wisest to ask for assistance from a trained professional.
The Android screen of death, especially the Android blue screen of death, is not a very pleasant sight and could worry you. The good news is that this problem can be fixed by you sitting at home without any technical assistance. Follow the simple and easy tips given above to reboot your device and use the Dr.Fone - Data Recovery (Damaged Device) tool to rescue your data in the most efficient and effective way, then use Dr.Fone - System Repair (Android) to repair your Nokia C12.
safe & secure
Super Easy Ways To Deal with Nokia C12 Unresponsive Screen
The evolution of smartphones signifies the development of mobile communication technology. Different from the initial years, they are not just used for messaging and calling but have many other applications. Nokia C12 cell phones are presently utilized for perusing the Internet and exploring through maps, photography, videography, and numerous other used cases. A development in arranged availability goes hand-in-hand with the development of cell phones.
Nokia C12 smartphones are gaining popularity owing to their low costs, high quality, and innovative features. High-resolution cameras, extensive battery life, and lightning-fast processing are just a few of the advantages of these mobile devices. Nevertheless, customers may sometimes need help with issues, such as a non-functioning Nokia C12 touchscreen, which may be challenging.
Some common issues might arise for Nokia C12 phone users. The Redmi note 4 touch not working is a serious problem. It can only go up to the initialization screen. In this guide, you’ll find the information you need to troubleshoot and fix the most common problems reported by Motorola customers.
What causes a Nokia C12 Screen to be unresponsive?
The screen on your Nokia C12 phone could stop responding for several reasons. The touchscreen, the system software, or the hardware itself might all be at fault. To effectively address an issue, it is crucial to locate its origins.
The following are some potential reasons for an unresponsive screen on a Nokia C12 device, along with descriptions of each.
There are signs of soft bricking
A touch screen not working on Nokia C12 smartphones indicates a soft brick (recoverable by firmware update), often caused by a defective or undercharged battery. System file corruption, old firmware, or failed upgrades are all possible causes. Several customers have complained that after installing a software update, their Nokia C12 4 or 5 device’s screen became unresponsive and remained at the boot logo.
There might be issues with the Nokia C12 device itself
Screens on Nokia C12 devices may become unresponsive for a variety of hardware-related reasons. A broken LCD panel, faulty touch sensor, or loosened ribbon wires are all possible causes. Every Nokia C12 device, including the Note 4 and 5, is susceptible to these problems.
There might be errors in the updated software
The Android operating system is adjustable. Some of our technological advancements may backfire on us. The phone won’t power on or become stuck in a boot loop where the logo will only show intermittently. For example, some Nokia C12 4 and 5 users have reported their screens are unresponsive after a software update, rendering the Nokia C12 device unusable.
The common solutions to solve a Nokia C12 Screen unresponsive
Could anything be more annoying than a broken touchscreen on your Nokia C12 phone? If this happens, the gadget is useless, and you won’t be able to do even the simplest tasks. Even so, it’s common for the screen to cease responding to touches.
Before taking the item in for repairs, see if you can figure out the problem independently. Do you want to learn the method? If the touch screens on your Nokia C12 stop working, don’t panic; we’ll teach you exactly what to do.
Solution 1: Try to restart your device
Giving your Nokia C12 a restart is one of the most common solutions if you encounter an unresponsive screen on your phone. Here’s how.
Step 1: Press and hold the power button until the screen becomes black;
Step 2: After 1 minute or so, hold the power button again to power on the Nokia C12 device.
Solution 2: Check your charging port and battery
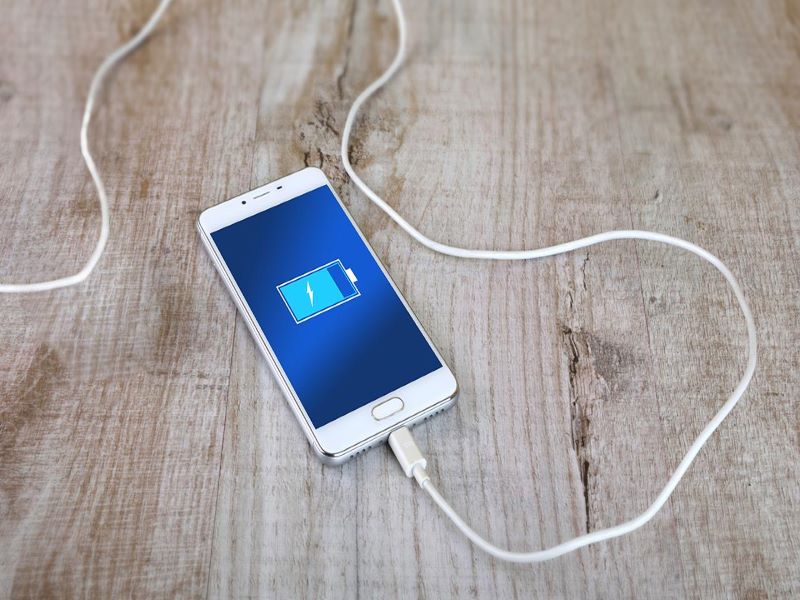
If the battery of your Nokia C12 is empty, your screen is expected to be unresponsive. To fix that, here are some easy steps for you:
- Charge your phone.
- Leave it for about an hour.
- Come back to check. Turn your phone on.
- Test if the touchscreen is now working.
Solution 3: Contact Customer Service
Let’s assume you’ve applied every possible course of action. For example, your Nokia C12 4 touchscreen is still unresponsive. You may contact the brand’s customer support department if you need assistance. When the time comes, they’ll always know what to do.
Based on the customer’s feedback, one of the frequent issues of the Nokia C12 is when the screen becomes unresponsive. These issues should not usually happen, but if you find yourself in this dilemma, a list of other solutions below will help you.
Solution 4: Turning on your full screen option offered by MI
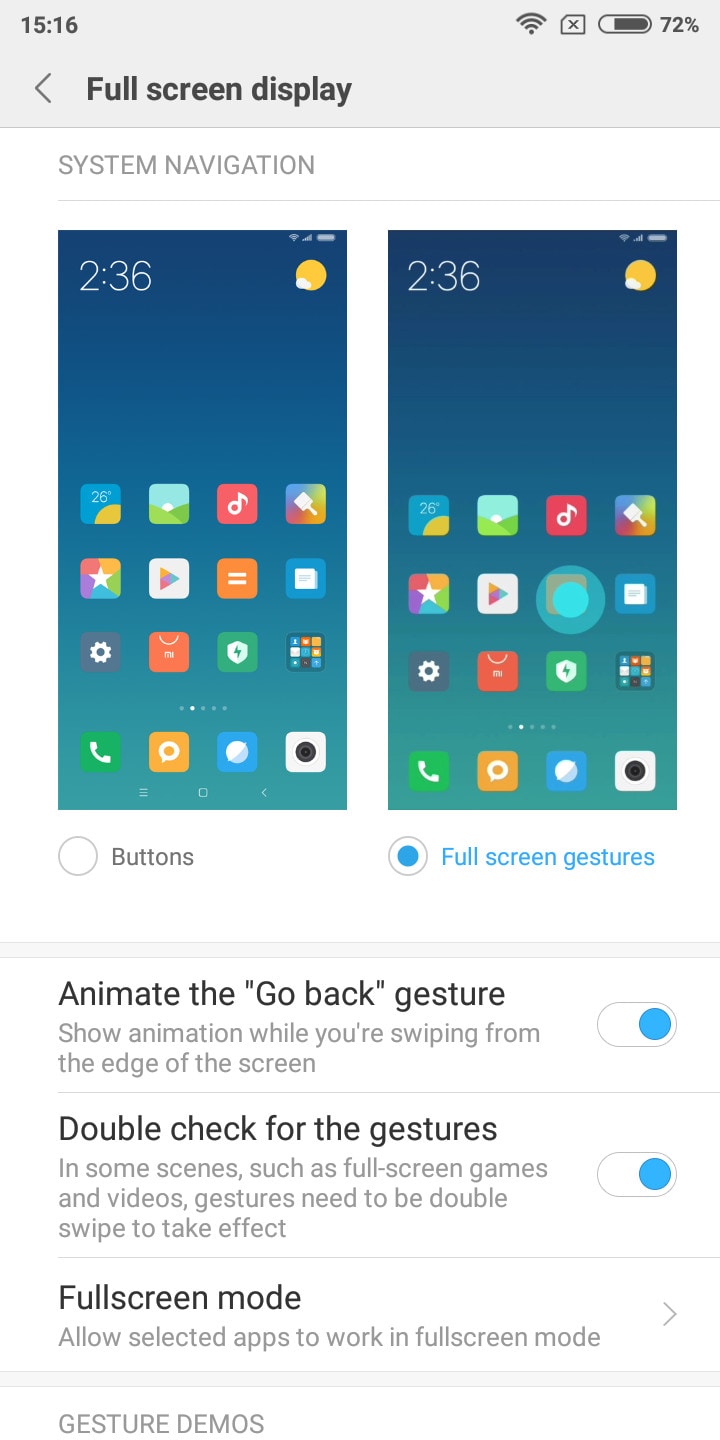
Steps to activate full screen gestures
Step 1: Browse you setting
Step 2: Search for full screen display
Step 3: From here, tap the screenshot on the right with the toggle labeled Full screen gestures
This may include gestures to get used to but it will also fix when your touchscreen sometimes stops responding.
Solution 5: Backup and Factory Reset is always a choice
Doing a factory reset may be your last remaining choice if the preceding solutions are unsuccessful. If you do this, all of the information on your phone will be deleted.
Easy Steps in Doing a Factory Reset
- Press the power button until the phone shuts down
- When your phone shuts down, press and hold the power buttonand Volume down button at the same time until the Android logo displays on the screen.
- Recovery Menuwill appear in your screen, press volume down button until Factory reset is highlighted
- Press thepower button in selecting the Factory reset option and your phone should restart automatically.
Solution 6: Using Dr. Fone Android Repair Toolkit
If you want to fix issues like this, most simply, Dr. Fone offers that. It is made to provide you with a complete mobile solution. You may have your phone fixed without losing any information. Dr. Fone’s many handy tools will quickly get your phone back in working order.
How to avoid a Nokia C12 screen unresponsive?
Users may take several precautions to avoid the Nokia C12 screen unresponsive problem. Stop using any app stores or other unofficial app providers. There is a risk that doing so may damage your device or introduce viruses that will force your phone to restart. There’s also a risk of losing important information like photos and files.
Regularly updating the Nokia C12 phone’s software is necessary to keep it running smoothly and free of issues. Tools like Dr. Fone allow users to periodically maintain and restore data by cleaning the cache and deleting unused applications.
Avoiding severe temperatures and humidity may protect the Nokia C12 device’s internal components and keep the screen responsive. Using high-quality charging cords is also recommended. For once, consumers won’t have to worry about breaking the screen because they accidentally dropped their cell phones. If users follow these measures, they may reduce the likelihood that their Nokia C12 smartphone will have an unresponsive screen.
safe & secure
Conclusion
Sometimes, Nokia C12 smartphones may experience problems with their screen. This occurs if there is an issue with the functioning of a new app or a software update. Several Nokia C12 phone owners have reported problems with an unresponsive screen. However, the remedies outlined here should help you quickly and efficiently fix the issue and get your phone back up and running. Keep your phone updated, and remember to back up your data often to avoid this problem in the future.
When following the directions, the user may require more research into some troubleshooting techniques. If this is the case, Dr.Fone Repair is usually the solution. The fact that Dr. Fone can continually tweak his system of unresponsive screens is wonderful news. This helpful tool can fix both black screens and endless starting cycles. That’s why it’s an integral part of every modern computer.
Also read:
- [Updated] In 2024, Quick Cuts Editing Instagram Videos on macOS
- 11 Proven Solutions to Fix Google Play Store Not Working Issue on Infinix Hot 40 | Dr.fone
- 2024 Approved Soundwave Statements on WhatsApp Snapshots
- Easy steps to recover deleted call history from Redmi 12
- Fixing Persistent Pandora Crashes on Tecno Pova 5 | Dr.fone
- Fixing Persistent Pandora Crashes on Xiaomi Redmi Note 13 Pro+ 5G | Dr.fone
- Guide on How To Change Your Apple ID Email Address On Apple iPhone 11 Pro Max
- How to Unlock Your iPhone 12 mini Passcode 4 Easy Methods (With or Without iTunes) | Dr.fone
- In 2024, What is Geo-Blocking and How to Bypass it On Google Pixel Fold? | Dr.fone
- Top 4 Android System Repair Software for Infinix Hot 40 Bricked Devices | Dr.fone
- Unlocking the Potential of Discord Streams for 2024
- Title: Proven Ways to Fix There Was A Problem Parsing the Package on Nokia C12 | Dr.fone
- Author: Ariadne
- Created at : 2024-10-07 22:07:53
- Updated at : 2024-10-10 23:29:07
- Link: https://howto.techidaily.com/proven-ways-to-fix-there-was-a-problem-parsing-the-package-on-nokia-c12-drfone-by-drfone-fix-android-problems-fix-android-problems/
- License: This work is licensed under CC BY-NC-SA 4.0.