
Super Easy Ways To Deal with Vivo X100 Unresponsive Screen | Dr.fone
Super Easy Ways To Deal with Vivo X100 Unresponsive Screen
The evolution of smartphones signifies the development of mobile communication technology. Different from the initial years, they are not just used for messaging and calling but have many other applications. Vivo X100 cell phones are presently utilized for perusing the Internet and exploring through maps, photography, videography, and numerous other used cases. A development in arranged availability goes hand-in-hand with the development of cell phones.
Vivo X100 smartphones are gaining popularity owing to their low costs, high quality, and innovative features. High-resolution cameras, extensive battery life, and lightning-fast processing are just a few of the advantages of these mobile devices. Nevertheless, customers may sometimes need help with issues, such as a non-functioning Vivo X100 touchscreen, which may be challenging.
Some common issues might arise for Vivo X100 phone users. The Redmi note 4 touch not working is a serious problem. It can only go up to the initialization screen. In this guide, you’ll find the information you need to troubleshoot and fix the most common problems reported by Motorola customers.
What causes a Vivo X100 Screen to be unresponsive?
The screen on your Vivo X100 phone could stop responding for several reasons. The touchscreen, the system software, or the hardware itself might all be at fault. To effectively address an issue, it is crucial to locate its origins.
The following are some potential reasons for an unresponsive screen on a Vivo X100 device, along with descriptions of each.
There are signs of soft bricking
A touch screen not working on Vivo X100 smartphones indicates a soft brick (recoverable by firmware update), often caused by a defective or undercharged battery. System file corruption, old firmware, or failed upgrades are all possible causes. Several customers have complained that after installing a software update, their Vivo X100 4 or 5 device’s screen became unresponsive and remained at the boot logo.
There might be issues with the Vivo X100 device itself
Screens on Vivo X100 devices may become unresponsive for a variety of hardware-related reasons. A broken LCD panel, faulty touch sensor, or loosened ribbon wires are all possible causes. Every Vivo X100 device, including the Note 4 and 5, is susceptible to these problems.
There might be errors in the updated software
The Android operating system is adjustable. Some of our technological advancements may backfire on us. The phone won’t power on or become stuck in a boot loop where the logo will only show intermittently. For example, some Vivo X100 4 and 5 users have reported their screens are unresponsive after a software update, rendering the Vivo X100 device unusable.
The common solutions to solve a Vivo X100 Screen unresponsive
Could anything be more annoying than a broken touchscreen on your Vivo X100 phone? If this happens, the gadget is useless, and you won’t be able to do even the simplest tasks. Even so, it’s common for the screen to cease responding to touches.
Before taking the item in for repairs, see if you can figure out the problem independently. Do you want to learn the method? If the touch screens on your Vivo X100 stop working, don’t panic; we’ll teach you exactly what to do.
Solution 1: Try to restart your device
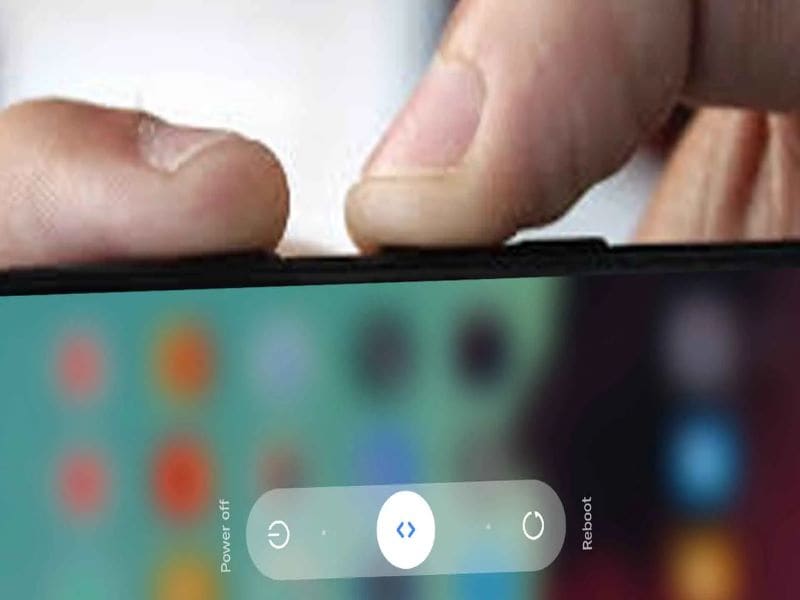
Giving your Vivo X100 a restart is one of the most common solutions if you encounter an unresponsive screen on your phone. Here’s how.
Step 1: Press and hold the power button until the screen becomes black;
Step 2: After 1 minute or so, hold the power button again to power on the Vivo X100 device.
Solution 2: Check your charging port and battery
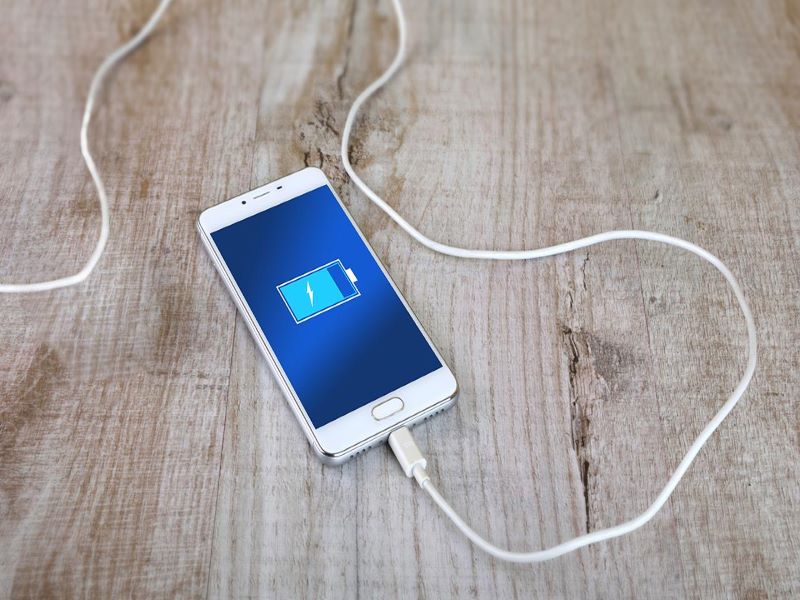
If the battery of your Vivo X100 is empty, your screen is expected to be unresponsive. To fix that, here are some easy steps for you:
- Charge your phone.
- Leave it for about an hour.
- Come back to check. Turn your phone on.
- Test if the touchscreen is now working.
Solution 3: Contact Customer Service
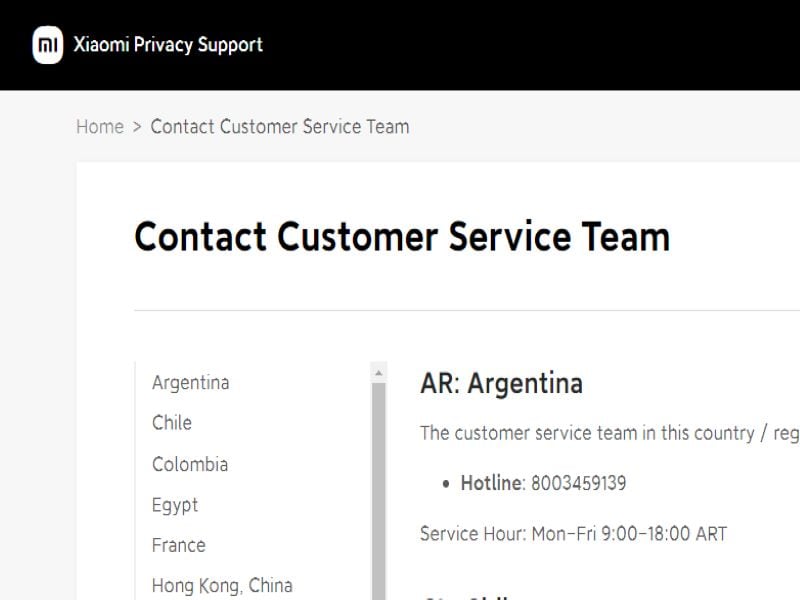
Let’s assume you’ve applied every possible course of action. For example, your Vivo X100 4 touchscreen is still unresponsive. You may contact the brand’s customer support department if you need assistance. When the time comes, they’ll always know what to do.
Based on the customer’s feedback, one of the frequent issues of the Vivo X100 is when the screen becomes unresponsive. These issues should not usually happen, but if you find yourself in this dilemma, a list of other solutions below will help you.
Solution 4: Turning on your full screen option offered by MI
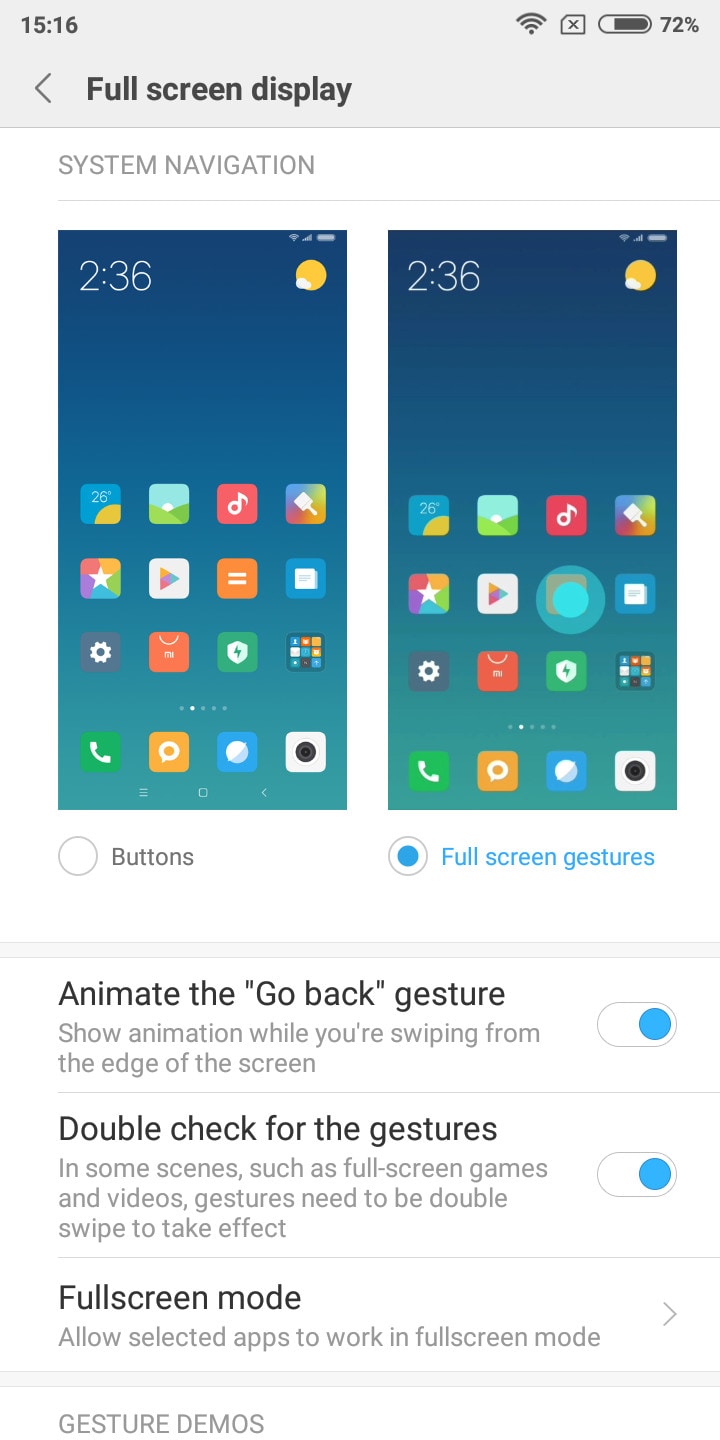
Steps to activate full screen gestures
Step 1: Browse you setting
Step 2: Search for full screen display
Step 3: From here, tap the screenshot on the right with the toggle labeled Full screen gestures
This may include gestures to get used to but it will also fix when your touchscreen sometimes stops responding.
Solution 5: Backup and Factory Reset is always a choice
Doing a factory reset may be your last remaining choice if the preceding solutions are unsuccessful. If you do this, all of the information on your phone will be deleted.
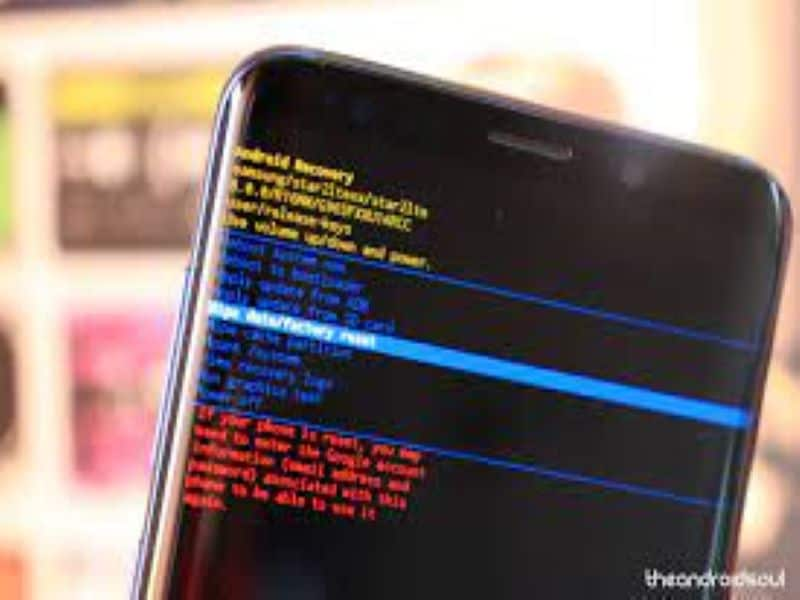
Easy Steps in Doing a Factory Reset
- Press the power button until the phone shuts down
- When your phone shuts down, press and hold the power buttonand Volume down button at the same time until the Android logo displays on the screen.
- Recovery Menuwill appear in your screen, press volume down button until Factory reset is highlighted
- Press thepower button in selecting the Factory reset option and your phone should restart automatically.
Solution 6: Using Dr. Fone Android Repair Toolkit

If you want to fix issues like this, most simply, Dr. Fone offers that. It is made to provide you with a complete mobile solution. You may have your phone fixed without losing any information. Dr. Fone’s many handy tools will quickly get your phone back in working order.
How to avoid a Vivo X100 screen unresponsive?
Users may take several precautions to avoid the Vivo X100 screen unresponsive problem. Stop using any app stores or other unofficial app providers. There is a risk that doing so may damage your device or introduce viruses that will force your phone to restart. There’s also a risk of losing important information like photos and files.
Regularly updating the Vivo X100 phone’s software is necessary to keep it running smoothly and free of issues. Tools like Dr. Fone allow users to periodically maintain and restore data by cleaning the cache and deleting unused applications.
Avoiding severe temperatures and humidity may protect the Vivo X100 device’s internal components and keep the screen responsive. Using high-quality charging cords is also recommended. For once, consumers won’t have to worry about breaking the screen because they accidentally dropped their cell phones. If users follow these measures, they may reduce the likelihood that their Vivo X100 smartphone will have an unresponsive screen.
 safe & secure
Conclusion
Sometimes, Vivo X100 smartphones may experience problems with their screen. This occurs if there is an issue with the functioning of a new app or a software update. Several Vivo X100 phone owners have reported problems with an unresponsive screen. However, the remedies outlined here should help you quickly and efficiently fix the issue and get your phone back up and running. Keep your phone updated, and remember to back up your data often to avoid this problem in the future.
When following the directions, the user may require more research into some troubleshooting techniques. If this is the case, Dr.Fone Repair is usually the solution. The fact that Dr. Fone can continually tweak his system of unresponsive screens is wonderful news. This helpful tool can fix both black screens and endless starting cycles. That’s why it’s an integral part of every modern computer.
Google Play Services Won’t Update? 12 Fixes are Here on Vivo X100
Google Play Services is a crucial component of any Android device, responsible for supporting various Google apps and services. However, at times, users may encounter issues with updating Google Play Services, preventing them from accessing the latest features and security updates.
It’s pretty much annoying when you try to launch Google Play Services but it isn’t able to operate correctly. You get some of the notifications like Google Play Services won’t run unless you update Google Play Services. On the other hand, when you start to update Google Play Services, you stuck again with the error pop-ups, and Google Play Services won’t update. This can create a lot of chaos in one’s life. So, what action should one need to take in such a situation? Well! You needn’t rankle more as we will explore some of the causes and tips to fix the issue. Keep reading!
Part 1: Causes for Google Play Services Won’t Update Issue
Before diving into the solutions, it’s essential to understand the potential causes of the Google Play Services update problem. Let’s talk about the causes without further ado.
- 1. Incompatibility with Custom ROMs: Using a custom ROM on your Vivo X100 can cause compatibility issues and prevent the installation of Google Play Services updates.
- 2. Network connectivity issues: Poor or unstable internet connection can prevent the download and installation of updates.
- 3. Insufficient storage space: When your device doesn’t have enough free space, it can hinder the installation of updates for Google Play Services.
- 4. Excessive Installed Apps: a large number of installed apps on your device can exacerbate the update problem with Google Play Services.
- 5. Cache Conflicts: Accumulated cache can lead to conflicts and cause issues with the updating process of “Google Play Services”.
- 6. Outdated version of Google Play Store: If your device has an outdated version of the Google Play Store app, it may interfere with the update process for Google Play Services.
- 7. Google Play Components: If certain components of Google Play Services are corrupted, it can contribute to update issues.
Part 2: One-Click Fix When Google Play Services Won’t Update
For those seeking a quick and effortless solution, several third-party tools offer one-click fixes for the Google Play Services update problem. These tools automate the update process, ensuring that you have the latest version of Google Play Services installed. However, it is crucial to use reputable and trusted tools to avoid potential security risks.
If you cannot update Google play services by the reason of custom ROM incompatibility or Google Play component corruption, there is a serious need of repairing firmware then. And to repair Android firmware, one of the expert ways is Dr.Fone - System Repair (Android) . This professional tool vows to bring your Vivo X100s back to normal by fixing the issues with ease. Here are the advantages of this tool.
Dr.Fone - System Repair (Android)
Android repair tool to fix Google Play Services not updating
- A completely user-friendly tool where no technical skills are needed.
- All Android models are easily supported.
- Any kind of Android issue like black screen , stuck in boot loop , Google play services won’t update, or app crashing can easily be resolved with these.
- Full security is promised with the tool so there’s no need to worry about harmful activities like viruses or malware.
- Trusted by a lot of users and carries a high success rate.
3,485,019 people have downloaded it
How to Fix Google Play Services can’t be installed using Dr.Fone - System Repair (Android)
- Step 1: Install the Software
Initiate the process of downloading the software on your computer. Now, click on “Install” button and go along with the installation procedure. Click on “System Repair” option from the Toolbox window.
- Step 2: Device Connection
Now, taking the assistance of an original USB cable, connect your Vivo X100 to the PC. Then hit on “Start”.

- Step 3: Check the Information
You will notice the next screen which asks for some information. Please ensure to choose the correct device brand, name, model, career, and other needed details. Click on “Next” after this.

- Step 4: Download Mode
You will now see some instructions on your PC screen. Just follow those according to your device. And then your device will boot in Download mode. Once done, hit on “Next”. The program will now download the firmware.

- Step 5: Repair the Problem
When the firmware is downloaded completely, the program will automatically start getting fixed the issue. Wait for a while until you get the notification of the process completion.

safe & secure
Part 3: 10 Common Fixes When Google Play Services Won’t Update
Method 1. Restart your Android and try to update again
In most cases, restarting the Vivo X100 device can simply do the trick. When you restart the Vivo X100 device, most of the issues get eliminated making the Vivo X100 device perform better than before. Also, it is all about RAM. While you restart your device, the RAM gets cleared. As a result, the apps work properly. So, in the first place, we would like you to restart your Vivo X100 when you cannot update Google Play Services. Once restarted, try to update again and see if the results are positive.
Method 2. Uninstall Google Play Services Updates and Reattempt the Update
Uninstalling previous Google Play Services updates resolves conflicts and errors, often addressing the issue of updates. This process clears potential obstacles, enabling a successful update of Google Play Services. Here’s how you can do it:
- Open your device’s “Settings.”
- Scroll down and select “Apps” or “App Manager.”
- Locate and tap on “Google Play Services.”
- Depending on your device and Android version, you might need to tap on “App info” or “Storage.”
- Look for the option to “Uninstall updates.” This will revert Google Play Services to its original version.
- Confirm the action when prompted.
- Once the updates are uninstalled, go back to the Google Play Store.
- Search for “Google Play Services” using the search bar at the top.
- If an update is available, you’ll see the option to “Update.” Tap on it to start the update process.
- After the update is complete, restart your device to ensure the changes take effect.
Method 3. Update Google Play Store
Ensure that you have the latest version of the Google Play Store app installed on your device. Open the Play Store, go to Settings, and check for updates. Updating the Play Store can often resolve compatibility issues with Google Play Services updates.
Method 4. Google account and re-add it
Go to your device’s Settings, select Accounts or Users, and remove your Google account. Restart your device and add the account again. This process can refresh the connection and resolve update issues.
Method 5. Uninstall unnecessary apps
As we mentioned above, due to a lot of apps being installed at the same time, the issue can crop up. And hence, if the above solution didn’t help, you can try to uninstall the apps that you don’t need currently. We hope this works. But if not, you can go to the next fix.
Method 6. Clear Google Play Services cache
If still you cannot update Google Play Services, clearing cache can solve your problem. We also stated this in the beginning as the reason. If you don’t know, cache holds the app’s data temporarily so that it can remember the information when you next open the app. Many times, old cache files get corrupted. And clearing cache can also help in saving storage space on your device. For these reasons, you need to clear cache of Google Play Services to get rid of the problem.
Here is how to clear Google Play Services cache:

- Launch “Settings” on your phone and go to “Apps & Notifications” or “Application” or “Application Manager”.
- Now, from all the apps’ list, choose “Google Play Services”.
- On opening it, tap “Storage” followed by “Clear Cache”.
Method 7. Boot into download mode to clear cache of whole phone
If unfortunately, things are still the same, we would like to recommend you wipe the cache of the whole device to fix the issue. This is an advanced method to solve issues and is helpful when the Vivo X100 device is facing any flaws or malfunctions. For this, you need to go to the download mode or recovery mode of your device. Every device has its own steps for this. Like in some, you need to simultaneously press the “Power” and “Volume Down” keys. While in some, the “Power” and both “Volume” keys work.
This is how it works when Google Play Services can’t be installed on your device:
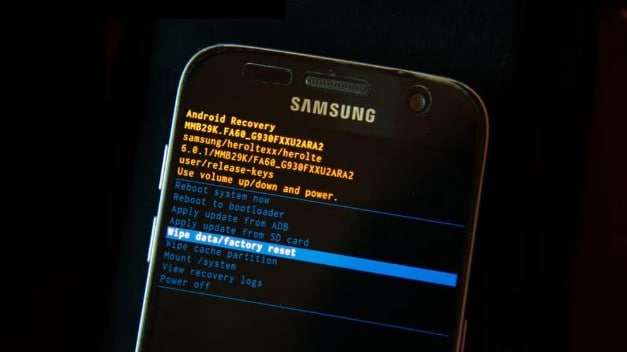
- Turn off the Vivo X100 device to begin with and then follow the steps for recovery mode.
- On the recovery screen, use the “Volume” buttons for scrolling up and down and go to “Wipe cache partition”.
- To confirm, press the “Power” button. Now, the Vivo X100 device will begin to wipe the cache.
- Hit reboot when asked and the Vivo X100 device will now be rebooted finishing the issue.
Method 8. Check your Android storage
Generally speaking, Google Play Services can update automatically in the background. But if there is not enough storage on your Android, the automatic update may fail, so check your android space.
Method 9. battery optimization
Some devices aggressively optimize battery usage, which can interfere with the background processes required for updating Google Play Services. Disable battery optimization for Google Play Services in the Vivo X100 device’s Settings to ensure uninterrupted updates.
Method 10. Check date and time settings
Sometimes, incorrect date and time settings on your device can cause conflicts with Google Play Services updates. Ensure that your device’s date and time are set correctly and set to automatic. Follow the steps below to set the date and time on your android correctly.

- Open “Settings” and go to “General Management”.
- Click “Date & time” and then enable “Automatic date & time”. Or you can disable and re-enable it.
Method 11. Factory Reset your Android
As a final measure, if everything went in vain, you can perform a factory reset on your device. This method will wipe away all your data while performing and make the Vivo X100 device go to factory state. Please ensure to keep backing up your important data if you are going to take the help of this method.
The steps are:
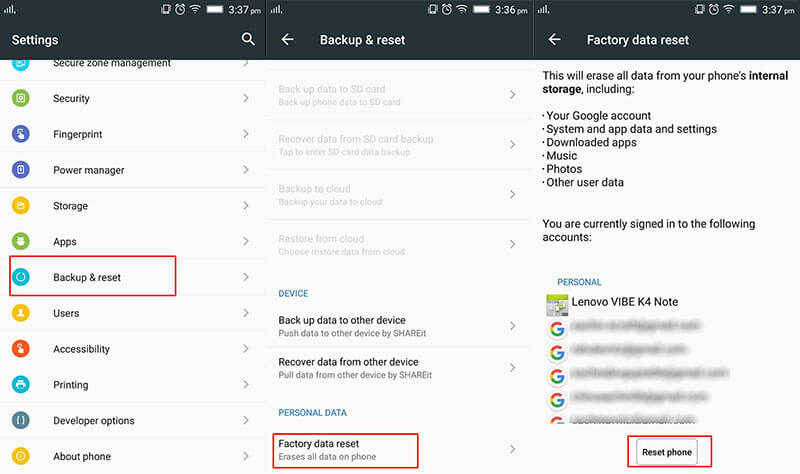
- Open “Settings” and go to “Backup & Reset”.
- Choose “Factory Reset” followed by “Reset Phone”.
FAQs about Google Play Services
To provide further clarity, here are some frequently asked questions about Google Play Services:
1. What is Google Play Services?
Google Play Services is a background service on Android devices that provides essential functionality and support for various Google apps and services. It includes features like authentication, push notifications, location services, and more, enabling seamless integration and enhanced performance for Google apps.
2. Why is it important to keep Google Play Services updated?
Keeping Google Play Services updated is crucial for several reasons. It ensures compatibility with the latest versions of Google apps, improves app performance, and enhances security. Updates often introduce new features, bug fixes, and optimizations, providing a better user experience and access to the latest advancements offered by Google.
3. Can I uninstall Google Play Services?
No, Google Play Services cannot be uninstalled as it is a core system component required for the proper functioning of Google apps and services. Removing or disabling it can lead to malfunctions and render many Google apps non-functional. However, you can disable specific permissions or clear its cache and data if troubleshooting issues related to Google Play Services.
4. How can I check the version of Google Play Services on my device?
To check the version of Google Play Services on your Vivo X100, follow these steps:
- Step 1. Open the Google Play Store app.
- Step 2. Tap on the menu icon (three horizontal lines) in the upper-left corner.
- Step 3. Scroll down and select “Settings.”
- Step 4. Scroll to the bottom and find the “Play Store version” or “Play Services version”. The number displayed indicates the version of Google Play Services installed on your device.
5. Why is my device not compatible with the latest version of Google Play Services?
There can be several reasons why a device is not compatible with the latest version of Google Play Services. It could be due to hardware limitations, an outdated Android operating system version, or the Vivo X100 device no longer receiving official software updates. Compatibility requirements can change with newer versions of Google Play Services, and older devices may not meet the necessary criteria to support the latest updates.
Conclusion
Encountering difficulties when updating Google Play Services can be frustrating, but with the right approach, these issues can be resolved. By understanding the causes and implementing the suggested fixes outlined in this guide, you can overcome the Google Play Services update problem. Remember to prioritize storage space, ensure a stable internet connection, and keep your apps and system components up to date. By doing so, you can enjoy the full functionality of Google Play Services and benefit from the latest features and security enhancements.
6 Fixes to Unfortunately WhatsApp has stopped Error Popups On Vivo X100
Ever seen a wheel going on without cog? Similarly, WhatsApp has become the cog of our lives. Be it in the professional era or personal (gossips, oomph) stuffs, it is a crucial engaging kind of application. WhatsApp is the slow poison yet a useful tool used worldwide after call logs or messages. Imagining a day without is enough to put someone off. And if one has recently faced a problem in WhatsApp crashing or not opening, then it is enough to give a heart break. It can be due to Cache memory piled up, storage running out of space, WhatsApp components getting corrupted. In such a case, resolving the problem by using an effective solution is very important! Don’t worry and wander as we will provide impeccable range of fixes to bid bye to WhatsApp stopping problem.
Cause 1: WhatsApp-related Firmware Components went wrong
You should start fixing the WhatsApp crashing issue with fixing the Android firmware. This is because the Android firmware components are many times the hidden culprit behind the problem of why a particular app stops working. And to fix these components in one click, you need Dr.Fone - System Repair (Android). It is one of the safest tools around in the market and works efficiently with Android system issues. It promises to bring your device back to normal and healthy state. Here are the benefits you get with this amazing tool.
Dr.Fone - System Repair (Android)
Android repair tool to fix firmware component issues
- Fixes all kinds of Android system issues with ease
- Supports 1000+ Android device in a hassle-free way
- Really easy to use and free from any virus infection
- One needn’t to be a tech pro to use this tool
- Can be downloaded for free and repairs the Vivo X100 device in few easy steps
4,388,871 people have downloaded it
Step 1: Download Dr.Fone Tool
To start repairing, go to the official website of Dr.Fone - System Repair (Android) and download it. Install it and then open the tool on your PC. To proceed, look for the “System Repair” tab and click on it.
Step 2: Choose the Right Tab
As the next step, you need to take the help of USB cable and then plug your device to the computer. Once connected appropriately, make sure to click on the “Android Repair” tab from the left panel.
Step 3: Enter Details
Next will be the information screen. Simply enter the model, brand and other details. Check everything once and click on “Next”.
Step 4: Enter Download Mode
Subsequently, you need to go along with the onscreen instructions. This will boot your device in the download mode. The step is necessary to download the firmware. When you follow the steps, you need to click “Next”. The program will then start downloading the firmware.
Step 5: Repair Android
Now, you just have to sit back and relax. The program will begin to repair your device. Wait until you get the notification for completion.
Cause 2: Cache conflict
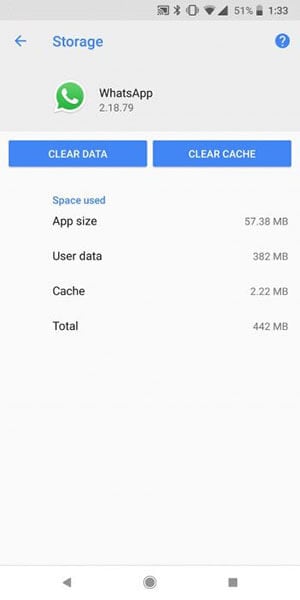
The purpose of Cache in a device is to keep the track of frequently used data and information of an application. And when there are the files or data that are corrupted in the cache, this might raise the “Unfortunately WhatsApp has stopped” error. Therefore, you need to clear the WhatsApp data if the above method went futile. Here are the steps.
- Open “Settings” and go to “App Manager” or “Apps & Notifications” or “Applications”.
- Now, from the list of all applications, choose “WhatsApp”.
- Click on “Storage” and tap “Clear Data”.
Cause 3: WhatsApp components corruption
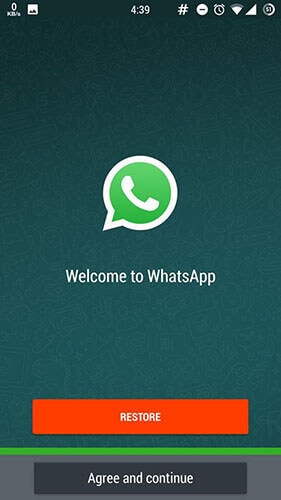
A lot of times, the WhatsApp crashes due to the corrupted components of WhatsApp. In such case, all you need to do is uninstall and install the WhatsApp again. This is how you do it.
- Uninstall the app right away from your Homescreen or from the “Settings” > “Applications” > “All” > “WhatsApp” > “Uninstall” (for some phones).
- Go to “Play Store” and search “WhatsApp” on the search bar.
- Tap on it and start downloading followed by installing it.

Cause 4: Not Enough Storage on your Phone
Insufficient storage could be the other reason why for your WhatsApp has stopped. When your device starts running out of space, some apps may not be able to operate properly for their functions take up space in the Vivo X100 device. And probably WhatsApp is one of them. If the space is the case with you, we suggest you the following two things to go with.
- Firstly, go to Settings and check the storage. Make sure it is enough i.e. at least 100 to 200MB.
- Secondly, start eliminating the apps that are no longer needed. This will indeed create more space in your device and will let your WhatsApp wok properly.
Cause 5: Gmail Account no longer valid or hacked
It is a well-known fact that Android device and Gmail account go hand in hand. To run the Vivo X100 device smoothly, it is always asked to enter your Gmail address for further configurations. And when WhatsApp stops on your device, the reason might be your Gmail account. Most probably it is not valid now or maybe hacked. If this is the case, we suggest you to log out and log in with some another Gmail account.
- Log out by opening “Settings” and tap on “Accounts”.
- Choose your Google account and tap on “REMOVE ACCOUNT”.
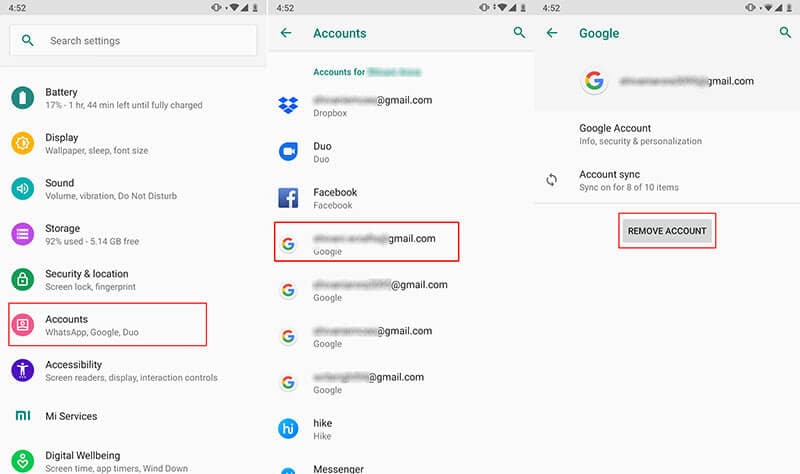
Now, you can login again and check if WhatsApp works or not.
Cause 6: WhatsApp Incompatible with your Android Phone
If still nothing works and your WhatsApp keeps stopping, most likely the reason is the incompatibility of your WhatsApp with your device. In such case, the thing that comes to your rescue is mod WhatsApp version like GBWhatsApp. It is a mod app which is similar to WhatsApp but in a more modified way. With this, a user gets more functionalities and customizable settings when compared to WhatsApp.
If you’re wondering how you can find this app and install, you should keep reading.
To find GBWhatsApp:
Since you can look for this mod app on the Play Store, here are some of the other secure places from where you can download apk file for this GBWhatsApp. Note down these websites to get GBWhatsApp downloaded if WhatsApp has stopped.
- Latest Mod APKs
- UptoDown
- Android APKs Free
- Soft Alien
- OpenTechInfo
To Install GBWhatsApp:
Now that you have decided where to download the apk file, these are the following steps that you should follow to install it on your phone. Please have a look:
- Firstly, open “Settings” on your device and go to “Security”. Turn the “Unknown Sources” option. Doing this will let you install the apps from other locations than Play Store.

- Using the browser on your phone, download the app from any of the aforementioned website.
- Launch the GBWhatsApp apk and follow the onscreen instruction in order to install. You need to go in a similar way as you do in mormal WhatsApp app.
- Simply proceed with entering your name, country and contact number. The app will verify your account. You are now ready to use this app.

Also read:
- [New] Ultimate Guide to Top-Notch Mac Audio Recorders A Comprehensive List
- [Updated] 2024 Approved High-Quality Action Recorders 12, Enhanced with GPS Navigation
- [Updated] Funicate Mastery for Seamless Media Access for 2024
- 2024 Approved Brilliance Bunch Leading GK Video Channels
- 2024 Approved Essential Film Techniques on YouTube by Future Visionaries
- 6 Fixes to Unfortunately WhatsApp has stopped Error Popups On Samsung Galaxy M14 5G | Dr.fone
- 8 Ultimate Fixes for Google Play Your Oppo Reno 10 5G Isnt Compatible | Dr.fone
- Ace Guide to Constructing Virtual Classroom Headlines
- Expert Insights Capturing the Essence of Online Meetings for 2024
- Top 10 Fixes for Phone Keep Disconnecting from Wi-Fi On Realme 12 5G | Dr.fone
- Vivo V27 Bootloop Problem, How to Fix it Without Data Loss | Dr.fone
- Why Your Lava Agni 2 5G Screen Might be Unresponsive and How to Fix It | Dr.fone
- Title: Super Easy Ways To Deal with Vivo X100 Unresponsive Screen | Dr.fone
- Author: Ariadne
- Created at : 2025-03-02 00:40:06
- Updated at : 2025-03-06 23:39:38
- Link: https://howto.techidaily.com/super-easy-ways-to-deal-with-vivo-x100-unresponsive-screen-drfone-by-drfone-fix-android-problems-fix-android-problems/
- License: This work is licensed under CC BY-NC-SA 4.0.