
Top 4 Android System Repair Software for Samsung Galaxy M34 Bricked Devices | Dr.fone
Top 4 Android System Repair Software for Samsung Galaxy M34 Bricked Devices
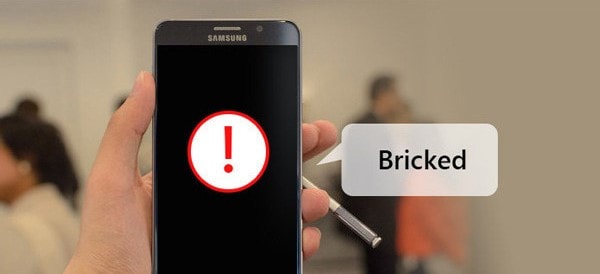
Is your Samsung Galaxy M34 device showing signs of being “bricked” or “soft-bricked”? When a Samsung Galaxy M34 is bricked, it becomes unresponsive and unusable. But fear not, as this article will guide you through reviving your device’s functionality. It will delve into the significance of unbricking and how it restores usability.
Moreover, this article will introduce you to the world of Samsung Galaxy M34 unbrick tools and software, ensuring you can get your device back on track. So read on and explore the top Android system repair software that can bring life back to your bricked Samsung Galaxy M34 device.
Part 1: Understanding Bricked Samsung Galaxy M34
Have you ever heard the term “bricked” concerning your Samsung Galaxy M34 device? This section explains it to you in simple terms. Imagine your device becoming like a brick, unresponsive and seemingly lifeless. That’s what happens when a Samsung Galaxy M34 gets bricked. There are two main types of brick: soft brick and hard brick.
Soft Brick
Soft brick is like a temporary setback for your device. To see if your Samsung Galaxy M34 is soft - bricked, check out the details below:
- It happens when the software encounters issues, but the hardware is usually fine.
- Your device might not start properly, freeze, or get stuck on the logo screen.
Hard Brick
Now, this is a more severe situation. In this case, your bricked Samsung Galaxy M34 might fall under the following conditions:
- Thesoftware and hardware have significant problems, making the Samsung Galaxy M34 device unresponsive.
- Your device won’t turn on and might not show any signs of life.
Common Causes of a Brick Samsung Galaxy M34
Now, let’s discuss why devices end up in this bricked state. It can happen due to a few common reasons:
- Failed Updates
Something might go wrong during the process when you’re trying to update your Samsung Galaxy M34 device. This is properly because of a poor internet connection or other interruptions. As a result, your device might get confused and end up bricked.
- Custom ROM Installations
A custom ROM is like a customized version of your device’s software. While it can bring cool new features, it can also cause issues if not installed correctly. Incompatible or poorly made custom ROMs can sometimes lead to a bricked device.
- Unauthorized Modifications
If you’re trying to tweak your device’s software without proper knowledge, you might make changes that the Samsung Galaxy M34 device can’t handle. This can lead to instability and, you guessed it, a bricked device.
So, why is it important to know all this? Well, a bricked device isn’t just frustrating; it can disrupt your daily life. You won’t be able to use your device, access your apps, or even make calls. That’s why unbricking is crucial.
Part 2: Top Android System Repair Software
Now that you’ve grasped the concept, let’s dive into how to unbrick a Samsung Galaxy M34. That’s where Android system repair software comes in. These clever programs are like doctors for your device’s software. They diagnose and fix issues to keep your appliance running smoothly. Let’s explore the cream of the crop when it comes to these software solutions:
Wondershare Dr.Fone – System Repair (Android)
Dr.Fone - System Repair (Android) is like a magic wand for your Samsung Galaxy M34 device. It’s designed to rescue your device from troubles and make it run smoothly again. Dr.Fone - System Repair (Android) is built to fix various issues, including a bricked device. It can resolve problems like black screens, frozen devices, boot loops, and even devices stuck in recovery mode.
![]()
Dr.Fone - System Repair (Android)
Repair Android System Errors without Any Trouble.
- Fix your Android to normal, no skills required.
- Fix various Android system issues, stuck in boot loop , black screen , or won’t turn on , looping on start, etc.
- The high success rate in resolving Android system issues.
- Compatible with a wide range of Android devices and OS versions
- User-friendly interface with easy-to-follow steps.
3981454 people have downloaded it

Key Features
Here’s what Dr.Fone offers as a powerful Android system repair software:
- Repair a wide variety of Android system issues.
- User-friendly interface that’s easy to navigate.
- No technical expertise required – it guides you step by step.
- Compatibility with a wide range of Samsung Galaxy M34 devices.
Pros
Check out Dr. Fone’s benefits you can take advantage of:
- Easy and intuitive to use.
- Can fix a range of software-related problems.
- Doesn’t require deep technical knowledge.
- Can help you avoid expensive repair services
Cons
As for its drawback, refer below:
- Some complex issues might still require professional help.
How To Unbrick Samsung Galaxy M34 Using Dr.Fone
This tutorial will show you how Dr.Fone can remove the brick from a Samsung Galaxy M34 smartphone.
- Step 1: Launch Dr.Fone and head to the program’s left-hand panel, where you’ll find the Toolbox. You may fix your broken Android device by connecting it to your computer and selecting System Repair from the menu.

 safe & secure
4,001,177 people have downloaded it
- Step 2: Select Android on the following screen to troubleshoot an Android device. After that, you’ll be brought to a new screen where you can initiate the fix by clicking Start.

- Step 3: When you click through to the next window, the service will automatically recognize the manufacturer of the Android device. Choose the appropriate Brand, Name, Model, Country, and Carrier from the drop-down menus. Select OPEN in the Carrier area if the phone is unlocked. The next step is to tick the box labeled I accept the risk and am ready to continue. Click Next to proceed with the rest of the Samsung Galaxy M34 device repair.

Step 4: Put your Samsung Galaxy M34 into Download Mode when prompted.
If your phone has a home button, follow the on-screen prompts to power it down. Keep pressing and holding the Volume Down, Home, and Power Then, press the Volume Upbutton to activate the Download Mode.

- If your Android doesn’t have a Home button, you may still use it byturning it off and pressing the Volume Down, Bixby, and Power buttons simultaneously. Repeatedly pressing the Volume Up button will activate Download Mode.

- Step 5: The firmware download starts on the platform immediately after the Samsung Galaxy M34 device enters Download Mode. You can click Stop to abort it at any stage during the process. The platform then verifies and presents the information as it downloads. By selecting Fix Now, you can install the firmware.

- Step 6: The Android repair procedure may delete all of your data. To proceed, please type “000000” in the box provided. The system repair process will begin, and its status can be viewed in the next screen’s progress bar.
Take Note: Backing up your Android is necessary before doing any Android repair.

- Step 7: The prompt window will show the completion message. If the Android device boots normally, you can close the tool by clicking the Done button. Press the Try Again button to try powering on the Samsung Galaxy M34 device again if it does not turn on automatically.
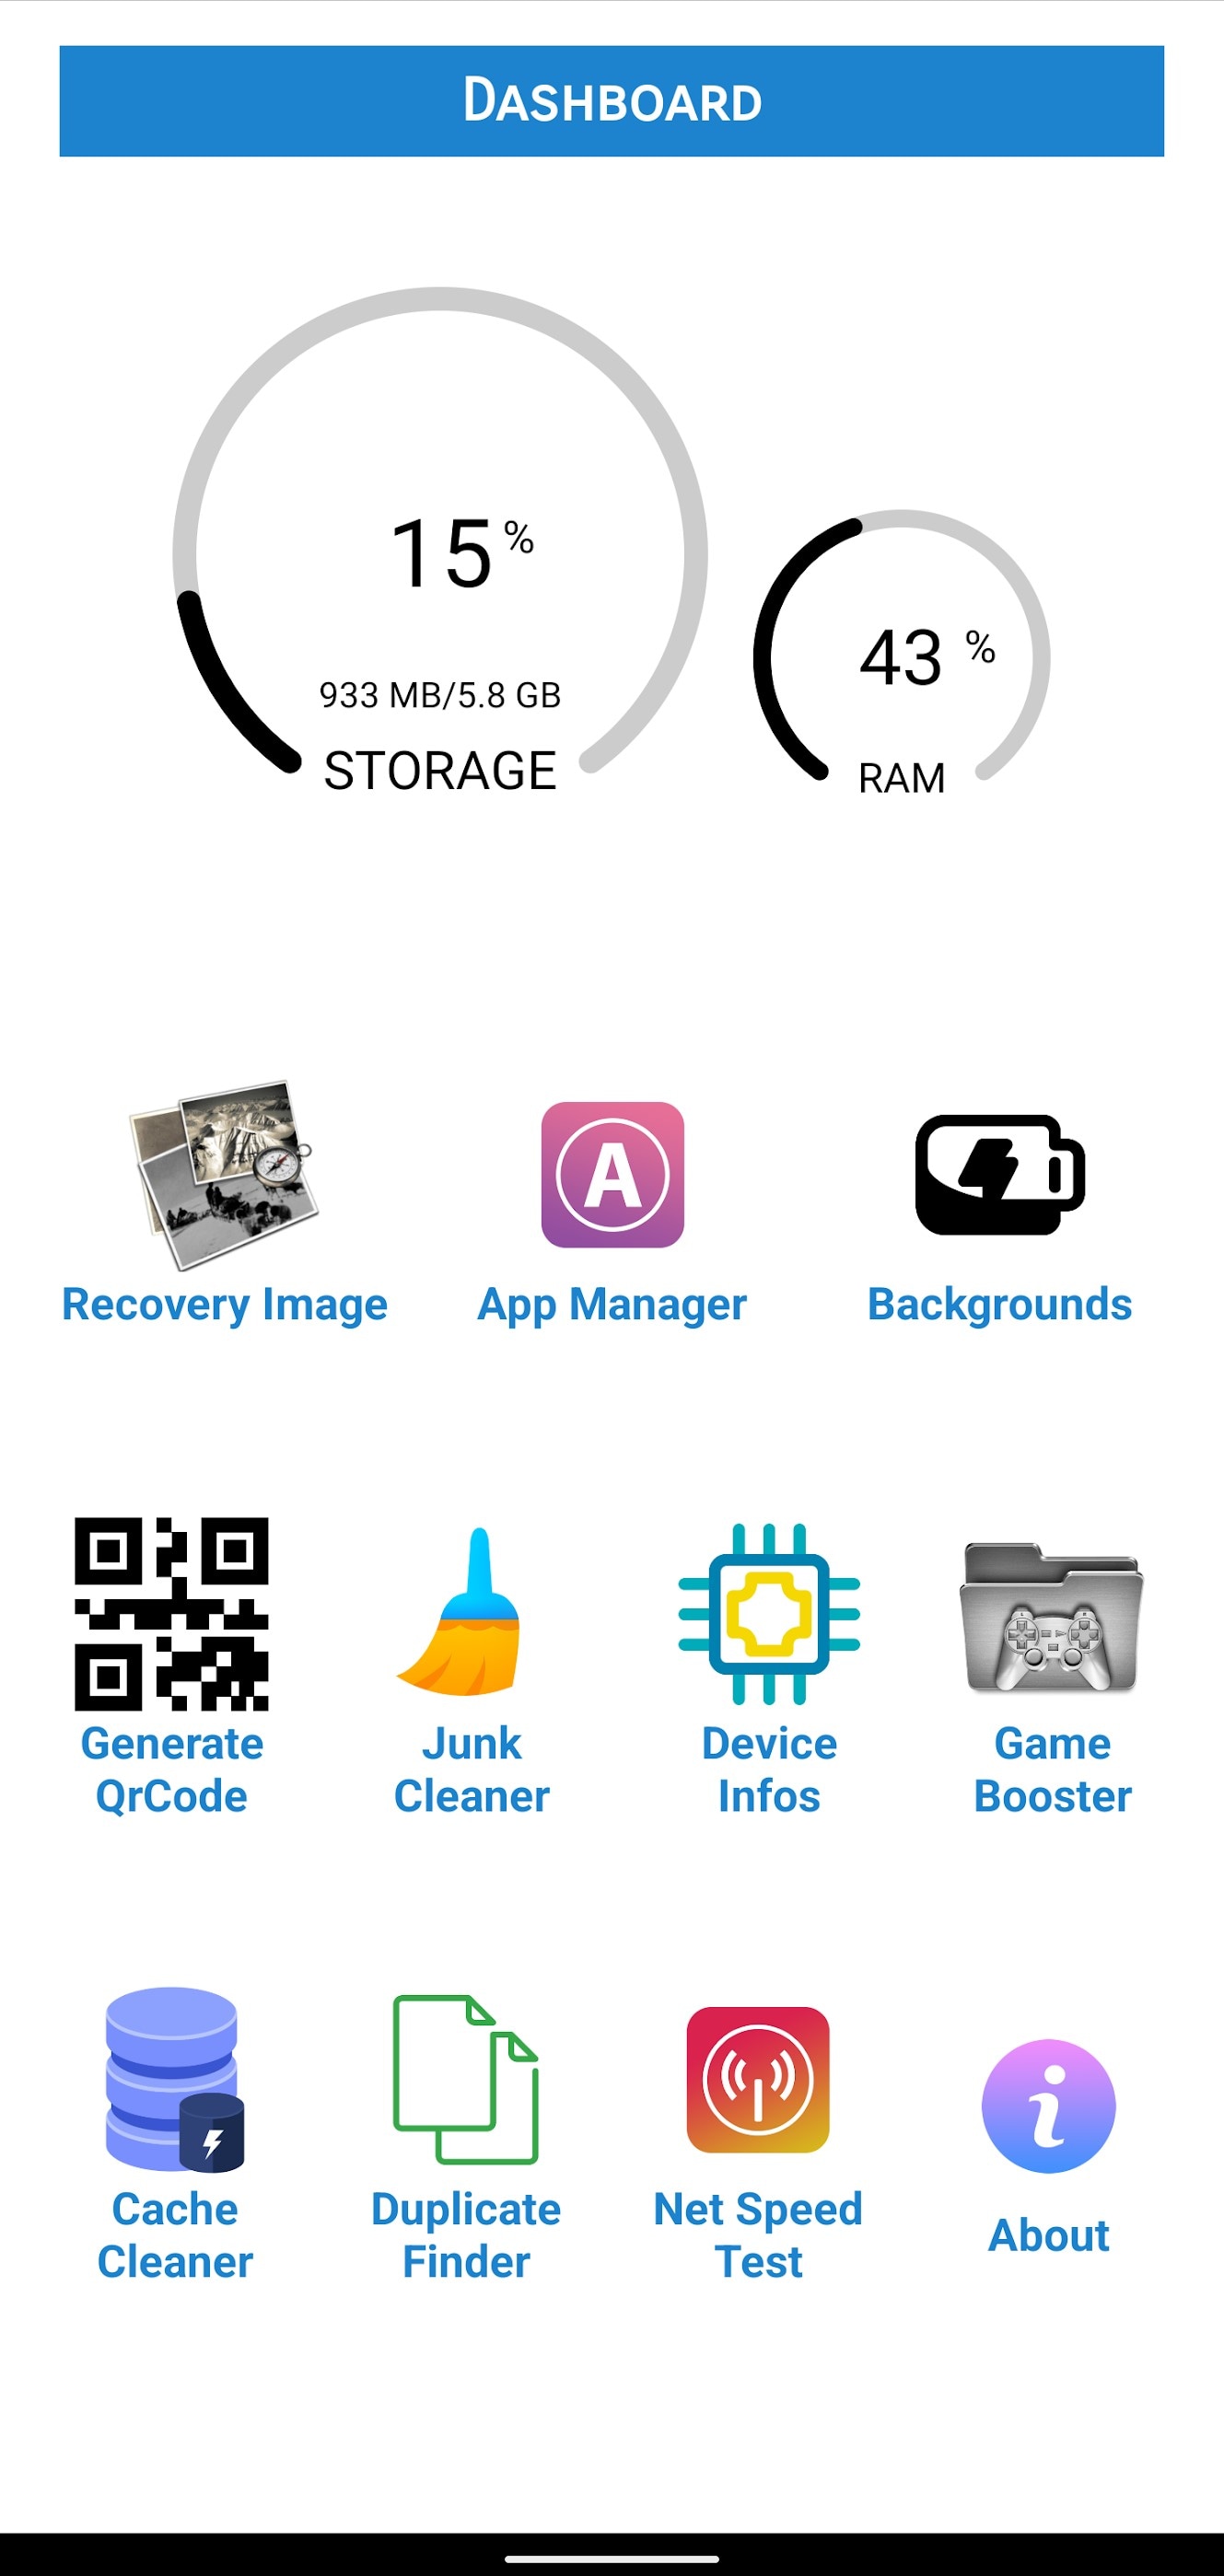
Repair System & Phone Master
This software is a real game-changer in resolving Android system problems. It specializes in repairing system issues, enhancing device performance, and cleaning up unnecessary files.
Key Features
Check out the key features of this software below:
- Repair a range of system issues, including bricking.
- Boost device speed and performance.
- Clean up junk files to free up space.
- The easy-to-use interface is suitable for all users.
Pros
Repair System & Phone Master’s advantages include the following:
- Straightforward operation.
- Focus on improving overall device performance.
- Can potentially extend your device’s lifespan.
Cons
Below is the disadvantage of this software:
- Repair capabilities might be limited for complex issues.
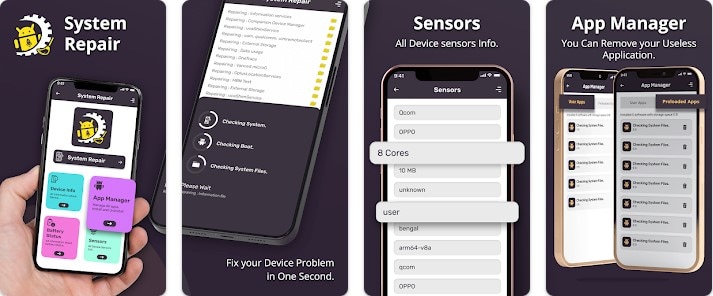
System Repair for Android
True to its name, System Repair for Android is designed to repair and rejuvenate your device’s Android system. It’s a reliable tool to tackle various software issues, including bricked devices.
Key Features
The key features of System Repair for Android app include:
- Repair various Android system problems.
- User-friendly interface for hassle-free operation.
Pros
As for its advantages, see the list below:
- Straightforward solution for commonsystem issues.
- Can save you from device replacement costs.
Cons
Check below to learn about this app’s drawback:
- Advanced issues might require professional intervention.
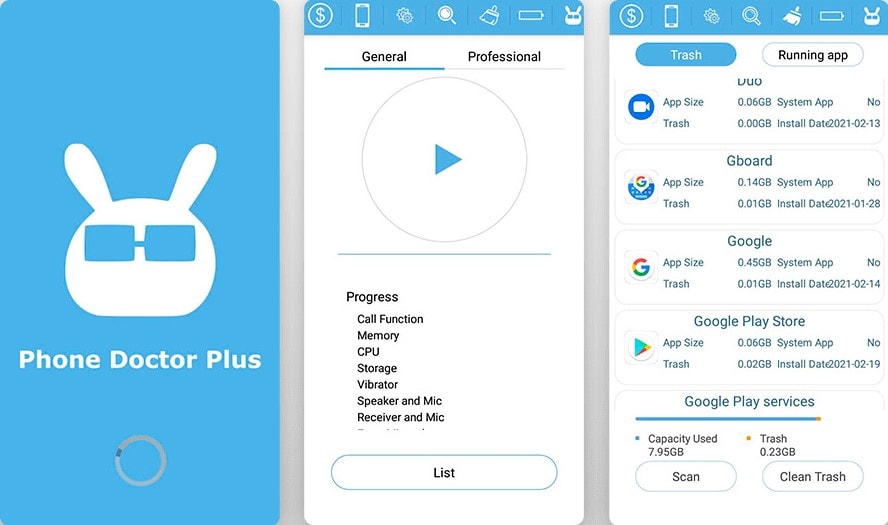
Phone Doctor Plus
Phone Doctor Plus is like a health check-up app for your device. It’s designed to repair system issues and diagnose hardware problems that might contribute to a bricked device.
Key Features
See Phone Doctor Plus’s essential features below:
- Diagnose and repair both software and hardware issues.
- Identify potential problems that could lead to bricking.
Pros
This app’s advantages include the following:
- Comprehensive diagnosis for both software and hardware.
- Can help you identify issues before they become serious.
Cons
Check out this app’s disadvantages below:
- Not solely focused on software repair, might not cover all scenarios.
Part 3: Tips on Preventing Future Bricking Incidents
Now that you know how to fix a bricked Samsung Galaxy M34 smartphone, let’s focus on preventing it in the first place. Here are some simple steps you can take to keep your Samsung Galaxy M34 device safe and sound:
- Regularly Check for Updates
Always keep your device’s software up to date. Updates often contain bug fixes and improvements that can prevent software-related issues.
- Use Reliable Tools and Software
When using any tools or software on your device, ensure they’re trusted and well-reviewed. Unreliable tools can lead to unexpected problems.
- Avoid Unauthorized Modifications
Avoid messing with your device’s software beyond basic settings unless you’re a tech expert. Unauthorized modifications can lead to bricking.
- Keep Your Battery Charged
Ensure your device has enough battery power before initiating software updates or installations. Low battery during critical processes can lead to issues.
- Backup Regularly
Regularly back up your device’s data to avoid losing important information during a bricking incident.
- Use Official Firmware
If you’re ever reinstalling or updating your device’s software, always use official firmware provided by the manufacturer.
- Utilize Safe Mode for Troubleshooting
If your device starts acting strange, try booting it into safe mode. This helps you identify if a third-party app is causing issues.
- Seek Professional Help
If you’re unsure about a particular action, seek help from experts. Trying to fix complex issues yourself can worsen the situation.
By following these easy tips, you can keep your Samsung Galaxy M34 device running smoothly and avoid the hassle of dealing with a bricked device. Always remember, prevention is better than cure!
safe & secure
Conclusion
Encountering a bricked Samsung Galaxy M34 device can be a frustrating roadblock. However, there’s a silver lining – the power of an Android system repair software like Dr.Fone – System Repair (Android). This user-friendly tool acts as your device’s superhero, rescuing it from the clutches of bricking incidents.
So, whether your device is experiencing a soft brick or a hard brick, you now have the best tools and knowledge to overcome it. Dive into the Android system repair software world, explore your options, and bid farewell to brick. Welcome a revived, functioning Samsung Galaxy M34 device into your daily life.
Android Screen Stuck: General Samsung Galaxy M34 Partly Screen Unresponsive
Over time, both stuck and dead pixels on phone screens can make it challenging to enjoy your device features, especially if they are in a critical area. In addition to making your phone look less appealing, they can make it hard to use for big tasks like texting, surfing, or taking pictures.
Fortunately, there are ways to overcome this, and one of the best is Dr.Fone. In this article, you will discover more about these broken pixels on phones, which of the different methods works for you, and why it is worth considering. By the end of this article, you will have the knowledge and tools you need to get your phone working like new again.
Part 1: Understanding Stuck and Dead Samsung Galaxy M34s on Phone Screens
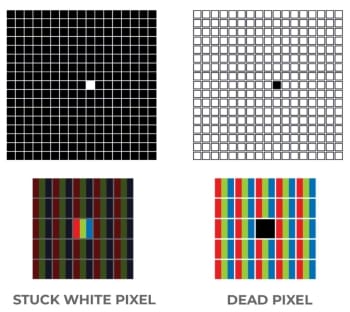
While dead and stuck pixels on the phone may seem similar, there are important distinctions between the two. Read on to discover the differences and what causes them.
Stuck Samsung Galaxy M34s on Phone
A stuck pixel phone is always on, so it shows up on a touchscreen as a bright, persistent dot of red, green, blue, or white. Combinations are also possible, and although it is usually stationary, this dot occasionally flickers.
Dead Samsung Galaxy M34s on Smartphones
In contrast to the stuck pixel, the dead pixel subpixels are all left unpowered, turning them off. A dead pixel on the phone is a tiny, persistent rectangle of black or white color on the part of the phone screen not working.
Some Differences Between Stuck and Dead Samsung Galaxy M34s on Phone
Stuck pixels may have less effect on the user experience than dead pixels on the phone screen since they still display color. But dead pixels may be more disturbing because they are either black or white.
It is easy to mistake stuck and dead pixels on the phone for one other, but they are unique issues with different causes and effects. Read on to understand the differences and how they affect your phone’s display.
- Power. The stuck pixel on your device always receives energy, causing it to display a specific color while the dead pixel is permanently off, resulting in a black spot on your phone screen.
- Possibility of repair. You can quickly fix ****stuck pixels on the phone,****while some may even disappear on their own. However, dead pixels are more challenging to repair.
- Occurrence. The stuck pixel is a common issue that often affects older or less-used displays, while dead pixels rarely appear on digital cameras and sensors.
Factors That Contribute to Stuck and Dead Samsung Galaxy M34s on Mobile Devices
Stuck and dead pixels on phone screens can happen for various reasons, including manufacturing defects, physical damage, and age-related wear and tear. These broken pixels on the phone can hurt the user experience, and it is essential to know the root causes to prevent them from occurring in the first place.
- Manufacturing defects. During manufacturing, some pixels may not work due to poor quality control, resulting in stuck or dead pixels on the phone In other words, if the power transfer issue isn’t completely fixed, you might see more dead pixels.
- Physical damage. Accidents such as dropping the phone or exposure to extreme heat or cold can damage the screen and cause stuck or dead pixels. For instance, the upper part of the touch screen not workingmay also occur due to pressure on the display when the phone is placed in a pocket with other sharp objects.
- Age-related wear and tear. Over time, the display on your phone may start to wear out, resulting in the appearance of dead or stuck pixels on the phone. It is more common in older devices and those with high usage rates. Factors such as exposure to sunlight or excessive phone use can also contribute to the issue.
Part 2: How To Fix Dead Samsung Galaxy M34s on Phone Screens on Android Devices
It is essential to have the right tools and knowledge to fix dead pixels on your phone screen. Fortunately, you can use several effective techniques to address the issue. In this section, you will discover step-by-step instructions on how to fix dead pixels on phone screens on Android devices.
Option 1: Check Phone Screen Appearance
Before attempting to fix a dead pixel on a smartphone screen, it is necessary to check its appearance and ensure there is no physical damage.
Step 1: Check for chips, cracks, or any other signs of damage on the screen if your phone touch screen is not working in some areas. If you find any damage, you may need to take your phone to a professional repair shop or consider getting a replacement.
Step 2: If you have a screen protector or case, remove them because they can interfere with the process. This step will allow you to get a clear view of the screen and accurately assess the dead pixel on the phone.
Step 3: Remove any gloves you may be wearing and any stickers placed over the screen or sensors. Gloves and stickers can interfere with the touchscreen and affect the accuracy of fixing the broken pixels on the phone.
Step 4: Finally, ensure that your screen is clean and free from any smudges or dirt that could affect the accuracy of fixing dead pixels on the phone. You can use a microfiber cloth to clean your screen gently, making sure not to apply too much pressure or use any harsh chemicals that could damage the screen.

Option 2: Restart Your Samsung Galaxy M34
This method may seem simple, but it can be the most effective solution to your problem. Here is how you restart most smartphones available in the market.
Step 1: Press and hold down the power key on your Samsung Galaxy M34 until the power menu appears.
Step 2: Select Restart on your phone’s screen. It will initiate a reboot of your device.
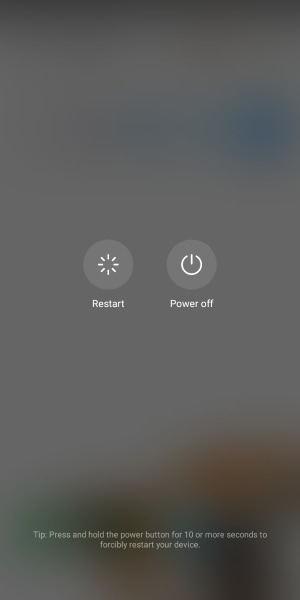
Tip:
If your Samsung Galaxy M34 is unresponsive to the usual restart method because a part of the phone screen is not working, try a forced restart by holding the power button for at least 10 seconds.
Option 3: Check If Stuck Samsung Galaxy M34 Phone Only Appears in Specific Mobile Apps
If the previous method did not work, check if the stuck pixels on the phone only appear in specific mobile apps. Sometimes, stuck pixels may only show up when using particular apps, so identifying which app is causing the issue can help pinpoint the problem.
Step 1: Put your smartphone in Safe Mode.
Note:
Visit the help page for your device’s manufacturer to learn how to activate and deactivate safe mode. Safe mode disables all downloaded programs momentarily.
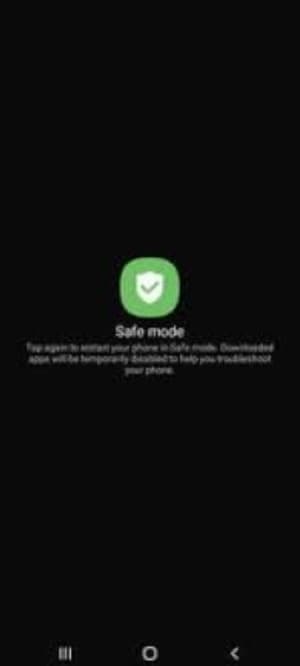
Step 2: Try touching the screen while your phone is in safe mode. If the display functions as intended, a specific app is likely causing the issue with the stuck pixel phone display. Next, turn off Safe Mode.
Step 3: To resolve issues related to a problematic app on your phone, remove the most recent downloads one at a time, and restart your phone after each uninstallation. Check if uninstalling the app resolves the issue. Once you know the problematic app, you may install the other applications you deleted again.
Option 4: Perform Factory Data Reset
Consider a factory data reset if the previous options did not resolve your issue with stuck or dead pixels on the phone screen. This process will erase all data from your device, so remember to back up any important information before proceeding.
Step 1: Open the Settings application.
Step 2: Choose System > Reset > Erase all data (factory reset) > Erase all data.
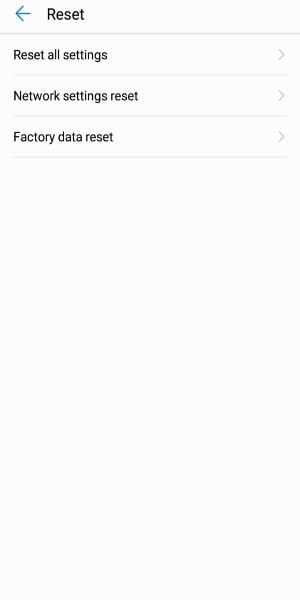
Note:
It is crucial to wait for the system to finish deleting all data during the factory data reset. For instructions tailored to your device, see your manufacturer’s help page.
Option 5: Use Wondershare Dr.Fone – Complete Mobile Solution
Dealing with the stuck pixels on the phone can be a challenging issue to tackle. Although Dr.Fone may not be able to fix this issue directly, it can still provide support with other problems you might face during the process. This includes content backup and recovery, as well as system repair for other system issues such as a black screen, being stuck in a boot loop, forced termination, and more. In this section, you’ll learn how to use Dr.Fone’s System Repair feature.
Step 1: Install and launch Dr.Fone, then click System Repair.
Step 2: Choose either Android or iPhone, depending on the type of device you have.
Note:
Wondershare Dr.Fone provides support for Samsung Galaxy M34 S22 as well as other popular Samsung Galaxy M34 models.
Step 3: Select the type of Android issues your phone has then click Start.
Step 4: Choose the corresponding Brand, Name, Model, Country, and Carrier from each drop-down menu and click Next.
Step 5: Connect your device to your computer and follow the in-app instructions to enter the Download mode, then click Next.
Step 6: Your device will need to have the new Android firmware flashed onto it, which Wondershare Dr.Fone will take care of. Simply wait while the process completes.
Part 3: Benefits of Using Dr.Fone on Phones With Dead Samsung Galaxy M34s
If your phone’s screen is malfunctioning or some features are inaccessible due to stuck or dead pixels, following the steps to fix dead pixels on the phone may be challenging. Resetting your phone and backing up data can also be a hassle.
The good thing is Dr.Fone can help you with these issues, making the process easier and more efficient. This app offers a variety of benefits and features that can help you find a quick and effective fix for your smartphone.
Backup and recovery of data. Dr.Fone offers a straightforward way to back up your vital data from iOS and Android smartphones and selectively restore specific files when needed. This feature is essential for those who have lost important files due to a phone’s damage, malfunction, or accidental deletion. It allows you to recover data and avoid potential data loss.
Ease of use. The software is user-friendly and easy to navigate, making it accessible to anyone without advanced technical knowledge.
Safety. The software is safe and secure, ensuring that your data is not compromised during the process. This feature is for users concerned about the confidentiality of their data and wants to ensure that their personal information is not shared or stored on the internet.
Part 4: Frequently Asked Questions
Aside from the methods and tools discussed for fixing dead pixels on phone screens and stuck pixels on the phone, you may still have some questions regarding the issues. Whether you are dealing with a single stuck pixel or a cluster of dead pixels, this section aims to provide you with helpful insights.
1. Can Dead Samsung Galaxy M34s Fix Themselves?
No, a dead pixel on the phone is permanent. There is a much lower chance that dead pixels will self-correct over time. They are often impossible to fix using any of the widely used techniques. Unlike stuck pixels, they rarely have a chance of recovery. Before giving up, verify if the pixel is dead, as stuck pixels may be fixable.
2. Can Dead Samsung Galaxy M34s Worsen?
Dead pixels cannot spread because each pixel functions independently of the others. Thus, a dead pixel on the phone does not affect surrounding pixels. However, it can be a nuisance for users, especially if it appears in prominent parts of the screen. Call an expert if you see that it is spreading so they can diagnose the issue and assess whether a repair is possible.
3. Why Are Dead Samsung Galaxy M34s Spreading on My Samsung Galaxy M34?
It simply signifies that this specific area of your screen had poor manufacturing quality or is physically damaged if you have a patch of closely spaced dead pixels on your phone. When a group of dead pixels is close together, it indicates localized damage or defect to that specific area. So, the pixels in that region no longer produce light or color.
4. How Many Stuck Samsung Galaxy M34s Are Acceptable?
It frequently happens throughout the LCD manufacturing process when one or more subpixels enter an unchanging state, leading to a bright or lifeless pixel. Generally speaking, an acceptable display has 1 to 5 fixed subpixels.
In addition, the essential factor in comparing dead pixel policies is whether or not the policy permits the Samsung Galaxy M34 devices to be returned, swapped, or repaired when this frequent issue arises.
safe & secure
Conclusion
You have learned the difference between a stuck and dead pixel on the phone. With this knowledge, you can apply the different tools and techniques for removing stuck pixels on phone screens and how to work around dead pixels on the phone screen. Whether using software like Dr.Fone or employing manual methods such as rebooting or cleaning your device, there are various options you can try.
Remember to back up your data before attempting any fixes and to seek professional help if necessary. If you are still experiencing issues with dead pixels on your phone screen, don’t hesitate to contact your device manufacturer for further assistance.
How to Flash Dead Samsung Galaxy M34 Safely
- Fix malfunctioning Android to normal in one click.
- Highest success rate to fix all Android issues.
- Step-by-step guidance through the fixing process.
- No skills required to operate this program.
A phone is considered to be dead when it becomes completely unresponsive and refuses to switch on. Similarly, an Android phone is said to be dead when it does not boot up. You may try to switch it on several times by pressing the power button but in vain. You will see no sign of the phone’s logo or anything like a welcome screen. The Android phone’s screen remains black and does not illuminate when you try to turn it on. Interestingly, even when you charge this dead device, it does not show that it is getting charged.
Many people regard this as a battery issue, and many think of it as a temporary software crash. Some users also seem to believe that this is because of a virus attack. However, if you are looking for ways that tell how to fix a dead Android phone, you must understand that a dead phone or device can be cured by flashing custom firmware safely. If you are keen to know how to flash a dead Android phone or how to flash dead Android phones using PC, here are ways to help you.
Given below are eight techniques to flash your Samsung Galaxy M34 safely, depending upon which phone you are using. It may seem time-consuming and tedious, but we can assure you that it works. So, move ahead and read on to learn about flashing new firmware, your Samsung Galaxy M34, MTK Android, and Samsung Galaxy M34 safely.
safe & secure
Part 1: Can a Dead Phone Be Flashed?
Flashing a dead Android phone might be skeptical for many users who have been in such a situation. Although it is possible to flash a dead Android phone, it is essential to be aware of the reasons that lead you into such a situation. Before a remedy, diagnosing the problem is a necessity for retaining the Samsung Galaxy M34 device.
From battery issues to physical damage to the Samsung Galaxy M34 device, there can be many reasons your Samsung Galaxy M34 died. The reasons for a dead Android phone are not restricted to these points. There can be software-related issues or firmware issues that might cause such havoc on your Android.
Part 2: How to flash Samsung Galaxy M34 in one click
While you are worried about how to flash Samsung Galaxy M34 instantly with a single click, Dr.Fone - System Repair (Android) swiftly makes its way with a galore of options for you. This amazing tool from Wondershare can fix a plethora of Android system issues such as crashing of apps, black screen of death, failed system update, etc. Moreover, it can also get your device out of boot loop, unresponsive bricked Android mobiles as well as stuck at the Samsung Galaxy M34 logo.
Dr.Fone - System Repair (Android)
One-click solution to flash Samsung Galaxy M34
- The high success rate in fixing Samsung Galaxy M34 Android devices.
- All the latest Samsung Galaxy M34 devices are supported by this software.
- One-click operation of this tool helps you how to flash Samsung Galaxy M34 easily.
- Being very intuitive, it doesn’t need you to be tech-savvy to use this software.
- It is one of its kind and the first one-click Android repair software on the market.
3981454 people have downloaded it
Step-by-step Tutorial
We are going to explain how to flash a dead Android phone using a PC using Dr.Fone - System Repair (Android)
Note: Before you understand how to flash Dead Android phone, take a backup of your data and then proceed to avoid any data loss.
Phase 1: Prepare your Samsung Galaxy M34
Step 1: Once you have downloaded and installed Dr.Fone, launch it. From the main menu, tap on ‘System Repair’ and get your Samsung Galaxy M34 connected to it.
Step 2: Click ‘Android Repair’ from the available options, and then press the ‘Start’ button to fix the Dead Android phone by flashing it.
Step 3: On the Samsung Galaxy M34 device information screen, pick the appropriate device brand, name, model, and other details followed by tapping the ‘Next’ button.
Phase 2: Put the Android device in Download mode to start repair.
Step 1: It is essential to boot your Samsung Galaxy M34 in Download mode before repairing.
- If the Samsung Galaxy M34 device has a ‘Home’ button: Turn it off and then hold down the ‘Volume Down’, ‘Home’, and ‘Power’ buttons altogether for 5-10 seconds. Un-hold all of them and hit the ‘Volume Up’ button for entering ‘Download’ mode.
- In the absence of a ‘Home’ button: Switch off the Android device and hold the ‘Volume Down’, ‘Bixby’, and ‘Power’ buttons for 5 to 10 seconds, then release them. Hit the ‘Volume Up’ button for entering the ‘Download’ mode.
Step 2: Press the ‘Next’ button for initiating firmware download.

Step 3: Once the firmware gets downloaded and verified Dr.Fone - System Repair (Android) starts to flash your Dead Android phone. All the Android system issues will be fixed soon after.

safe & secure
Part 3: How to flash Samsung Galaxy M34 dead phone with Odin?
In this segment, we will learn how to fix the dead Android phone, i.e., Samsung Galaxy M34 phones using Odin software. Odin is software used internally by Samsung Galaxy M34 to generally unblock devices and perform a more utility-based job, namely, flashing new firmware in place of the old one. There are different variants available, so choose the one which is supported by your Galaxy phone. Here is a step-by-step explanation of how to flash dead Android phone (Samsung Galaxy M34) using Odin software.
Step 1: Install the driver software on the computer. You can find the best driver software for your device and PC on the official Samsung Galaxy M34 website. You may also download Samsung Galaxy M34 Kies on your PC. Once you have downloaded and installed the driver software, restart the PC.
Step 2: Now download suitable firmware for your device in the form of a zip folder that you can open and store on your desktop.

Make sure the file is .bin, .tar, or .tar.md5 only as these are the only file types recognized by Odin.


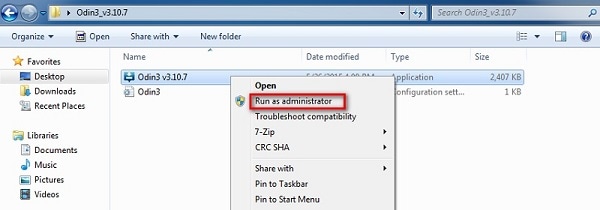
Step 3: In this step, download the latest version of Odin on your PC and move it to the desktop, and then right-click on the downloaded Odin file to select “Run as Administrator”.

Step 4: Now, boot your dead device to Download Mode by pressing the power, volume down, and home button together. When the phone vibrates, release the power button only.

Step 5: Gently press the volume up button, and you will see the Download Mode Screen.

Step 6: Now, you may use a USB to connect your Samsung Galaxy M34 to the PC. Odin will recognize your device, and in the Odin window, you will see a message saying “Added”.

Step 7: In this step, find the tar.md5 file you downloaded by clicking on “PDA” or “AP” on the Odin window and then click “Start”.
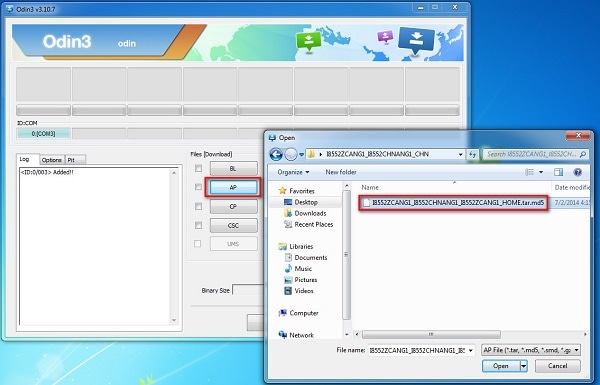
Finally, once the flashing process is complete, your Samsung Galaxy M34 phone will reboot and start normally, and you may see a “Pass” or “Reset” message on the Odin window on the PC.
Part 4: How to flash MTK Android dead phone with SP Flash tool?
SP Flash tool, also known as SmartPhone Flash tool is a popular freeware tool used to flash custom ROM or firmware in MTK Android phones. It is a very successful tool and is extremely easy to use.
Let us look at the steps given below to learn how to flash dead Android phones using PC with the help of the SP Flash tool.
Step 1: To start with, download and install the MTK driver on your PC and then download the ROM/firmware you wish to use for flashing purposes.
Step 2: Once done, you should download the SP Flash tool and extract it on your PC and move on to launch the Flash_tool.exe file to open the SP Flash tool window.
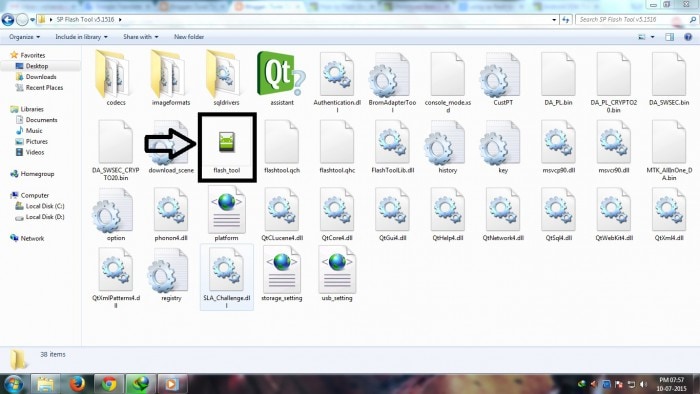
Step 3: Now, on the SP Flash tool window, click on “Download” and select “Scatter-loading”.

Step 4: The last step would be to locate the file downloaded by you and click “Open” and then finally, select “Download” on the SP Flash tool window.
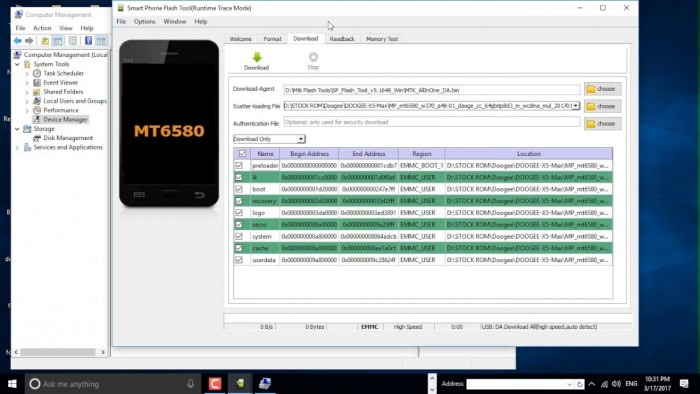
After completing the above steps, connect your dead device to the PC with a USB cable and wait for it to get recognized. The flashing process will take a few minutes to finish and then you will see a green circle indicating “OK Download”.
That’s it! Now simply disconnect your phone and wait for it to reboot.
Part 5: How to flash Samsung Galaxy M34 dead phone with the Phoenix tool?
Phoenix tool, better known as PhoenixSuit, is a tool similar to the SP False tool and Odin. It works very well with Samsung Galaxy M34 and is the best answer to “How to fix dead Android phone?”, “How to flash dead Android phone using PC?”, etc.
Let’s look at the steps of flashing the Samsung Galaxy M34 dead phone with the Phoenix tool.
First, download and install the Samsung Galaxy M34 PC Suite driver on your PC. Then you will need to download the PhoenixSuit tool and then launch it.

Now, on the toolbar, click “Tools” and select “Data Package Download” from the drop-down list.

Then move to download the firmware for your dead Samsung Galaxy M34 and save it in a new Folder. Once done, go back to the Phoenix tool window and click on “File” and select “Open Product”.

Simply, feed in the details and then click “OK”.

After this, click on “Flashing” and select “Firmware update” and then browse to select the appropriate product code and then click “OK” again.
Then move on to select “Dead Phone USB Flashing” from the Firmware Update Box.

Lastly, just click on “Refurbish” and connect your phone to the PC using a USB cable.
That was it, the flashing process may take up to a few minutes after which your dead Samsung Galaxy M34 will restart automatically.
Part 6: How to flash a dead phone that won’t turn on via factory reset?
Using tools for flashing Android devices can be a solution; however, it is heavily restricted to the Samsung Galaxy M34 device models. For a generalized solution, there can be other options that you can go with. Factory resetting an Android device by putting it in Recovery Mode is one way. To know how to flash a dead Android phone using factory reset, go through the steps featured below:
Step 1: To initiate the process, you will have to put your Samsung Galaxy M34 in Recovery Mode. Generally, Android phones are put in Recovery Mode by holding the “Power” and “Volume Up” keys for a few seconds after turning them off. The key combinations can vary according to your Samsung Galaxy M34.
Step 2: As the Android boot menu opens on your screen, use the “Volume Down” and “Volume Up” keys to scroll up and down the menu. On accessing the “Wipe Data/Factory Reset” option, use the “Power” key to select the particular option.
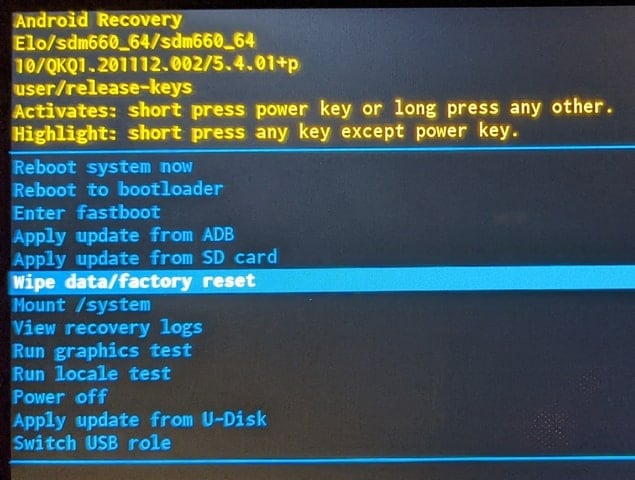
Step 3: Continue to select the “Yes” option for confirming the factory reset of the Android device. The phone will automatically reboot after successfully factory resetting.
Part 7: How to flash a dead Android phone by checking screen faulty
The screen of your Samsung Galaxy M34 may be faulty, due to which it is not launching. While seeking the right way of how to fix a dead Android phone, you can force restart your phone using the Volume buttons according to your device model.
If the Android vibrates on restarting and the screen does not lighten up, the problem can be directed to a hardware fault. The screen is broken and needs physical assistance to resolve the issue.

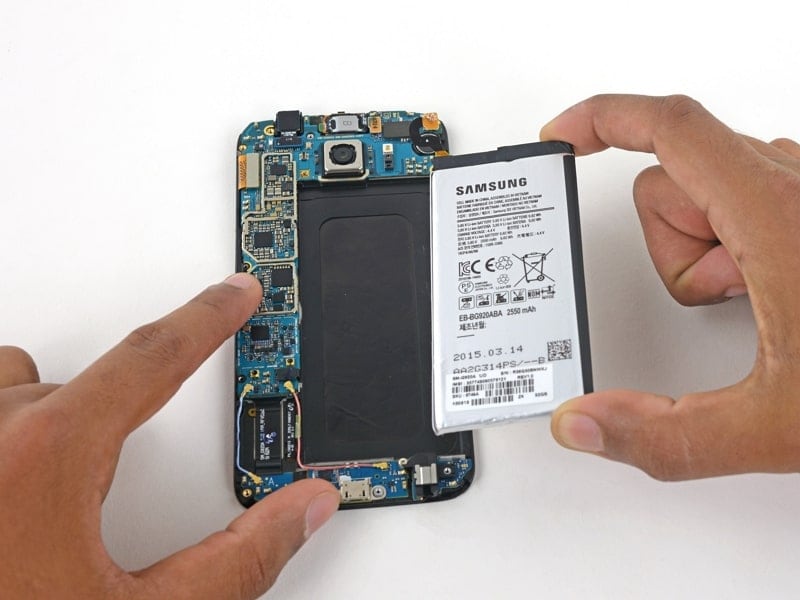
Part 8: How to fix a dead Android phone by changing the battery
Another solution that can help you fix the dead Android phone is changing its battery. The battery of an Android device can last up to 3 years. When its capacity drops to a bare minimum, it is best to change the battery of your Android. Upon trying to restart your Samsung Galaxy M34, if it does not, you might need to replace your battery. All Android phone batteries are removable, which should be regulated with proper supervision.
Part 9: How to repair dead Android phone by contacting official support
If you are unable to discover any proper solution for how to flash dead Android phones, you might have to consult the respective customer support of the Android phone manufacturers. Consult customer support to discover why the phone is dead and how it can be flashed. The respective personnel will assist you in resolving the issue, which might require monetary input from your side.
Conclusion
A dead Android phone might be the cause of worry, but the techniques given above to flash your dead Android device safely are very helpful. These methods have been tried and tested by users all over the world and thus, we recommend them to you. If your phone is dead or has become unresponsive, do not panic. Depending on your phone’s brand, here are ways to guide you on how to fix the dead Android phone and how to flash dead Android phone using PC.
It has been observed that Wondershare Dr.Fone – System Repair (Android) assists in the best way. Resolve all your concerns involving your dead Android phone and flash it to make it operable again.
Carefully follow the instructions given, and you will be able to reboot your dead Android phone successfully.
Also read:
- [New] 2024 Approved Extend Video Duration for YouTube Posting
- [New] Effortless Gameplay Capture A Compreayer's Approach to Xbox Recording
- [New] Expert Advice on Selecting The Best Lenses For Filmmaking
- [New] Recovering From a Mistaken TikTok Reload for 2024
- 2024 Approved Unresolved Problem Viewing Videos on Sony A6400
- 4 Solutions to Fix Unfortunately Your App Has Stopped Error on OnePlus Ace 2V | Dr.fone
- 8 Workable Fixes to the SIM not provisioned MM#2 Error on Honor Magic 5 Lite | Dr.fone
- Fix Unfortunately Settings Has Stopped on Honor Magic 6 Pro Quickly | Dr.fone
- Full Guide on Mirroring Your Tecno Camon 20 Premier 5G to Your PC/Mac | Dr.fone
- How Reliable Is ChatGPT in Crafting Personalized and Safe Exercise Schedules for Your Needs?
- How To Fix Unresponsive Touch Screen on Vivo V29e | Dr.fone
- How To Fix Unresponsive Touch Screen on Vivo Y100t | Dr.fone
- In 2024, Create Music for Free Top 10 Recording Software Options
- Lenovo Touchpad Not Responding? Here's the Definitive Fix for Windows Users!
- Proven Ways to Fix There Was A Problem Parsing the Package on Asus ROG Phone 8 | Dr.fone
- Quick Fixes for Why Is My ZTE Nubia Z60 Ultra Black and White | Dr.fone
- Why Is My Xiaomi Redmi 12 Offline? Troubleshooting Guide | Dr.fone
- Title: Top 4 Android System Repair Software for Samsung Galaxy M34 Bricked Devices | Dr.fone
- Author: Ariadne
- Created at : 2025-01-25 20:16:28
- Updated at : 2025-01-26 21:06:11
- Link: https://howto.techidaily.com/top-4-android-system-repair-software-for-samsung-galaxy-m34-bricked-devices-drfone-by-drfone-fix-android-problems-fix-android-problems/
- License: This work is licensed under CC BY-NC-SA 4.0.