
Troubleshooting Guide How to Fix an Unresponsive Lava Yuva 3 Pro Screen | Dr.fone
Troubleshooting Guide: How to Fix an Unresponsive Lava Yuva 3 Pro Screen

Smart devices have become an integral part of our lives, and Lava Yuva 3 Pro phones are increasingly popular due to their advanced features and affordable prices. These phones offer numerous benefits, including high-quality cameras, fast processors, long-lasting batteries, and sleek designs.
However, like any other electronic device, Lava Yuva 3 Pro phones can sometimes encounter issues that may impede their functionality. One common problem that users face is an unresponsive screen, which can be frustrating and disruptive to daily activities.
This article will discuss some valuable solutions for dealing with Lava Yuva 3 Pro phone screen unresponsiveness. We will provide step-by-step instructions for troubleshooting and getting your phone back in working order. Whether you’re a novice or an experienced user, these tips and tricks will help you navigate this problem and get back to using your phone without any issues. So, let’s dive in and explore how to fix a Lava Yuva 3 Pro phone with an unresponsive screen.
What causes the Lava Yuva 3 Pro Screen unresponsive?
The Lava Yuva 3 Pro screen may become unresponsive due to various reasons. Here are some common situations and their possible causes:
During Use/Gaming: The screen may become unresponsive due to overheating when using or gaming on a Lava Yuva 3 Pro phone. This can be caused by running too many apps simultaneously or playing games for an extended period, especially on models such as the Lava Yuva 3 Pro 9 Pro, which generates much heat during gaming.
**No Response When Touching the Screen:**Sometimes, the Lava Yuva 3 Pro screen may not respond when touched due to a faulty touch screen or display. This can happen due to physical damage or a manufacturing defect. Some Lava Yuva 3 Pro Nord 2 users have reported this issue.
After Dropping the Phone: If a Lava Yuva 3 Pro phone has been dropped, the screen may become unresponsive due to physical damage or a loose connection. This can happen to any model, including the Lava Yuva 3 Pro.
Overheating, physical damage, and manufacturing defects are some common causes of Lava Yuva 3 Pro screen unresponsiveness, which may occur during use/gaming, no response when touching the screen, or after dropping the phone.
The common solutions to solve a Lava Yuva 3 Pro Screen unresponsive
Here are the three most common solutions to deal with phone screens being unresponsive, regardless of the brand:
Restart the Lava Yuva 3 Pro device

Restarting the Lava Yuva 3 Pro device is a simple and quick solution to an unresponsive phone screen. To restart the phone, press and hold the power button until the screen turns off, then press and hold the power button again to turn the phone back on.
Check the Charging Port and Battery
Sometimes, an unresponsive screen can be caused by a dead battery or a faulty charging port. To check for these issues:
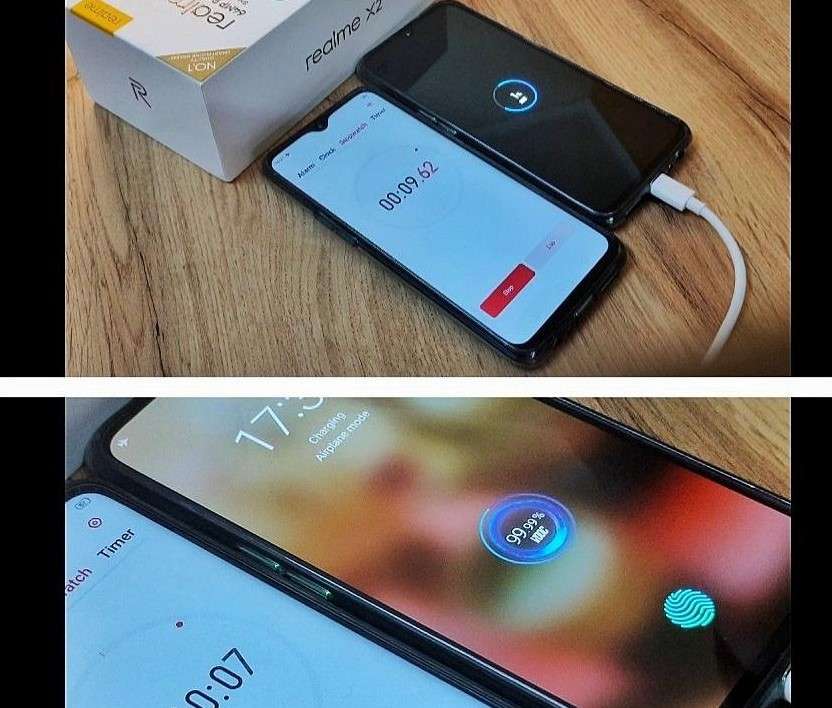
Step 1: Plug the phone into a charger and wait for at least 30 minutes to see if the battery charges.
Step 2: Try a different charger or cable to see if the issue is with the charging accessories.
Contact the Pros

If the above solutions don’t work, contacting a professional is best. A trained technician can diagnose and fix the problem. Contact the phone manufacturer or an authorized repair center to get help with your phone.
For different Lava Yuva 3 Pro models, there may be additional solutions to consider:
Check the Phone’s Temperature

Sometimes, a Lava Yuva 3 Pro phone’s screen, specifically Lava Yuva 3 Pro 8 Pro, may become unresponsive due to overheating. To check the phone’s temperature:
Step 1: Go to Settings > Battery > Battery Temperature.
Step 2: If the phone is overheating, let it cool down before using it again.
Reset to Factory Settings
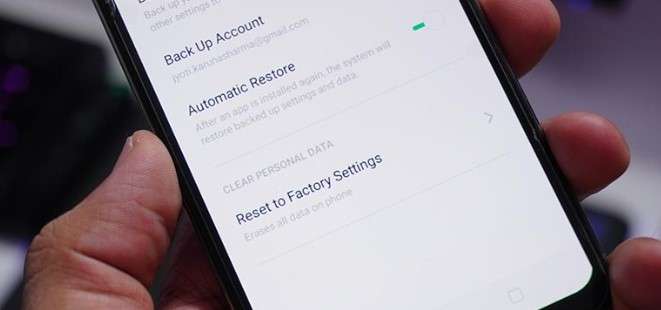
A factory reset may help fix the problem if none of the above solutions work. Note that this will erase all data and settings on the phone, so be sure to back up your data before resetting. To reset the phone:
Step 1: Go to Settings > Additional Settings > Backup and Reset > Erase All Data.
Step 2: Follow the on-screen instructions to reset the phone.
Replace a New Screen

If the phone’s screen is physically damaged or cracked, it may need to be replaced. To replace the screen:
- Contact a professional repair center or the manufacturer for replacement parts and installation.
How to avoid Lava Yuva 3 Pro Screen being unresponsive?
To avoid Lava Yuva 3 Pro screen being unresponsive, here are some suggestions based on the possible causes:
Check Software Updates on Time
Make sure to regularly check for and install software updates on your Lava Yuva 3 Pro phone. These updates often include bug fixes and security patches that can help prevent issues like overheating and screen unresponsiveness.
Check Hardware from Time to Time
Regularly inspect your phone’s hardware components such as charging ports, battery, and screen for any signs of damage or wear and tear. If you notice any issues, get them fixed promptly to prevent them from causing further damage.
Avoid extreme temperatures
Keep your Lava Yuva 3 Pro device in a temperature-controlled environment. High temperatures can cause the screen to become unresponsive, and low temperatures can cause it to freeze.
Keep the screen clean
Dirt and debris on the screen can cause it to become unresponsive. Use a microfiber cloth to clean the screen regularly.
Reduce the number of running apps
Running too many apps at once can overload the system and cause the screen to become unresponsive. Close any apps you’re not using to free up system resources.
Use Wondershare Dr.Fone to Repair or Manage Your Data
Wondershare Dr.Fone is a helpful tool that can help manage and repair your phone’s data. It can be used to back up your data, transfer files between devices, and even fix issues like an unresponsive screen. Dr.Fone has the DF13 version to be launched, which includes more features to help manage your phone’s data effectively.
By following these suggestions, you can help prevent screen unresponsiveness on your Lava Yuva 3 Pro phone. Download Dr.Fone at https://drfone.wondershare.com/ to manage your phone’s data effectively and fix any issues that may arise.
 safe & secure
Conclusion
Lava Yuva 3 Pro phones offer numerous benefits, including high-quality cameras, fast processors, long-lasting batteries, and sleek designs. However, like any other electronic device, Lava Yuva 3 Pro phones can sometimes encounter issues, such as an unresponsive screen. The causes of an unresponsive screen may include overheating, physical damage, and manufacturing defects.
To deal with an unresponsive screen, users can try restarting the Lava Yuva 3 Pro device, checking the charging port and battery, or contacting a professional. Additional solutions for specific Lava Yuva 3 Pro models include checking the phone’s temperature, resetting to factory settings, or replacing a new screen. To avoid an unresponsive screen, users can check software updates on time, inspect the phone’s hardware, avoid extreme temperatures, keep the screen clean, and reduce the number of running apps. Dr.Fone is a helpful tool that can help manage and repair your phone’s data.
Bricked Your Lava Yuva 3 Pro? Here’s A Full Solution
A bricked phone is a device that won’t turn on no matter what you do and everything you try to do to fix it doesn’t work. Most people will tell you that there is really nothing you can do to fix a bricked device. But with the right information, the right buttons to push and useful additional software you can actually try to fix a bricked device.
In this article we are going to look at how you can fix your device if you are sure it is bricked, how to rescue the data on your bricked device and even how you can avoid this situation in the future.
Part 1: Rescue the data on your Bricked Android Phone
Before we can learn how to fix a bricked device, it is important that you are able to save the data that is on the Lava Yuva 3 Pro device. Having the data saved somewhere else will be the added insurance you need in case anything goes wrong during the process. There are very few software solutions in the market to help you get back data from a bricked device. One of these and the most reliable is Wondershare Dr.Fone - Data Recovery (Android) .
Dr.Fone - Data Recovery (Android)
World’s 1st Android smartphone and tablet recovery software.
- Recover data from broken Android in different situations.
- Scan and preview files before starting the retrieval process.
- SD card recovery on any Android devices.
- Recover contacts, messages, photos, call logs, etc.
- It works great with any Android devices.
- 100% safe to use.
4,771,974 people have downloaded it
How to Use Dr.Fone - Data Recovery (Android) to Rescue Data from a Bricked Android
If your device is completely unresponsive, don’t worry Dr.Fone can help you get all the data back. Simply follow these steps to gain access to the Lava Yuva 3 Pro device and recover all your data.
Step 1: Download and install Wondershare Dr.Fone to your PC. Launch the program and then click on Data Recovery. Select the data types you would like to recover and then click on Next.

Step 2. Select the issue type for your phone. Choose from “Touch screen not responsive or cannot access the phone” or “Black/broken screen”.

Step 3: In the next step, you need to select your device model. If you don’t know the model of your device click on “How to check the Lava Yuva 3 Pro device model” to get help.

Step 4: The next screen will provide instructions on how to enter “Download mode.” Connect the Lava Yuva 3 Pro device to your PC once it is in “Download Mode”

Step 5: The program will begin an analysis of your device and then download the recovery package.

Step 6: Then Dr.Fone will display all the recoverable file types. You can click on the files to preview them. Select the ones you need and click on “Recover to Computer” to save them to your computer.

Part 2: How to Fix Your Bricked Android Phone
Android devices are usually very flexible in allowing users to flash ROM but sometimes an incorrect process can result in a bricked device. While there are few solutions to this problem, here are a few things you can do;
When the Lava Yuva 3 Pro device Boots Straight into Recovery
If the Lava Yuva 3 Pro device can boot to the recovery screen, you can find an alternative ROM to install and copy it your device. Installation can then be done in the recovery menu. If the Lava Yuva 3 Pro device is booting to recovery mode there is a chance that it can be fixed.
Step 1: Load up Clockworkmod or any other recovery tool that you have been using.
Step 2: Once you are in, navigate to the “Reboot system now.” If you are using Clockworkmod, this should be your first option. Hopefully everything will work just right if you do this, If it doesn’t you may need to download and re-flash the ROM again.

When the Lava Yuva 3 Pro device won’t stop rebooting
Here’s what to do if the Lava Yuva 3 Pro device wont stop rebooting.
Step 1: Turn off the Lava Yuva 3 Pro device and then reboot in recovery mode.
Step 2: Go to “Advanced” which will bring up a number of options to choose from.
Step 3: One of the options should be “Wipe Dalvik cache” select this option and then follow the instructions. When finished select “Go Back” to return to the main menu.

Step 4: Go to the “Wipe Cache Partition” and select it.
Step 5: Go to “Wipe data/ factory reset.”

Step 6: Finally reboot the Lava Yuva 3 Pro device by selecting “Reboot system now.” This should fix the problem. You may also want to flash the same ROM or try a new one.
If the above methods don’t work, try one of the following options.
You can return to resource where you found the flash tools and search or ask for advice
Sometimes these errors can be caused if the ROM installation was performed via SD card. In this case reformatting the SD card might help.
If all else fails, it is time to returning the Lava Yuva 3 Pro device to the vendor if your warranty is still applicable.
Part 3: Useful Tips to avoid Bricking your Android Phone
If you are planning on installing custom ROM you need to install Custom Recovery. This will enable you restore the Lava Yuva 3 Pro device to its original settings should anything go wrong and hopefully help you avoid bricking your device.
- Ensure that you are familiar with the Fastboot or ADB commands before doing anything. You should know how to recover your device by flashing a command line and also manually transfer important files to your device.
- Make a backup of your device. This is obvious but most people fail to adhere to it. At the very least you can get back all your files and settings to transfer to a new phone.
- Keep a full Nandroid backup on your phone
- Keep another backup on your PC which you can access should anything go wrong with the Custom ROM installation
- Know how to hard reset your device. It may come in handy when your device freezes on you.
- You should also consider enabling USB debugging. This is because many solutions for a Bricked device rely on USB debugging.
- Ensure the Custom ROM you choose can actually be used on your device model.
While installing Custom ROM can actually be a great way to customize your device, it is also the leading reason for bricked devices. Therefore ensure that you understand what you are doing when you decide to customize your device. Learn as much as you can about the process before attempting everything.
How To Fix Part of the Touch Screen Not Working on Lava Yuva 3 Pro
You probably touch the screen of your phone hundreds of times per day. It’s no surprise that smartphone touchscreens are one of the most common components to fail, given their delicate glass construction. However, a part of the touch screen not working on your Lava Yuva 3 Pro does not necessarily mean it is a hardware issue. There could be other reasons why your Android’s touch screen stopped responding.
If your phone’s touchscreen frequently fails to respond, there are several things you can try before calling a professional. This article will reveal those proven fixes you can easily perform independently.
Part 1. Why Is Part of My Screen Not Working
There are two possible causes as to why your phone’s touch screen is not working. One is the touch screen may have been damaged, and the other is the Lava Yuva 3 Pro device may be experiencing technical difficulties.
If you drop your phone and it becomes stuck against something, the touch screen’s connectivity may fail. Only a part of the touch screen may sometimes become damaged and unresponsive. That may also occur when there is a technical failure, such as the phone hanging. A part of the touch screen not working can occur when malware is downloaded or when phone settings are changed.
Now, the problem can affect any Android phone, and users may encounter the following error messages on their respective phone models:
- Lava Yuva 3 Pro P40 lite half touch screen not working
- Nexus touch screen not working
- LG screen is unresponsive to touch
- Lava Yuva 3 Pro left side of the screen is not working
- Redmi’s whole screen is unresponsive to touch
Part 2. Different Types of Touch Screen Issues and What You Should Check Before Fixing
You may experience a variety of touch screens not working on Android issues:
- A certain part of the touch screen is not working.
- Your touches do not register on the touch screen.
- The touch screen incorrectly responds to your touch.
- Half touch screen is not working.
- The touch screen becomes frozen or hangs.
- The screen flashes, flickers, or remains blank.
- Theleft side of the phone screen is not working.
Before proceeding to how to fix an unresponsive touch screen on an Android device, you should complete the following steps:
- Examine the screen of your device. Check to see if it is cracked or chipped.
- If the screen is damaged, it must be replaced.
- Remove the Lava Yuva 3 Pro device cover and screen protector if they are not damaged.
- If there is a sticker on the Lava Yuva 3 Pro device screen, you must remove it.
- Before continuing, make sure your screen is spotless.
Part 3. How To Fix Part of the Touch Screen Not Working (No Physical Damage)
If you have already tried running the Lava Yuva 3 Pro device in diagnostic mode and verified that it is not physically damaged, then the problem is most likely technical. If your Lava Yuva 3 Pro’s screen is not responding to touches for technical reasons, follow the methods below to resolve the issue.
Restart Your Device
When your touch screen stops working, the first thing you should do is restart your device. The operation is known as soft resetting. You cannot turn your device off from the option on the screen because the touch screen is not responding. Here are the steps to take.
Step 1: Hold the “Power” button until the Lava Yuva 3 Pro device turns off.
Tip: If you hold down the power button for a few seconds, you will see the “Power Off” and “Restart” options on the screen. You can’t use it because the entire screen isn’t responding. Hence, you should press and hold the “Power” button for as long as necessary.

Step 2: When the Lava Yuva 3 Pro device turns off, wait a few seconds.
Step 3: Press and hold the “Power” button to restart the Lava Yuva 3 Pro device.
Check to see if the Android auto touch screen is not working problem has been resolved. Otherwise, proceed with the following methods.
Turn On Safe Mode
You should switch to Safe mode whenever an application or piece of software causes a problem on your device. Only the most fundamental system components are loaded and used when operating in Safe mode.
If your touch screen is functional in safe mode, the issue is most likely internal. You can quickly fix the Android touchscreen issue by following the prompts given below to activate the safe mode:
Step 1: To force a restart, press and hold the Lava Yuva 3 Pro device’s “Power” button for an extended period.
Step 2: Maintain pressure on the “Power” button. Take your finger off it once you see the manufacturer’s logo.
Step 3: When you let go of the “Power” button, press and hold the “Volume Down” button. After that, a “Safe Mode” label will appear in your screen’s lower-left corner.

Turn Off Developer Options
Every smartphone is bound to have limitations. However, smartphone makers include a “Developer Options” menu for advanced users. Here, restrictions are removed, and user preferences can be customized.
If you enable Developer Options on some Android devices, they may stop working properly. If you have recently activated Developer Options and your touchscreen is no longer responding as expected, you should disable it. To do so, follow the instructions below:
Step 1: Launch the Settings app on your device.
Step 2: Select the System menu item, which usually locates at the bottom of the screen.
Step 3: Tap the Advanced options menu, then select Developer Options.
Step 4: You will then find the switch to turn it on or off. Disable itby toggling the button off.

Step 5: Restart your device to check if the part of the touch screen not working issue has been resolved.
Reset Device to Factory Settings
Resetting your device to its factory settings will return it to its state when you first unboxed it. All your phone’s data and installed apps will be erased, including any malware on your device that may be causing the issue to occur. Here’s how to restore your device to factory settings:
Step 1: Since your touch screen is not working, you can factory reset it using Google’s Find My Device web service.
Step 2: Go to Find My Device from any device and sign in to the Google account associated with the damaged screen device.
Step 3: After successfully logging in, you will see your device’s name. Select the Erase Device option.

Step 4: Confirm by pressing the Erase Device button.
Tip: Since all your data will be removed, it’s recommended to back up your data first before resetting your device to factory settings.

Part 4. Fix Using a Third-Party App – Wondershare Dr.Fone
If you’ve exhausted all other options and still can’t fix your Android’s part of the touch screen not working issue, it’s time to resort to Dr.Fone – System Repair! It allows you to repair Android system issues with a single click.
Many users have reported exceptions on their Android devices, such as touch screen failure, black screen of death, system UI failure, app crashing, etc. And in this case, people should seek an Android repair tool.
Dr.Fone – System Repair has made it easier than ever for Android users experiencing technical issues with their device, including an unresponsive touch screen, among other system issues. The best part is that no data will be lost while repairing Android system issues.
Follow the steps given below on how to use Wondershare Dr.Fone System Repair for Android:
Step 1: Select the System Repair option from the main window after starting Dr. Fone.

Step 2: Connect your Lava Yuva 3 Pro or tablet to the computer using the appropriate cable. Choose Android Repair from the three options shown on the left side of the screen.

Step 3: The device information screen will appear in the next window. There, input your device’s unified brand, name, model, country/region, and carrier information. Then click Next after you confirm the warning.

The Android repair procedure may wipe out all data on your device. To confirm and proceed, enter “000000”.
Note: It is strongly advised that you back up your Android data before attempting Android repair.

Step 4: Before repairing your Lava Yuva 3 Pro, you must boot it into Download mode. To boot your Lava Yuva 3 Pro or tablet into DFU mode, follow the steps below:
For a device that has a Home button:
- Turn off your phone or tablet.
- Hold the Volume Down, Home, and Power buttons for 5 to 10 seconds.
- To enter Download mode, release all the buttons and press the Volume Up button.

For a device that lacks a Home button:
- Turn off the Lava Yuva 3 Pro device.
- Hold the Volume Down, Bixby, and Power buttons for 5 to 10 seconds.
- To enter Download mode, release all the buttons and press the Volume Up button.

Step 5: Then press the Next button. The program will then download the firmware. After downloading and verifying the firmware, the program will automatically repair your Lava Yuva 3 Pro. And in a while, your Lava Yuva 3 Pro’s system issues will be resolved.

Supported OS
Check Dr.Fone’s supported operating systems below before using the application to fix your mobile technical issues.
| Platform | Supported OS |
|---|---|
| Windows | Windows 11/10/8.1/8/7/Vista/XP |
| Mac | Mac 14/13/12/11/10.15/10.14/X/10.13/10.12/10.11/10.10/10.9/10.8 |
Key Features
Dr.Fone – System Repair is a data management and recovery tool that contains several toolkits in one program, each designed to repair a specific phone problem. Check out its key features below:
- One-click Android Repair Tool
- Troubleshoots and repairs a wide range of Android system problems, including black screen of death, Play Store not working, apps crashing, phone stuck in a boot loop, and bricked Android issues
- A high success rate for fixing Android system issues
- Fixes Android system back to normal
Pros
Here are the advantages of using Dr.Fone – System Repair:
- Highly intuitive UI/UX/. No need for any skill to operate it
- Provides a comprehensive set of toolkits, including advanced data recovery and system repair
- Data management is simple and seamless for both Android and iOS devices
- Data backup with Dr. Fone is simple and quick.
Cons
Check below to know Dr.Fone – System Repair’s limitations:
- Depending on the toolkit required, the program can be costly.
safe & secure
Conclusion
Fixing an Android part of the touch screen not working issue can be quickly done with just a few fixes you can do on your own. However, there may be times when the solutions provided above may not work, and the worst part is factory resetting your phone erases all your data.
That’s why Dr.Fone – System Repair might be your best solution. It has all the tools you need to keep your Lava Yuva 3 Pro 100%. Not only that, but with Dr.Fone, you can repair your Android system issues without dealing with any data loss.
Also read:
- [New] In 2024, Step-by-Step Guide Enhancing Snaps with Zoom Feature
- [Updated] In 2024, Blueprint for Buzz Elevating Your Profile on FB
- $99 ASUS TUF Gaming Screen, 24 IPS Display with 165 Hz, Exclusive Deal on Newegg
- 2024 Approved Refine iPhone Image Capture Specialized Filming Tools
- 6 Fixes to Unfortunately WhatsApp has stopped Error Popups On Vivo X Fold 2 | Dr.fone
- 8 Solutions to Solve YouTube App Crashing on Oppo K11 5G | Dr.fone
- Calls on Nokia G22 Go Straight to Voicemail? 12 Fixes | Dr.fone
- Console Clash: Evaluating the Features of Nintendo Switch Lite Vs. OLED Display
- How to Resolve Xiaomi Redmi Note 12T Pro Screen Not Working | Dr.fone
- How To Revive Your Bricked Samsung Galaxy A14 4G in Minutes | Dr.fone
- In 2024, Your Complete Breakdown of YouTube Short Content
- Os Melhores Softwares De Resgate Do Servidor Windows - Descubra a Solução Eficiente Do AoMee Backupper
- Realme C67 5G Camera Not Working Unexpected Error? Fix It Now | Dr.fone
- Title: Troubleshooting Guide How to Fix an Unresponsive Lava Yuva 3 Pro Screen | Dr.fone
- Author: Ariadne
- Created at : 2025-01-23 16:46:26
- Updated at : 2025-01-26 21:29:32
- Link: https://howto.techidaily.com/troubleshooting-guide-how-to-fix-an-unresponsive-lava-yuva-3-pro-screen-drfone-by-drfone-fix-android-problems-fix-android-problems/
- License: This work is licensed under CC BY-NC-SA 4.0.