
Troubleshooting Guide How to Fix an Unresponsive Vivo X90S Screen | Dr.fone
Troubleshooting Guide: How to Fix an Unresponsive Vivo X90S Screen

Smart devices have become an integral part of our lives, and Vivo X90S phones are increasingly popular due to their advanced features and affordable prices. These phones offer numerous benefits, including high-quality cameras, fast processors, long-lasting batteries, and sleek designs.
However, like any other electronic device, Vivo X90S phones can sometimes encounter issues that may impede their functionality. One common problem that users face is an unresponsive screen, which can be frustrating and disruptive to daily activities.
This article will discuss some valuable solutions for dealing with Vivo X90S phone screen unresponsiveness. We will provide step-by-step instructions for troubleshooting and getting your phone back in working order. Whether you’re a novice or an experienced user, these tips and tricks will help you navigate this problem and get back to using your phone without any issues. So, let’s dive in and explore how to fix a Vivo X90S phone with an unresponsive screen.
What causes the Vivo X90S Screen unresponsive?
The Vivo X90S screen may become unresponsive due to various reasons. Here are some common situations and their possible causes:
During Use/Gaming: The screen may become unresponsive due to overheating when using or gaming on a Vivo X90S phone. This can be caused by running too many apps simultaneously or playing games for an extended period, especially on models such as the Vivo X90S 9 Pro, which generates much heat during gaming.
**No Response When Touching the Screen:**Sometimes, the Vivo X90S screen may not respond when touched due to a faulty touch screen or display. This can happen due to physical damage or a manufacturing defect. Some Vivo X90S Nord 2 users have reported this issue.
After Dropping the Phone: If a Vivo X90S phone has been dropped, the screen may become unresponsive due to physical damage or a loose connection. This can happen to any model, including the Vivo X90S.
Overheating, physical damage, and manufacturing defects are some common causes of Vivo X90S screen unresponsiveness, which may occur during use/gaming, no response when touching the screen, or after dropping the phone.
The common solutions to solve a Vivo X90S Screen unresponsive
Here are the three most common solutions to deal with phone screens being unresponsive, regardless of the brand:
Restart the Vivo X90S device

Restarting the Vivo X90S device is a simple and quick solution to an unresponsive phone screen. To restart the phone, press and hold the power button until the screen turns off, then press and hold the power button again to turn the phone back on.
Check the Charging Port and Battery
Sometimes, an unresponsive screen can be caused by a dead battery or a faulty charging port. To check for these issues:
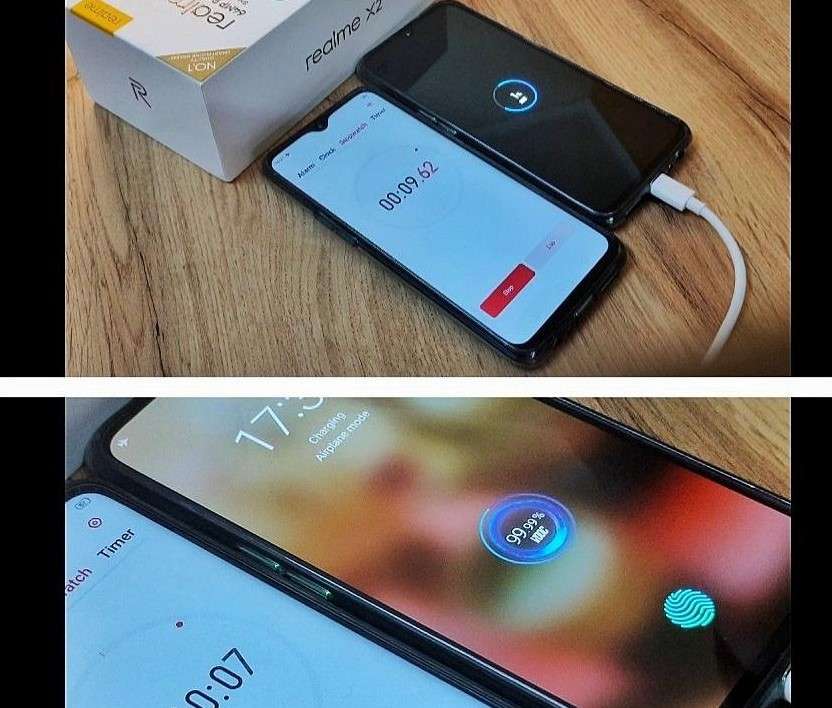
Step 1: Plug the phone into a charger and wait for at least 30 minutes to see if the battery charges.
Step 2: Try a different charger or cable to see if the issue is with the charging accessories.
Contact the Pros

If the above solutions don’t work, contacting a professional is best. A trained technician can diagnose and fix the problem. Contact the phone manufacturer or an authorized repair center to get help with your phone.
For different Vivo X90S models, there may be additional solutions to consider:
Check the Phone’s Temperature

Sometimes, a Vivo X90S phone’s screen, specifically Vivo X90S 8 Pro, may become unresponsive due to overheating. To check the phone’s temperature:
Step 1: Go to Settings > Battery > Battery Temperature.
Step 2: If the phone is overheating, let it cool down before using it again.
Reset to Factory Settings
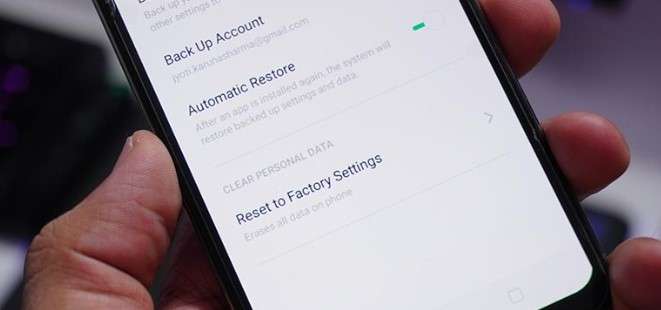
A factory reset may help fix the problem if none of the above solutions work. Note that this will erase all data and settings on the phone, so be sure to back up your data before resetting. To reset the phone:
Step 1: Go to Settings > Additional Settings > Backup and Reset > Erase All Data.
Step 2: Follow the on-screen instructions to reset the phone.
Replace a New Screen

If the phone’s screen is physically damaged or cracked, it may need to be replaced. To replace the screen:
- Contact a professional repair center or the manufacturer for replacement parts and installation.
How to avoid Vivo X90S Screen being unresponsive?
To avoid Vivo X90S screen being unresponsive, here are some suggestions based on the possible causes:
Check Software Updates on Time
Make sure to regularly check for and install software updates on your Vivo X90S phone. These updates often include bug fixes and security patches that can help prevent issues like overheating and screen unresponsiveness.
Check Hardware from Time to Time
Regularly inspect your phone’s hardware components such as charging ports, battery, and screen for any signs of damage or wear and tear. If you notice any issues, get them fixed promptly to prevent them from causing further damage.
Avoid extreme temperatures
Keep your Vivo X90S device in a temperature-controlled environment. High temperatures can cause the screen to become unresponsive, and low temperatures can cause it to freeze.
Keep the screen clean
Dirt and debris on the screen can cause it to become unresponsive. Use a microfiber cloth to clean the screen regularly.
Reduce the number of running apps
Running too many apps at once can overload the system and cause the screen to become unresponsive. Close any apps you’re not using to free up system resources.
Use Wondershare Dr.Fone to Repair or Manage Your Data
Wondershare Dr.Fone is a helpful tool that can help manage and repair your phone’s data. It can be used to back up your data, transfer files between devices, and even fix issues like an unresponsive screen. Dr.Fone has the DF13 version to be launched, which includes more features to help manage your phone’s data effectively.
By following these suggestions, you can help prevent screen unresponsiveness on your Vivo X90S phone. Download Dr.Fone at https://drfone.wondershare.com/ to manage your phone’s data effectively and fix any issues that may arise.
 safe & secure
Conclusion
Vivo X90S phones offer numerous benefits, including high-quality cameras, fast processors, long-lasting batteries, and sleek designs. However, like any other electronic device, Vivo X90S phones can sometimes encounter issues, such as an unresponsive screen. The causes of an unresponsive screen may include overheating, physical damage, and manufacturing defects.
To deal with an unresponsive screen, users can try restarting the Vivo X90S device, checking the charging port and battery, or contacting a professional. Additional solutions for specific Vivo X90S models include checking the phone’s temperature, resetting to factory settings, or replacing a new screen. To avoid an unresponsive screen, users can check software updates on time, inspect the phone’s hardware, avoid extreme temperatures, keep the screen clean, and reduce the number of running apps. Dr.Fone is a helpful tool that can help manage and repair your phone’s data.
Play Store Stuck on Downloading Of Vivo X90S? 7 Ways to Resolve
Part 1: Symptoms when “Play Store Stuck on Downloading”
Just as any problem gives some indication of anything wrong is going to befall. Similarly, a user does feel some unexpected turns of events resulting in Play Store to stick at downloading. If one happens to see that the progress bar has suddenly frozen to a certain scope and taking ages to march any further, it is treated as the first signs for Play store not working properly. Another, such scenario is where your apps are not able to download easily. Rather, the Play store reflects a message downloads are yet in the pending queue. If one happens to witness such problems, these can be in fact be giving you the warning signal of the Play store problem
Part 2: Causes of why “Play Store Stuck on Downloading”
With technology, uncertainties are bound to happen. It becomes quite tricky to analyze the real problem and craft a solution. As, there can be several causes that might be disturbing the smooth functionality of Play store. Here are some collated issues that we’ve gathered that are indicative of the cause.
- The time is not rightly setup: Sometimes, the unexpected root cause of play store failing to work is due to the date and time not set up rightly. If the system time is not according to the standard timing, then the application can misbehave.
- Fluctuations in internet connection: If internet speed is running too low or has weaker connection, Play Store download stuck at 99 problem may arise out. Always, use a good speed of internet.
- Get rid of Cache: Extras of cache can pose to be problematic in the working of applications. Users must timely clean their devices so as to brush away any kind of cache memory.
- Outdated version of Play store app: Users generally do not feel the urge for updating the play store app. It is important to use only the updated version so as the functioning of Google Play app is not affected.
Part 3: 7 fixes for Play Store stuck on downloading
3.1 Check SD card and phone storage space
All the applications, data of one’s device is generally loads directly in phone’s storage or the SD card (if plugged). Hence, it is crucial to check whether your phone storage or SD is not fully occupied. As it can indirectly be the reason why the issue of “**Play Store download stuck at 99%**” might occur. Ensure to get rid of any application that you are no longer using. Or, consider deleting any picture, videos or documents that aren’t required by you.
3.2 Check Wi-Fi or cellular data connection
Sometimes, it’s not your phone that is going all faulty, the root cause might be the internet connection. If the internet is running low or does not seem to be stable, then the play store download problem may occur. Users must ensure that the Vivo X90S device they are working should have a stable network connection so as to combat the problem. Then, they can try downloading the application and check if the problem is prevalent or not.
3.3 One click to fix corrupted Play Store components
The world of internet and its intricacies are beyond a novice’s realm. Chances of malfunctioning of Google Play Store may be due to the components relating to Play Store may have gone corrupted. To resolve such issue, the need of a good software that is courageous enough to tackle all kinds of issues is need. For that, the only perfect solution is Dr.Fone - System Repair (Android), an impeccable software useful in providing speedy recovery of your phone. With it you can ward away the issues like boot problem, black screen of death, phone stuck etc.
Dr.Fone - System Repair (Android)
Android repair tool to fix Play Store stuck on downloading
- Can easily deal with all kinds of problems disrupting the activities of Android phone including app crashes, system crash, black screen of death, Play Store stuck on downloading。
- 1-click technology helpful in repairing rare kinds of issues like phone stuck in boot loop, recovery mode, Vivo X90S logo or Android devices getting bricked.
- Supports compatibility with several kinds of Android phones, including the all Vivo X90S models even the Vivo X90S S9.
- The easy to use interface is crafted with underlying features and functionalities in a right manner.
- Provides 24 hours customer assistance to users for resolving queries or problems.
3,224,929 people have downloaded it
Step by Step Tutorial
Here is the complete guide which will help users in understanding how Dr.Fone - System Repair (Android) can vanish Play store download problem completely.
Step 1: Launch Dr.Fone - System Repair (Android) and connect device
First of all, load the program on PC. In the interim, draw connection of device with phone using a genuine cable. Over the interface, tap on “System Repair” mode.

Step 2: Select Android Repair mode
Over the following screen, select “Android Repair” placed at the left panel to resolve play store stuck issue and press “Start” button too!

Step 3: Fill in the information
It is important to add in all the necessary information for successful execution of program. Make sure to give details of “Brand”, “Name”, “Country”, “Model” and all other fields.

Step 4: Ensure to Download Firmware
Now, follow the on the on-screen prompts to boot Android phone into the download mode. Once done, you’re ready to download the suitable firmware package by hitting the “Next”.
Fret not, the program will automatically detect the most suitable firmware for your device.

Step 5: Repair Android phone
After the package downloads, program will repair all kinds of problems surfacing over your phone automatically. This way, the Play store stuck on downloading will get resolved fully.

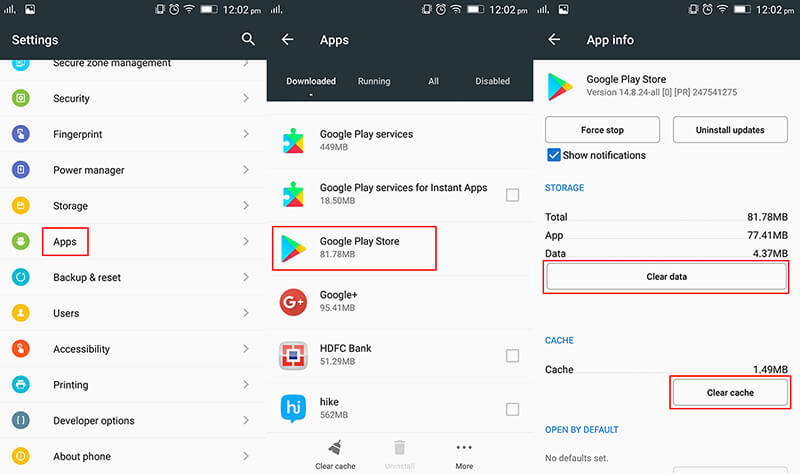
3.4 Clear data and cache of Play Store and download again
Did you know the piling up of cache memory can certainly pull off a great deal for Play Store getting stuck? Cache data may generally stash the data so that you can access it even in future course. But, this do east up a good chunk of space and result in the misbehavior of Play Store app. You can opt to brush away Play store stuck on downloading by using the following steps.
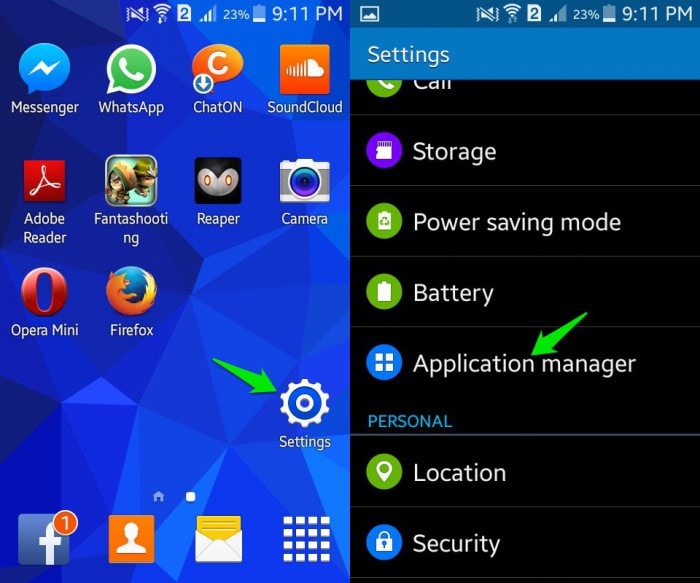
- Get your Vivo X90S and visit “Settings”.
- Then, surf for “Application manager” option and launch “Google Play store” option.
- From there, click on “Cached Data” and select the “Clear Cache” option.
- Optionally, make use of “Force Stop” feature to halt the functioning of the app.
- At last, reboot/restart your smartphone.
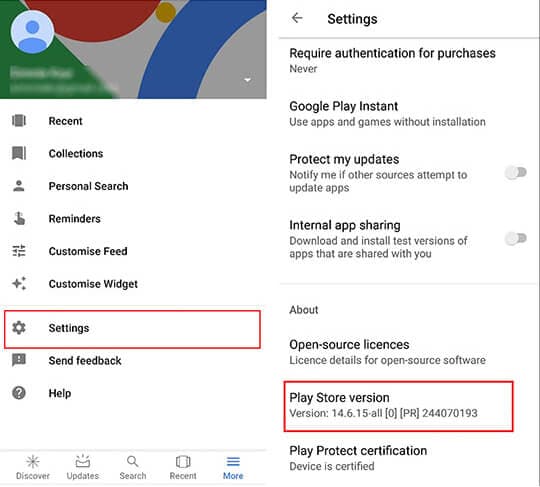
3.5 Update Play Store to the latest version
When was the last time you cared to update your Play store app? Generally, users overlook the need of updating the application. As, they think that it may not be of any greater importance. But, in reality working in an outdated version can directly impact Play Store and cause download problem. Follow the below steps to update Play Store to latest version.
- From phone, just launch Google Play Store app from app drawer.
- Press the 3 horizontal lines icon over the top and locate “Settings” from the left menu.
- In Settings, browse for “Play Store Version” located under “About” section.
- Tap on it, if it shows that Play Store app is not updated then proceed with the on-screen prompts to update it to the latest version.
3.6 Try another Google account
If you’re unable to see a streak of hope and wondering why my Play Store is still showing download pending. Well, some unexpected issue might be there with your Google account. As, there are times where your existing Google account can be the hurdle. Therefore, trying your hand in some other Google account might assist to work things out.
3.7 Avoid downloading large apps
Last but certainly not the least, users must avoid downloading large applications. Especially those games that eats a whopping number of 300+MB of your space. You must always watch out on size of the application is and only then craft the decision to load it on your device. This may help out in keeping the Play store stuck on downloading problem at bay.
4 Solutions to Fix Unfortunately Your App Has Stopped Error on Vivo X90S
We often find people complaining, “Unfortunately Youtube has stopped”, “Unfortunately the internet has stopped” or “Unfortunately Netalpha has stopped”. An error that causes Apps to randomly stop working is experienced by users daily. This is a strange error as it occurs while you are using an App, and it suddenly stops working or crashes. You are brought back from the App screen to the Home Screen of your device with an error message saying: “Unfortunately, it has stopped working.”
Apps not working or stopped while working, such as unfortunately Netalpha has stopped or unfortunately the internet has stopped, is a very confusing error because one moment your App is running smoothly and the next moment it shuts down automatically with an error message. Unfortunately, Youtube has stopped working, Netalpha has stopped. Unfortunately, the internet has stopped, and many more such examples of Apps stopping while working normally are witnessed by users all over the world, and they are constantly on a lookout for solutions to fix such an error.
Read on to find out why exactly your App stops working suddenly and 3 of the best and most effective ways to tackle the problem.
Part 1: Why your App stops working suddenly?
Unfortunately, Youtube has stopped; unfortunately, Netalpha has stopped working, etc. are error messages that pop-up now and then while using Apps on Android mobile devices. It is important to understand that such errors are not App/Apps specific and may occur to any App/Apps. There is no one specific App or genre of Apps that face this problem.
The reason behind unfortunately internet has stopped or any other App which experiences such a glitch in data crash. A data crash is not a serious problem and only means a situation wherein an App, OS, or software stops working normally and exits abruptly. This may happen due to various reasons such as unstable internet connection, both cellular and WiFi. Another reason for Apps to stop working could be corrupted Cache files, which have not been cleared in a long time.
Many users also feel that incomplete or improper installation may cause the App to crash and stop working suddenly.
There may be many more reasons for them; unfortunately, App has stopped error to show up, but no one reason can be blamed for it.
Therefore it is important for us to carefully examine the problem and choose from the solutions given below to fix Unfortunately, Youtube has stopped; unfortunately, Netalpha has stopped; unfortunately, the internet has stopped and many other similar unfortunately App has stopped working errors.
Part 2: A One-Click Fix to ‘Unfortunately App has Stopped’
Fortunately, while this is an annoying problem that stops you from doing what you’re doing, the best way to eliminate this error is simply to repair the data glitch, thus preventing it from happening.
The easiest solution is to use a software application known as Dr.Fone - System Repair , a specialist piece of programming designed to help you fix your devices as quickly as possible.
If this sounds like the option you need to alleviate your, unfortunately, YouTube has stopped errors; this is how to use it.
How to Use Dr.Fone -Repair to Fix Unfortunately App has Stopped Error
Note: Please note that using this solution may rewrite and repair all data on your phone, meaning there is the potential to lose data during the process. Make sure you back up your device before continuing.
Step #1 - Acquire the Software
Head over to the Dr.Fone - System Repair website and download the software to your Mac or Windows computer.
Step #2 - Connect Your Android Device
Launch Dr.Fone and click the System Repair option from the main menu. Now connect your Vivo X90S using the official cable.
From the next menu, select the ‘Android Repair’ option and press ‘Start’.
Step #3 - Input Information & Repair
Tap in your phone information. This is to make sure your device is repaired correctly while minimizing the risk of bricking your device.

Follow the on-screen instructions on how to then boot your Vivo X90S in Download mode.

Once booted, the software will verify your firmware and start repairing your device. Make sure your phone stays connected throughout the process, and you’ll be ready to go and your ‘unfortunately the internet [or another app] has stopped’ error should be erased!
This could take some time, depending on your internet connection and speeds, so be mindful that everything stays connected.
Part 3: Fix your App has unfortunately stopped by clearing App Cache
Herein we bring to you 3 of the most effective remedies to combat the; unfortunately, App has stopped error, which has helped many users facing similar problems.
First among these is to clear the App’s cache. Clearing App Cache to fix Unfortunately Youtube has stopped, and such errors are very popular as it cleans your App/Apps by wiping off data that has been stored due to constant App usage, and it makes the App/Apps as good as new. It is advised to all users to clear the App cache regularly for Apps to function better.
Follow the steps given below to learn how to clear App cache:
• Visit “Settings” to find an option named “Apps”.

• Tap on “Apps” and look for the App which has suddenly stopped.
• Click the App name, say, for example, “Youtube” by scrolling down in “All” Apps.
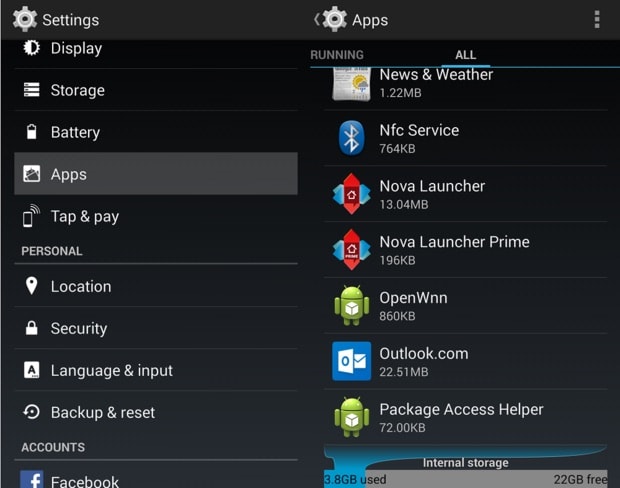
• From the options that appear, tap on “Storage” and then on “Clear cache” as shown below.

Clearing App cache is always a good idea as it prevents any errors which may be caused due to the cache being corrupt or too full. This method is likely to help you, but if the problem persists, read on to find out about 2 more solutions.
Part 4: Fix your App has unfortunately stopped by the fresh installation
Sometimes, unfortunately, Youtube has stopped; unfortunately, the internet has stopped, and such errors are caused due to improper or inappropriate App installation. It is mandatory to completely download the App from the Google Play Store and use it after it is successfully installed on your device.
Firstly, to uninstall all an existing App from your device, follow the instructions given hereunder:
• Visit “Settings” and search for “Application Manager” or “Apps”.
• Select the App you wish to uninstall, say, for example, “Messenger”.
• From the options that appear before you, click on “Uninstall” to delete the App from your device.

You may also uninstall an app directly from the Home Screen (only possible in certain devices) or the Play Store.
To re-install the App, visit Google Play Store, search for the App name and click on “Install”. You will also find the deleted App in “My Apps and games” on your Play store.
This method has helped many and will be useful to you too. So don’t hesitate to try it. It may sound tedious and time-consuming, but it hardly takes 5 minutes of your time.
Part 5: Fix your App has unfortunately stopped by factory reset
Factory Reset must be used only when nothing else works. Please remember to take a back-up of all your data and contents on the cloud or an external memory device, such as a pen drive before adopting this method because the one you perform a factory reset on your device, all media, contents, data and other files are wiped out, including device settings. Do remember to back up the data on an Android device before performing a factory reset.
Follow the step-by-step explanation given below to factory reset your device to fix Unfortunately Youtube has stopped; unfortunately, the internet has stopped working and similar errors:
• Visit “Settings” by clicking the settings icon, as shown below.
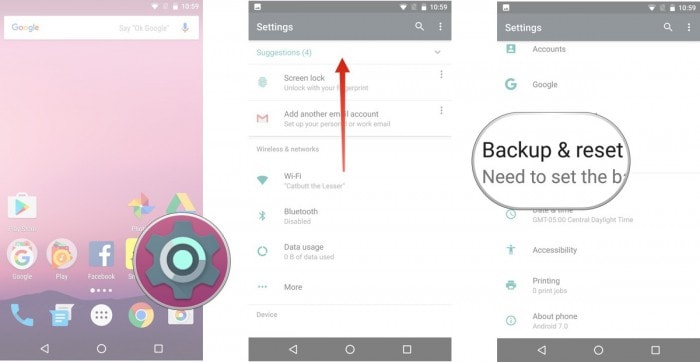
• Now select “Backup and Reset” and move on.
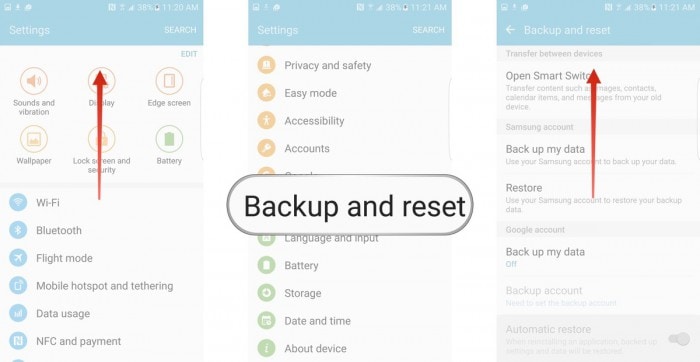
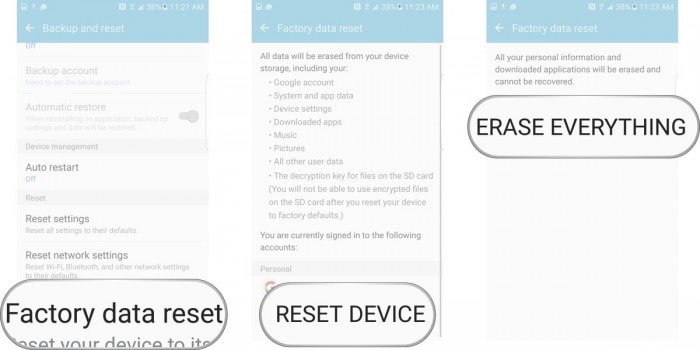
• In this step, select “Factory data reset” and then “Reset Device”.
• Finally, tap on “ERASE EVERYTHING” as shown below to Factory Reset your device.
Note: Once the factory reset process is complete, your device will automatically restart and you will have to set it up once again.
Errors such as unfortunately, Youtube has stopped, unfortunately, Netalpha has stopped, unfortunately, the internet has stopped working and so on are very common these days. They disrupt the normal functioning of an App/Apps and prevent you from using the App/Apps smoothly. Unfortunately, App has stopped error is not a serious problem and does not mean there is a problem with the App, your Android OS version, or your handset. It is a random error which occurs due to various reasons in a given situation. If you experience such an error while sign in your favorite App/Apps, DO NOT panic as unfortunately, App has stopped error can be fixed easily. All you need to do is be patient with the App’s software and not try to launch it again and again once it crashes, and an error message pops-up. Just follow the methods listed and explained in detail in the previous segments to solve the problem of unfortunately App has stopped.
Also read:
- [Updated] 2024 Approved Elevating Conference Calls Top 3 Methods, #4 Insights
- [Updated] 2024 Approved Key Strategies for Professional Video Production via NVIDIA
- [Updated] Maximize Engagement Mastering Sound Editing for YouTube
- 2024 Approved YouTube Vs. Dailymotion Key Platform Distinctions
- 8 Workable Fixes to the SIM not provisioned MM#2 Error on Tecno Camon 20 | Dr.fone
- 9 Solutions to Fix Oppo Find N3 System Crash Issue | Dr.fone
- Angler’s Guide to Premium Fishing Cameras for 2024
- Best Methods for Poco C65 Wont Turn On | Dr.fone
- In 2024, How to Factory Reset iPad or iPhone 15 Pro Max without iCloud Password or Apple ID?
- In 2024, No Money Down? Best Free Video Chat Platforms
- In 2024, YouTube CPM Rates How Much Do YouTubers Make
- OnePlus Nord 3 5G Bootloop Problem, How to Fix it Without Data Loss | Dr.fone
- Super Easy Ways To Deal with Realme Note 50 Unresponsive Screen | Dr.fone
- Swift Fix for Sims 4 Blackout
- Why Does My Vivo X100 Keep Turning Off By Itself? 6 Fixes Are Here | Dr.fone
- Title: Troubleshooting Guide How to Fix an Unresponsive Vivo X90S Screen | Dr.fone
- Author: Ariadne
- Created at : 2025-01-16 19:16:14
- Updated at : 2025-01-20 16:03:31
- Link: https://howto.techidaily.com/troubleshooting-guide-how-to-fix-an-unresponsive-vivo-x90s-screen-drfone-by-drfone-fix-android-problems-fix-android-problems/
- License: This work is licensed under CC BY-NC-SA 4.0.