
Vivo Y200 Screen Unresponsive? Heres How to Fix It | Dr.fone
Vivo Y200 Screen Unresponsive? Here’s How to Fix It
Vivo Y200 phones have become increasingly popular due to their advanced features, sleek designs, and affordable prices. These phones offer many benefits, including high-quality cameras, long battery life, and fast processing speeds. However, sometimes users may encounter problems such as a Vivo Y200 touch screen not working, which can be frustrating and difficult.
This article aims to provide solutions for Vivo Y200 phone users experiencing screen unresponsiveness. We will explore various reasons this issue may occur and discuss step-by-step instructions for fixing the problem. So, if your Vivo Y200 touchscreen is not working, don’t worry – we’ve got you covered!
What Causes A Vivo Y200 Screen Unresponsive?
There are several reasons why a Vivo Y200 phone’s screen may become unresponsive. Some common causes include software issues, hardware problems, or issues with the touchscreen itself. It’s essential to identify the root cause of the problem to fix it properly.
Below are some possible causes of Vivo Y200 screen unresponsiveness, along with explanations of each.
Soft-bricked software: Soft-bricking refers to the state where the phone is stuck in an infinite boot loop or unable to boot. It can occur due to corrupt system files, outdated firmware, or unsuccessful updates. For example, some Vivo Y200 Y2 and 5A users have reported their screens getting stuck on the boot logo after a software update, rendering the Vivo Y200 device unusable.
Equipment is worn out: Hardware problems can also cause Vivo Y200 screens to become unresponsive. It can be due to worn-out equipment, such as a damaged LCD screen, malfunctioning touch sensor, or loose ribbon cables. These issues can also occur in any Vivo Y200 model, including the Y2 and 5A.
**Touchscreen problems:**Sometimes, the touchscreen itself can become unresponsive for various reasons. For instance, Vivo Y200 Y2 and 5A users may face this issue if they have accidentally dropped their phone, exposed it to water, or used an incompatible screen protector. It can result in a damaged or malfunctioning touchscreen, making it difficult or impossible to operate the phone.
The Common Solutions To Solve A Vivo Y200 Screen Unresponsive
In the previous section, we identified the possible causes of Vivo Y200 screen unresponsiveness, including soft-bricked software, hardware problems, and touchscreen issues. While the underlying reasons for screen unresponsiveness can be varied and complex, some common solutions can help resolve the issue. Here are three of the most common solutions to address tablet screen unresponsiveness, no matter the Vivo Y200 model.
1. Restart The Device
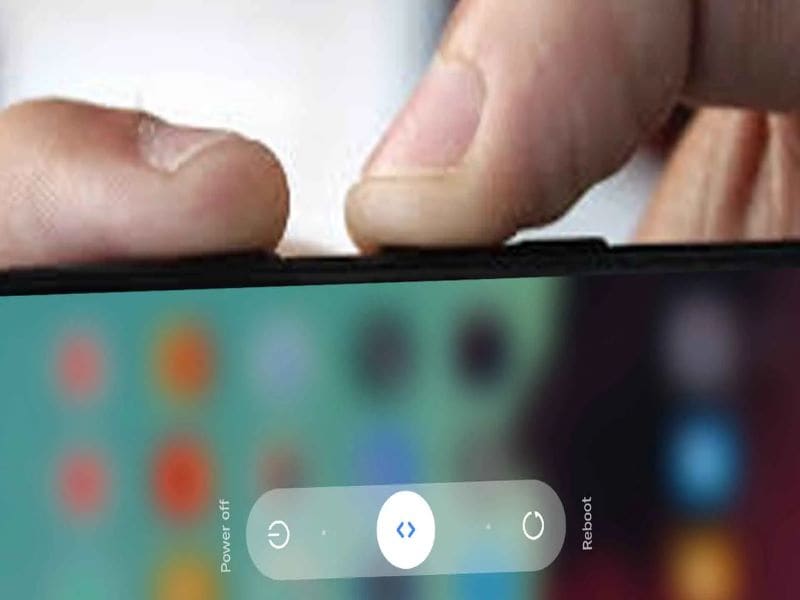
Restarting the phone is typically the initial solution that comes to mind when we encounter the Vivo Y200 black screen problem. It’s a simple and widely used method to address the issue, as the black screen problem could be caused by a software glitch, which can often be resolved by freeing up the phone’s memory.
It is the most commonly used method to fix Vivo Y200’s touch screen and power button issues, such as unresponsiveness. By restarting the Vivo Y200 device, background processes are disabled, and memory is freed up, allowing programs to run smoothly and potentially resolve the problem. To restart a Vivo Y200 device, press the Power and Volume Up buttons simultaneously, and release the Power button once the Vivo Y200logo appears.
2. Leave The Phone And Let The Battery Drain Completely
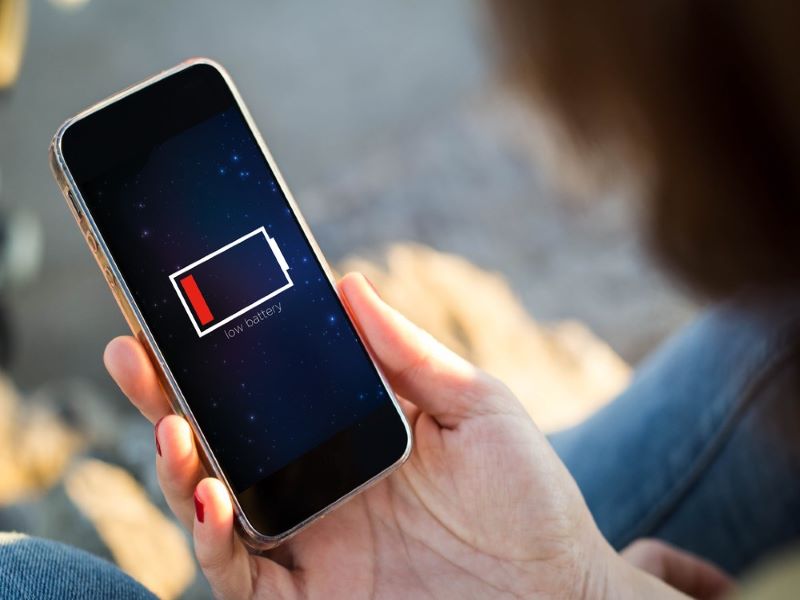
Sometimes, the tablet screen may become unresponsive due to a software issue preventing the Vivo Y200 device from functioning correctly. Leaving the Vivo Y200 device unused and draining the battery helps resolve these issues. After fully discharging the battery, the Vivo Y200 device can be recharged and turned back on, potentially resolving the issue.
3. Contact Custom Service
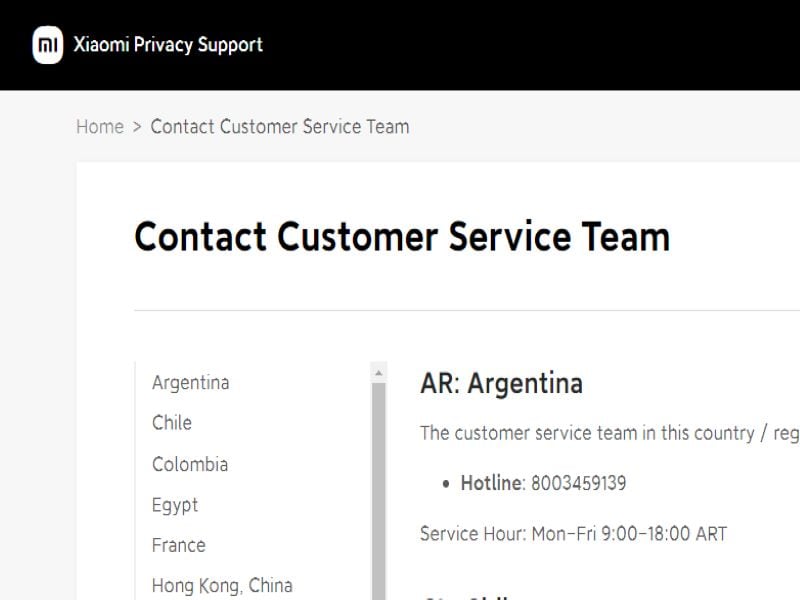
If restarting the Vivo Y200 device or allowing the battery to drain doesn’t resolve the issue, seeking professional assistance is recommended. The manufacturer may provide additional troubleshooting steps or recommend sending the Vivo Y200 device in for repair or replacement. It’s important to check the warranty before contacting customer service, which may affect repair or replacement options.
In addition to the common solutions we discussed earlier, some model-specific solutions can help resolve the screen unresponsiveness issue on Vivo Y200 Y2 and Vivo Y200 5A.
4. Optimize Device Performance
One solution is to optimize the Vivo Y200 device performance by clearing the cache, removing unwanted apps, and disabling unnecessary features. This method can help free up memory and resolve the issue.
You can clear your cached data using the default settings.
- Select Settings> Storage > Cached Data.
- To clear the cache, select Clear Cache.

5. Back Up And Factory Reset
Another solution is to back up the Vivo Y200 device and perform a factory reset, which can help reset the Vivo Y200 device to its original state and remove any software glitches that may be causing the screen unresponsiveness. The factory settings on your phone will restore any data saved by third-party applications and some of the phone’s settings when it was first built. Note that this method erases all data from the Vivo Y200 device, so it should only be considered a last resort.
In the following steps, we will show you how to format the Vivo Y200 Redmi 5A to erase all your data and restore it to its factory state.
- Open the Settings.
- Navigate to the Additional settings section of the Vivo Y200 Redmi 5A settings.
- Please scroll down the screen until you reach the Backup & reset option, then click to access it.
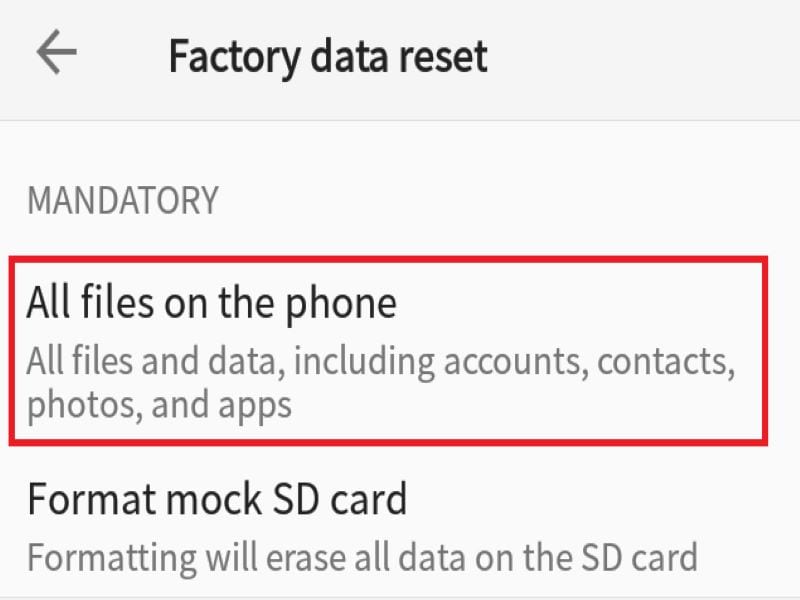
- ClickErase all data (factory reset) to restore the network settings and applications, or completely reset the Vivo Y200 Redmi 5A.
- Select All files on the phoneto make a complete format of the Vivo Y200 Redmi 5A.
6. Using Dr. Fone Repair
If none of the above solutions worked, you can try using Dr. Fone Repair. This software is designed to fix various software issues on Android phones, including Vivo Y200 devices. It can fix issues such as screen stuck on boot, black screen, and other software-related problems. Dr. Fone Repair is easy to use and can protect your data and files on your phone.
Here’s how to fix repair screen unresponsiveness or any software-related issues on Vivo Y200 Y2 and Vivo Y200 5A using Dr. Fone Repair:
- Begin by installing and opening Dr.Foneon your PC.
- Once opened, select the ‘System Repair’ option and connect your Android smartphone to your PC via USB cable.
- On the next screen, choose “Android****Repair“ from the list of available options.
- Click on the “Start“ button to initiate the repair process.
- You will then be prompted to enter the required device information such as the Vivo Y200 device name, model number, and firmware version.
- Once you have entered the necessary information, click on the ‘Next’ button to proceed.
- Follow the on-screen instructions carefully to repair your Vivo Y200.

How To Avoid A Vivo Y200 Screen Unresponsive?
To avoid facing a Vivo Y200 screen unresponsive issue, users can take several preventative measures. One important step is to update the Vivo Y200 phone regularly to ensure the software is up to date and all bugs and glitches are fixed. Users can also use tools like Dr. Fone to regularly manage and repair data, including clearing cache and removing unwanted apps. It is also important to use quality charging cables and avoid exposing the Vivo Y200 device to extreme temperatures or humidity, which can damage the internal components and potentially cause screen unresponsiveness. Finally, users can avoid dropping or mishandling the Vivo Y200 device, leading to physical damage and causing the screen to become unresponsive. Users can help prevent screen unresponsiveness by taking these steps and ensuring their Vivo Y200 device runs smoothly and reliably.
 safe & secure
Conclusion
Encountering a Vivo Y200 screen unresponsive issue can be a common problem for some Vivo Y200 phone users. However, with the solutions we have provided in this article, you can effectively solve the problem and get your phone back up and running in no time. It’s important to remember to regularly back up your data and take preventative measures, such as avoiding harmful malware and keeping your phone updated, to avoid experiencing this issue in the future.
By using reliable software, like Dr.Fone Repair, you can ensure that your Vivo Y200 phone is well-maintained and operating smoothly. With these solutions and tips, you can enjoy the benefits of your Vivo Y200 phone without any interruptions.
11 Proven Solutions to Fix Google Play Store Not Working Issue on Vivo Y200
Google Play Store is a necessary and bundled service of any Android device. This app is required to download or even run any apps. So, getting an error like Play store not working or Play Store crashing is very unfortunate and a matter of a headache. Here we tried to put the best solution to overcome this issue. Keep reading this article for all the 11 best solutions.
Part 1. The recommended method to fix Google Play Store issues
If you search on the internet, you may find various tricks dealing with Google Play Store not working issue. However, either to try each of them or choose several to follow would certainly cost a lot of time. What’s more, we are not sure whether they will really work. Therefore, we would recommend you with a more effective and fast way, that is to use Dr.Fone - System Repair (Android) , a dedicated Android repair tool to fix Google Play Store, not working issues just in one click.
Dr.Fone - System Repair (Android)
A most effective method to fix Google Play Store not working
- Fix all Android system issues like the black screen of death, won’t turn on, system UI not working, etc.
- Industry’s 1st tool for one-click Android repair.
- Supports all the new Vivo Y200 devices like Galaxy S8, S9, etc.
- Step-by-step instructions provided. No technicals skills required.
3981454 people have downloaded it
Brief steps to guide you through the process of fixing Google Play Store not working (followed by video tutorial):
- Get this tool downloaded on your computer. Install and launch it, and you can find the following welcome screen displayed.

- Select the option “System Repair”. In the new interface, click on the “Android Repair” tab.

- Start fixing Google Play Store not working by clicking “Start”. Select and confirm the correct model details as instructed.

- Activate the Download mode from your Vivo Y200.

- After entering the Download mode, the Dr.Fone tool starts to download the correct firmware to your Android.

- The downloaded firmware will be loaded and flashed to your Vivo Y200 to fix the Google Play Store not working issue.

- Wait until the Android repair process is complete. Start your Android and Google Play Store, you can then find that the Google Play Store not working issue no longer exists.

Video tutorial to fix Google Play Store not working
Part 2: Other 10 common methods to fix Google Play Store issues
1. Fix Date and Time settings
Sometimes Google creates a problem connecting with the Play Store or Play store crashing due to the wrong date and time. The first and most common thing is you have to check if the date and time are updated or not. If not, update it first by following the below step by step guide.
Step 1 – First, go to the “Settings” of your device. Find ‘Date and time’ and tap on it.

Step 2 – Now you can see several options. Select “Automatic date and time”. This should override the wrong date and time your device have. Else, deselect the tick beside that option and select the date and time manually.
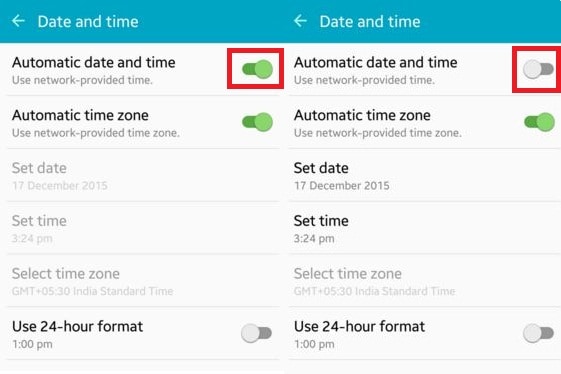
Step 3 – Now, go to the Play store and try to connect again. This should be working without any problem now.
2. Cleaning of Cache data of Play Store
This may happen that sometimes Google Play Store stopped working due to excessive unnecessary data stored in the cache of the Vivo Y200 device. So, clearing unnecessary data is very important to keep the application run smoothly. To do this, you need to follow the below steps.
Step 1 – Firstly, go to “Settings” on your device.
Step 2 – Now, navigate to the “Apps” option available at the settings menu.
Step 3 – Here you can find the “Google Play Store” app listed. Open it by tapping.
Step 4 – Now, you can find a screen like below. Tap on “Clear cache” to remove all the cache from the application.
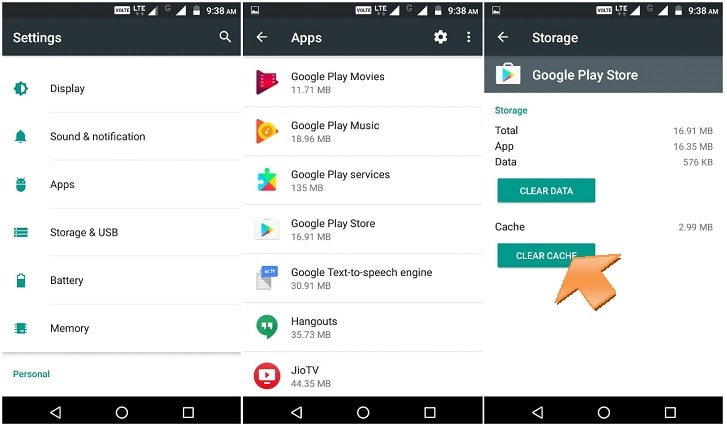
Now, again try to open Google Play Store and you may successfully overcome the Play Store not working issue. If not, check the next solution.
3. Reset Play store by Clear data
If the above solution is not working for you, you might try this option instead. This step will erase all the app data, settings, etc so that it can be set up a fresh one. This will also fix the Google Play store not working issue. For this solution, use the following method step by step.
Step 1 – Like the previous method, head towards the settings and then find “Apps”
Step 2 – Now find “Google Play Store” and open it.
Step 3 – Now, instead of tapping “Clear cache”, tap on “Clear data”. This will erase all the data and settings from the Google Play store.
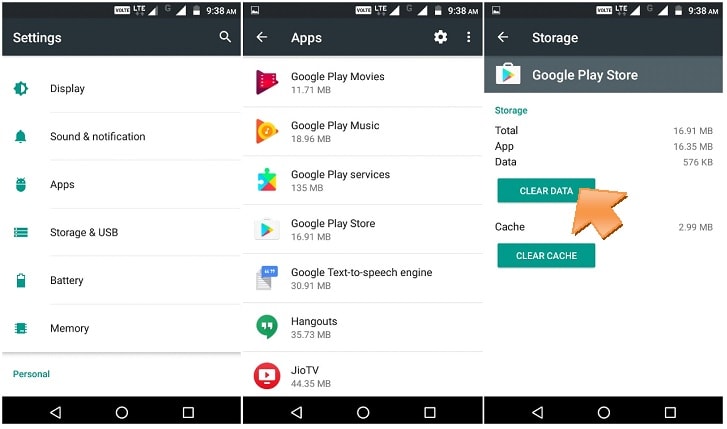
After this, open “Google Play Store” and now your problem might be solved now.
4. Reconnecting the Google account
Sometimes it may happen that removing and reconnecting your Google account may solve the Play Store not working issue. To do this, you need to follow the instructions below.
Step 1 – Go to the “Settings” and then find “Accounts”.
Step 2 – Upon opening the option, select “Google”. Now you can see your Gmail ID listed there. Tap on it.

Step 3 – Now click on the top right side three dots or “more” option. Here you can find the “Remove account” option. Select it to remove the Google Account from your Mobile.
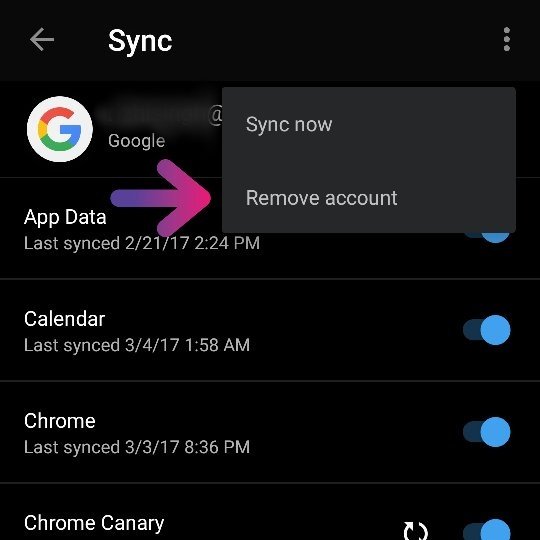
Now, go back and try to open Google Play Store again. This should work now and enter your Google ID and password again to continue. If it’s still not working, move to the next solution.
5. Reinstall the latest version of Google Play Store
Google Play store can’t be uninstalled completed completely from your Vivo Y200. But disabling and reinstalling its latest version can resolve the Play Store crashing issue. For doing this, just follow the below guide.
Step 1 – First of all, go to “Settings” and then move on to “Security”. Then find “Device administration” here.
Step 2 – Upon clicking on this option, you can find “Android device manager”. Uncheck this and disable.

Step 3 – Now you can be able to uninstall Google play service by going into application manager.

Step 4 – After that, try to open any app that requires Google Play store to open, and that will automatically guide you to install the Google Play service. Now install the updated version of the Google Play service.
After installing, your problem might be solved by now. If not, try the next solution.
6. Clear Google Service Framework Cache
Besides the Google Play store, this is important to keep healthy the Google Service Framework as well. The cache and unnecessary data should be removed from there also. Follow the steps below.
Step 1 – Go to settings and then tap on “Application Manager”
Step 2 – Here you can find “Google Service Framework”. Open it.
Step 3 – Now, tap on “Clear cache”. And you are done.

Now go back and try to open Google Play store again. This might solve the Google Play Store has stopped the problem by now. If not, check the next solution.
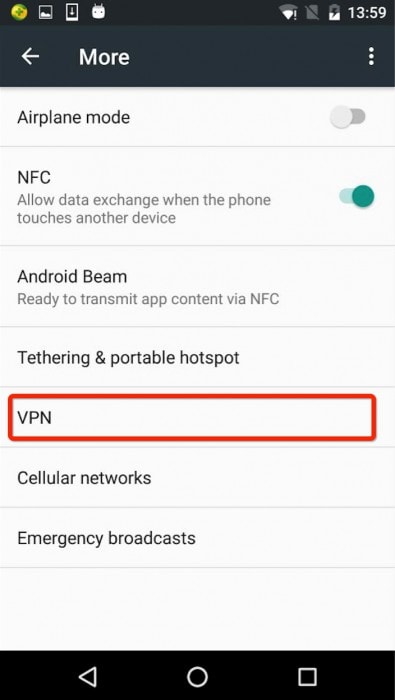
7. Disable the VPN
The VPN is a service to get all the media outside your geographic location. This is also used to install a country-specific app in another country. But sometimes it can create a problem with Play Store crashing. So, this is recommended to try disabling the VPN.
Step 1 – Go to the settings of your device.
Step 2 – Under the “networks”, click on “More”.
Step 3 – Here you can find “VPN”. Tap on it and turn it off.
Now, again go back and try to open the Google Play Store. This may solve your problem now. If not, check the next solution.
8. Force stop Google Play Service
Google Play Store needs to be restart just like your PC. This is a really helpful and common trick to overcome the Play Store crashing issue on your Vivo Y200. To do this, follow the below steps.
Step 1- Go to settings and then go to the “Application Manager”.
Step 2 – Now find “Google Play Store” and click on it.
Step 3 – Here click on “Force Stop”. This allows the Google Play Store to stop.

Now, try to open Google Play store again and this time the service is being restarted and might work properly. If not, try the next solution.
9. Try a Soft Reset of your device
This easy to use solution will remove all the unnecessary temporary files of your device, close all recent apps, and make it clean. This is just rebooting your device. It won’t delete any data from your device.
Step 1 – Long press the “Power” button on your device.
Step 2 – Now, click on ‘Reboot’ or ‘Restart’ option. Your device will restart in some time.

After restarting, try to open the Google Play Store again and this time you should succeed. If any case, it’s not opening, try the last (but not the least) method by hard reset your Android.
10. Hard reset your device
If you have done with all of the above solutions and still Play Store crashing, and you are aggressive to get it, then only try this method. Using this method will delete all the data of your device. So take a backup of the whole. Follow the step by step instruction below.
Step 1 – Go to setting and find “backup and reset” there.
Step 2 – Click on it. And then Click on the “Factory data reset” option.
Step 3 – Now confirm your action and tap on the “Reset device”.

This will take a while to reset your device completely. After completion, start the Google Play Store and set up as a new device.
The above methods are the best 11 among all the solutions you can get for your Play Store not working on wifi or Play Store crashing error. Try one by one and you might get rid of this problem.
Effective Methods on How To Take Viruses Off Your Phone
Cell phones have become a part of a person’s daily life. It offers convenience and connectivity at your fingertips. Yet, these handy devices are prone to viruses when used carelessly. Viruses can infiltrate your phone through unverified downloads, unsecured networks, or malicious links. This can compromise your data and device performance.
In this article, you’ll explore practical methods on h ow to take a virus off your phone. From simple preventive measures to specific solutions, this guide aims to equip you with practical strategies, ensuring a safer and smoother mobile experience by safeguarding your phone against the perils of viruses.

Part 1: Why You Get Mobile Viruses in the First Place
Mobile viruses are tiny bugs that sneak into your phone and mess things up. They’re sneaky software programs designed to cause trouble, like stealing your info or making your phone act strange. Pesky viruses are usually acquired by accessing unverified links and downloading sketchy files. This is why it’s essential to be careful about what you access on the internet. It’s also a great habit to beware of the computers you’re connecting your phone to.
You might notice weird things happening on your phone when infected with a virus. It may suddenly slow down, show pop-ups you didn’t click, or run out of battery super-fast . These could be signs that your phone has a virus. Take note of these.

Here are some common ways viruses get into your phone:
- **Accessing sketchy links.**Clicking on strange or suspicious links in messages or emails is the number one virus source.
- **Downloading apps from unauthorized developers.**Getting apps from places other than the official app stores like Google Play or Apple Store can also be a gateway for trojan viruses. This is mainly because apps install files directly to your system when downloaded.
- Connecting to compromised computers. Watching out for viruses or malware when plugging your phone into a computer would be best.
- **Transferring malware files to your phone:**Moving files with viruses from a computer or another device to your phone.
Remember, these bugs can cause a lot of trouble, but staying careful while using your phone can help you avoid them!
Part 2: Different Methods To Take Viruses Off Your Phone
If your phone’s caught a virus, it’s time to remove those bugs. You might wonder about how you get a virus off your phone. Well, this section has you covered with 4 different methods you can use.
Method 1: Wondershare Dr. Fone’s System Repair
If you need a quick, professional, and safe solution, Wondershare Dr.Fone is here to save the day. Its System Repair feature is like a superhero—it swoops in and fixes the problem in a snap. This magic tool does the heavy lifting to remove viruses from your phone.
Here’s how you can use Dr. Fone’s System Repair feature:
- Step 1: Launch Dr.Fone. Choose System Repair in the Toolbox section. Ensure that your phone is connected.
safe & secure
3,391,426 people have downloaded it
- Step 2: Choose either Android or iPhone. In this example, iPhone shall be selected. For Android devices, simply follow and mirror the prompts that will follow.

- Step 3: Select iOS Repair to proceed.

- Step 4: Choose either Standard Mode or Standard Repair. Standard Repair will not remove data from your device. However, for a sure fix, choose Standard Mode.

- Step 5: Put your device to Recovery Mode . Dr. Fone will provide on-screen instructions.

- Step 6: Click Download next to the iOS firmware you want to install.

- Step 7: After the firmware is downloaded, click Repair Now.

- Step 8: Once the process is completed, choose Done. Your phone should be virus-free by now.

Method 2: Using Safe Mode
Safe Mode is like a secret agent—it helps but with a downside. It turns off third-party apps, making your phone useful only for basic calls or texts. Use this method if any solutions in this section do not work. It’s especially handy if you use your phone before sending it to a technician. This way, you’ll learn how you can get a virus off your phone before actually letting a technician do it.
Generally, here’s how you can enter Safe Mode on Android Phones. Do check with your phone manufacturer’s official manual/guides on how to enter them:
- Step 1: Press and hold the power button. Wait for the power options to appear.
- Step 2: Tap and hold the Power Off button.
- Step 3: Tap on the prompt when you see the Reboot to safe mode option.

For iPhones, here’s how you can do it:
- Step 1: Power off your iPhone.
- Step 2: Hold the power button.
- Step 3: Hold the volume down button until you see the Apple logo.
- Step 4: Your phone should now be in safe mode.

Method 3: Downloading Anti-Virus Software
Anti-virus software works like a shield, protecting your phone from sneaky viruses and malware. Here are three recommended anti-virus apps that you should try out. They’re available on both the Google Play Store and App Store. So, regardless of what device you’re using, you’re sure to be safe with these:
- Avast Anti-virus – Mobile Security
- Norton 360: Online Security
- Bitdefender Mobile Security & Anti-virus
Method 4: Performing a Factory Reset
A Factory Reset is like a phone makeover—it wipes everything and starts fresh. But be cautious, as it erases all data!
Generally, the Factory Reset option should be in Settings > General & Backup and reset or under Settings > About phone for Android devices.

IOS devices should be under Settings > General > Transfer or Reset iPhone.

Remember, each method has its strengths and weaknesses. Dr.Fone is quick and effective, Safe Mode is limited but useful, anti-virus apps can protect, and a Factory Reset gives a clean slate. Try these methods to zap those viruses away!
Part 3: Handy Prevention Tips To Avoid Future Infections
To keep your phone safe from viruses, follow these easy tips that act as a shield against potential threats.
- **Regular software updates:**Keep your phone updated with the latest software. Updates often include security patches that protect your phone from new threats.
- **Cautious downloads:**Be careful when downloading apps or files. Stick to trusted sources like Google Play Store or Apple Store. Avoid clicking on suspicious links from unknown sources.
- **Secure networks:**Use secure Wi-Fi networks and limit public Wi-Fi use for sensitive activities. Public networks can expose your device to potential risks.
- **Anti-virus software:**Install a reliable anti-virus app and keep it updated. These apps constantly scan for and detect viruses, safeguarding your device against threats.
These simple yet crucial tips will fortify your phone’s defenses, reducing the likelihood of virus infections and ensuring a safer digital experience.
Conclusion
Viruses can make your phones act weird, but you have the tools to fight back. Keep your phone healthy by updating software, being cautious with downloads and links, using secure networks, and having an anti-virus app.
And, if you’re thinking, “**How do I get a virus off My Vivo Y200?**” then Wondershare Dr.Fone is a reliable hero. It’s quick and effective in clearing out those bugs. By staying aware and taking preventive steps, you can keep your phone safe and ensure a trouble-free experience. And if viruses strike, Dr. Fone’s got your back for an instant fix!
Also read:
- [New] 2024 Approved Snapedit 101 Simple Steps to Stunning Photos
- [New] Pulling Fun on Pedal Power
- [Updated] 2024 Approved Step-by-Step Install & Utilize iFunny Memes
- [Updated] Exploring the World of ASPECT RATIOS in YOUTUBE Content for 2024
- [Updated] In 2024, Expand Your Knowledge Elite 15 Sci-YT Channels List
- Best Methods for Itel P55+ Wont Turn On | Dr.fone
- Fix Unfortunately Settings Has Stopped on Realme 11X 5G Quickly | Dr.fone
- Fixing Persistent Pandora Crashes on Infinix Zero 5G 2023 Turbo | Dr.fone
- Full Solutions to Fix Error Code 920 In Google Play on Vivo V29e | Dr.fone
- Google Pixel 7a Bootloop Problem, How to Fix it Without Data Loss | Dr.fone
- How to Change/Fake Your Vivo Y100t Location on Viber | Dr.fone
- How to Fix It Oppo K11 5G Wont Turn On | Dr.fone
- Navigating the World of Streamed Games for 2024
- Penning Down Value: A Comprehensive Look at the Moto G's Stylus Capabilities
- Restore Your Lost Data on Windows 10 with Windows File Recovery - Tutorial
- Top 10 Fixes for Phone Keep Disconnecting from Wi-Fi On Lava Blaze Curve 5G | Dr.fone
- Top 4 Android System Repair Software for Tecno Phantom V Fold Bricked Devices | Dr.fone
- Unlock Smooth 4K Editing The Top Video Editing Apps for Proxy Videos for 2024
- Why Does My Samsung Galaxy A15 5G Keep Turning Off By Itself? 6 Fixes Are Here | Dr.fone
- Title: Vivo Y200 Screen Unresponsive? Heres How to Fix It | Dr.fone
- Author: Ariadne
- Created at : 2025-01-19 20:48:02
- Updated at : 2025-01-20 18:26:32
- Link: https://howto.techidaily.com/vivo-y200-screen-unresponsive-heres-how-to-fix-it-drfone-by-drfone-fix-android-problems-fix-android-problems/
- License: This work is licensed under CC BY-NC-SA 4.0.