
Want to Uninstall Google Play Service from Oppo A1 5G? Here is How | Dr.fone
Want to Uninstall Google Play Service from Oppo A1 5G? Here is How
In this article, you will learn the pros and cons of uninstalling Google Play services, as well as a free root tool to help you do this.
Acts as a one-stop destination to download various kinds of apps from the Play Store. The Play service also provides a way to manage these apps without much hassle. From uninstalling to updating an app, all of this can be done with Google Play service. Nevertheless, there are times when users wish to uninstall Google Play services. To start with, it takes a lot of storage and makes it pretty tough for users to manage their devices. To help you, we will let you know how to uninstall Google Play Store in this informative post.
Part 1: Reason you might want to get rid of Google Play Service
Before we proceed and discuss different ways on how to update Play Store after uninstalling updates, it is important to cover the basics. We have heard plenty of users who wish to uninstall Google Play services, but are not sure of the repercussions. One of the main reasons is that it consumes a lot of space on phone’s storage. Not just that, it only consumes plenty of battery as well.
If your device is giving the insufficient storage warning, then you need to start by clearing your phone’s data. It is observed that the Google Play Service accumulates most of the data in a device. This leads to users looking for different ways to how to uninstall Google Play Store.
Part 2: What will it affect to uninstall Google Play Service?
If you think that Google Play Service only provides a platform to download new apps, then you are wrong. It provides several other functions that might alter the way you use your smartphone. It is linked with other essential Google services as well, like Google Maps, Gmail, Google Music, etc. After uninstalling the Google Play Service, you might face trouble using various essential apps.
Furthermore, it might tamper with the overall functionality of your device as well. For instance, you could encounter network issues, messaging problems, app crashing, and more. Since the Play Service is closely associated with Android system, it might have a prominent effect on your phone. If you have a rooted device, then you can easily install custom ROM and resolve these issues. Though, for a non-rooted device, overcoming these problems could be a big hurdle.
Part 3: How to disable Google Play Service?
By now, you already know all the repercussions of getting rid of Google Play Services permanently. Before you learn how to update Play Store after uninstalling updates, be sure whether you wish to uninstall Google Play Services or not. You can also choose to simply disable the services as well. If you face any severe issue afterward, then you can always enable the services manually.
To disable the Google Play Services, just go to your phone’s Settings > Applications > All and open Google Play Services. You will get to know about the app’s detail and a few other options here. Just tap on the “Disable” button. It will generate another pop-up message. Confirm it by tapping on the “Ok” button. This will disable Google Play Services on your device. Later, you can follow the same drill to enable it as well.

Now when you know how to uninstall Google Play Store on your device, you can easily customize it. Get rid of any kind of problem you are facing due to lack of storage or battery issues related to Google Play services after following these instructions. Feel free to drop a comment below if you face any setback while following this tutorial.
How to Quickly Fix Bluetooth Not Working on Oppo A1 5G
One of the key features of an Android device these days is the Bluetooth technology. This is such an important part of the phone that many of us take for granted, but as soon as the feature stops working, it can cause all kinds of problems.
Fortunately, despite there being many reasons why a problem could occur to your Bluetooth feature, there are also plenty of fixes. Today, we’re going to share with you the complete guide that details everything you need to know to get your Bluetooth up and running once again as quickly as possible.
Let’s get straight into it!
Part 1. About Bluetooth Not Working on Android
Of course, the most common problem to occur with Bluetooth technology in your Oppo A1 5G is when it doesn’t connect to the Oppo A1 5G device you’re trying to link it to. This could be anything from a Bluetooth headset or headphones, to a portable speaker or even an in-car audio system.
However, the problems don’t stop there. You may have problems with turning your Bluetooth settings on through your actual device. Perhaps the software simply isn’t loading, or maybe the Bluetooth feature keeps turning itself off randomly.
Due to the complicated nature of Bluetooth technology, there could be many reasons as to why your Bluetooth feature is playing up in this way, but that doesn’t mean it can’t be fixed. For the rest of this guide, we’re going to explore the nine need-to-know ways you can fix the Bluetooth problems not working on your Oppo A1 5G as quickly as possible.
Part 2. 9 fixes for Bluetooth not working on Android
2.1 One click to fix Android Bluetooth issues due to Android system
Since Bluetooth is an internal technology, this indicates there’s a problem with the software or firmware of your Oppo A1 5G. If something’s broken, this means you need to fix it. Fortunately, there’s a quick and easy way to do this using software known as Dr.Fone - System Repair (Android).
Dr.Fone - System Repair (Android) is a powerful Android repair tool which is hailed as many as being on the best software applications in the industry. With all the tools you need to repair your phone not just for Bluetooth errors, but basically any internal firmware problems, this is a one-shot-tool that gets the job done.
Dr.Fone - System Repair (Android)
Android repair tool to fix Bluetooth issues in one click
- Can fix most internal software and firmware issues
- Trusted by over 50+ million people around the world
- Supports over 1,000+ unique Android brands, manufacturers, and devices
- Incredibly user-friendly and easy-to-use
- Compatible with all Windows computers
3981454 people have downloaded it
To ensure you have the best experience while using the Dr.Fone - System Repair (Android) software, here’s a complete step-by-step guide on how it works when fixing your Android’s Bluetooth problems.
Step One Make your way over to the Wondershare website and download the Dr.Fone - System Repair (Android) software to either your Mac or Windows computer. Install the downloaded file by following the on-screen instructions. Once installed, open the software, so you’re on the Main Menu.

Step Two Connect your Oppo A1 5G to your computer using the USB cable, wait a couple of seconds, and then click the System Repair option. On the Menu on the left, click Android Repair, and then press Start.

Step Three Next, use the drop-down menus to make sure all the information about your specific device is correct, including your device, operating system number, and carrier information. Click Next to confirm your selections.

Step Four When prompted, put your phone into Download Mode needed for repairs. You can do this by following the on-screen instructions which will depend on which device you have and the available buttons.

Step Five The software will now begin the repair process. This will happen automatically, and all you’ll need to do is make sure your device doesn’t disconnect during this process, and your computer doesn’t turn off.

When the repair process has been completed, you’ll receive the screen below, which means you can try again if the process didn’t work, or you can disconnect your Oppo A1 5G and start using it and your Bluetooth features.
2.2 Restart Android and turn on Bluetooth again

One of the most common solutions in technology is simply to turn it on and off again, which is the case to happen here. By restarting your device, you can clear out any problems you may be suffering from to help it get up and running again. Here’s how;
- Turn your Oppo A1 5G off by holding down the Power button
- Wait for several minutes and then turn your phone on again
- Wait for your phone to completely power up, so you’re on the Main Menu
- Navigate Settings > Bluetooth and then enable the setting
- Try to connect your Bluetooth device to what you were trying to do before
2.3 Clear the Bluetooth cache

Every service on your Oppo A1 5G using a feature called a cache. This is where information is stored to help the feature run properly and give you the best experience. However, over time this can get messy and can cause problems with your Bluetooth feature.
By clearing the cache, you can restart the service and hopefully clear up any issues or problems you may be experiencing.
- On your phone, navigate Settings > Application Manager, and you’ll see all the apps and services on your phone. Locate and select the Bluetooth service.
- Select the Storage option
- Tap the Clear Cache option
- Go back of the Menu and restart your phone
- Now turn your Bluetooth feature on and turn connecting it to your preferred device
2.4 Remove paired devices

Sometimes, you may have a problem with the Oppo A1 5G device you’re trying to connect to via Bluetooth, especially if this is a device you’ve updated. To counter and repair this, you’re going to need to remove the paired devices saved with your device and then reconnect them.
Here’s how;
- From the Main Menu of your Oppo A1 5G, head to Settings > Bluetooth > Connected Devices.
- Turn Bluetooth on, and you’ll see all the connections your Oppo A1 5G is paired with
- Go through these settings and remove/delete/forget every connection on your device
- Now when you go to connect to a device using Bluetooth, repair the Oppo A1 5G device, enter the passcode, and use a fresh paired connection.
2.5 Use Bluetooth in safe mode

If you’re having problems with your connection and paired devices, sometimes you may have conflicting software faults in your device that are causing the problems. If this is the case, you’ll need to boot your Oppo A1 5G in Safe Mode.
This is an operating state in which your phone will run the bare minimum services it needs to perform. If your Bluetooth works in Safe Mode, you know you have an app or a service that’s causing the problem.
Here’s how to find out;
- Hold the power button down, so the Android power menu turns on
- Long-press the power button again and the restart in Safe Mode option will come up
- The phone will automatically boot into Safe Mode
- Wait a minute on the Main Menu
- Now turn on your Bluetooth and connect it to your preferred device
2.6 Turn on the discoverable feature

To ensure your Bluetooth can connect to other devices, it’s important to make sure you’re making your device discoverable to other Bluetooth devices. If it’s hidden, other devices won’t be able to find it, and sometimes it can bug and prevent connections.
Here’s how to turn on your Bluetooth discoverable feature;
- From the home screen of your Android, navigate to the Menu> Settings > Bluetooth
- Toggle the Bluetooth switch, so it’s on
- Under the available settings, tick the box that allows your Bluetooth device to be discoverable
- Turn your Bluetooth feature on and connect to the Oppo A1 5G device you’re trying to connect too
2.7 Exclude Bluetooth issues of the other device

Sometimes, you might not even have a problem with your Oppo A1 5G, but rather the Bluetooth device you’re trying to connect to, whether that’s a Bluetooth speaker, an in-car entertainment system, or any other kind of Bluetooth device.
By testing out another Bluetooth device to see if it will work with your preferred device, you can rule this out from being the issue.
- Disconnect your Oppo A1 5G from the Bluetooth device and turn your Bluetooth off
- Now take another Bluetooth device and connect this to the Oppo A1 5G device you’re trying to connect too. This could be another Android device, or even a computer or iOS device
- If the new device doesn’t connect to your Bluetooth device, you’ll know there’s a problem with your Bluetooth device, not your Oppo A1 5G
- If the Oppo A1 5G devices connect, you’ll know there’s a problem with your Oppo A1 5G
2.8 Place both devices within close proximity

One of the common misconceptions of Bluetooth is just how far the wireless range is of the service. You need to make sure your devices are well and truly close to each other to make sure a stable connection can be formed.
The further away the Oppo A1 5G devices are from each other, the less likely the connection will remain secure. As a rule of thumb, Bluetooth can work up to 100 meters, but to play it safe, always try and keep your devices under 50m apart.
2.9 Avoid interference of other Bluetooth sources

The final consideration you’ll want to think about is that Bluetooth radio waves, or wireless waves, can interfere with each other. This means they can bounce off each other or get muddled up and make things confusing from your devices.
With this in mind, you’ll want to make sure you’re limiting the amount of Bluetooth activity in the area where you’re trying to use a device. While uncommon, this could be the problem.
To fix this issue, turn off all the Bluetooth connections in the area. This includes computers, laptops, mobile phones, tablets, and any other Bluetooth devices you may have. Then, try connecting your Oppo A1 5G to the Oppo A1 5G device you were trying to use. If it works, you know you were experiencing Bluetooth interference.
Fix the Error of Unfortunately the Process.com.android.phone Has Stopped on Oppo A1 5G
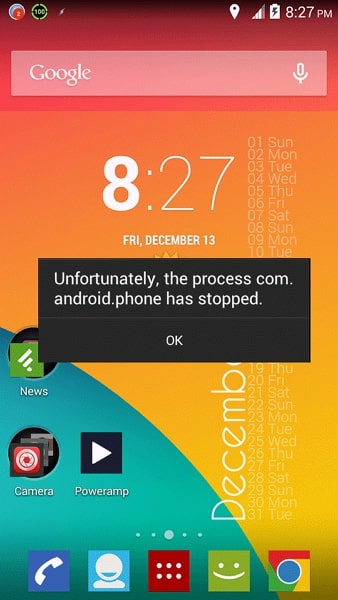
Nowadays, smartphones are integral to life. They serve as your communication lifeline and powerful personal assistant. However, it can be frustrating when a sudden error disrupts our phone’s functionality. One common error Android users encounter is the “Unfortunately, The process.com.android.phone has stopped” error. Fear not if you have come across this error message on your Oppo A1 5G.
This beginner’s guide is here to help you understand the causes of this problem. It will also provide you with practical “unfortunately the phone has stopped solutions.”
Part 1: Learn Why Unfortunately the process.com.android.phone Has Stopped
The error message “Unfortunately, the process com.android.phone has stopped“ typically appears on Android devices when there is an issue with the Phone app. Issues with underlying processes responsible for handling phone-related functions are also a cause.
It can prevent you from making or receiving phone calls, accessing contacts, or using other phone-related features. Following are some of the possible reasons why you may encounter this error:
App or System Update
When you update your device’s OS or the Phone app itself, it is possible to encounter bugs or compatibility issues. These issues can lead to the Phone app crashing and displaying this error message. Sometimes, the updated software may not work with the existing configurations of the Phone app. It results in instability which causes this error.
App Cache/Data Corruption
The Phone app relies on cached data and stored settings to function properly. If the cache or data of the app becomes corrupted, it can cause the Phone app to malfunction. The reasons include interrupted app installations or updates, improper shutdowns, or software conflicts. As a result, you may see the error message indicating that the process com.android.phone has stopped.
Insufficient System Resources
Android devices need sufficient memory (RAM) and processing power to run apps smoothly. If your device is running low on memory or processing capacity, it may struggle to handle the Phone app and its processes. It can lead to crashes and the error message. Running many resource-intensive apps at the same time also causes this issue. Other reasons include too many background processes that contribute to this error.
Conflicting Third-Party Apps
Third-party apps installed on your device can sometimes conflict with the Phone app. These conflicts can occur for various reasons, such as incompatible app versions. The software bugs within the third-party apps or configurations can also clash with the Phone app. Such conflicts can disrupt the normal operation of the Phone app. The result of all this trigger the error message.
Software or Firmware Glitches
Software glitches or firmware issues can occasionally occur in Android devices. These glitches can affect the functioning of system processes, including the Phone app. They may arise from programming errors and system inconsistencies. Sometimes unexpected interactions between different OS components can also lead to this error.
Part 2: 100% Working Fixes To Fix Unfortunately the process.com.android.phone Has Stopped
Having been denied access to your Phone can cause a lot of issues. Luckily, many simple fixes to the “process.com.android.phone has stopped“ error exist. These solutions have worked for many users, and by following them, you may be able to resolve the issue too. Given below are the top 8 fixes to resolve this error and restore your device’s phone functions:
Fix 1: Restart/Reboot your Android Device
One of the simplest yet effective solutions to tackle the “Unfortunately, the process com.android.phone has stopped“ error is to reboot your Oppo A1 5G. Restarting your device can often resolve temporary software glitches or conflicts. This fix requires no technical expertise.
So, it is worth trying before moving on to more complex solutions. Follow the guide below to restart your Oppo A1 5G and potentially fix the error:
- Step: Long-press your Oppo A1 5G’s “Side” key and wait for the power menu to appear. Here, select “Restart” to initiate the reboot of your phone.

Fix 2: Re-insert the SIM Card
There is also a chance that the reason you are seeing this error message relates to the SIM card. A loose or improperly inserted SIM card can cause disruptions in the phone’s communication functions. As a result, you see the “Unfortunately, the process com.android.phone has stopped“ error.
To fix this error, you can remove the SIM card and then re-insert it. If the issue is actually related to a SIM card, the issue will get resolved after you resolve the problem.

Fix 3: Clear the Cache and Data of the Phone App
The “Unfortunately, the process com.android.phone has stopped“ error is connected to the Phone app. In this situation, clearing the cache and data of the Phone app itself can often resolve the issue. This fix focuses on removing any corrupted or conflicting data within the app.
Once the corrupted data is gone, it will restore the Phone app to proper functioning. Here is how to clear the cache and data of the Phone app on an Android device:
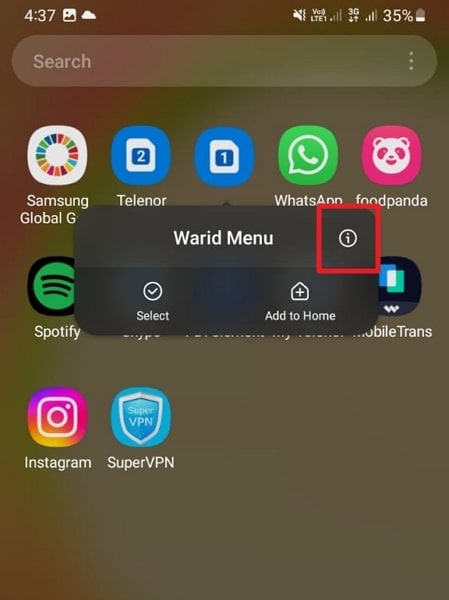
- Step 1: Find the Phone app on your Oppo A1 5G and long-press its icon. A small menu will pop up where you need to select “App Info.”

- Step 2: It will lead you to detailed information about the Phone app. Here, press “Storage,” and following that, you will see the “Clear Cache” and “Clear Data” options. Use them in the same order to clear the cache and data of the Phone app.

Fix 4: Disable Automatic Updates Feature
In some cases, this error may occur due to conflicts or compatibility issues with the automatic app updates feature. The automatic update on your Oppo A1 5G keeps your apps updated. Disabling this feature temporarily can help resolve the problem.
As a result, you will be able to use the Phone app without interruptions. To disable the automatic updates option on the Google Play Store, you can use the following steps:
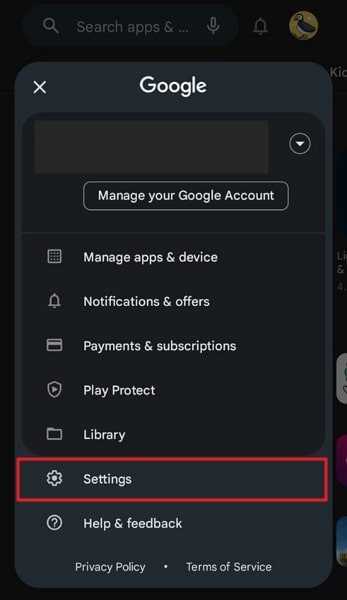
- Step 1: Navigate to the Google Play Store app on your Oppo A1 5G and launch it. Next, tap on the profile icon in the screen’s top right corner. From the options presented, select “Settings.”
- Step 2: In Settings, press “Network Preferences” to expand the option. Now, open the “Auto-update apps” settings and enable the “Don’t auto-update apps” option.

Fix 5: Clear All Apps Cache and Data
When dealing with this error, clearing the cache and data of all apps on your Oppo A1 5G can also help. Doing this will remove any corrupt or conflicting data that might be causing the issue. This fix targets the overall app ecosystem on your device.
It intends to ensure a clean slate and potentially resolve the error. Use the following guide to clear the cache and data of all apps:
- Step 1: Access your Oppo A1 5G’s Settings and tap the “Apps” option. It will lead you to all the apps running on your phone. Here, select an app to see detailed app info.

- Step 2: On the app info screen, scroll down and press “Storage.” Now use “Clear Cache” to clean the app’s cache and “Clear Data” to erase the app’s data. Repeat the same process for all the apps installed on your device.

Fix 6: Clear SIM Toolkit Cache and Data
It is worth considering the SIM Toolkit is a potential source of the problem. The SIM Toolkit is an app that provides functionality related to your SIM card. Its functions include accessing value-added services and managing mobile network settings. Clearing the cache and data of the SIM Toolkit app can help resolve this issue. The steps you need to clear the cache and data of this app are the following:
- Step 1: On your Oppo A1 5G, find the SIM Toolkit app. After finding it, press and hold its icon until a short menu appears. Choose “App Info” from the available options to access its settings.
- Step 2: Now, you need to tap “Storage” to proceed. On the next screen, first, tap “Clear Cache” to clean the cache, and later press “Clear Data.”

Fix 7: Perform Factory Reset
If all previous fixes have been unsuccessful, performing a factory reset is also an option to resolve this issue. It is a drastic measure that can potentially address underlying software issues. However, it’s important to note that a factory reset will erase the entire data and settings of your device.
So, it’s crucial to back up your important files before proceeding with this fix. By doing so, you can restore your device to its original state and eliminate the error. Use the detailed guide described below to factory reset your Oppo A1 5G:
- Step 1: Start by launching the Settings app and selecting “General Management.” Here, choose “Reset,” and following that on the next screen, tap “Factory data reset.”

- Step 2: After tapping “Factory data reset,” hit the “Reset” option. Next, enter your Oppo A1 5G PIN to confirm the process, and use “Delete All” to start the factory reset process.

Fix 8: Try Wondershare Dr.Fone - The Best and Most Reliable Android System Repair Tool
It must be a frustrating experience to try one solution after the next and not be able to resolve the issue. In such situations, the best thing you can do is find a tool that can resolve all Android system problems. While there are many options available online, not all are great. The best Android system repair tool currently available is Wondershare Dr.Fone.
Using Wondershare Dr.Fone, you can fix issues like “Unfortunately, the process.com.android.phone has stopped,” Play Store not working, frozen phone, and many more. It is a specialized tool for resolving Android system issues in Oppo A1 5G devices with support for all modern Oppo A1 5G phones.
Key Features of Wondershare Dr.Fone
- You do not need any technical skills to fix your Android system issues when using Dr.Fone.
- It has the highest success rate in fixing complex software issues related to Android OS.
- Wondershare Dr.Fone supports over 1000 Android models for system repair and can fix most issues within minutes.
Steps To Fix the process.com.android.phone Has Stopped via Wondershare Dr.Fone
All you need to fix your Oppo A1 5G’s system issues is a computer with Wondershare Dr.Fone installed and your device connected to it. Here is the simplified process of resolving most Android system issues in a matter of minutes:
- Step 1: Link Your Android Device with Wondershare Dr.Fone
To start, connect your Oppo A1 5G to your computer. Launch Wondershare Dr.Fone on your computer screen and click on “Toolbox,” located in the left sidebar. From the options available, select “System Repair” and follow it by clicking “Android” on the next screen.
- Step 2: Enter the Required Details of Your Oppo A1 5G
Click on “Start” to initiate the process, and following that, you will be prompted to provide specific details about your Oppo A1 5G. These details include the “Brand,” “Name,” “Model,” “Country,” and “Carrier.” Afterward, tick the box that says, “I agree with the warning, and I am ready to proceed,” and click “Next.”
- Step 3: Resolve The process.com.android.phone Has Stopped Issue
The subsequent step involves entering Download Mode on your device, following the on-screen instructions provided by the software. Once your device is in Download Mode, this Android repair toolkit will proceed to download and install the relevant firmware. Now, select “Fix Now” and confirm the repair of your Oppo A1 5G by entering the code “000000.”

 safe & secure
3,595,007 people have downloaded it
Conclusion
To sum the article up, encountering the frustrating error message “Unfortunately, the process com.android.phone has stopped“ can be daunting. However, with the right knowledge and tools, resolving this issue becomes achievable. Throughout this guide, we have explored various troubleshooting methods. These included clearing the cache, rebooting the Oppo A1 5G device, and even performing a factory reset.
While there are many options to fix this error, only one is an excellent choice: Wondershare Dr.Fone. With its powerful Android system repair feature, Wondershare Dr.Fone is a reliable solution to resolve this error.
Also read:
- [New] In 2024, IPhone's Artistry for Time-Extended Cinematography
- [Updated] In 2024, Seamless Creativity on the Go Android/iOS Montages Top 8
- [Updated] In 2024, The Power of Pacing Keeping Your Audience Glued to the Screen
- [Updated] The Definitive List of Top-Quality Mics for YT Styles
- Best Methods for Google Pixel 7a Wont Turn On | Dr.fone
- Fixes for Apps Keep Crashing on Xiaomi Redmi Note 12 4G | Dr.fone
- In 2024, Does PokeGo++ still work on Apple iPhone 13 mini/iPad? | Dr.fone
- Seamless Video Upload for Zune Users: Transforming and Adding Content Using EaseSoft Solutions
- Troubleshooting Guide How to Fix an Unresponsive Samsung Galaxy S23 Tactical Edition Screen | Dr.fone
- What To Do When Samsung Galaxy A15 4G Has Black Screen of Death? | Dr.fone
- Title: Want to Uninstall Google Play Service from Oppo A1 5G? Here is How | Dr.fone
- Author: Ariadne
- Created at : 2025-01-08 17:49:57
- Updated at : 2025-01-14 16:24:06
- Link: https://howto.techidaily.com/want-to-uninstall-google-play-service-from-oppo-a1-5g-here-is-how-drfone-by-drfone-fix-android-problems-fix-android-problems/
- License: This work is licensed under CC BY-NC-SA 4.0.