
What to Do if Google Play Services Keeps Stopping on Infinix Smart 8 | Dr.fone
What to Do if Google Play Services Keeps Stopping on Infinix Smart 8

Is the annoying Google Play Services error constantly popping up on your phone? Is it happening while reading, gaming, or browsing social media?
The error constantly plagues thousands of Android users, and it can be incredibly frustrating when you’re using the phone for something important or doing something entirely unrelated to the Google Play app.
Oddly enough, the “Unfortunately, Google Play Services has stopped.” error isn’t severe – you can fix it with a few general and easy-to-do fixes, a factory reset, or a system repair. Below, you’ll find info about why it’s happening and a list of ten possible solutions.
Why Am I Getting the Message “Google Play Services Keeps Stopping?”
Computers and phones often speak in error codes and apps that stop working. Even minor connectivity issues can cause these problems, leaving you wondering what’s wrong with your device or displaying the “Unfortunately, Google Play Services has stopped working.” error message.
Software errors are another set of problems that can also cause this issue. Namely, an average phone user has at least 40 installed apps, and sometimes these apps don’t play well together. They generate problems or steal resources from each other, such as RAM, causing crashes and errors.
There’s also the issue of wrong app versions. Although each Android phone uses the Android operating system, these systems can be vastly different, and the apps built for them can be made to be phone-specific and only run on a specific phone model.
That’s also the case with Google Play Store and Google Play Services.
Why Google Play Services Keeps Stopping
The Google Play Services keeps stopping error is an infamous one, and it can appear for various reasons and even on brand new phones. However, these causes can be categorized into three groups, which are:
- Network Issues
- Software Errors
- Wrong Play Services Version
Regardless of what’s causing the issue on your phone, we’ve compiled a list of ten possible solutions, and you can find those below.
Solutions to Try When Google Play Services Keeps Stopping
There are many solutions for the issue of Google Play Services that keeps stopping. We’ve listed the most famous and effective ones, and you’ll find them below in no particular order. Try them out and see whether they fix the issue.
1. Do a Factory Reset
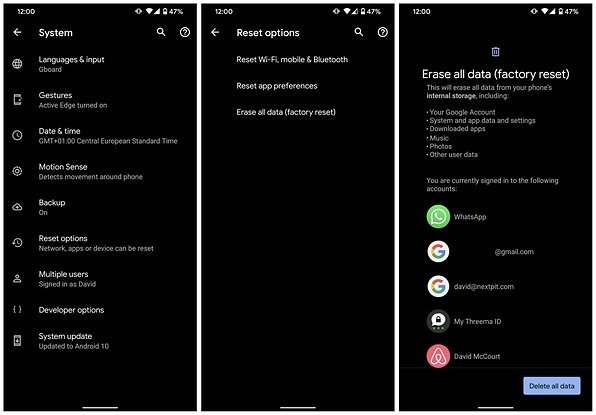
A factory reset on any smartphone removes all your data on the phone’s internal storage and can even wipe your SD card clean if you select the option. Before you reset your phone to factory settings, ensure you’ve backed up all your essential apps and files. When you’re ready, you can do a factory reset by following these steps:
Step 1: Go into Settingsand search for “reset.”
Step 2: Choose Factory reset.
Step 3: Tap the Erase all dataor Reset device at the bottom, whichever button is there.

Step 4: Input your password and confirm the action.

Your phone will now restart and start the reset process. Once the factory reset completes, your phone will look brand new, and you’ll need to install all your apps again. Moreover, your Google Play Services app will likely get fixed by this, too.
2. Update Your System
As keeping your phone’s system and apps updated to the latest possible version is essential and recommended for the best performance and highest efficiency, you can try updating it to see whether it fixes your Google Play Services error. Here’s how:
- Step 1: Open the Settings
- Step 2: Head into System> System update.
- Step 3: If there’s an update available, click it and go through the process of updating your phone’s system.
Restarting your phone after an update, even if it doesn’t restart itself, is highly advisable, ensuring that the new updates apply without issues.
3. Revert to the Previous Version
As we’ve discussed the wrong Play Services versions above, it’s worth noting that sometimes even the developers can make mistakes and roll out the wrong version for your phone. So, if you notice that the phone is getting the error after you’ve updated Google Services or the Play Store, you can quickly revert to the previous version, and here’s how:
- Step 1: Head into Settings> Apps > Google Play Services.
- Step 2: Press the Disablebutton at the bottom of the screen.
- Step 3: Restart the phone, repeat the process by clicking Enablethis time, and restart the phone again.
As these are system apps, you can’t remove them from the phone, and disabling them will only remove the updates, leaving you with a base version that came with your phone out of the box.
4. Uninstall the App’s Updates and Reinstall
Like reverting to the previous version, you can also try reinstalling updates to fix the Google Play Services has stopped working error. The process is similar to the one above, but we’ve still included the steps. Here’s how you can do that:
Step 1: Go into Settings> Apps and find Google Play Services.
Step 2: Tap it and press Uninstall Updatesat the bottom.
Step 3: Exit the Settingsapp and restart the phone.
Step 4: Open the Play Storeapp and head into the app’s settings by clicking your profile icon. Then scroll to the bottom, and tap Settings.
Step 5: Find and tap the Play Store versionto update your Google Play Services.

As you’re already there, you might as well update all other apps after you tap Manage apps & device. That will ensure that older and not-up-to-date apps aren’t causing the issue.
5. Check Storage
Believe it or not, one of the leading causes of the Google Play Services issue is a phone overfilled with apps. Namely, if you have insufficient storage, the Google Play Store app will likely crash and display errors such as “Unfortunately, Google Play Services has stopped working.”
Head into your phone’s Settings and select Storage to see how your phone’s doing storage-wise. Deleting a few apps you don’t use and transferring your photo and video library to a PC is highly advisable if your phone’s storage space lacks gigabytes.
6. Do a System Repair
Although the other solutions here are general fixes that might help, a system repair might take a bit longer but will undoubtedly fix your issue. You can use the Wondershare Dr.Fone app to repair the system and eliminate the annoying “Unfortunately, Google Play Services has stopped working” error.
Moreover, Dr. Fone works on Android and iOS devices and can fix various phone issues, including boot loops, a white screen of death, a stuck phone, etc. That’s why we’ve included a guide on using it for an Android phone issue. Here’s how:
Step 1: Launch the Wondershare Dr.Fone app on your PC and head into Toolkit> System Repair > Android.
Step 2: Select the type of issue you want to fix > Start.
Step 3: Select the make and model of your phone so that Dr.Fone can find the appropriate Android software.
Step 4: Connect the phone to the PC via a USB cable and follow the on-screen instructions to put the phone into Download Mode. The instructions are available for both phones with and without the home button.
Step 5: Select the appropriate Android firmware, download it, and hit Fix Nowafter it downloads.
Step 6: Enter the code and hit Confirmto continue the system repair process. When it’s done, click the Done

That’s all it takes to do a system repair with Wondershare Dr.Fone. Give the software a few minutes to complete, during which your phone might restart a few times. Once it’s done, your Google Play Services app will undoubtedly work.
7. Clear Cache
The easiest and the most obvious fix for many Android apps is clearing the app’s cache. Here’s how you can do that for Google Play Services and Google Play Store:
Step 1: Go into Settings> Apps and find the Google Play Store
Step 2: Tap Storageand hit the Clear cache

- Step 3: Repeat the process for the Google Play Services
If this doesn’t work, move on to another possible fix.
8. Check Date and Time Settings
Oddly enough, the Google Play Services app is prone to failure because of an incorrectly set time or date. That’s because Google’s servers constantly check these settings before issuing updates to the Infinix Smart 8 devices, so you’ll need to ensure they’re correct beforehand. Here’s how:
Step 1: Head into Settings> System > Date & Time.
Step 2: Ensure that both “**Use network–provided time” and “Use network-provided time zone**” are toggled on.
Step 3: If this doesn’t work, you can try repeating the process and manually setting the time and the time zone.

Once you check or change these settings, try using the Google Play Store app and check whether the issue is fixed. Restarting the phone after changing the settings is also highly advisable.
9. Troubleshoot Your Internet Connection
Another regularly overlooked troublemaker is a poor internet connection. That’s because most apps nowadays are meant to work in online mode only, and losing connection or using a bad one interferes with the app’s functionality.
To test the internet connection on your Infinix Smart 8, you should open a browser and head to a random internet page to see if it’s opening and whether there are any delays. If it’s working fine, your internet connection isn’t the problem.
10. Adjust Google Play Services Permissions
Although permissions rarely change, they can cause issues if you change them accidentally. These settings can be found in the same place where you would uninstall updates or clear the app’s cache, so you can use some of the steps mentioned above to check them.
Once inside Permission Settings, check whether the Google Play Services and Play Store apps have sufficient permission to do their jobs and whether any required permissions were recently removed. If so, grant these two apps their permissions back.
 safe & secure
4,953,228 people have downloaded it
Conclusion
Although it’s an incredibly frustrating error, the “Unfortunately, Google Play Services has stopped” message is more annoying than serious. We’ve explained why it happens, but we’ve also given you a list of solutions to fix it.
Our list includes various fixes, from simple ones, like deleting the app’s cache and ensuring your network works fine, to more serious ones, like doing a factory reset. Alternatively, you can do a system repair with the help of Wondershare Dr.Fone, which will certainly fix the problem, but it might be a bit more complicated than cache deletion.
Google Play Services Won’t Update? 12 Fixes are Here on Infinix Smart 8
Google Play Services is a crucial component of any Android device, responsible for supporting various Google apps and services. However, at times, users may encounter issues with updating Google Play Services, preventing them from accessing the latest features and security updates.
It’s pretty much annoying when you try to launch Google Play Services but it isn’t able to operate correctly. You get some of the notifications like Google Play Services won’t run unless you update Google Play Services. On the other hand, when you start to update Google Play Services, you stuck again with the error pop-ups, and Google Play Services won’t update. This can create a lot of chaos in one’s life. So, what action should one need to take in such a situation? Well! You needn’t rankle more as we will explore some of the causes and tips to fix the issue. Keep reading!
Part 1: Causes for Google Play Services Won’t Update Issue
Before diving into the solutions, it’s essential to understand the potential causes of the Google Play Services update problem. Let’s talk about the causes without further ado.
- 1. Incompatibility with Custom ROMs: Using a custom ROM on your Infinix Smart 8 can cause compatibility issues and prevent the installation of Google Play Services updates.
- 2. Network connectivity issues: Poor or unstable internet connection can prevent the download and installation of updates.
- 3. Insufficient storage space: When your device doesn’t have enough free space, it can hinder the installation of updates for Google Play Services.
- 4. Excessive Installed Apps: a large number of installed apps on your device can exacerbate the update problem with Google Play Services.
- 5. Cache Conflicts: Accumulated cache can lead to conflicts and cause issues with the updating process of “Google Play Services”.
- 6. Outdated version of Google Play Store: If your device has an outdated version of the Google Play Store app, it may interfere with the update process for Google Play Services.
- 7. Google Play Components: If certain components of Google Play Services are corrupted, it can contribute to update issues.
Part 2: One-Click Fix When Google Play Services Won’t Update
For those seeking a quick and effortless solution, several third-party tools offer one-click fixes for the Google Play Services update problem. These tools automate the update process, ensuring that you have the latest version of Google Play Services installed. However, it is crucial to use reputable and trusted tools to avoid potential security risks.
If you cannot update Google play services by the reason of custom ROM incompatibility or Google Play component corruption, there is a serious need of repairing firmware then. And to repair Android firmware, one of the expert ways is Dr.Fone - System Repair (Android) . This professional tool vows to bring your Infinix Smart 8s back to normal by fixing the issues with ease. Here are the advantages of this tool.
Dr.Fone - System Repair (Android)
Android repair tool to fix Google Play Services not updating
- A completely user-friendly tool where no technical skills are needed.
- All Android models are easily supported.
- Any kind of Android issue like black screen , stuck in boot loop , Google play services won’t update, or app crashing can easily be resolved with these.
- Full security is promised with the tool so there’s no need to worry about harmful activities like viruses or malware.
- Trusted by a lot of users and carries a high success rate.
3,485,019 people have downloaded it
How to Fix Google Play Services can’t be installed using Dr.Fone - System Repair (Android)
- Step 1: Install the Software
Initiate the process of downloading the software on your computer. Now, click on “Install” button and go along with the installation procedure. Click on “System Repair” option from the Toolbox window.

- Step 2: Device Connection
Now, taking the assistance of an original USB cable, connect your Infinix Smart 8 to the PC. Then hit on “Start”.

- Step 3: Check the Information
You will notice the next screen which asks for some information. Please ensure to choose the correct device brand, name, model, career, and other needed details. Click on “Next” after this.

- Step 4: Download Mode
You will now see some instructions on your PC screen. Just follow those according to your device. And then your device will boot in Download mode. Once done, hit on “Next”. The program will now download the firmware.

- Step 5: Repair the Problem
When the firmware is downloaded completely, the program will automatically start getting fixed the issue. Wait for a while until you get the notification of the process completion.

safe & secure
Part 3: 10 Common Fixes When Google Play Services Won’t Update
Method 1. Restart your Android and try to update again
In most cases, restarting the Infinix Smart 8 device can simply do the trick. When you restart the Infinix Smart 8 device, most of the issues get eliminated making the Infinix Smart 8 device perform better than before. Also, it is all about RAM. While you restart your device, the RAM gets cleared. As a result, the apps work properly. So, in the first place, we would like you to restart your Infinix Smart 8 when you cannot update Google Play Services. Once restarted, try to update again and see if the results are positive.
Method 2. Uninstall Google Play Services Updates and Reattempt the Update
Uninstalling previous Google Play Services updates resolves conflicts and errors, often addressing the issue of updates. This process clears potential obstacles, enabling a successful update of Google Play Services. Here’s how you can do it:
- Open your device’s “Settings.”
- Scroll down and select “Apps” or “App Manager.”
- Locate and tap on “Google Play Services.”
- Depending on your device and Android version, you might need to tap on “App info” or “Storage.”
- Look for the option to “Uninstall updates.” This will revert Google Play Services to its original version.
- Confirm the action when prompted.
- Once the updates are uninstalled, go back to the Google Play Store.
- Search for “Google Play Services” using the search bar at the top.
- If an update is available, you’ll see the option to “Update.” Tap on it to start the update process.
- After the update is complete, restart your device to ensure the changes take effect.
Method 3. Update Google Play Store
Ensure that you have the latest version of the Google Play Store app installed on your device. Open the Play Store, go to Settings, and check for updates. Updating the Play Store can often resolve compatibility issues with Google Play Services updates.
Method 4. Google account and re-add it
Go to your device’s Settings, select Accounts or Users, and remove your Google account. Restart your device and add the account again. This process can refresh the connection and resolve update issues.
Method 5. Uninstall unnecessary apps
As we mentioned above, due to a lot of apps being installed at the same time, the issue can crop up. And hence, if the above solution didn’t help, you can try to uninstall the apps that you don’t need currently. We hope this works. But if not, you can go to the next fix.
Method 6. Clear Google Play Services cache
If still you cannot update Google Play Services, clearing cache can solve your problem. We also stated this in the beginning as the reason. If you don’t know, cache holds the app’s data temporarily so that it can remember the information when you next open the app. Many times, old cache files get corrupted. And clearing cache can also help in saving storage space on your device. For these reasons, you need to clear cache of Google Play Services to get rid of the problem.
Here is how to clear Google Play Services cache:

- Launch “Settings” on your phone and go to “Apps & Notifications” or “Application” or “Application Manager”.
- Now, from all the apps’ list, choose “Google Play Services”.
- On opening it, tap “Storage” followed by “Clear Cache”.
Method 7. Boot into download mode to clear cache of whole phone
If unfortunately, things are still the same, we would like to recommend you wipe the cache of the whole device to fix the issue. This is an advanced method to solve issues and is helpful when the Infinix Smart 8 device is facing any flaws or malfunctions. For this, you need to go to the download mode or recovery mode of your device. Every device has its own steps for this. Like in some, you need to simultaneously press the “Power” and “Volume Down” keys. While in some, the “Power” and both “Volume” keys work.
This is how it works when Google Play Services can’t be installed on your device:
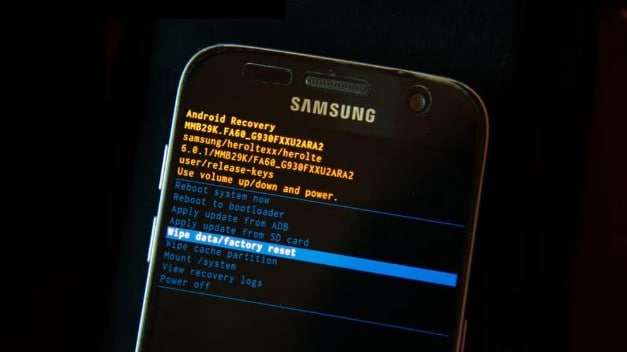
- Turn off the Infinix Smart 8 device to begin with and then follow the steps for recovery mode.
- On the recovery screen, use the “Volume” buttons for scrolling up and down and go to “Wipe cache partition”.
- To confirm, press the “Power” button. Now, the Infinix Smart 8 device will begin to wipe the cache.
- Hit reboot when asked and the Infinix Smart 8 device will now be rebooted finishing the issue.
Method 8. Check your Android storage
Generally speaking, Google Play Services can update automatically in the background. But if there is not enough storage on your Android, the automatic update may fail, so check your android space.
Method 9. battery optimization
Some devices aggressively optimize battery usage, which can interfere with the background processes required for updating Google Play Services. Disable battery optimization for Google Play Services in the Infinix Smart 8 device’s Settings to ensure uninterrupted updates.
Method 10. Check date and time settings
Sometimes, incorrect date and time settings on your device can cause conflicts with Google Play Services updates. Ensure that your device’s date and time are set correctly and set to automatic. Follow the steps below to set the date and time on your android correctly.

- Open “Settings” and go to “General Management”.
- Click “Date & time” and then enable “Automatic date & time”. Or you can disable and re-enable it.
Method 11. Factory Reset your Android
As a final measure, if everything went in vain, you can perform a factory reset on your device. This method will wipe away all your data while performing and make the Infinix Smart 8 device go to factory state. Please ensure to keep backing up your important data if you are going to take the help of this method.
The steps are:
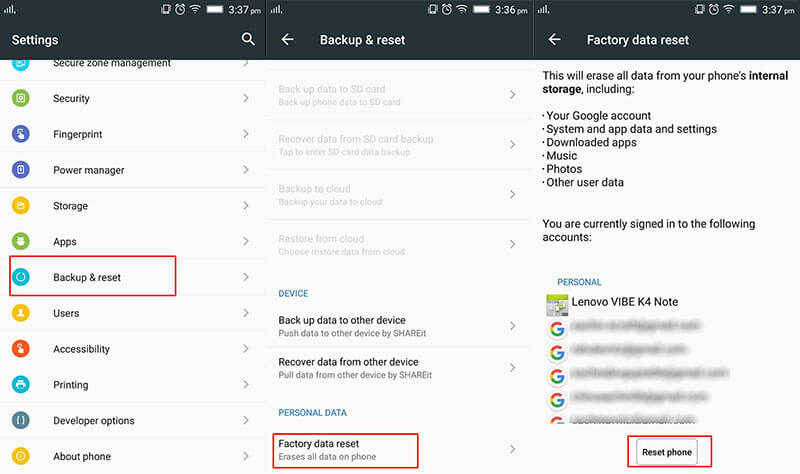
- Open “Settings” and go to “Backup & Reset”.
- Choose “Factory Reset” followed by “Reset Phone”.
FAQs about Google Play Services
To provide further clarity, here are some frequently asked questions about Google Play Services:
1. What is Google Play Services?
Google Play Services is a background service on Android devices that provides essential functionality and support for various Google apps and services. It includes features like authentication, push notifications, location services, and more, enabling seamless integration and enhanced performance for Google apps.
2. Why is it important to keep Google Play Services updated?
Keeping Google Play Services updated is crucial for several reasons. It ensures compatibility with the latest versions of Google apps, improves app performance, and enhances security. Updates often introduce new features, bug fixes, and optimizations, providing a better user experience and access to the latest advancements offered by Google.
3. Can I uninstall Google Play Services?
No, Google Play Services cannot be uninstalled as it is a core system component required for the proper functioning of Google apps and services. Removing or disabling it can lead to malfunctions and render many Google apps non-functional. However, you can disable specific permissions or clear its cache and data if troubleshooting issues related to Google Play Services.
4. How can I check the version of Google Play Services on my device?
To check the version of Google Play Services on your Infinix Smart 8, follow these steps:
- Step 1. Open the Google Play Store app.
- Step 2. Tap on the menu icon (three horizontal lines) in the upper-left corner.
- Step 3. Scroll down and select “Settings.”
- Step 4. Scroll to the bottom and find the “Play Store version” or “Play Services version”. The number displayed indicates the version of Google Play Services installed on your device.
5. Why is my device not compatible with the latest version of Google Play Services?
There can be several reasons why a device is not compatible with the latest version of Google Play Services. It could be due to hardware limitations, an outdated Android operating system version, or the Infinix Smart 8 device no longer receiving official software updates. Compatibility requirements can change with newer versions of Google Play Services, and older devices may not meet the necessary criteria to support the latest updates.
Conclusion
Encountering difficulties when updating Google Play Services can be frustrating, but with the right approach, these issues can be resolved. By understanding the causes and implementing the suggested fixes outlined in this guide, you can overcome the Google Play Services update problem. Remember to prioritize storage space, ensure a stable internet connection, and keep your apps and system components up to date. By doing so, you can enjoy the full functionality of Google Play Services and benefit from the latest features and security enhancements.
How To Fix Unresponsive Touch Screen on Infinix Smart 8
With the increase in our reliance on smartphones, having touchscreen problems on your device can be annoying. Sometimes, it’s even more frustrating than a physically broken screen because you don’t know where the issue is coming from.
If your touchscreen is malfunctioning or doesn’t work correctly, you cannot interact with your device. On this page, you’ll learn general phone touch problems on Android and how to get rid of them. Now explore the article to learn more.

Part 1: Why Is My Android Experiencing Touch Screen Problems
Below are some of the most common reasons you’re experiencing touch problems on your Android smartphone.
- The touchscreen problemfreezes your phone, lags, or hangs.
- Some parts of the screen work fine, but some don’t.
- Your screen responds inaccurately (typing “a” gets you “q” or “z”).
- The touchscreen is automatically operating itself, resulting in ghost touch.
- It doesn’t respond to any taps, and the phone’s screen has stopped working.
- The device is physically damaged, or the screen is cracked or broken.
- Outdated devices are prone to the black/white/blue screen of death.
Part 2: Tips, Fixes, and Workarounds To Fix Your Infinix Smart 8 Touch Problems
If any of the outlined reasons above are the cause of your touch screen malfunctioning, here are some solutions to fix it.
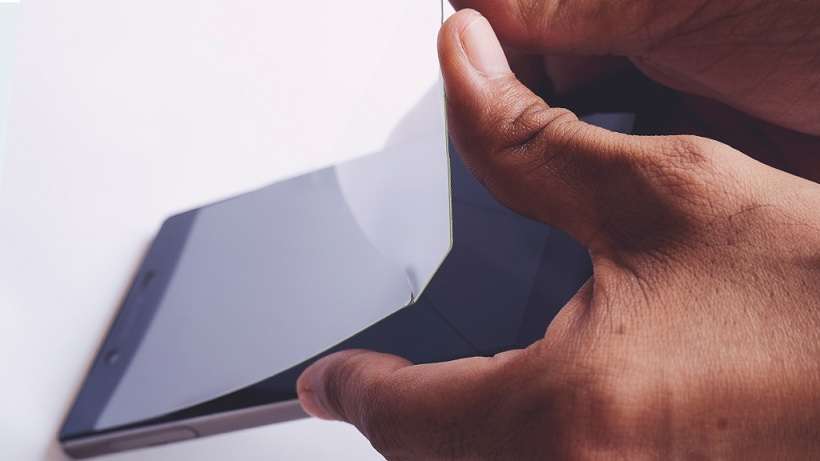
Method 1: Remove the Screen Protector and Phone Case
Some phone cases and screen protectors cause touch problems on your Android screen. This issue is prevalent if you recently changed your phone case or screen protector. It may be due to incompatibility, but you should remove them to see if your phone starts responding again.
Method 2: Clean Your Android Smartphone
A touchscreen malfunctioning can also be a sign of a dirty display. Since the screen relies on contact between your fingers and the touchpad to perform actions, this also applies to foreign particles such as dirt, debris, smudges, oil, and more. Clean your touchscreen with wipes or a soft cloth by gently wiping over the screen.
Method 3: Stop Using Your Android Device for a While
Touch problems also arise due to abnormal temperature changes. Your phone might experience ghost touch if it’s too cold or hot. For your screen to function correctly, it needs to be in a temperate environment. Remember to take breaks between phone usage, especially when the phone gets too hot. Avoid using your device under hot conditions, direct sunlight, or anything affecting your phone’s normal temperature.
Method 4: Restart Your Android
Performing a reboot sounds trivial with such a complicated issue. But sometimes, it’s often the most successful way to fix a touchscreen problem on an Android device. Restarting your Android shuts down and resets all background services, which may have led to your issue.
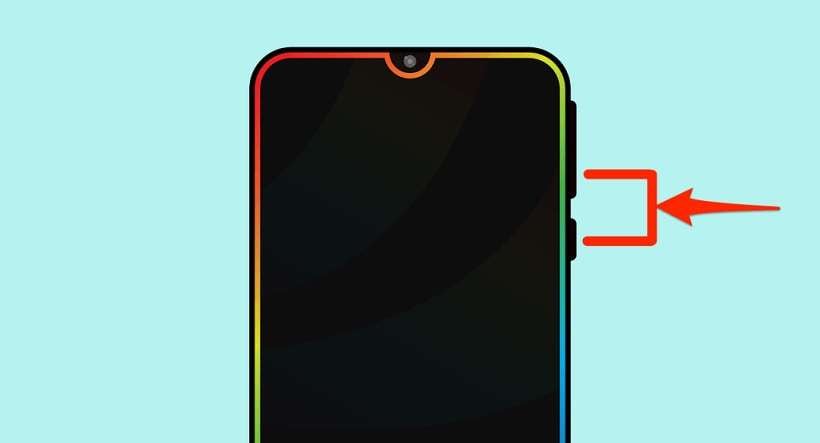
To restart your Android, press and hold the Power button for several seconds to switch off your phone. In other smartphones, you may need to hold down the Power button as well as the Volume Down button at the same time.
Method 5: Factory Data Reset Your Android
Before attempting to have your device checked for any hardware defects, you should try completing a Factory Reset. To do this, go to Settings > Backup and Reset. Next, tap on Factory data reset > Delete all.
Performing a Factory Data Reset will erase all your data and restore your device to its factory default settings. Creating a backup before doing this step is recommended, as you will lose all your personal data once the process starts.
Method 6: Put Your Android into Recovery Mode
If all else fails, placing your Android into Recovery Mode should be a last resort. Doing this method works similarly to the method above. You should perform this method if the screen is unresponsive and only the buttons on your Android are functional. Here’s how.
Note
Placing your Android into Recovery Mode is different depending on your Android smartphone. Refer to your owner’s manual to see which method is right for your Infinix Smart 8.
Step 1A: Press and hold the Power button and Volume Down buttons at the same time. Continue holding both buttons until the screen starts.
Step 1B: If your Infinix Smart 8 still has a Home button, press and hold the Home button and the Power button at the same time. Continue holding them until the screen starts.
Step 1C: If step 1A did not put your Android into Recovery Mode, press and hold the Power and Volume Up and Down buttons simultaneously. Continue pressing all three until the screen starts.
Step 2: Use the Volume buttons to navigate the choices, select Wipe data/factory reset, and confirm your choice with the Power button.
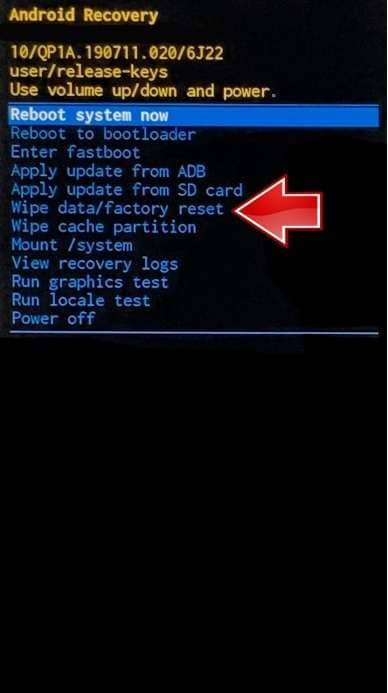
Step 3: Wait for the process to complete and for your Infinix Smart 8 to restart automatically.
Method 7: Replace Your Android Touchscreen
If doing all the earlier workarounds and fixes couldn’t resolve the touchscreen problem, it could be the screen itself. While replacing the touchscreen yourself is possible if you have the technical know-how, it’s still best to bring it to a professional to prevent further damage. You should have your Infinix Smart 8 checked by a technician if the screen is getting weak, has water damage, or has failing screen components.
 “
“
Method 8: Bring it to an Authorized Service Center
Your phone touch problem might not be caused by the screen, even when you had it replaced. If your Android is still unresponsive, it’s best to bring your smartphone to an authorized service center or directly to the phone manufacturer, especially when all efforts are exhausted.
Part 3: How To Fix Android Touch Problem With an Alternative
If all the general phone touch problems on your Infinix Smart 8 persist, you should strongly consider Wondershare Dr.Fone to do the job. The program can fix all Android system issues without any required skills. Problems caused by the operating system or software, such as the black screen of death, boot loop, ghost touch, and more, are done within less than 10 minutes with the program.
Key Features
Dr.Fone – System Repair (Android) has many features you can immediately take advantage of. Here are some of them below.
- Fix All Android Problems In Minutes
Wondershare Dr.Fone allows you to fix all touchscreen problems on your smartphone within less than 10 minutes. Moreover, it has a high success rate making it one of the most reliable tools available today.
- Supports up to 1000+ Android Models
The program supports almost all Infinix Smart 8 models and other Android devices, whether unlocked or from a carrier. Dr.Fone is equipped with all the proper firmware to flash your Infinix Smart 8 with just a few clicks. In addition, it has handy on-screen instructions to help you complete the whole process with ease.
Pros and Cons
Here are the pros and cons of using Dr.Fone – System Repair (Android) to know if you’re still undecided.
Pros
- The user interface is clutter-free, making it highly beginner-friendly.
- The fast processing time to fix your Infinix Smart 8 means you can do more in less time.
Cons
- The free version only works until you see if your Infinix Smart 8 is compatible with the app. You will be required to enter a valid license once you initiate the repair process.
- If you own an iOS device, you’ll have to get the iOS version.
How To Fix Black Phone Screen With Wondershare Dr.Fone
Follow the step-by-step guide below to start fixing general phone screen problems on Android using Wondershare Dr.Fone.
Step 1: Download and install Wondershare Dr.Fone on your computer. Next, launch the program and connect your Infinix Smart 8 to your computer.
Step 2: Click Start to initiate the setup on a new window. From there, select the Brand, Name, Model, Country, and Carrier of your Infinix Smart 8 and click Next.

Step 3: Follow the on-screen instructions on the main program window to initiate the repair process. After that, wait for your Android smartphone to return to its original state.

Part 4: FAQs
Here are some FAQs you should remember when experiencing phone touch problems.
1. Does a Cracked Screen Affect Touch on an Android?
If you continue using a smartphone with a cracked screen, there are several implications. Your device will be vulnerable to further damage and might develop touchscreen problems,and your sensors will gradually begin to malfunction. The capabilities of your device are also compromised the longer you delay repairing it. Moreover, a cracked screen can put your fingers at risk of injury due to potential glass splinters.
2. How Do I Temporarily Fix a Cracked Screen?
If you can’t take your cracked screen to a repair shop, apply a small amount of vegetable oil or petroleum jelly to the screen. Doing this will not fix the issue but will make the cracks less noticeable. On the other hand, you can also apply a screen protector to safeguard your phone against further damage. The screen protector slows down or prevents the cracks from getting worse.
3. Can I Use Dr.Fone for Free?
You can download and install Dr.Fone – System Repair (iOS) or (Android) for free to evaluate the program’s offerings. You can do the first few steps to see if the app supports your device. However, you need to get the full version and enter a valid license code to repair your smartphone.
safe & secure
4,471,551 people have downloaded it
Conclusion
If the touchscreen is malfunctioning on your smartphone, one of the fixes above should help solve the problem. If it did not solve the issue, consider using Dr. Fone – System Repair for iOS or Android when you need an all-in-one solution to all your phone screen problems.
However, if your screen is broken or cracked, going to an authorized service center is still your best bet, especially when your screen urgently needs a replacement. Delaying it further may hurt your wallet in the long run, so it’s best to fix it as soon as possible.
Also read:
- [New] In 2024, Streaming Showdown OBS versus Twitch Space
- [New] Time Markers for YouTube Videos Expert Tips (Desktop/Mobile)
- 8 Ultimate Fixes for Google Play Your Vivo Y77t Isnt Compatible | Dr.fone
- 9 Solutions to Fix Process System Isnt Responding Error on Infinix Note 30 Pro | Dr.fone
- Full Solutions to Fix Error Code 920 In Google Play on Samsung Galaxy A54 5G | Dr.fone
- In 2024, Spy on FB Chronicles, Unseen
- In-Depth Look at Google's AI Project Gemini and Its Objectives
- Reviving the Past Top 5 Desktop-Friendly GB Emulation Software for 2024
- Top 8 Android Multi-User Video Chat Tools for 2024
- Why Does My Realme 12 5G Keep Turning Off By Itself? 6 Fixes Are Here | Dr.fone
- Why Your Poco M6 Pro 5G Screen Might be Unresponsive and How to Fix It | Dr.fone
- Title: What to Do if Google Play Services Keeps Stopping on Infinix Smart 8 | Dr.fone
- Author: Ariadne
- Created at : 2025-01-07 06:30:36
- Updated at : 2025-01-07 17:01:19
- Link: https://howto.techidaily.com/what-to-do-if-google-play-services-keeps-stopping-on-infinix-smart-8-drfone-by-drfone-fix-android-problems-fix-android-problems/
- License: This work is licensed under CC BY-NC-SA 4.0.