
What to Do if Google Play Services Keeps Stopping on Vivo Y100i | Dr.fone
What to Do if Google Play Services Keeps Stopping on Vivo Y100i

Is the annoying Google Play Services error constantly popping up on your phone? Is it happening while reading, gaming, or browsing social media?
The error constantly plagues thousands of Android users, and it can be incredibly frustrating when you’re using the phone for something important or doing something entirely unrelated to the Google Play app.
Oddly enough, the “Unfortunately, Google Play Services has stopped.” error isn’t severe – you can fix it with a few general and easy-to-do fixes, a factory reset, or a system repair. Below, you’ll find info about why it’s happening and a list of ten possible solutions.
Why Am I Getting the Message “Google Play Services Keeps Stopping?”
Computers and phones often speak in error codes and apps that stop working. Even minor connectivity issues can cause these problems, leaving you wondering what’s wrong with your device or displaying the “Unfortunately, Google Play Services has stopped working.” error message.
Software errors are another set of problems that can also cause this issue. Namely, an average phone user has at least 40 installed apps, and sometimes these apps don’t play well together. They generate problems or steal resources from each other, such as RAM, causing crashes and errors.
There’s also the issue of wrong app versions. Although each Android phone uses the Android operating system, these systems can be vastly different, and the apps built for them can be made to be phone-specific and only run on a specific phone model.
That’s also the case with Google Play Store and Google Play Services.
Why Google Play Services Keeps Stopping
The Google Play Services keeps stopping error is an infamous one, and it can appear for various reasons and even on brand new phones. However, these causes can be categorized into three groups, which are:
- Network Issues
- Software Errors
- Wrong Play Services Version
Regardless of what’s causing the issue on your phone, we’ve compiled a list of ten possible solutions, and you can find those below.
Solutions to Try When Google Play Services Keeps Stopping
There are many solutions for the issue of Google Play Services that keeps stopping. We’ve listed the most famous and effective ones, and you’ll find them below in no particular order. Try them out and see whether they fix the issue.
1. Do a Factory Reset
A factory reset on any smartphone removes all your data on the phone’s internal storage and can even wipe your SD card clean if you select the option. Before you reset your phone to factory settings, ensure you’ve backed up all your essential apps and files. When you’re ready, you can do a factory reset by following these steps:
Step 1: Go into Settingsand search for “reset.”
Step 2: Choose Factory reset.
Step 3: Tap the Erase all dataor Reset device at the bottom, whichever button is there.

Step 4: Input your password and confirm the action.

Your phone will now restart and start the reset process. Once the factory reset completes, your phone will look brand new, and you’ll need to install all your apps again. Moreover, your Google Play Services app will likely get fixed by this, too.
2. Update Your System
As keeping your phone’s system and apps updated to the latest possible version is essential and recommended for the best performance and highest efficiency, you can try updating it to see whether it fixes your Google Play Services error. Here’s how:
- Step 1: Open the Settings
- Step 2: Head into System> System update.
- Step 3: If there’s an update available, click it and go through the process of updating your phone’s system.
Restarting your phone after an update, even if it doesn’t restart itself, is highly advisable, ensuring that the new updates apply without issues.
3. Revert to the Previous Version
As we’ve discussed the wrong Play Services versions above, it’s worth noting that sometimes even the developers can make mistakes and roll out the wrong version for your phone. So, if you notice that the phone is getting the error after you’ve updated Google Services or the Play Store, you can quickly revert to the previous version, and here’s how:
- Step 1: Head into Settings> Apps > Google Play Services.
- Step 2: Press the Disablebutton at the bottom of the screen.
- Step 3: Restart the phone, repeat the process by clicking Enablethis time, and restart the phone again.
As these are system apps, you can’t remove them from the phone, and disabling them will only remove the updates, leaving you with a base version that came with your phone out of the box.
4. Uninstall the App’s Updates and Reinstall
Like reverting to the previous version, you can also try reinstalling updates to fix the Google Play Services has stopped working error. The process is similar to the one above, but we’ve still included the steps. Here’s how you can do that:
Step 1: Go into Settings> Apps and find Google Play Services.
Step 2: Tap it and press Uninstall Updatesat the bottom.
Step 3: Exit the Settingsapp and restart the phone.
Step 4: Open the Play Storeapp and head into the app’s settings by clicking your profile icon. Then scroll to the bottom, and tap Settings.
Step 5: Find and tap the Play Store versionto update your Google Play Services.

As you’re already there, you might as well update all other apps after you tap Manage apps & device. That will ensure that older and not-up-to-date apps aren’t causing the issue.
5. Check Storage
Believe it or not, one of the leading causes of the Google Play Services issue is a phone overfilled with apps. Namely, if you have insufficient storage, the Google Play Store app will likely crash and display errors such as “Unfortunately, Google Play Services has stopped working.”
Head into your phone’s Settings and select Storage to see how your phone’s doing storage-wise. Deleting a few apps you don’t use and transferring your photo and video library to a PC is highly advisable if your phone’s storage space lacks gigabytes.
6. Do a System Repair
Although the other solutions here are general fixes that might help, a system repair might take a bit longer but will undoubtedly fix your issue. You can use the Wondershare Dr.Fone app to repair the system and eliminate the annoying “Unfortunately, Google Play Services has stopped working” error.
Moreover, Dr. Fone works on Android and iOS devices and can fix various phone issues, including boot loops, a white screen of death, a stuck phone, etc. That’s why we’ve included a guide on using it for an Android phone issue. Here’s how:
Step 1: Launch the Wondershare Dr.Fone app on your PC and head into Toolkit> System Repair > Android.
Step 2: Select the type of issue you want to fix > Start.
Step 3: Select the make and model of your phone so that Dr.Fone can find the appropriate Android software.
Step 4: Connect the phone to the PC via a USB cable and follow the on-screen instructions to put the phone into Download Mode. The instructions are available for both phones with and without the home button.
Step 5: Select the appropriate Android firmware, download it, and hit Fix Nowafter it downloads.
Step 6: Enter the code and hit Confirmto continue the system repair process. When it’s done, click the Done
That’s all it takes to do a system repair with Wondershare Dr.Fone. Give the software a few minutes to complete, during which your phone might restart a few times. Once it’s done, your Google Play Services app will undoubtedly work.
7. Clear Cache
The easiest and the most obvious fix for many Android apps is clearing the app’s cache. Here’s how you can do that for Google Play Services and Google Play Store:
Step 1: Go into Settings> Apps and find the Google Play Store
Step 2: Tap Storageand hit the Clear cache
Step 3: Repeat the process for the Google Play Services

If this doesn’t work, move on to another possible fix.
8. Check Date and Time Settings
Oddly enough, the Google Play Services app is prone to failure because of an incorrectly set time or date. That’s because Google’s servers constantly check these settings before issuing updates to the Vivo Y100i devices, so you’ll need to ensure they’re correct beforehand. Here’s how:
Step 1: Head into Settings> System > Date & Time.
Step 2: Ensure that both “**Use network–provided time” and “Use network-provided time zone**” are toggled on.
Step 3: If this doesn’t work, you can try repeating the process and manually setting the time and the time zone.

Once you check or change these settings, try using the Google Play Store app and check whether the issue is fixed. Restarting the phone after changing the settings is also highly advisable.
9. Troubleshoot Your Internet Connection
Another regularly overlooked troublemaker is a poor internet connection. That’s because most apps nowadays are meant to work in online mode only, and losing connection or using a bad one interferes with the app’s functionality.
To test the internet connection on your Vivo Y100i, you should open a browser and head to a random internet page to see if it’s opening and whether there are any delays. If it’s working fine, your internet connection isn’t the problem.
10. Adjust Google Play Services Permissions
Although permissions rarely change, they can cause issues if you change them accidentally. These settings can be found in the same place where you would uninstall updates or clear the app’s cache, so you can use some of the steps mentioned above to check them.
Once inside Permission Settings, check whether the Google Play Services and Play Store apps have sufficient permission to do their jobs and whether any required permissions were recently removed. If so, grant these two apps their permissions back.
 safe & secure
4,953,228 people have downloaded it
Conclusion
Although it’s an incredibly frustrating error, the “Unfortunately, Google Play Services has stopped” message is more annoying than serious. We’ve explained why it happens, but we’ve also given you a list of solutions to fix it.
Our list includes various fixes, from simple ones, like deleting the app’s cache and ensuring your network works fine, to more serious ones, like doing a factory reset. Alternatively, you can do a system repair with the help of Wondershare Dr.Fone, which will certainly fix the problem, but it might be a bit more complicated than cache deletion.
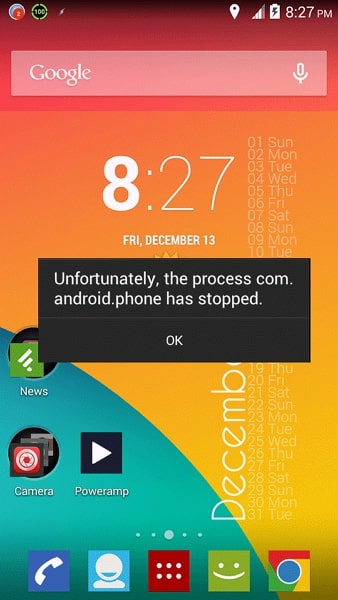
Fix the Error of Unfortunately the Process.com.android.phone Has Stopped on Vivo Y100i
Nowadays, smartphones are integral to life. They serve as your communication lifeline and powerful personal assistant. However, it can be frustrating when a sudden error disrupts our phone’s functionality. One common error Android users encounter is the “Unfortunately, The process.com.android.phone has stopped” error. Fear not if you have come across this error message on your Vivo Y100i.
This beginner’s guide is here to help you understand the causes of this problem. It will also provide you with practical “unfortunately the phone has stopped solutions.”
Part 1: Learn Why Unfortunately the process.com.android.phone Has Stopped
The error message “Unfortunately, the process com.android.phone has stopped“ typically appears on Android devices when there is an issue with the Phone app. Issues with underlying processes responsible for handling phone-related functions are also a cause.
It can prevent you from making or receiving phone calls, accessing contacts, or using other phone-related features. Following are some of the possible reasons why you may encounter this error:
App or System Update
When you update your device’s OS or the Phone app itself, it is possible to encounter bugs or compatibility issues. These issues can lead to the Phone app crashing and displaying this error message. Sometimes, the updated software may not work with the existing configurations of the Phone app. It results in instability which causes this error.
App Cache/Data Corruption
The Phone app relies on cached data and stored settings to function properly. If the cache or data of the app becomes corrupted, it can cause the Phone app to malfunction. The reasons include interrupted app installations or updates, improper shutdowns, or software conflicts. As a result, you may see the error message indicating that the process com.android.phone has stopped.
Insufficient System Resources
Android devices need sufficient memory (RAM) and processing power to run apps smoothly. If your device is running low on memory or processing capacity, it may struggle to handle the Phone app and its processes. It can lead to crashes and the error message. Running many resource-intensive apps at the same time also causes this issue. Other reasons include too many background processes that contribute to this error.
Conflicting Third-Party Apps
Third-party apps installed on your device can sometimes conflict with the Phone app. These conflicts can occur for various reasons, such as incompatible app versions. The software bugs within the third-party apps or configurations can also clash with the Phone app. Such conflicts can disrupt the normal operation of the Phone app. The result of all this trigger the error message.
Software or Firmware Glitches
Software glitches or firmware issues can occasionally occur in Android devices. These glitches can affect the functioning of system processes, including the Phone app. They may arise from programming errors and system inconsistencies. Sometimes unexpected interactions between different OS components can also lead to this error.
Part 2: 100% Working Fixes To Fix Unfortunately the process.com.android.phone Has Stopped
Having been denied access to your Phone can cause a lot of issues. Luckily, many simple fixes to the “process.com.android.phone has stopped“ error exist. These solutions have worked for many users, and by following them, you may be able to resolve the issue too. Given below are the top 8 fixes to resolve this error and restore your device’s phone functions:
Fix 1: Restart/Reboot your Android Device
One of the simplest yet effective solutions to tackle the “Unfortunately, the process com.android.phone has stopped“ error is to reboot your Vivo Y100i. Restarting your device can often resolve temporary software glitches or conflicts. This fix requires no technical expertise.
So, it is worth trying before moving on to more complex solutions. Follow the guide below to restart your Vivo Y100i and potentially fix the error:
- Step: Long-press your Vivo Y100i’s “Side” key and wait for the power menu to appear. Here, select “Restart” to initiate the reboot of your phone.

Fix 2: Re-insert the SIM Card
There is also a chance that the reason you are seeing this error message relates to the SIM card. A loose or improperly inserted SIM card can cause disruptions in the phone’s communication functions. As a result, you see the “Unfortunately, the process com.android.phone has stopped“ error.
To fix this error, you can remove the SIM card and then re-insert it. If the issue is actually related to a SIM card, the issue will get resolved after you resolve the problem.

Fix 3: Clear the Cache and Data of the Phone App
The “Unfortunately, the process com.android.phone has stopped“ error is connected to the Phone app. In this situation, clearing the cache and data of the Phone app itself can often resolve the issue. This fix focuses on removing any corrupted or conflicting data within the app.
Once the corrupted data is gone, it will restore the Phone app to proper functioning. Here is how to clear the cache and data of the Phone app on an Android device:
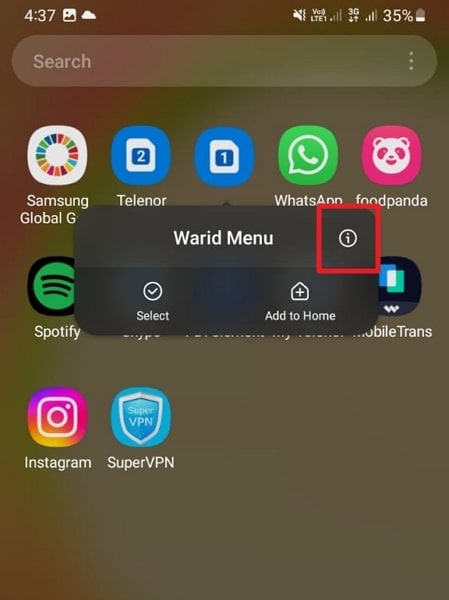
- Step 1: Find the Phone app on your Vivo Y100i and long-press its icon. A small menu will pop up where you need to select “App Info.”

- Step 2: It will lead you to detailed information about the Phone app. Here, press “Storage,” and following that, you will see the “Clear Cache” and “Clear Data” options. Use them in the same order to clear the cache and data of the Phone app.

Fix 4: Disable Automatic Updates Feature
In some cases, this error may occur due to conflicts or compatibility issues with the automatic app updates feature. The automatic update on your Vivo Y100i keeps your apps updated. Disabling this feature temporarily can help resolve the problem.
As a result, you will be able to use the Phone app without interruptions. To disable the automatic updates option on the Google Play Store, you can use the following steps:
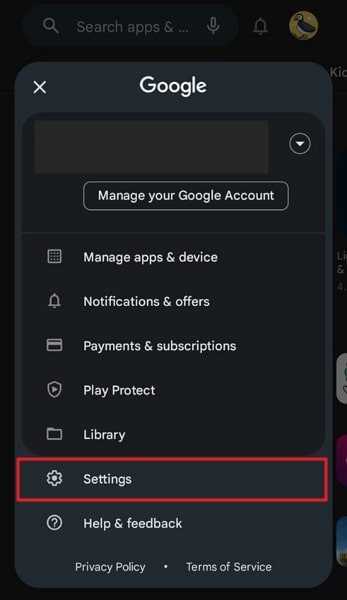
- Step 1: Navigate to the Google Play Store app on your Vivo Y100i and launch it. Next, tap on the profile icon in the screen’s top right corner. From the options presented, select “Settings.”
- Step 2: In Settings, press “Network Preferences” to expand the option. Now, open the “Auto-update apps” settings and enable the “Don’t auto-update apps” option.

Fix 5: Clear All Apps Cache and Data
When dealing with this error, clearing the cache and data of all apps on your Vivo Y100i can also help. Doing this will remove any corrupt or conflicting data that might be causing the issue. This fix targets the overall app ecosystem on your device.
It intends to ensure a clean slate and potentially resolve the error. Use the following guide to clear the cache and data of all apps:
- Step 1: Access your Vivo Y100i’s Settings and tap the “Apps” option. It will lead you to all the apps running on your phone. Here, select an app to see detailed app info.

- Step 2: On the app info screen, scroll down and press “Storage.” Now use “Clear Cache” to clean the app’s cache and “Clear Data” to erase the app’s data. Repeat the same process for all the apps installed on your device.

Fix 6: Clear SIM Toolkit Cache and Data
It is worth considering the SIM Toolkit is a potential source of the problem. The SIM Toolkit is an app that provides functionality related to your SIM card. Its functions include accessing value-added services and managing mobile network settings. Clearing the cache and data of the SIM Toolkit app can help resolve this issue. The steps you need to clear the cache and data of this app are the following:
- Step 1: On your Vivo Y100i, find the SIM Toolkit app. After finding it, press and hold its icon until a short menu appears. Choose “App Info” from the available options to access its settings.
- Step 2: Now, you need to tap “Storage” to proceed. On the next screen, first, tap “Clear Cache” to clean the cache, and later press “Clear Data.”

Fix 7: Perform Factory Reset
If all previous fixes have been unsuccessful, performing a factory reset is also an option to resolve this issue. It is a drastic measure that can potentially address underlying software issues. However, it’s important to note that a factory reset will erase the entire data and settings of your device.
So, it’s crucial to back up your important files before proceeding with this fix. By doing so, you can restore your device to its original state and eliminate the error. Use the detailed guide described below to factory reset your Vivo Y100i:
- Step 1: Start by launching the Settings app and selecting “General Management.” Here, choose “Reset,” and following that on the next screen, tap “Factory data reset.”

- Step 2: After tapping “Factory data reset,” hit the “Reset” option. Next, enter your Vivo Y100i PIN to confirm the process, and use “Delete All” to start the factory reset process.

Fix 8: Try Wondershare Dr.Fone - The Best and Most Reliable Android System Repair Tool
It must be a frustrating experience to try one solution after the next and not be able to resolve the issue. In such situations, the best thing you can do is find a tool that can resolve all Android system problems. While there are many options available online, not all are great. The best Android system repair tool currently available is Wondershare Dr.Fone.
Using Wondershare Dr.Fone, you can fix issues like “Unfortunately, the process.com.android.phone has stopped,” Play Store not working, frozen phone, and many more. It is a specialized tool for resolving Android system issues in Vivo Y100i devices with support for all modern Vivo Y100i phones.
Key Features of Wondershare Dr.Fone
- You do not need any technical skills to fix your Android system issues when using Dr.Fone.
- It has the highest success rate in fixing complex software issues related to Android OS.
- Wondershare Dr.Fone supports over 1000 Android models for system repair and can fix most issues within minutes.
Steps To Fix the process.com.android.phone Has Stopped via Wondershare Dr.Fone
All you need to fix your Vivo Y100i’s system issues is a computer with Wondershare Dr.Fone installed and your device connected to it. Here is the simplified process of resolving most Android system issues in a matter of minutes:
- Step 1: Link Your Android Device with Wondershare Dr.Fone
To start, connect your Vivo Y100i to your computer. Launch Wondershare Dr.Fone on your computer screen and click on “Toolbox,” located in the left sidebar. From the options available, select “System Repair” and follow it by clicking “Android” on the next screen.

- Step 2: Enter the Required Details of Your Vivo Y100i
Click on “Start” to initiate the process, and following that, you will be prompted to provide specific details about your Vivo Y100i. These details include the “Brand,” “Name,” “Model,” “Country,” and “Carrier.” Afterward, tick the box that says, “I agree with the warning, and I am ready to proceed,” and click “Next.”

- Step 3: Resolve The process.com.android.phone Has Stopped Issue
The subsequent step involves entering Download Mode on your device, following the on-screen instructions provided by the software. Once your device is in Download Mode, this Android repair toolkit will proceed to download and install the relevant firmware. Now, select “Fix Now” and confirm the repair of your Vivo Y100i by entering the code “000000.”

safe & secure
3,595,007 people have downloaded it
Conclusion
To sum the article up, encountering the frustrating error message “Unfortunately, the process com.android.phone has stopped“ can be daunting. However, with the right knowledge and tools, resolving this issue becomes achievable. Throughout this guide, we have explored various troubleshooting methods. These included clearing the cache, rebooting the Vivo Y100i device, and even performing a factory reset.
While there are many options to fix this error, only one is an excellent choice: Wondershare Dr.Fone. With its powerful Android system repair feature, Wondershare Dr.Fone is a reliable solution to resolve this error.
How to Exit Android Factory Mode On Vivo Y100i?
You’ve often heard that recovery mode will solve just about any problem your Vivo Y100i is experiencing. This is mostly true and one of the components of Android’s recovery mode, factory mode or factory reset is one of the most efficient ways to solve various problems on your device. While factory mode is often a good thing, there are times when your device can enter factory mode on its own. Other times, you can safely enter factory mode but not know how to get out.
Fortunately for you, this article will explain all aspects of factory mode and especially how to safely exit factory mode.
Part 1. What is Android Factory Mode?
Factory mode or what is commonly known as factory reset is one of the options available for you when your Vivo Y100i is in recovery mode. Several options are available for you once you enter Recovery mode on your device but few are as effective as the wipe data/ factory reset option. This option is useful in solving a whole host of problems that your device could be experiencing.
If you have been using your Vivo Y100i for a while now and its performance to be less than ideal, a factory reset might be a good solution. That is however not the only problem a factory reset or factory mode can solve. It will also work for a number or Android errors that you may experience, problems caused by faulty firmware updates and also tweaks made on your device that may not have worked as expected.
It is however important to note that a factory reset or factory mode does often result in the loss of all your data. Therefore a backup is necessary to protect against this data loss risk.
Part 2. Backup your Android Device First
Before we can see how to safely enter and exit factory mode, it is important to have a full backup of your device. We mentioned that a factory mode will likely erase all the data on your device. A backup will ensure that you can get your phone back to its original state before the factory mode.
In order to do a full and complete backup of your device you need to have a tool that will not only ensure that you backup everything on your device but one that makes it easy for you to accomplish this. One of the best tools in the market is Dr.Fone - Backup & Resotre (Android) . This software is designed to enable you to create a full backup of your device.
Dr.Fone - Backup & Restore (Android)
Flexibly Backup and Restore Android Data
- Selectively backup Android data to computer with one click.
- Preview and restore backup to any Android devices.
- Supports 8000+ Android devices.
- There is no data lost during backup, export or restore.
3,428,803 people have downloaded it
Follow these very simple steps to use this MobileTrans Phone Transfer software to create a full backup of your device.
Step 1. Launch Dr.Fone on your computer and choose “Backup & Restore”
Run the software on your computer and you can see all features displayed in the primary window. Choose this one: Backup & Restore. It allows you to get your device backed up entirely with one click.
Step 2. Plug in with your device
Then plug in with your device to the computer. When your devic is detected, click on Backup.

Step 3. Select the file types to backup
The program will display all the file types it can support to backup. Just select the ones you would like to backup and hit Backup.

Step 4. Start backing up your device to the computer
After choosing the file’s type for backup, click “Backup” to begin backing up your device to your computer. It will take you a few minutes, depending on the storage of the data.

Note: You can use the feature of “Restore From Backup” to restore the backup file to your device, when you have the need later.
Part 3: One Click Solution to fix Android stuck in factory mode
From the above parts, you are well aware about what is factory mode. As we discussed, this mode fixes most troubles with Android devices.
But for situations when your Vivo Y100i gets stuck in this very same factory mode, the most feasible solution for you is Dr.Fone - System Repair (Android) . This tool fixes all Android system issues including unresponsive or bricked device, stuck on Vivo Y100i logo or factory mode or blue screen of death with a single click.
Dr.Fone - System Repair (Android)
One click fix to Android stuck in factory mode
- You can easily fix your Android stuck in factory mode with this tool.
- The one-click solution’s ease of operation is appreciable.
- It has carved a niche being the first Android repair tool in the market.
- You don’t need to be a pro in technology to use this program.
- It is compatible with all latest Vivo Y100i devices like Galaxy S9.
3,645,867 people have downloaded it
In this part we will explain how to exit Android recovery mode using Dr.Fone - System Repair (Android) . Prior to proceeding, you got to remember that device backup is paramount to keep your data safe. This process might erase your Vivo Y100i data.
Phase 1: Ready your device and connect it
Step 1: Installation completion needs to be followed by running Dr.Fone on your system. Over the program window, tap ‘Repair’ afterwards and get the Android device connected.
Step 2: Select the ‘Android Repair’ option from the list to fix Android stuck in factory modeissue. Hit the ‘Start’ button soon after.
Step 3: Select Android device details on the Vivo Y100i device information window, followed by tapping the ‘Next’ button.

Step 4: Enter ‘000000’ for confirmation then proceed.
Phase 2: Get in ‘Download’ mode for repairing the Android device
Step 1: It’s important to put the Android device in ‘Download’ mode, here are the steps to do so –
- On a ‘Home’ button-less device – turn off the Vivo Y100i device and push down the ‘Volume Down’, ‘Power’ and ‘Bixby’ buttons for about 10 seconds and un-hold. Now, hit the ‘Volume Up’ button to get into ‘Download’ mode.

- For a device with ‘Home’ button – switch it off and hold down the ‘Power’, ‘Volume Down’ and ‘Home’ buttons together for 10 seconds and release. Click the ‘Volume Up’ button for entering ‘Download’ mode.

Step 2: Press ‘Next’ for initiating firmware downloading.

Step 3: Dr.Fone –Repair (Android) starts Android repair as soon as download and verification of firmware is done. All Android issues along with Android stuck in factory mode will be fixed now.

Part 4. Common Solutions to Exit Factory Mode on Android
Having a backup of all your data will eliminate the risk of losing any of your data. You can now safely exit factory mode using one of the 2 methods below. These two methods will work on a rooted device.
Method 1: Using “ES File Explorer”
To use this method, you will need to have installed file explorer on your device.
Step 1: Open “ES File Explorer” and then press the icon on the top left corner
Step 2: Next, go to “Tools” and then turn on “Root Explorer”
Step 3: Go to Local> Device> efs> Factory App and then open factorymode as text in the “ES Note Editor” Turn it ON
Step 4: Open keystr as text in the “ES Note Editor” and change it to ON. Save it.
Step 5: Reboot the Vivo Y100i device

Method 2: Using Terminal Emulator
Step 1: Install Terminal emulator
Step 2: Type “su”
Step 3: Then Type the following;
rm /efs/FactoryApp/keystr
rm /efs / FactoryApp/ Factorymode
Echo –n ON >> / efs/ FactoryApp/ keystr
Echo –n ON >> / efs/ FactoryApp/ factorymode
chown 1000.1000/ efs/FactoryApp/keystr
chown 1000.1000/ efs/FactoryApp/ factorymode
chmod 0744 / efs/FactoryApp/keystr
chmod 0744 / efs/ FactoryApp/ factorymode
reboot
You can also exit factory mode on unrooted device by going to Settings> Application manager> All and the search for Factory Test and “Clear Data”, “Clear Cache”
As much as factory mode can be a useful solution to a number of problems, it can be quite annoying when it pops up unexpectedly. Now you are equipped with 2 effective solutions to help you safely exit factory mode if ever you find yourself in this situation.
Also read:
- [Updated] Infuse Melodies Into PowerPoint Visuals
- [Updated] Smooth Transition of Short Videos to YouTube - Device Guide for 2024
- 4 Feasible Ways to Fake Location on Facebook For your Infinix Hot 40i | Dr.fone
- Mastering Your Home Network: The Ultimate Guide to the Netgear Nighthawk X4 Mesh Experience
- Restore Missing App Icon on Samsung Galaxy S24 Ultra Step-by-Step Solutions | Dr.fone
- Simple Solutions to Fix Android SystemUI Has Stopped Error For Nokia G310 | Dr.fone
- Sky's the Limit Crafting Professional Drone Videos for 2024
- Solve Your Elgato HD60 Drivers Problems in Minutes | Simple Steps
- Solved Warning Camera Failed on Xiaomi Redmi Note 12 Pro 4G | Dr.fone
- Spotify Keeps Crashing A Complete List of Fixes You Can Use on Itel S23 | Dr.fone
- Spotify Keeps Crashing A Complete List of Fixes You Can Use on Motorola Edge 2023 | Dr.fone
- Spotify Keeps Crashing A Complete List of Fixes You Can Use on Poco F5 Pro 5G | Dr.fone
- Stuck at Android System Recovery Of Motorola G54 5G ? Fix It Easily | Dr.fone
- Stuck at Android System Recovery Of Motorola Moto G73 5G ? Fix It Easily | Dr.fone
- Transforming an Affordable Gaming Screen Into the Perfect Workstation: A Productivity Hack Featured on ZDNet
- Unboxing and Testing the Samsung Galaxy Tab S7 - The Ultimate Compact Device for Fans of Android OS
- Updated In 2024, Top-Rated MTS Video Editors Expert Reviews
- Title: What to Do if Google Play Services Keeps Stopping on Vivo Y100i | Dr.fone
- Author: Ariadne
- Created at : 2024-12-25 22:21:37
- Updated at : 2024-12-29 07:23:30
- Link: https://howto.techidaily.com/what-to-do-if-google-play-services-keeps-stopping-on-vivo-y100i-drfone-by-drfone-fix-android-problems-fix-android-problems/
- License: This work is licensed under CC BY-NC-SA 4.0.