
Why Is My Google Pixel 7a Offline? Troubleshooting Guide | Dr.fone
Why Is My Google Pixel 7a Offline? Troubleshooting Guide
Ever had your Google Pixel 7a claim it’s offline, leaving you scratching your head about where it went wrong? We get it; it’s confusing. That’s why this article is here to untangle the mystery.
In the following sections, we’re diving into the “why is My Google Pixel 7a offline” dilemma that many Android users face. We’ll break down the possible reasons behind this common issue and guide you through simple steps on how to fix it. By the end of the article, you’ll be able to get back to smooth internet surfing on your Google Pixel 7a. Let’s get started.
Part 1: Why Does My Google Pixel 7a Say Offline?
When you encounter the “offline” error message, it can disrupt your usual smartphone activities. Suddenly, you find yourself unable to browse the internet, send or receive emails, or stay connected through instant messages.
It’s a frustrating scenario, but let’s break down the potential reasons why your phone might be displaying this offline status:
- Enabling Airplane mode
Why is My Google Pixel 7a showing offline? Well, one common culprit behind the “offline” message is the accidental activation of Airplane Mode on your Google Pixel 7a. When Airplane Mode is enabled, it disconnects your phone from all wireless networks, rendering it unable to connect to the internet or cellular networks.
- Internet connection issues
Fluctuations in your signal strength or unexpected data loss can also be the culprit behind the “Why is My Google Pixel 7a offline?” problem. Android devices rely on stable internet connections, and disruptions, whether temporary or prolonged, can lead to this error.
- Glitches or bugs
Sometimes, glitches or bugs in Google apps installed on your Google Pixel 7a can mislead it into thinking it’s offline. Google Play Services or other related applications may encounter issues, causing the phone to display an “offline” message.
- Firewall restrictions
In some cases, a firewall on your Google Pixel 7a might be overly restrictive, preventing the Google Pixel 7a device from establishing a connection to the internet. This security measure, intended to protect your device, can sometimes go overboard and disrupt normal online functionality.
Now, you have understood the potential causes as the first step toward resolving the issue. Next, we’ll guide you through the process of troubleshooting and getting your Google Pixel 7a back online.

Part 2: How To Fix “Phone Offline” With Internet Connection Problem
Now that we’ve figured out why your phone says it’s offline, let’s tackle the issue head-on. If you’re facing problems like downloads that won’t start, Google Play stuck on “Loading…,” or web pages refusing to load, chances are it’s an internet connection issue causing the problem.
Here are some easy solutions to get your connection back.
Solution 1: Change connection to mobile data
Switching to mobile data can be a quick fix if your Wi-Fi is acting up. It ensures a change in your connection source and might resolve the “Phone offline” issue. Follow these easy steps to change your connection to mobile data:
- Step 1: Swipe down from the top of your screen to access the Quick Settings menu.
- Step 2: Tap the Wi-Fi icon to turn off the Wi-Fi connection.
- Step 3: Tap Mobile Data to turn it on.

Solution 2: On and off Airplane mode
Airplane Mode can sometimes cause connectivity confusion. Turning it off and on essentially resets your phone’s wireless connections, which might resolve the offline issue.
How to on and off Airplane mode on Android:
- Step 1: Swipe down from the top of your screen to access the Quick Settings menu.
- Step 2: Look for the Airplane Mode icon and tap the icon to turn on Airplane Mode.
- Step 3: Wait a few seconds, then tap it again to turn off the Airplane Mode. Now, check if your phone is now online.

Solution 3: Reset network settings
Resetting network settings can help eliminate any configuration glitches that might be causing the phone offline problem. It’s like giving your phone’s connection settings a fresh start.
To reset your network settings, the steps may differ depending on the phone model you are using. However, you can generally do so by looking for the “Network” settings.
- Step 1: Open your phone’s Settings > Connection & sharing.
- Step 2: Find and select “Reset Wi-Fi, mobile networks, and Bluetooth.”
- Step 3: Tap “Reset Settings” and confirm the action and allow your phone to reset.
- Step 4: Reconnect to your Wi-Fi and check if the issue persists.

Solution 4: Restart your Wi-Fi router
Sometimes, the problem might not be with your phone but rather with the Wi-Fi router. Restarting it can refresh the connection and potentially resolve the connectivity problem.
How to restart your Wi-Fi router:
- Step 1: Locate your Wi-Fi router.
- Step 2: Turn off the router using the power button or unplug it.
- Step 3: Wait for about 10–15 seconds before plugging the router back in or turning it on.
- Step 4: Allow the router to restart and establish a connection. Then, check if your phone still shows the “Phone Offline” message.
These solutions should cover the most common connectivity issues. If the problem persists, we’ll explore further steps in the following sections.
Part 3: How To Fix “Phone Offline” Despite Having an Internet Connection
Ever found it odd to receive the frustrating offline error message when you’re sure your internet connection is up and running? If you’ve double-checked your internet connection and your phone still says it’s offline, the issue may lie within your browser, apps, or device settings.
In this part, we’ll answer the question “**Why does My Google Pixel 7a say offline android?**” despite a seemingly functional internet connection. Then, let’s see other solutions on how to get your device back to its online, fully functional self.
Solution 1: Clear Google Chrome’s cache and data
Sometimes, the answer to “Why is my Android phone offline” can be attributed to a buildup of corrupted or outdated data in your browser’s cache. Clearing the cache and data for Google Chrome can resolve this issue, allowing for a fresh start and potentially eliminating the offline status.
How to clear your browser’s cache and data on Android:
- Step 1: Open the Settings > Apps > Manage Apps.
- Step 2: Locate and tap “Google Chrome” or your preferred browser in the list of installed apps.
- Step 3: Tap “Storage” and select “Clear Cache” to remove temporary files.
- Step 4: Choose “Clear Data” to delete app data. Confirm the action if prompted.
Now, restart Google Chrome and check if the offline error persists.

Solution 2: Re-install Google Chrome
If clearing the cache and data didn’t solve the offline issue, reinstalling Google Chrome can be the next step. A fresh installation can eliminate any underlying glitches or corrupted files that might be causing the persistent offline status.
How to re-install Google Chrome:
- Step 1: Visit the Google Play Store and search for Google Chrome.
- Step 2: Tap “Uninstall” to remove the app from your device.
- Step 3: Wait until it has finished uninstalling your app. Then, tap “Install” to start reinstalling the app.
- Step 4: Once the installation is complete, open Google Chrome and check if the offline error persists while browsing.

Solution 3: Repair the system to fix the phone showing offline
When persistent offline issues seem deeply rooted in your device’s system, a comprehensive system repair may be the solution. Wondershare Dr. Fone’s system repair tool is designed to address a range of system problems, providing a reliable way to fix any problem you have with your phone.
With Dr. Fone’s system repair tool, you can diagnose and resolve “Why is My Google Pixel 7a offline on Android,” ensuring a smooth and functional Android experience.
Key Features:
- Comprehensive system repair for any devices
- User-friendly interface
- Efficient problem diagnosis
How to use Dr. Fone’s system repair tool:
- Step 1: Open Dr.Fone’s system repair tool
Start by launching Wondershare Dr.Fone on your computer. Go to the Toolbox section and connect your Google Pixel 7a. Choose System Repair and pick Android as your device type.

 safe & secure
3,189,324 people have downloaded it
- Step 2: Start the repair
Click Start on the new screen to kick off the repair. Since you’re dealing with an offline connection issue on Android, select System Damage.

- Step 3: Confirm your device details
The platform will detect your Google Pixel 7a’s brand. Confirm the Name, Model, Country, and Carrier. If your device is unlocked, choose OPEN in the Carrier section. Agree to the warning, click Next, and proceed with the repair.

- Step 4: Download firmware.
Follow the instructions to put your Google Pixel 7a into Download Mode. Once in Download Mode, you will start downloading the firmware.

- Step 5: Confirm Installation
Remember, the repair may erase data. It’s advisable to back up your data first before starting the repair. Enter “000000” to confirm the repair process, shown by a progress bar. Click Done once it is completed and see if your Android is back online.

Conclusion
Dealing with the “Phone Offline” hiccup on your Google Pixel 7a can be a real headache. But fear not – we’ve covered a range of solutions to get you back online smoothly. From troubleshooting internet connection problems to addressing browser and app-related glitches, the solutions provided in this guide are designed to cater to a variety of scenarios. If you find it troublesome to try solutions one by one, then we recommend using Dr.Fone directly which is a full toolkit for your phone and can help resolve most device glitches one-off.
Remember, technology can sometimes be tricky. But with patience and the right guidance, you can overcome these challenges.
11 Ways to Fix it When My Google Pixel 7a Won’t Charge
What would you do if your phone or other device’s battery is draining? You will plug it into a power source. Right? What if you realize that your phone won’t charge? My phone won’t charge, and the Google Pixel 7a tablet won’t charge is a common problem.
Android devices are very prone to this problem, and hence Android device owners complain frequently that My Google Pixel 7a won’t charge even when it is plugged into a power source properly. The reason behind the phone won’t charge, or Google Pixel 7a tablet won’t charge are not very complicated and, therefore, can be dealt with by you sitting at home.
A charging problem can occur due to a temporary software crash. It is also possible that a corrupted device cache may be causing such a glitch. Another reason for phones not to charge normally or charge slowly is an inappropriate power source or defective charging cable and adapter. All these and many more problems will be cured in the 10 solutions to fix My Google Pixel 7a won’t charge error.
So if you’re still thinking about why won’t My Google Pixel 7a charge, read on to find out solutions to fix My Google Pixel 7a won’t charge problem.
Part 1. One-click solution to fix Android phone won’t charge
While you are upset over ‘why My Google Pixel 7a won’t charge?’, would you mind us helping you around?
Well, we have got Dr.Fone - System Repair (Android) at your fingertips to get rid of this annoying phone won’t charge issues (caused by system corruption). Whether the Google Pixel 7a device froze or became unresponsive, bricked, or got stuck on the Google Pixel 7a logo/blue screen of death or apps started crashing. It can fix every Android system problem.
Dr.Fone - System Repair (Android)
Easy-to-operate program to fix Android phone won’t charge
- As it supports all the latest Google Pixel 7a devices, it can even easily fix the Google Pixel 7a tablet won’t charge issue.
- With a single click, you can fix your entire Android system issues.
- The very first tool is available in the market for Android system repair.
- Without any technical knowledge, one can use this software.
- This tool is intuitive with a high success rate.
3981454 people have downloaded it
Note: When you are stressed over ‘why won’t My Google Pixel 7a charge’, we are ready to eliminate the tension and make things easier for you. But, before you start fixing the phone won’t charge the problem, make sure to back up the Android device . This fixing process might wipe out all the Google Pixel 7a device data.
Phase 1: Preparing and connecting the Android device
Step 1: Install and then run Dr.Fone - System Repair (Android), the ultimate Android repair software on your PC. Hit the ‘System Repair’ tab, followed by connecting your Google Pixel 7a.
Step 2: Tap on the ‘Android Repair’ option and then click ‘Start’ for moving ahead.
Step 3: Mention the detailed information about your Google Pixel 7a under the Google Pixel 7a device information section. Press ‘Next’ then on.
Phase 2: Get to ‘Download’ mode for repairing the Google Pixel 7a device
Step 1: It’s essential that you put the Android device under ‘Download’ mode to resolve the phone won’t charge the issue. Here comes how to do –
- With a ‘Home’ button device, switch off it before holding down the set of keys, including ‘Power’, ‘Volume Down’, and ‘Home’ key for 5-10 seconds. Let them go and hit the ‘Volume Up’ key for entering the ‘Download’ mode.

- If the ‘Home’ button is not there, you got to turn down the Google Pixel 7a device and altogether hold down the ‘Volume Down’, ‘Bixby’, and ‘Power’ keys between 5-10 seconds. Soon after you release the keys, tap the ‘Volume Up’ button for entering the ‘Download’ mode.

Step 2: Click ‘Next’ to start downloading the Android firmware.
Step 3: Now, Dr.Fone - System Repair (Android) would verify the firmware and then start repairing the Android system on its own. It will ultimately fix your ‘why won’t My Google Pixel 7a charge’ trouble.

Part 2. 10 common ways to fix Android won’t charge
1. Check/replace charging cable
Charging cables fray or become defunct after prolonged usage. Therefore, it is advised to always use the Google Pixel 7a device’s original charging cable or purchase a good quality charging cord, which doesn’t damage your device or your adapter.
It is also very commonly observed that the charging end of the cable which gets connected to the charging port of the Google Pixel 7a device gets damaged and prevents the current from flowing to the phone/tablet.

2. Check/clean charging port
The charging port in your device is a small opening where the charging end of the cabbie is inserted for the current to flow to the phone/tablet. Very often, we notice that the charging port gets blocked with tiny particles of dirt. The charging port might also get clogged if dirt and dust get accumulated in it, preventing the sensors from receiving and forwarding the current to the Google Pixel 7a device.

The best way to take this problem is to clean the port with a blunt pin or a soft bristle unused toothbrush. Make sure you clean the port gently and do not damage it or its sensors.

3. Check/replace charging adapter
This method is fairly simple, and all you need to do is check whether or not the charging adapter is working properly as sometimes, the adapter itself is to be blamed for the charge. To make sure that you are not using a defective adapter, connect your charging cable/USB to another adapter. If your device charges normally, it means there is a problem is with your adapter, and you must replace it at the earliest to solve My Google Pixel 7a won’t charge the issue.

4. Try another power source
This technique is more like a quick trick. It means to switch from one power source to another or use a more efficient and suitable power source. Laptops and PCs charge slower than a direct power source, i.e., a wall socket. Sometimes, the charging speed is slower, and the battery is draining. In such a scenario, choose to charge your device by directly plugging it into a socket on the wall to never experience My Google Pixel 7a won’t charge problem.
5. Clear device Cache
Clearing Cache is a great technique as it cleans your device and all its partitions. By clearing the cache, all the unwanted data and files stored in your device get deleted, which may be causing glitches in the Google Pixel 7a device’s software, preventing it from recognizing the current.
Follow the steps given below to clear your device’s cache:
• Visit “Settings” and find “Storage”

• Now tap on “Cached Data”.

• Click “OK” to clear all unwanted cache from your device as shown above.
Try charging your phone after clearing the cache. If your phone doesn’t charge even now, do not worry. There are more ways to help you combat My Google Pixel 7a won’t charge problem.
6. Re-start/reboot your phone/tablet
Restarting your device to fix why won’t My Google Pixel 7a charge error is a very effective remedy. This method of rebooting your device not only fixes software glitches but other but also tackles other factors/operations that might be running in the background preventing your device from charging.
Restarting a device is simple and can be done by following the steps given below:
• Long press the power button of your device.
• From the options that appear, click on “Restart”/ “Reboot” as shown in the image below.

To restart your device, you may also press the power button for about 20-25 seconds for the phone/tablet to automatically reboot.
7. Download and install the Ampere App
The Ampere app can be downloaded from the Google Play Store. It is very helpful to fix the why won’t my charge error as it gives you real-time information about your device’s battery consumption, charging status, and other essential data.
If the App gives information in green color, it means all is wetland your device is charging normally, however, if the information before you is in orange, you need to take steps to fix the charging problem.


8. Install software updates
Installing your Android version updates is a good idea as the software is the interface that receives charge from the charging port sensors and gives a command for the phone/tablet to charge. People often continue to use older OS versions, which cause trouble and prevent the Google Pixel 7a device from charging.
To check for and install updates on your device, you must be connected to WiFi or a cellular network. Next, visit “Settings” and select “About device”. Now click on “Software Update”.

If there is an update available, you will be prompted to download it. Just follow the instructions given before you install a brand new Android OS version on your device.
9. Factory reset your device
Factory Reset is must be done after due deliberation. Remember to take a back-up of all your data and contents on the cloud or an external memory device, such as a pen drive before adopting this method because once you perform a factory reset on your device, all media, contents, data and other files are wiped out, including your device settings.
Follow the steps given below to factory reset your device:
• Visit “Settings” by clicking the settings icon as shown below.
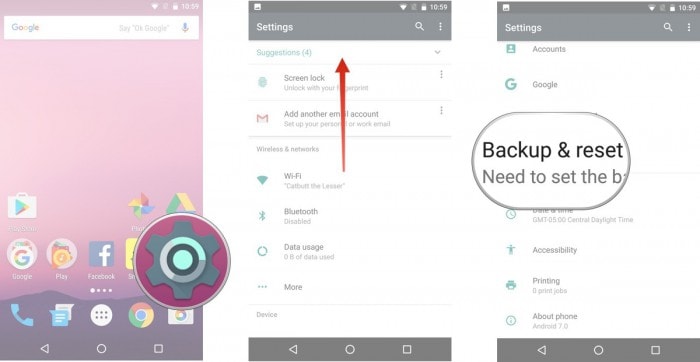
• Now select “Backup and Reset” and move on.
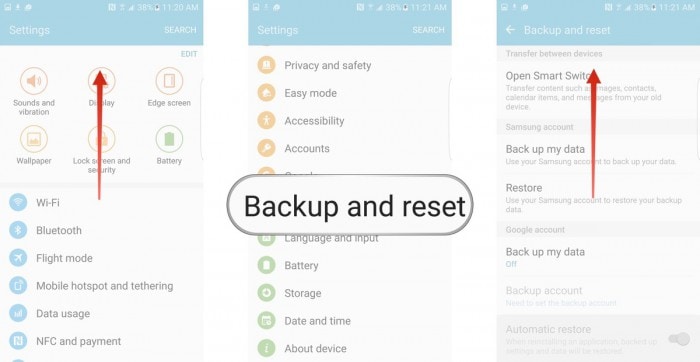
• In this step, select “Factory data reset” and then “Reset Device”.
• Finally, tap on “ERASE EVERYTHING” as shown below to Factory Reset your device.

Note: Once the factory reset process is complete, your device will automatically restart and you will have to set it up once again.
10. Replace your battery
This should be your last resort to fix My Google Pixel 7a won’t charge problem, and you should only attempt to replace your battery if none of the other techniques work. Also, please consult a technician before purchasing and installing a new battery in your device as different phones and tablets have a different type of battery requirements.

Finally, fixing the phone won’t charge the problem is simple, and therefore there is no need for you to worry as you are not the only one experiencing such an issue. Other Android users have tried, tested, and recommended the methods given above to solve why won’t My Google Pixel 7a charge or Google Pixel 7a tablet won’t charge error. So go ahead and try them out now.
Top 4 Android System Repair Software for Google Pixel 7a Bricked Devices
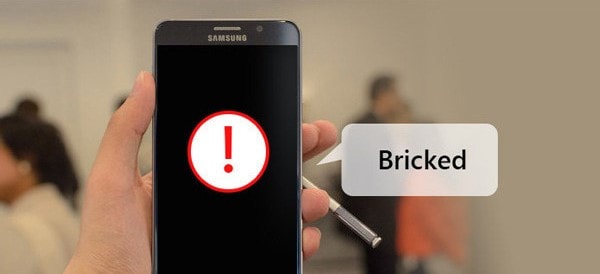
Is your Google Pixel 7a device showing signs of being “bricked” or “soft-bricked”? When a Google Pixel 7a is bricked, it becomes unresponsive and unusable. But fear not, as this article will guide you through reviving your device’s functionality. It will delve into the significance of unbricking and how it restores usability.
Moreover, this article will introduce you to the world of Google Pixel 7a unbrick tools and software, ensuring you can get your device back on track. So read on and explore the top Android system repair software that can bring life back to your bricked Google Pixel 7a device.
Part 1: Understanding Bricked Google Pixel 7a
Have you ever heard the term “bricked” concerning your Google Pixel 7a device? This section explains it to you in simple terms. Imagine your device becoming like a brick, unresponsive and seemingly lifeless. That’s what happens when a Google Pixel 7a gets bricked. There are two main types of brick: soft brick and hard brick.
Soft Brick
Soft brick is like a temporary setback for your device. To see if your Google Pixel 7a is soft - bricked, check out the details below:
- It happens when the software encounters issues, but the hardware is usually fine.
- Your device might not start properly, freeze, or get stuck on the logo screen.
Hard Brick
Now, this is a more severe situation. In this case, your bricked Google Pixel 7a might fall under the following conditions:
- Thesoftware and hardware have significant problems, making the Google Pixel 7a device unresponsive.
- Your device won’t turn on and might not show any signs of life.
Common Causes of a Brick Google Pixel 7a
Now, let’s discuss why devices end up in this bricked state. It can happen due to a few common reasons:
- Failed Updates
Something might go wrong during the process when you’re trying to update your Google Pixel 7a device. This is properly because of a poor internet connection or other interruptions. As a result, your device might get confused and end up bricked.
- Custom ROM Installations
A custom ROM is like a customized version of your device’s software. While it can bring cool new features, it can also cause issues if not installed correctly. Incompatible or poorly made custom ROMs can sometimes lead to a bricked device.
- Unauthorized Modifications
If you’re trying to tweak your device’s software without proper knowledge, you might make changes that the Google Pixel 7a device can’t handle. This can lead to instability and, you guessed it, a bricked device.
So, why is it important to know all this? Well, a bricked device isn’t just frustrating; it can disrupt your daily life. You won’t be able to use your device, access your apps, or even make calls. That’s why unbricking is crucial.
Part 2: Top Android System Repair Software
Now that you’ve grasped the concept, let’s dive into how to unbrick a Google Pixel 7a. That’s where Android system repair software comes in. These clever programs are like doctors for your device’s software. They diagnose and fix issues to keep your appliance running smoothly. Let’s explore the cream of the crop when it comes to these software solutions:
Wondershare Dr.Fone – System Repair (Android)
Dr.Fone - System Repair (Android) is like a magic wand for your Google Pixel 7a device. It’s designed to rescue your device from troubles and make it run smoothly again. Dr.Fone - System Repair (Android) is built to fix various issues, including a bricked device. It can resolve problems like black screens, frozen devices, boot loops, and even devices stuck in recovery mode.
![]()
Dr.Fone - System Repair (Android)
Repair Android System Errors without Any Trouble.
- Fix your Android to normal, no skills required.
- Fix various Android system issues, stuck in boot loop , black screen , or won’t turn on , looping on start, etc.
- The high success rate in resolving Android system issues.
- Compatible with a wide range of Android devices and OS versions
- User-friendly interface with easy-to-follow steps.
3981454 people have downloaded it

Key Features
Here’s what Dr.Fone offers as a powerful Android system repair software:
- Repair a wide variety of Android system issues.
- User-friendly interface that’s easy to navigate.
- No technical expertise required – it guides you step by step.
- Compatibility with a wide range of Google Pixel 7a devices.
Pros
Check out Dr. Fone’s benefits you can take advantage of:
- Easy and intuitive to use.
- Can fix a range of software-related problems.
- Doesn’t require deep technical knowledge.
- Can help you avoid expensive repair services
Cons
As for its drawback, refer below:
- Some complex issues might still require professional help.
How To Unbrick Google Pixel 7a Using Dr.Fone
This tutorial will show you how Dr.Fone can remove the brick from a Google Pixel 7a smartphone.
- Step 1: Launch Dr.Fone and head to the program’s left-hand panel, where you’ll find the Toolbox. You may fix your broken Android device by connecting it to your computer and selecting System Repair from the menu.
safe & secure
4,001,177 people have downloaded it
- Step 2: Select Android on the following screen to troubleshoot an Android device. After that, you’ll be brought to a new screen where you can initiate the fix by clicking Start.
- Step 3: When you click through to the next window, the service will automatically recognize the manufacturer of the Android device. Choose the appropriate Brand, Name, Model, Country, and Carrier from the drop-down menus. Select OPEN in the Carrier area if the phone is unlocked. The next step is to tick the box labeled I accept the risk and am ready to continue. Click Next to proceed with the rest of the Google Pixel 7a device repair.
Step 4: Put your Google Pixel 7a into Download Mode when prompted.
If your phone has a home button, follow the on-screen prompts to power it down. Keep pressing and holding the Volume Down, Home, and Power Then, press the Volume Upbutton to activate the Download Mode.
- If your Android doesn’t have a Home button, you may still use it byturning it off and pressing the Volume Down, Bixby, and Power buttons simultaneously. Repeatedly pressing the Volume Up button will activate Download Mode.
- Step 5: The firmware download starts on the platform immediately after the Google Pixel 7a device enters Download Mode. You can click Stop to abort it at any stage during the process. The platform then verifies and presents the information as it downloads. By selecting Fix Now, you can install the firmware.

- Step 6: The Android repair procedure may delete all of your data. To proceed, please type “000000” in the box provided. The system repair process will begin, and its status can be viewed in the next screen’s progress bar.
Take Note: Backing up your Android is necessary before doing any Android repair.
- Step 7: The prompt window will show the completion message. If the Android device boots normally, you can close the tool by clicking the Done button. Press the Try Again button to try powering on the Google Pixel 7a device again if it does not turn on automatically.
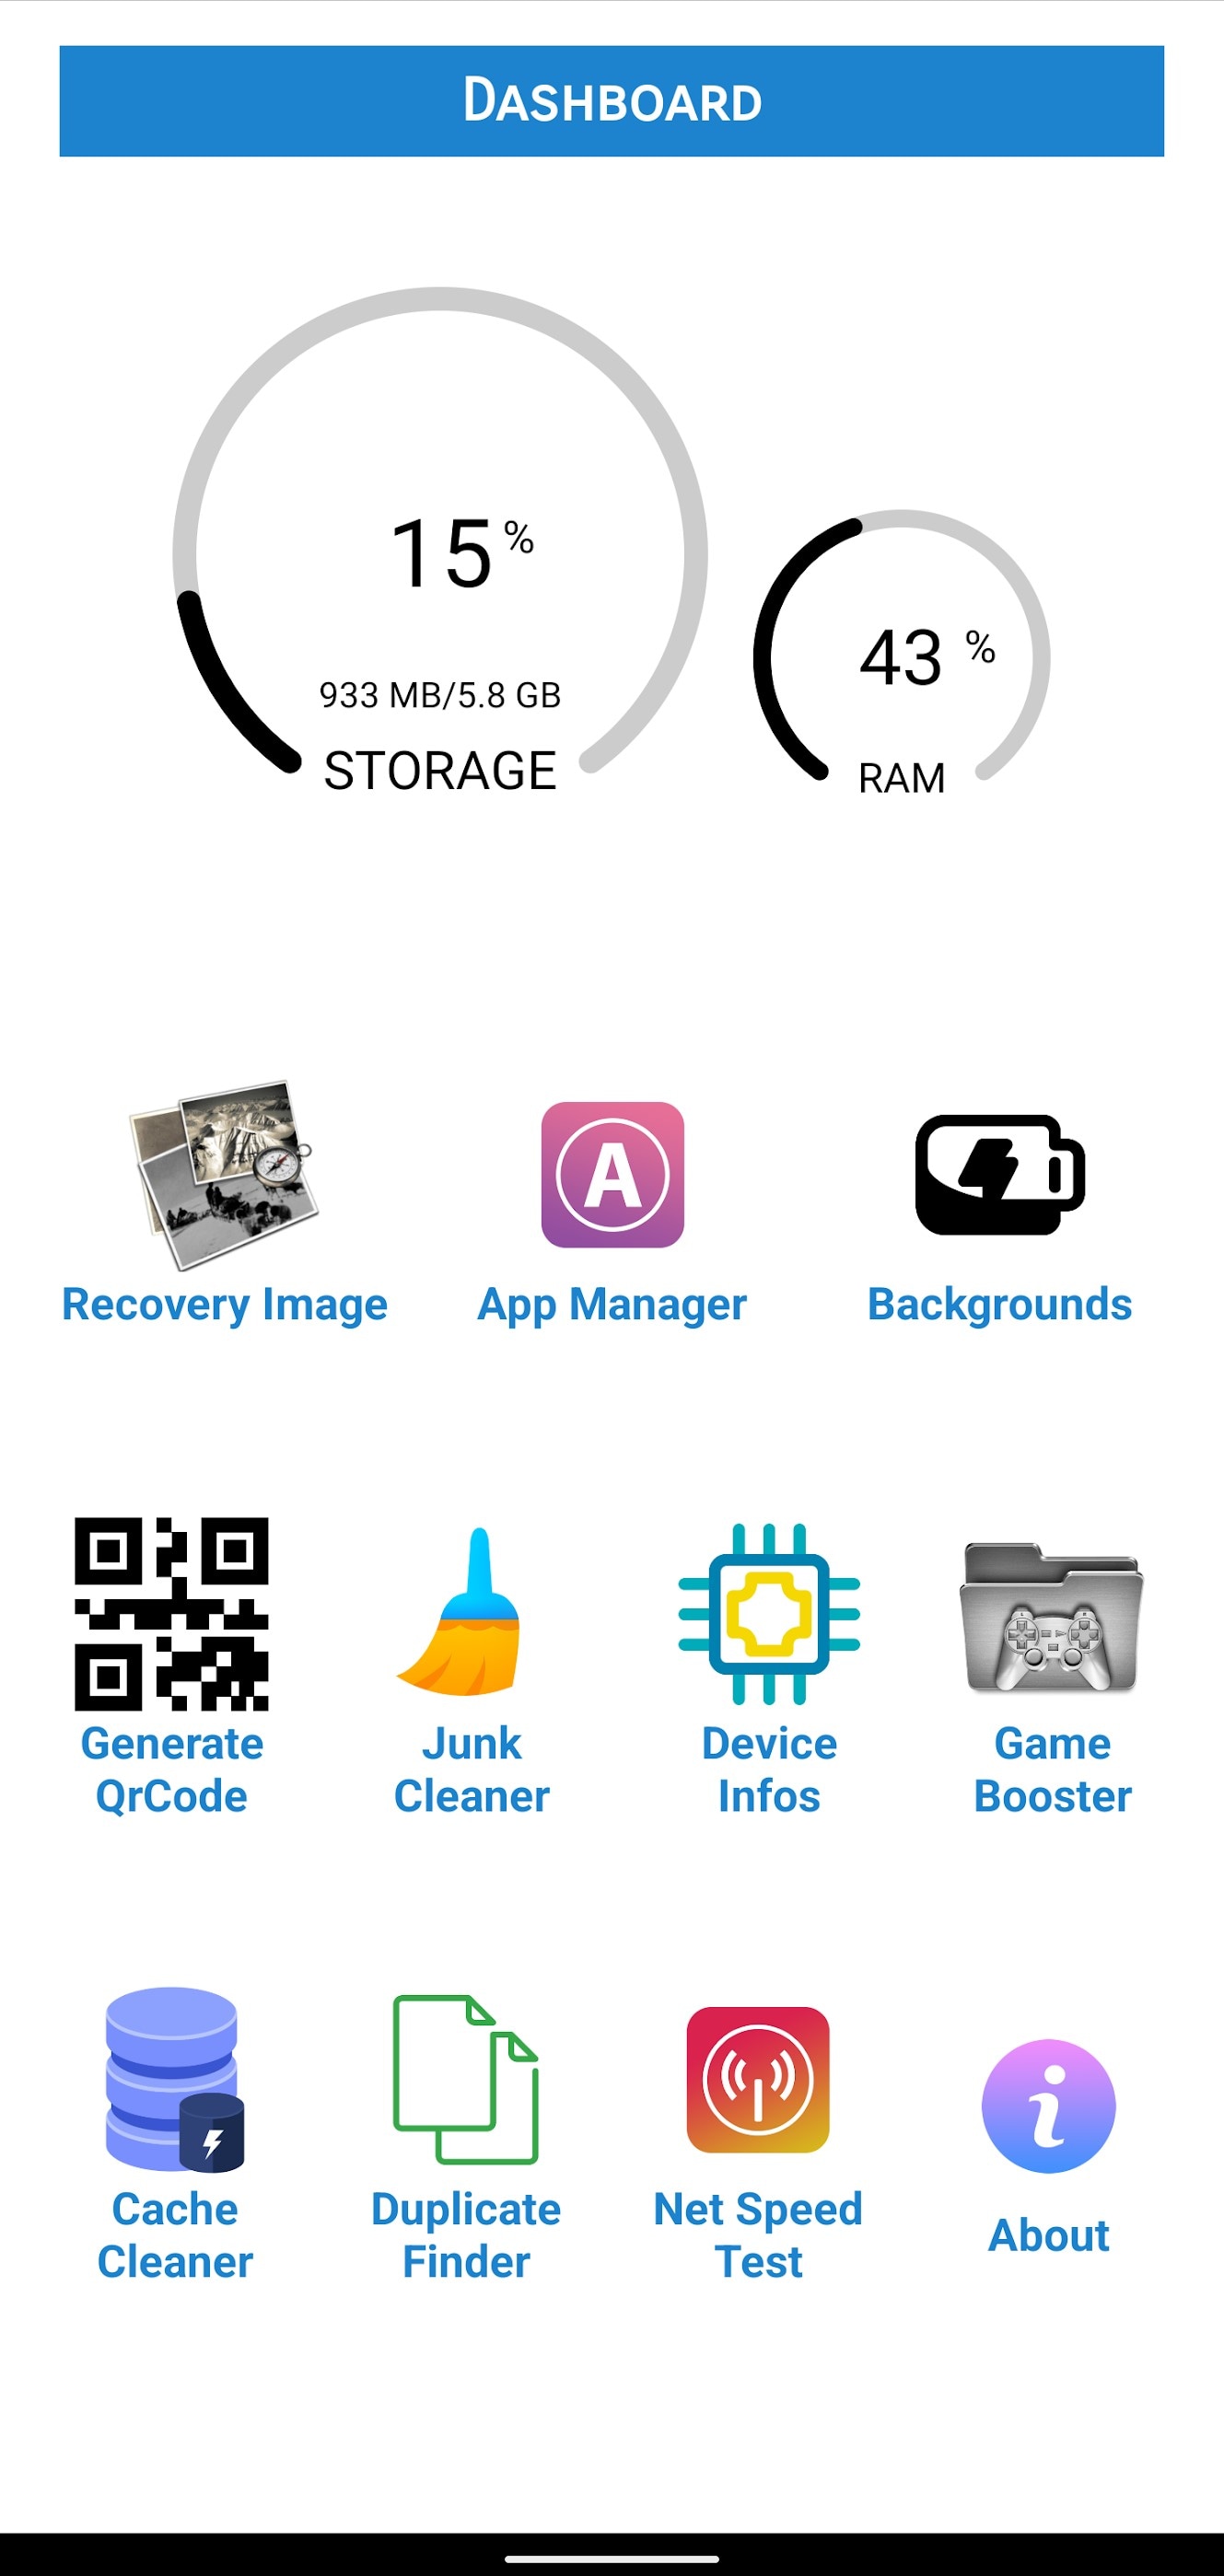
Repair System & Phone Master
This software is a real game-changer in resolving Android system problems. It specializes in repairing system issues, enhancing device performance, and cleaning up unnecessary files.
Key Features
Check out the key features of this software below:
- Repair a range of system issues, including bricking.
- Boost device speed and performance.
- Clean up junk files to free up space.
- The easy-to-use interface is suitable for all users.
Pros
Repair System & Phone Master’s advantages include the following:
- Straightforward operation.
- Focus on improving overall device performance.
- Can potentially extend your device’s lifespan.
Cons
Below is the disadvantage of this software:
- Repair capabilities might be limited for complex issues.
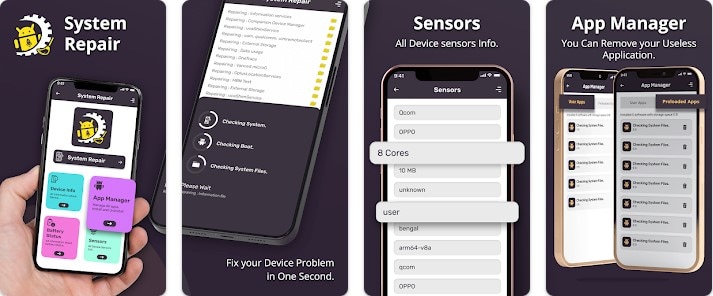
System Repair for Android
True to its name, System Repair for Android is designed to repair and rejuvenate your device’s Android system. It’s a reliable tool to tackle various software issues, including bricked devices.
Key Features
The key features of System Repair for Android app include:
- Repair various Android system problems.
- User-friendly interface for hassle-free operation.
Pros
As for its advantages, see the list below:
- Straightforward solution for commonsystem issues.
- Can save you from device replacement costs.
Cons
Check below to learn about this app’s drawback:
- Advanced issues might require professional intervention.
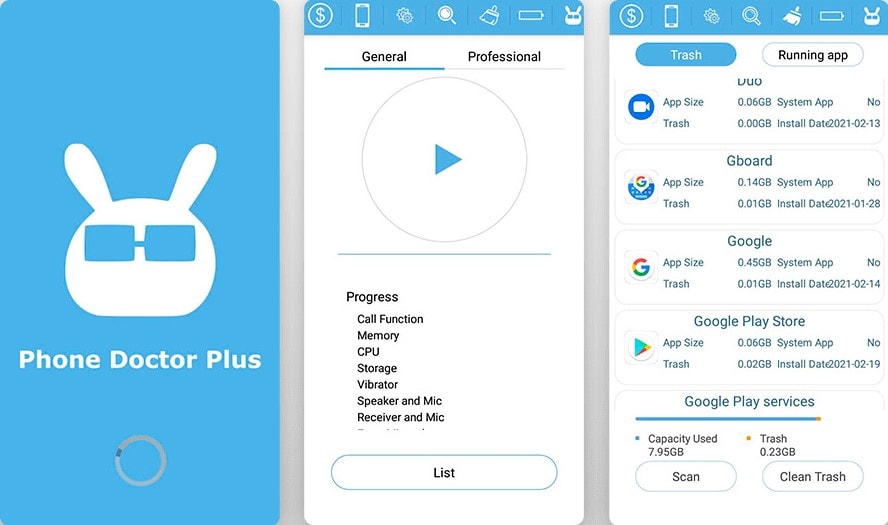
Phone Doctor Plus
Phone Doctor Plus is like a health check-up app for your device. It’s designed to repair system issues and diagnose hardware problems that might contribute to a bricked device.
Key Features
See Phone Doctor Plus’s essential features below:
- Diagnose and repair both software and hardware issues.
- Identify potential problems that could lead to bricking.
Pros
This app’s advantages include the following:
- Comprehensive diagnosis for both software and hardware.
- Can help you identify issues before they become serious.
Cons
Check out this app’s disadvantages below:
- Not solely focused on software repair, might not cover all scenarios.
Part 3: Tips on Preventing Future Bricking Incidents
Now that you know how to fix a bricked Google Pixel 7a smartphone, let’s focus on preventing it in the first place. Here are some simple steps you can take to keep your Google Pixel 7a device safe and sound:
- Regularly Check for Updates
Always keep your device’s software up to date. Updates often contain bug fixes and improvements that can prevent software-related issues.
- Use Reliable Tools and Software
When using any tools or software on your device, ensure they’re trusted and well-reviewed. Unreliable tools can lead to unexpected problems.
- Avoid Unauthorized Modifications
Avoid messing with your device’s software beyond basic settings unless you’re a tech expert. Unauthorized modifications can lead to bricking.
- Keep Your Battery Charged
Ensure your device has enough battery power before initiating software updates or installations. Low battery during critical processes can lead to issues.
- Backup Regularly
Regularly back up your device’s data to avoid losing important information during a bricking incident.
- Use Official Firmware
If you’re ever reinstalling or updating your device’s software, always use official firmware provided by the manufacturer.
- Utilize Safe Mode for Troubleshooting
If your device starts acting strange, try booting it into safe mode. This helps you identify if a third-party app is causing issues.
- Seek Professional Help
If you’re unsure about a particular action, seek help from experts. Trying to fix complex issues yourself can worsen the situation.
By following these easy tips, you can keep your Google Pixel 7a device running smoothly and avoid the hassle of dealing with a bricked device. Always remember, prevention is better than cure!
safe & secure
Conclusion
Encountering a bricked Google Pixel 7a device can be a frustrating roadblock. However, there’s a silver lining – the power of an Android system repair software like Dr.Fone – System Repair (Android). This user-friendly tool acts as your device’s superhero, rescuing it from the clutches of bricking incidents.
So, whether your device is experiencing a soft brick or a hard brick, you now have the best tools and knowledge to overcome it. Dive into the Android system repair software world, explore your options, and bid farewell to brick. Welcome a revived, functioning Google Pixel 7a device into your daily life.
Also read:
- [New] Effortless Transfer of Images to iOS Device for 2024
- [New] Unlocking the Full Potential Innovative Techniques for Youtube End Screen Designs
- 8 Workable Fixes to the SIM not provisioned MM#2 Error on Tecno Phantom V Flip | Dr.fone
- Bricked Your Oppo A58 4G? Heres A Full Solution | Dr.fone
- Complete Tutorial for Tecno Pova 5 Pro Hard Reset | Dr.fone
- In 2024, How to Change Google Play Location On Nubia Z50 Ultra | Dr.fone
- Premier Sound Recognition Technology for 2024
- Top 10 Fixes for Phone Keep Disconnecting from Wi-Fi On Tecno Spark Go (2023) | Dr.fone
- What To Do When Nokia C32 Has Black Screen of Death? | Dr.fone
- Title: Why Is My Google Pixel 7a Offline? Troubleshooting Guide | Dr.fone
- Author: Ariadne
- Created at : 2024-12-05 20:29:15
- Updated at : 2024-12-08 20:06:56
- Link: https://howto.techidaily.com/why-is-my-google-pixel-7a-offline-troubleshooting-guide-drfone-by-drfone-fix-android-problems-fix-android-problems/
- License: This work is licensed under CC BY-NC-SA 4.0.