
Why Your Itel P40+ Screen Might be Unresponsive and How to Fix It | Dr.fone
Why Your Itel P40+ Screen Might be Unresponsive and How to Fix It
This article aims to provide practical solutions for troubleshooting an unresponsive Itel P40+ screen. Whether you’re facing a software glitch or hardware damage, this guide will offer useful tips and tricks to help you resolve the issue and get your device back up and running smoothly.
5 Solutions to Solve Itel P40+ Screen Unresponsive Issues
An unresponsive Itel P40+ screen can be frustrating, but several potential solutions can help. This article will explore five methods for troubleshooting an unresponsive Itel P40+ screen. From force restarting your device to contacting customer service, we’ll cover everything you need to know to get your device back up and running.
1. Force Restart

If your Itel P40+ screen is unresponsive, the first thing to try is a force restart. This can help refresh the system and clear any temporary files causing the issue.
Step 1. Press and hold the power button on your Itel P40+ device.
Step 2. When the power options appear, tap “Restart.”
Step 3. Hold the power button if the screen is completely unresponsive until the Itel P40+ device shuts down. Then, press and hold the power button to turn the Itel P40+ device back on.
2. Drain the Battery Completely
If force restarting doesn’t work, let the battery drain completely. This can help reset the Itel P40+ device and clear any temporary files or processes causing the issue.
Step 1. Leave your Itel P40+ device on until the battery completely drains and the Itel P40+ device shuts down.
Step 2. Connect your device to a power source and turn it back on.
3. Check for Software Updates

Sometimes, an unresponsive Itel P40+ screen can be caused by outdated software. Checking for software updates ensures your device runs the latest and most stable operating system version.
Step 1. Go to “Settings“ on your Itel P40+ device.
Step 2. Scroll down and tap “Software Updates.”
Step 3. If an update is available, tap “Download and Install.”
4. Using Dr. Fone Repair

Dr. Fone Repair is a professional tool that can help fix a wide range of software issues on your Itel P40+ device. Dr. Fone Repair can be a good option to protect your data and files while troubleshooting an unresponsive Itel P40+ screen.
 safe & secure
Step 1. Download and install Dr. Fone Repair software on your computer.
Step 2. Connect your Itel P40+ phone to your computer using a USB cable.
Step 3. Launch Dr. Fone Repair and select the “System Repair“ option.
Step 4. Choose the “Android Repair“ option from the available choices.
Step 5. Click on “Start“ to begin the repair process.
Step 6. Provide the necessary device information on the screen, including your name and model.
Step 7. Click “Next“ to proceed to the next step.
Step 8. Follow the on-screen instructions to complete the repair process for your Itel P40+ phone’s touchscreen.
5. Contact Customer Service
If none of the above solutions work, it may be time to contact Itel P40+ customer service. They can provide additional support and help troubleshoot the issue.
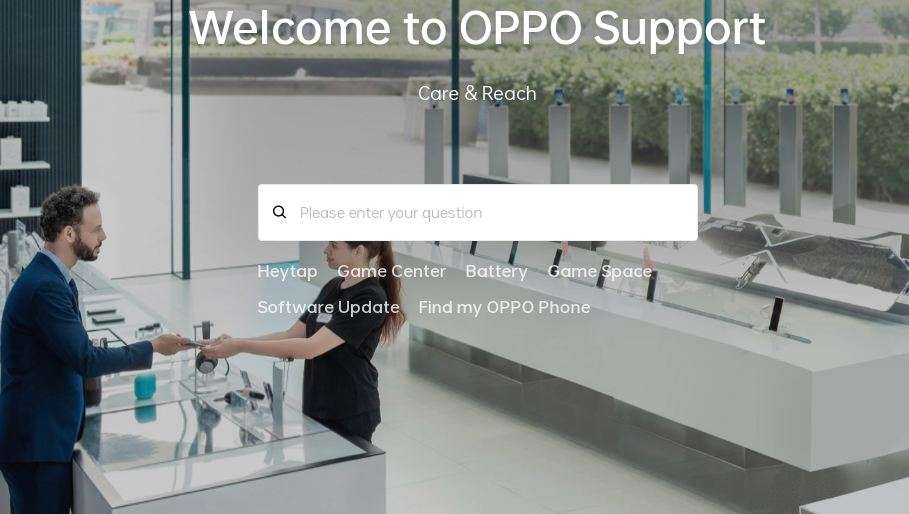
Step 1. Go to the Itel P40+ website and navigate to the “Support“ section.
Step 2. Select your device model and click “Contact Us.”
Step 3. Choose your preferred method of contact, such as phone or email, and describe the issue you’re experiencing.
Common Causes of Itel P40+ Screen Unresponsiveness
While Itel P40+ devices offer reliable performance, users may encounter situations where the screen becomes unresponsive or stuck on boot. Soft-bricked software or corrupted firmware can cause an Itel P40+ device to become unresponsive, including the screen stuck on the boot. This can happen to various models, such as the Itel P40+, A37, A5, and A5s. Software updates and resets can help fix these issues.
Over time, the touch screen of an Itel P40+ device may become unresponsive due to wear and tear. This can happen to models like the Itel P40+ F1s and F3. In this case, replacing the touch screen or seeking professional assistance may be necessary.
Dropping or impacting an Itel P40+ device can cause physical damage to the touch screen, resulting in unresponsiveness. This can happen to various models like the Itel P40+ Reno and Find X. In some cases, the damage may be repairable, but the screen replacement or the Itel P40+ device itself may be necessary in severe cases. Protecting the Itel P40+ device with a case and handling it carefully to prevent physical damage is important.
While Itel P40+ devices are generally reliable, various factors can contribute to screen unresponsiveness. Users can effectively troubleshoot and resolve issues by identifying these potential causes and seeking appropriate solutions.
How to Avoid Itel P40+ Screen Unresponsiveness Issue
One of the most effective ways to prevent Itel P40+ Screen unresponsiveness is by keeping the Itel P40+ device software up-to-date. Regularly checking for system updates and installing them promptly can prevent software issues and potential bugs that may cause unresponsiveness. Additionally, updating device apps can help prevent conflicts that affect the touch screen’s functionality.
Another way to avoid Itel P40+ Screen unresponsiveness is by protecting the Itel P40+ device from physical damage. Using a protective case or screen protector can help prevent cracks or scratches on the screen that can lead to unresponsiveness. Avoiding impacts or drops can also reduce the risk of physical damage to the touch screen.
Installing apps from unknown sources or suspicious websites can expose the Itel P40+ device to malware and viruses, which can cause unresponsiveness and other issues. To avoid this, it’s recommended to only install apps from trusted sources such as the Google Play Store or the Itel P40+ App Store.
Using a reliable tool like Dr. Fone can help prevent Itel P40+ Screen unresponsiveness by allowing you to manage and repair your device’s software and data. With features such as System Repair and Data Backup & Restore, you can quickly diagnose and fix software issues that may cause unresponsiveness and safely back up important data to prevent loss in case of device damage or malfunction.
Conclusion
Itel P40+ Screen unresponsiveness can be a frustrating issue to deal with, but there are solutions available. Force restarting the Itel P40+ device, checking for software updates, using Dr. Fone Repair, and contacting customer service are all effective ways to solve the problem. However, it’s also important to understand the possible causes of the issue, such as soft-bricking or equipment wearing out, and take preventative measures, such as updating your phone on time and avoiding malware. These tips can help prevent Itel P40+ Screen unresponsiveness and keep your device running smoothly.
safe & secure
Proven Ways to Fix There Was A Problem Parsing the Package on Itel P40+
Unable to install your favorite Apps from Google Play Store because there was a problem parsing the package?
The Parse Error or there was a problem parsing the package error is very common with Android devices. Android is a versatile platform and, therefore, a very popular OS. It is an open software and allows users to download and use various types of apps from the Play store. Android is also a cheaper alternative as compared to other Operating Software.
Since many of us are well versed with most of the Android devices, parse error, or there is a problem parsing the package is an error is not something new and uncommon.
The error message usually pops up on the Itel P40+ device screen when we try to download and install an App, for example, “There is a problem parsing the package Pokémon Go ”.
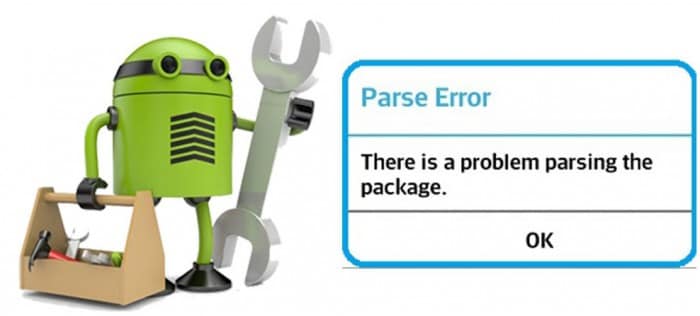
The error message which appears reads as follows:
“Parse error: There is a problem parsing the package”.
Android users who have experienced this would know that the parse error leaves us with only one option, i.e., “OK” as shown in the image below.
There was a problem parsing the package may occur due to several reasons, most of which are listed and explained below. Furthermore, there is a list of solutions to choose from to eliminate the “there is a problem parsing the package” error.
Read on to find out more.
Part 1: Reasons for the parsing error
Parse Error, better known as “there was a problem parsing the package” error is very common and normally surfaces when we try to download and install new Apps onto our Android devices from Google Play Store.
The reason for the error message to pop-up are many but none of them can be blamed singularly for the “there is a problem parsing the package” error. Given below is a list of the most probable reasons for Parse Error to stop an App from installing. Examine them carefully before moving on to the solutions to fix the “there was a problem parsing the package” error.
• Updating the OS may cause some disturbances in the manifest files of different Apps leading to Parse Error.
• Sometimes, the APK File, i.e., Android Application Package, gets infected due to improper or incomplete App installation causing “there is a problem parking the package” error.
• When Apps are downloaded and installed from unknown sources, due permission is needed. In the absence of such permission, the chances of the Parse Error to occur increase.
• Certain Apps are not compatible or supported by the latest and updated Android versions.
• Anti-virus and other cleaning Apps are also a major reason for the “there was a problem parsing the package” error.
The causes listed above are not App specific. The Parse Error may occur due to any one or more of these reasons, but what is more important is to try to get rid of the problem.
Let us move on to learn ways to fix the there was a problem parsing the package error.
Part 2: 8 Solutions to fix the parsing error
“There is problem parking the package” error can be dealt with easily if only we do not panic and deliberately follows the steps explained in this segment. Here are 7 of the most reliable and trustworthy methods to fix the Parse Error.
They are easy, user-friendly, and do not take much of your time. So don not waste any more of your time and try them now.
2.1 One Click to Fix ‘There is a Problem Parsing the Package
If you’re still encountering the Parsing error, there may be a problem with the Itel P40+ device data on your device, which means you’ll need to repair it. Luckily, there’s a simple, one-click solution you can follow called Dr.Fone - System Repair .
Dr.Fone - System Repair (Android)
Android repair tool to fix all android system issues in one click
- Simple, clean, and user-friendly interface
- No technical knowledge required
- Easy one-click repair to fix ‘there is a problem parsing the package’ error
- Should repair most parsing problems with apps, like ‘there is a problem parsing the package Pokemon Go’ error
- Supports most Itel P40+ devices and all the latest models like Galaxy S9/S8/Note 8
3981454 people have downloaded it
If this sounds like the solution you’re looking for, here’s a step by guide on how to use it yourself;
Note: Please note that this repair process can erase all data on your phone, including your personal information. This is why it’s so important to back up your Itel P40+ before proceeding.
Step #1 Head over to the Dr.Fone website and download the software. Install the downloaded software and open it. From the main menu, select the System Repair option.

Input your device and firmware information to confirm you’re installing the right version of the operating system.

Step #2 Follow the onscreen instructions on how to get into Download Mode to start the Repair process.

Once complete, the firmware will start downloading.

Step #3 Once the firmware has downloaded, it will automatically install it to your device.
When this is completed, you’ll be free to disconnect your Itel P40+ and use it how you please without the ‘there is a problem with the parsing package’ error.

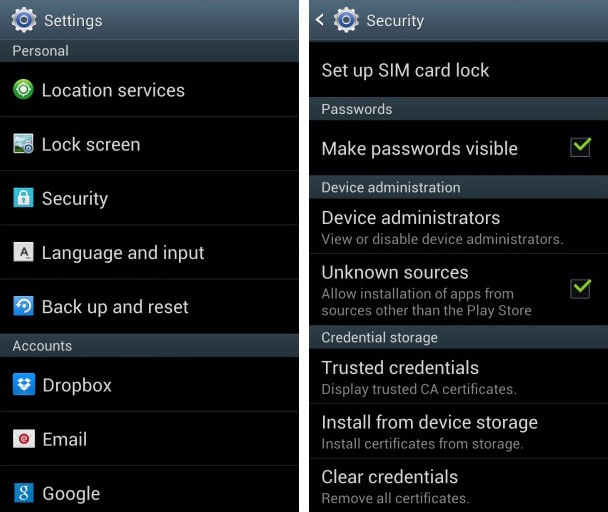
2.2 Allow installation from unknown sources
When we install Apps from other sources and not Google Play Store, there might be a glitch in using such Apps. To overcome this problem, turn on “Allow App installation from other sources”. Follow the steps given below for better understanding:
• Visit “Settings” and select “Applications”.
• Now tick mark on the option saying allow App installation from unknown sources.
2.3 Enable USB debugging
USB debugging is not considered necessary by many users but these methods give you an edge over others while using an Android device as it lets you access things on your phone, etc which you could not earlier.
To enable USB Debugging to fix “There is a problem parsing the package” error, follow these steps:
• Visit “Settings” and select “About Device”.
• Now click on “Build Number” not once but continuously for seven times.

• Once you see a pop-up saying “You are now a developer”, go back to “Settings”.

• In this step, select “Developer Options” and turn on “USB Debugging”.

This should solve the problem. If not, move on to the other techniques.
2.4 Check APK File
An incomplete and irregular App installation may cause the .apk file to get corrupted. Make sure you download the file completely. If need be, delete the existing App or its .apk file and reinstall it from Google Play Store for it to be compatible with your device’s software and to use the App smoothly.
2.5 Check App Manifest File
Manifested App files are nothing but .apk files which are improvised by you. Such changes may cause the Parse Error to occur more frequently. Modifications in the App file can be made by changing its name, App settings, or more advanced customizations. Make sure you roll back all changes and restore the App file to its original state to prevent it from getting corrupted.
2.6 Disable Antivirus and other cleaner Apps
Antivirus software and other cleaning Apps are very helpful in blocking unwanted and harmful Apps from damaging your device. However, sometimes such Apps also prevent you from using other safe Apps.
We do not suggest that you delete the Antivirus App permanently. Temporary uninstallation will be useful here. To do so:
• Visit “Settings” and then select “Apps”.
• Select the antivirus App to click on “Uninstall” and then tap “OK”.
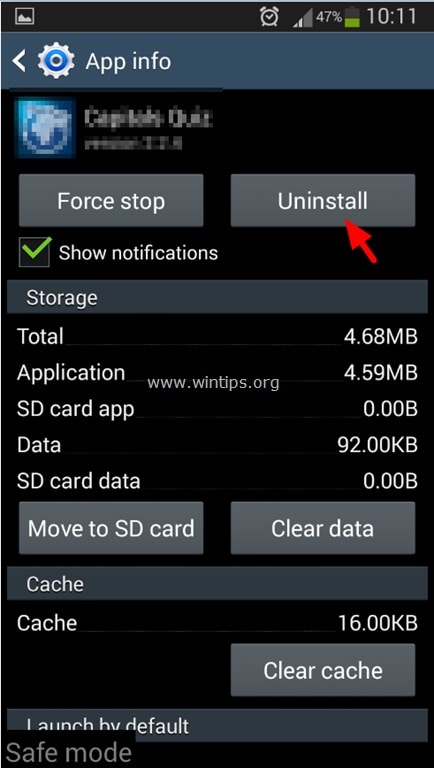
Now download and install the desired App again. Once this is done, do not forget to install the Antivirus App again.
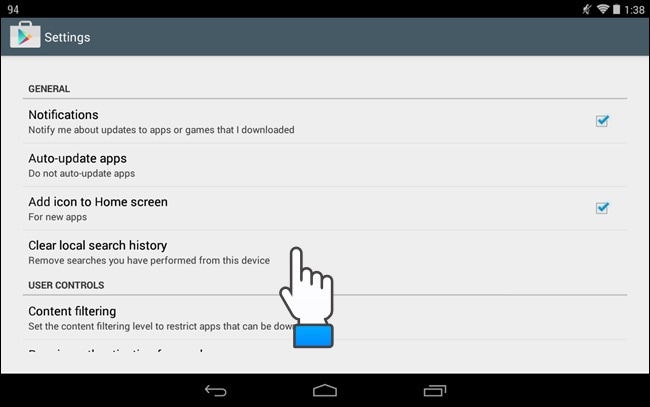
2.7 Clear Cache cookies of Play Store
Clearing Play Store Cache cleans the Android Market platform by deleting all clogged up unwanted data. Follow the steps given below to delete Play Store cache:
• Tap on Google Play Store App.
• Now visit Play Store’s “Settings”.

• Select “General Settings” to “Clear local search history”.
2.8 Factory Reset Android
Factory Resetting your device to fix the Parse Error should be the last thing you try. Make sure you take a back-up of all your data on your Google Account or a Pen Drive because this technique erases all media, contents, data, and other files, including your device settings.
Follow the steps given below to factory reset your device:
• Visit “Settings”.
• Now select “Backup and Reset”.

• In this step, select “Factory data reset” and then “Reset Device” to confirm Factory Reset.
The whole process of factory resetting your Itel P40+ might sound tedious, risky, and cumbersome but it helps to fix the Android SystemUI has stopped error 9 out of 10 times. So, think carefully before using this remedy.
Parse Error: There was a problem parsing the package is an error message that has troubled many Android users. The good part is that the above-stated fixes not only solve the problem but also prevent it from occurring in the future. So, keep them in mind the next time you or anyone you know faces such an issue.
Cellular Network Not Available for Voice Calls On Itel P40+
The “Cellular Network Not Available for Voice Calls“ error is a common experience for many Android users. In our contemporary world, communication stands as the fundamental pillar of our existence. Yet, the malfunctioning of our devices hinders this connectivity. It often gives rise to numerous complications. Fortunately, your concerns are now a thing of the past.
This article serves as your guide for troubleshooting and overcoming this frustrating dilemma. It has compiled expert perspectives, valuable tips, and detailed, systematic solutions. The article will go through the underlying causes behind this issue and explore potential fixes. By the conclusion of this article, you’ll be armed with the necessary knowledge to tackle this problem.

Part 1. Preliminary Reasons For Cellular Network Not Available For Voice Calls
Facing the “Cellular Network Not Available for Voice Calls Android“ error can be overwhelming. Thus, it becomes evident that specific reasons underlie this issue. Solutions indeed exist to tackle this problem. Yet, comprehending the underlying reasons is equally crucial to resolve the issue:
1. Internet Access
One primary reason behind cellular network unavailability glitches lies in unstable internet access. Voice calls over cellular networks often require a stable internet connection. When this connection fluctuates or drops, it can result in the dreaded error message.
2. Terrain Coverage
Another contributing factor is the geographical terrain. In remote or sparsely populated areas, cellular tower coverage might be limited. It causes a signal disturbance or complete loss of the network.
3. Network Congestion
During peak usage hours or in densely populated areas, network congestion can also be a cause. It leads to temporary unavailability of the cellular network for voice calls. When the network is overloaded with traffic, it might struggle to accommodate more voice calls. That results in connectivity issues.
4. Technical Glitches
Furthermore, technical glitches within the Itel P40+ device or network infrastructure can cause this issue. These glitches could range from software bugs to hardware malfunctions.
5. Battery or Power Issues
In some instances, insufficient battery power or power-saving modes on devices can cause this issue. They affect the Itel P40+ device’s capacity to sustain a consistent connection with the cellular network. This consequently causes voice call unavailability.
Part 2. Prominent Solutions For Cellular Network Not Available For Voice Calls Android
A myriad of purposeful solutions exists to resolve the TracFone cellular network not available for voice calls issue. These solutions are specifically designed to address various underlying causes. The aim of these solutions is to restore smooth connectivity for voice calls. Described below are the top 8 solutions to fix the “Cellular Network Not Available” error:
| Method | Efficiency | Difficulty | Duration (Minutes) |
|---|---|---|---|
| Check Network Availability | Moderate | Easy | 5-10 |
| Check Airplane Mode | Low | Easy | 2-5 |
| Select Network Operator | Moderate | Moderate | 5-10 |
| Restart Device | Low to Moderate | Easy | 3-5 |
| Enable Roaming Settings | Moderate | Easy | 3-7 |
| Update Android Smartphone | Moderate | Moderate | 15-30 |
| Performing Factory Reset | High (Last Resort) | Difficult | 30-60+ |
| Contact Carrier Provider | High (Specialized Help) | Moderate | Varies (Depends on Carrier Provider) |
| Wondershare Dr.Fone - System Repair | Highest (Complex Issues) | Easiest | 5-10 |
Solution 1. Check the Availability of Cellular Networks
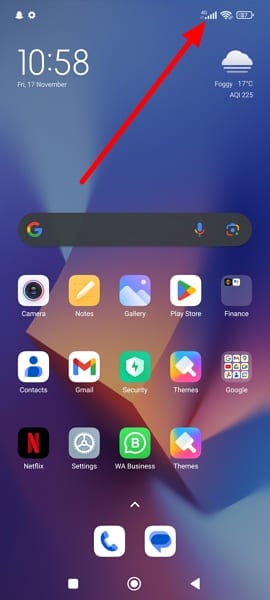
Before diving into complex fixes, the first thing to do is to check if nearby cell networks are available and how strong their signals are. It is an essential step when trying to fix the “Cellular Network Not Available“ error. This basic check ensures your phone is close enough to a working network tower, which matters for staying connected. It allows you to find out the availability of nearby cellular networks.
Moreover, with it, you can ensure your device is connected to a reliable network. This preliminary check sets the foundation for further troubleshooting.
Solution 2. Check the Airplane Mode of the Smartphone
Another crucial step in resolving this error involves ensuring that the Airplane Mode is disabled. This mode, when activated, disables all wireless connections. It also includes cellular networks, which could lead to connectivity issues. Follow these simple steps to check and disable Airplane Mode on your device:
Instructions: Swipe down on your phone’s screen from the top to access the Notification Panel, unveiling the Quick Settings tiles. Search for the airplane-shaped icon; if Airplane Mode is active, the icon will be highlighted or shown in a distinct color. Tap the Airplane Mode to turn off the Airplane Mode on your Android.

Solution 3. Selecting the Network Operator of the Itel P40+ device
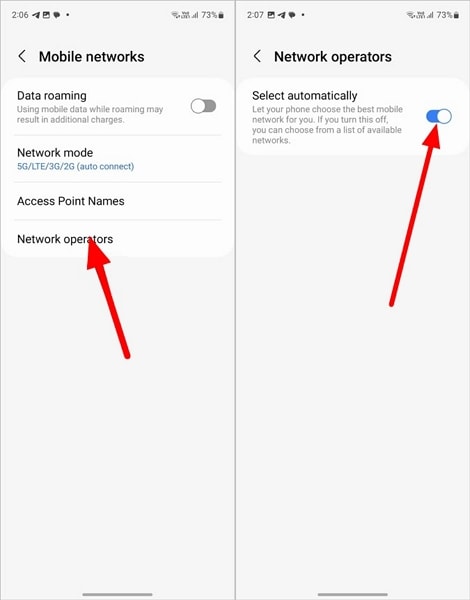
In certain instances, manually selecting your network operator can help. It effectively resolves the “Cellular Network Not Available for Voice Calls Android“ error on your Itel P40+. By choosing the network operator manually, you ensure a deliberate connection to a specific carrier. This potentially bypasses issues related to automatic network selection. Follow these steps to select your network operator manually:
- Step 1. Access “Settings” on your Itel P40+, then tap on “Connections.” From there, navigate to “Mobile Networks” and proceed by selecting “Network Operators.”

- Step 2. Look for the “Automatically Select” toggle, which will be turned on. Toggle it off to see available networks and choose the one best suited to your device.
Solution 4. Restart Your Device
Sometimes, resolving the “Cellular Network Not Available for Voice Calls“ error on your Itel P40+ can be as simple as performing a restart. This basic troubleshooting step helps refresh the Itel P40+ device’s software. It clears temporary glitches and reestablishes essential connections, potentially resolving network-related issues. Follow these straightforward steps to restart your Itel P40+:
Instructions: Hold down the “Power” button until the Power menu emerges on the display. From there, select “Restart” to initiate the Itel P40+ device’s reboot process.

Solution 5. Enable Roaming Settings
There are situations where you’re in an area with weak or no coverage from your primary network provider. In such a case, enabling roaming settings on your Itel P40+ can sometimes resolve the issue at hand. Enabling roaming allows your device to connect to partner networks. This extends your coverage beyond your home network’s reach. Follow these steps to enable roaming settings on your Itel P40+:
- Step 1. Start by accessing your device’s Settings and tapping the “Connections” option. Here, scroll downward to press “Mobile Networks.”

- Step 2. Presently, you will encounter the “Data Roaming” option. Toggle this option on to enable data roaming on your device and resolve the issue.

Solution 6. Update Android Smartphone
Updating your Itel P40+’s OS to the latest version can often resolve performance issues. It can also fix network connectivity issues, including the “Cellular Network Not Available” error. Manufacturers regularly release system updates containing bug fixes and security patches. It also includes enhancements that can address underlying software-related problems. Follow these steps to update your Android smartphone:
- Step 1. In your device’s Settings, scroll through to find the “Software Update” option. Select it, and on the subsequent screen, verify the availability of any updates.

- Step 2. If an update is accessible, select the ‘Download and Install’ choice. Then, proceed by following the prompts displayed on the screen to finalize the process.

Solution 7. Performing Factory Reset
Performing a factory reset is a drastic but effective measure. It can resolve persistent software-related issues, including the “Cellular Network Not Available” error. Be aware that initiating a factory reset results in the deletion of all data and settings stored on your device. Hence, it is crucial to back up any vital information before proceeding with this action. Here is how to fix the Verizon cellular network not available for voice calls:
- Step 1. To access your device’s “General Management” section, navigate through Settings. There, tap on “Reset,” and select “Factory Data Reset” from the subsequent screen.

- Step 2. You will need to tap “Reset” to confirm your choice. Then, follow the on-screen guidelines carefully to complete the reset process.

Solution 8. Contact Carrier Provider
If you’ve exhausted all options and the issue persists, reaching out to your carrier provider for assistance is a viable solution. Carrier providers can offer specific insights and guidance regarding network-related issues. When connected to customer service, explain the issue you’re experiencing in detail. Contacting your carrier provider enables you to tap into their expertise and resources.

You May Also Like:
Top 5 DFU Tools for iPhone to Enter DFU Mode
9 Ways to Fix iPhone Error 4013 or iTunes Error 4013
Itel P40+ ROM Download & Install: The Definitive Guide
Part 3. [100% Resolvable] Resolve Cellular Network Not Available For Calls Issues
Despite all your attempts, the cellular network not available for voice calls remains unresolved. It might state a more complex software-related issue or glitch within the Itel P40+ device. However, there’s a solution designed explicitly for addressing such complex issues. That software is Wondershare Dr.Fone, a comprehensive toolkit for Android devices. It stands out as the world’s first one-click Android repair tool.
Dr.Fone specializes in resolving a wide array of Android system issues, including the notorious black screen of death. With this tool, users can effortlessly restore their Android system to normal functionality.
Key Features of Wondershare Dr.Fone
- Fone’s advanced repairing mechanism has the ability to repair even the bricked Android devices.
- This tool supports more than 1000 models of Android devices across different brands for system repair.
- It boasts the highest success rate when it comes to fixing Android devices.
![]()
Dr.Fone - System Repair (Android)
Repair Android System Errors without Any Trouble.
- Fix your Android to normal, no skills required.
- Fix various Android system issues, stuck in boot loop , black screen , or won’t turn on , looping on start, etc.
- The high success rate in resolving Android system issues.
- Compatible with a wide range of Android devices and OS versions
- User-friendly interface with easy-to-follow steps.
3981454 people have downloaded it
Steps Needed To Fix the Cellular Network Not Available for Calls Issue via Wondershare Dr.Fone
The following are the steps to resolve the Tracfone cellular network not available for voice calls using Wondershare Dr.Fone:
- Step 1. Open Wondershare Dr.Fone and Opt for System Repair
Launch the software. Then, navigate to the “Toolbox” section located in the left panel. Connect your Itel P40+ and proceed by choosing “System Repair.” Then, opt for “Android” to specify the Itel P40+ device type. On the subsequent screen, click “Start” to commence the repair procedure.
- Step 2. Provide Details of Your Android Device
The system automatically identifies the brand of the Android device undergoing repair. Afterward, choose the “Name,” “Model,” “Country,” and “Carrier” from the provided list options. If the Itel P40+ device is already unlocked, you can choose OPEN in the Carrier section. Then, confirm by checking the warning box indicating agreement and readiness to proceed. Click on “Next” to initiate the repair process for your Itel P40+.
- Step 3. Complete the Android Repair Process Successfully
Follow the guidance displayed on your device’s screen to access Download Mode. Once in, the firmware download begins automatically. During this process, the platform verifies and presents the firmware details. Select “Fix Now” to proceed with the installation of the firmware onto your Itel P40+. Since Android repair will result in the deletion of all data, input “000000” to confirm. This action initiates the system repair process.

safe & secure
3,336,459 people have downloaded it
Conclusion
In conclusion, facing the “Cellular Network Not Available for Voice Calls“ problem on your Itel P40+ can be frustrating. This article has explored many ways to fix this issue. These include simple checks like turning off Airplane Mode to solutions like contacting your carrier. However, when facing persistent network problems, a tool like Wondershare Dr.Fone becomes the only hope.
Among the various methods discussed, Dr.Fone stands out as a top choice. Its thorough system repair function targets and removes complex software glitches. The tool’s easy interface, broad compatibility, and secure repair process make it perfect. It is ideal for users looking for a reliable solution beyond regular troubleshooting.
![]() Why isn’t My Itel P40+ establishing a connection with the cellular network?
Why isn’t My Itel P40+ establishing a connection with the cellular network?
![]() What steps can I take when the mobile network isn’t available?
What steps can I take when the mobile network isn’t available?
![]() What might be causing my SIM card to not display a network?
What might be causing my SIM card to not display a network?
Also read:
- [New] Ace Circular Designs & Spherical Structures in MC for 2024
- [New] In 2024, The Slow-Motion Journey for Aspiring IG Video Makers
- [Updated] Innovative Ways to Implement B Roll in Productions
- 「🔁魅力的な動画を一発で手早く作成! iPhone/Android用の逆再生アプリトップ5」
- 2024 Approved The Ultimate Guide to Android's MOBAs
- 4 Ways to Fix Android Blue Screen of Death On Vivo S18 | Dr.fone
- 7 Fixes for Unfortunately, Phone Has Stopped on Poco X6 Pro | Dr.fone
- 8 Quick Fixes Unfortunately, Snapchat has Stopped on Vivo Y28 5G | Dr.fone
- Amplify Your PC’s Performance: The DuoBlast Air Chiller by CyberFlow Cools Dual CPUs Seamlessly
- Android Safe Mode - How to Turn off Safe Mode on Realme GT Neo 5 SE? | Dr.fone
- Core Library Loader Dll Deficiency Noted
- Expand Horizons with Dual Booting - Windows & OS/SteamOS
- Fix Unfortunately Settings Has Stopped on Motorola Edge+ (2023) Quickly | Dr.fone
- Gmail Not Working on Vivo Y100i 7 Common Problems & Fixes | Dr.fone
- In 2024, A Quick Guide to Tecno Camon 30 Pro 5G FRP Bypass Instantly
- In 2024, The Definitive List High-Quality, Costless LUT Options Explored
- What to Do if Google Play Services Keeps Stopping on Poco M6 Pro 4G | Dr.fone
- What To Do if Your Nokia G42 5G Auto Does Not Work | Dr.fone
- Why Your Xiaomi Redmi Note 12 5G Screen Might be Unresponsive and How to Fix It | Dr.fone
- Title: Why Your Itel P40+ Screen Might be Unresponsive and How to Fix It | Dr.fone
- Author: Ariadne
- Created at : 2024-11-25 10:51:31
- Updated at : 2024-11-30 06:02:33
- Link: https://howto.techidaily.com/why-your-itel-p40plus-screen-might-be-unresponsive-and-how-to-fix-it-drfone-by-drfone-fix-android-problems-fix-android-problems/
- License: This work is licensed under CC BY-NC-SA 4.0.