
Why Your Nokia G310 Screen Might be Unresponsive and How to Fix It | Dr.fone
Why Your Nokia G310 Screen Might be Unresponsive and How to Fix It
This article aims to provide practical solutions for troubleshooting an unresponsive Nokia G310 screen. Whether you’re facing a software glitch or hardware damage, this guide will offer useful tips and tricks to help you resolve the issue and get your device back up and running smoothly.
5 Solutions to Solve Nokia G310 Screen Unresponsive Issues
An unresponsive Nokia G310 screen can be frustrating, but several potential solutions can help. This article will explore five methods for troubleshooting an unresponsive Nokia G310 screen. From force restarting your device to contacting customer service, we’ll cover everything you need to know to get your device back up and running.
1. Force Restart

If your Nokia G310 screen is unresponsive, the first thing to try is a force restart. This can help refresh the system and clear any temporary files causing the issue.
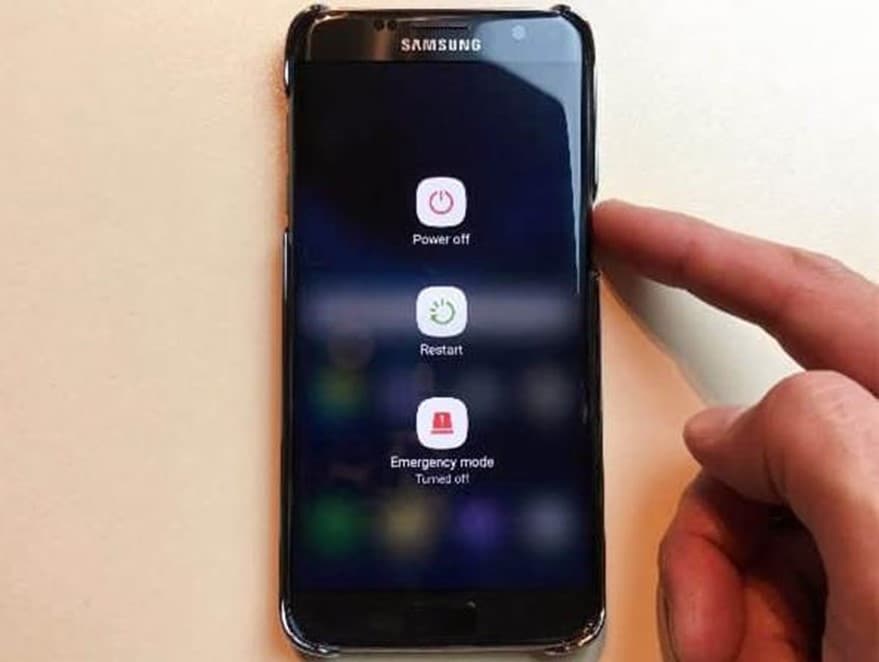
Step 1. Press and hold the power button on your Nokia G310 device.
Step 2. When the power options appear, tap “Restart.”
Step 3. Hold the power button if the screen is completely unresponsive until the Nokia G310 device shuts down. Then, press and hold the power button to turn the Nokia G310 device back on.
2. Drain the Battery Completely
If force restarting doesn’t work, let the battery drain completely. This can help reset the Nokia G310 device and clear any temporary files or processes causing the issue.
Step 1. Leave your Nokia G310 device on until the battery completely drains and the Nokia G310 device shuts down.
Step 2. Connect your device to a power source and turn it back on.
3. Check for Software Updates

Sometimes, an unresponsive Nokia G310 screen can be caused by outdated software. Checking for software updates ensures your device runs the latest and most stable operating system version.
Step 1. Go to “Settings“ on your Nokia G310 device.
Step 2. Scroll down and tap “Software Updates.”
Step 3. If an update is available, tap “Download and Install.”
4. Using Dr. Fone Repair

Dr. Fone Repair is a professional tool that can help fix a wide range of software issues on your Nokia G310 device. Dr. Fone Repair can be a good option to protect your data and files while troubleshooting an unresponsive Nokia G310 screen.
 safe & secure
Step 1. Download and install Dr. Fone Repair software on your computer.
Step 2. Connect your Nokia G310 phone to your computer using a USB cable.
Step 3. Launch Dr. Fone Repair and select the “System Repair“ option.
Step 4. Choose the “Android Repair“ option from the available choices.
Step 5. Click on “Start“ to begin the repair process.
Step 6. Provide the necessary device information on the screen, including your name and model.
Step 7. Click “Next“ to proceed to the next step.
Step 8. Follow the on-screen instructions to complete the repair process for your Nokia G310 phone’s touchscreen.
5. Contact Customer Service
If none of the above solutions work, it may be time to contact Nokia G310 customer service. They can provide additional support and help troubleshoot the issue.
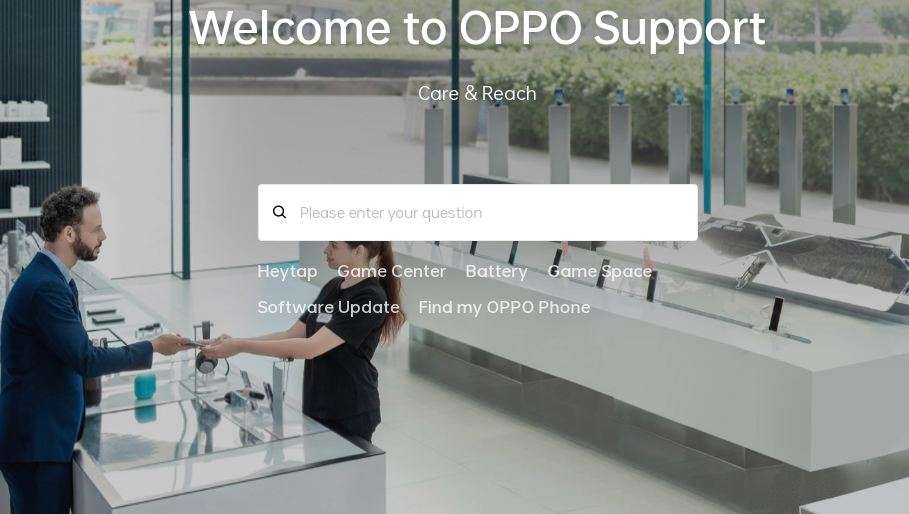
Step 1. Go to the Nokia G310 website and navigate to the “Support“ section.
Step 2. Select your device model and click “Contact Us.”
Step 3. Choose your preferred method of contact, such as phone or email, and describe the issue you’re experiencing.
Common Causes of Nokia G310 Screen Unresponsiveness
While Nokia G310 devices offer reliable performance, users may encounter situations where the screen becomes unresponsive or stuck on boot. Soft-bricked software or corrupted firmware can cause an Nokia G310 device to become unresponsive, including the screen stuck on the boot. This can happen to various models, such as the Nokia G310, A37, A5, and A5s. Software updates and resets can help fix these issues.
Over time, the touch screen of an Nokia G310 device may become unresponsive due to wear and tear. This can happen to models like the Nokia G310 F1s and F3. In this case, replacing the touch screen or seeking professional assistance may be necessary.
Dropping or impacting an Nokia G310 device can cause physical damage to the touch screen, resulting in unresponsiveness. This can happen to various models like the Nokia G310 Reno and Find X. In some cases, the damage may be repairable, but the screen replacement or the Nokia G310 device itself may be necessary in severe cases. Protecting the Nokia G310 device with a case and handling it carefully to prevent physical damage is important.
While Nokia G310 devices are generally reliable, various factors can contribute to screen unresponsiveness. Users can effectively troubleshoot and resolve issues by identifying these potential causes and seeking appropriate solutions.
How to Avoid Nokia G310 Screen Unresponsiveness Issue
One of the most effective ways to prevent Nokia G310 Screen unresponsiveness is by keeping the Nokia G310 device software up-to-date. Regularly checking for system updates and installing them promptly can prevent software issues and potential bugs that may cause unresponsiveness. Additionally, updating device apps can help prevent conflicts that affect the touch screen’s functionality.
Another way to avoid Nokia G310 Screen unresponsiveness is by protecting the Nokia G310 device from physical damage. Using a protective case or screen protector can help prevent cracks or scratches on the screen that can lead to unresponsiveness. Avoiding impacts or drops can also reduce the risk of physical damage to the touch screen.
Installing apps from unknown sources or suspicious websites can expose the Nokia G310 device to malware and viruses, which can cause unresponsiveness and other issues. To avoid this, it’s recommended to only install apps from trusted sources such as the Google Play Store or the Nokia G310 App Store.
Using a reliable tool like Dr. Fone can help prevent Nokia G310 Screen unresponsiveness by allowing you to manage and repair your device’s software and data. With features such as System Repair and Data Backup & Restore, you can quickly diagnose and fix software issues that may cause unresponsiveness and safely back up important data to prevent loss in case of device damage or malfunction.
Conclusion
Nokia G310 Screen unresponsiveness can be a frustrating issue to deal with, but there are solutions available. Force restarting the Nokia G310 device, checking for software updates, using Dr. Fone Repair, and contacting customer service are all effective ways to solve the problem. However, it’s also important to understand the possible causes of the issue, such as soft-bricking or equipment wearing out, and take preventative measures, such as updating your phone on time and avoiding malware. These tips can help prevent Nokia G310 Screen unresponsiveness and keep your device running smoothly.
safe & secure
Reasons for Nokia G310 Stuck on Boot Screen and Ways To Fix Them
One of the main reasons why people own a phone is for convenience. It will be ironic if that device, supposed to grant convenience, provides problems instead. Some people face this when their Android phone is stuck on the logo page and unable to do anything. As expected, this is common in Android phones and is why people are unhappy with Android phones.
This article will share the possible reasons why your Android phone is stuck on the boot screen. This article will share three possible reasons for this problem and five valuable tips to help fix this issue. If all else fails, we have an application to share and recommend that is guaranteed to solve your problem in no time. Keep on reading to find out more!
Part 1. Why Is Your Nokia G310 Stuck on the Boot Screen?
There are countless reasons why a problem happens, just like why your Android phone is stuck on the logo page. This section sieved out the top 3 reasons why your Android boot screen happens and some tips to overcome it.
1. Changes to the Software
Android is a flexible operating system. It allows users to customize it in any way they desire, which is Android’s beauty. The customizable nature of the operating system allows users to unlock, root, flash, and tinker. However, this flexibility in customization might be a double edge sword. Accidental tampering with the Android system might result in software problems, such as being stuck on the Android boot screen.
Fortunately, this is not a complicated fix. Android accepts different fixes and allows the system to return to how it once was. Even with software issues, the system does not get completely inoperable. The best way to fix changes to the software is to start from the beginning of the process. This might offer the best chance for you to restore your phone to normal.
Although it is fun to customize and change the software, following trusted sources ensures you do not damage your phone. Having an Android phone stuck on the logo page is one of the many examples of the problems that might happen if changes to the software go out of hand.
2. Android Software Updates
Updates are a common cause of Android phones stuck on the logo. It happened when the update did not complete as it should have been. Several reasons for incomplete updates, such as poor internet connection, the connection between computer and phone being lost, a power cut, the phone freezing, and the list go on. When an update is uncompleted, issues such as being stuck at the Android boot screen and many others might occur.
Before an update starts, your mobile device will notify you of the duration of the update. As a tip, set aside an additional 10-15 minutes on top of the update duration to ensure your update is completed successfully. It will be ideal for activating the software update only when there is sufficient power in your phone or keep it charging during the update.
When an update is disrupted or stopped before it completes, the existing Android version will become corrupted while the new software to be updated is incomplete. This means that your Nokia G310 has no system to run on. Always complete your software updates, and you will not have the problem of your Android phone getting stuck on the logo.

3. Malfunctioning Applications
If you noticed that your Android phone is stuck on the logo page only after installing certain apps, there is a high chance that the app is not compatible with the existing apps in your phone or with the Android version. When an app conflicts with the Android system or other apps, this will run into problems with your phone.
This problem typically happens when an app is downloaded from a third-party source, not the official Google Play Store. This app from a third-party source might be malicious or contain a virus. This can cause problems such as being stuck at the Android boot screen.
To overcome this, locate the app that has been giving you issues and remove the app from your phone. Restart your device, and you should be able to have your Nokia G310 functioning properly.
Part 2. 5 Helpful Ways To Fix Android Phones Stuck on Boot Screen
After understanding the common problems on why your Android phone is stuck on the logo page, here are five easy solutions you can try solving at home.
1. Force Reboot
When encountering problems with your Nokia G310, such as being stuck at the Android boot screen, you should first try a forced reboot. This simple yet effective solution could be what you need to solve all your Android problems. It is essential to leave your device turned off for at least a minute or two before turning it back on.
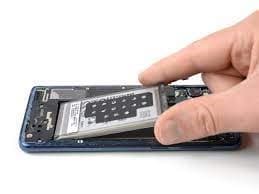
2. Pull Out Battery
Another way to restart your Nokia G310 when it is frozen is to try taking the battery out. Android devices are designed with a removable battery, and sometimes you can resolve the issue easily by removing the battery and replacing it after a couple of seconds. Then, turn on your device again and test to see if your Android phone is stuck on the logo page.
If it works, then the problem is solved. However, some Android devices come with a built-in battery. For these kinds of devices, a stimulated battery pull should be attempted. A simulated battery pull is a set of instructions telling your Nokia G310 to switch off and on again. If your device does not offer the simulated battery pull option, omit this troubleshooting option.
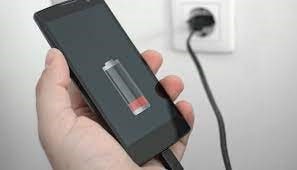
3. Charge Your Device
If your Android phone is stuck on the logo page and not getting past it, no matter how many times you have tried, it may be due to a low battery! As simple as it sounds, plug your device into a power outlet and try restarting your phone. You might be surprised that this simple fix is all it takes to solve your Android problem.
4. Wipe Cache Data
Cache refers to a software or hardware component of an Android device that stores your program and data for reference. This data might result from the daily usage of your device or duplicate data from a different source on the Nokia G310 device. Similar to a computer, if the cache occupies too much space on your device, it might cause your Nokia G310 to become slower and eventually get stuck at the Android boot screen.
Wiping out the cache data from your Nokia G310 could free up more space, allow your device to function faster, and avoid problems such as being stuck at the Android boot screen. Do not worry; wiping the cache data is entirely safe and will not lead to any loss of important data or programs on your phone.
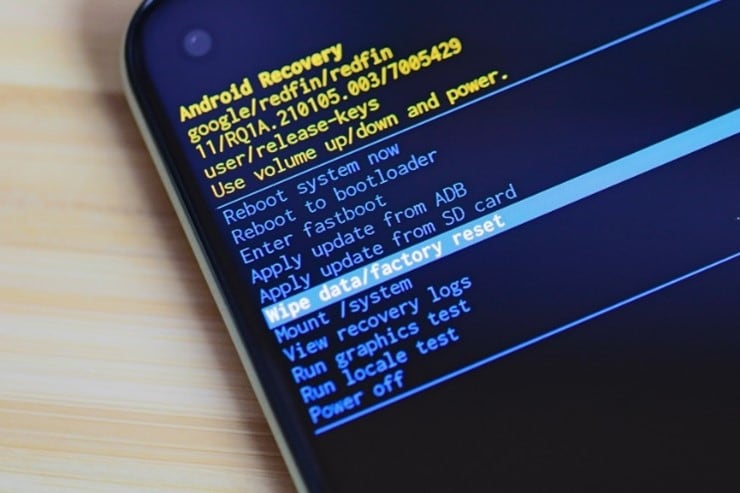
5. Factory Reset
If all the methods above fail, performing a factory rest might be your last option. However, it is important to note that performing a factory reset will erase everything on your phone, including apps, contacts, photos, etc. As a tip, back up all your data from your device before performing a factory reset. That way, you can still retrieve all your precious information after the reset.
Follow the steps below to perform a factory rest on your Nokia G310:
Step 1: Turn off your phone and press the Power button and Volume Down button at the same time
Step 2: Use the Volume button to scroll the options and highlight Wipe data/factory reset. Press the Power button to begin the factory reset.
Part 3. Bonus Tip: Best App To Solve Android Phone Stuck On Boot Screen
If all the solutions above do not work and you do not want to perform a factory reset on your phone, one option is to use an app called Dr.Fone. It is one of the most effective phone recovery solutions and can help to bring your Nokia G310 back to a state like it was brand new. Being stuck on the Android boot screen will be a problem of the past.

Refer to the tutorial below to solve your Android phone is stuck on the logo page issue.
Step 1: Download and install Dr.Fone – System Repair (Android) on your computer. Open the application and connect your Nokia G310 to the computer.
Step 2: Select the issue you face on the next page. If you use a Nokia G310 phone, select Stuck at Nokia G310 Logo. Alternatively, you can click on Black Screen or Stuck in Boot Loop.
Step 3: Input the Brand, Name, Model, Country, and Carrier of your phone and click on Next.

Step 4: Follow the instructions provided on the page and wait for the system repair to finish. After which, click on Done to complete the process.
safe & secure
Conclusion
This article summarizes some possible reasons your Android phone is stuck on the logo page. Five useful strategies were shared to easily overcome your Nokia G310 being stuck in the boot. However, if all the above methods do not work, we recommend trying the Dr.Fone-System Repair.
Dr.Fone-System Repair repairs the operating system issues and fixes the problem with your Nokia G310. Once you power on your Nokia G310 again, you can rest assured that it will be like new.
Effective Methods on How To Take Viruses Off Your Phone
Cell phones have become a part of a person’s daily life. It offers convenience and connectivity at your fingertips. Yet, these handy devices are prone to viruses when used carelessly. Viruses can infiltrate your phone through unverified downloads, unsecured networks, or malicious links. This can compromise your data and device performance.
In this article, you’ll explore practical methods on h ow to take a virus off your phone. From simple preventive measures to specific solutions, this guide aims to equip you with practical strategies, ensuring a safer and smoother mobile experience by safeguarding your phone against the perils of viruses.

Part 1: Why You Get Mobile Viruses in the First Place
Mobile viruses are tiny bugs that sneak into your phone and mess things up. They’re sneaky software programs designed to cause trouble, like stealing your info or making your phone act strange. Pesky viruses are usually acquired by accessing unverified links and downloading sketchy files. This is why it’s essential to be careful about what you access on the internet. It’s also a great habit to beware of the computers you’re connecting your phone to.
You might notice weird things happening on your phone when infected with a virus. It may suddenly slow down, show pop-ups you didn’t click, or run out of battery super-fast . These could be signs that your phone has a virus. Take note of these.

Here are some common ways viruses get into your phone:
- **Accessing sketchy links.**Clicking on strange or suspicious links in messages or emails is the number one virus source.
- **Downloading apps from unauthorized developers.**Getting apps from places other than the official app stores like Google Play or Apple Store can also be a gateway for trojan viruses. This is mainly because apps install files directly to your system when downloaded.
- Connecting to compromised computers. Watching out for viruses or malware when plugging your phone into a computer would be best.
- **Transferring malware files to your phone:**Moving files with viruses from a computer or another device to your phone.
Remember, these bugs can cause a lot of trouble, but staying careful while using your phone can help you avoid them!
Part 2: Different Methods To Take Viruses Off Your Phone
If your phone’s caught a virus, it’s time to remove those bugs. You might wonder about how you get a virus off your phone. Well, this section has you covered with 4 different methods you can use.
Method 1: Wondershare Dr. Fone’s System Repair
If you need a quick, professional, and safe solution, Wondershare Dr.Fone is here to save the day. Its System Repair feature is like a superhero—it swoops in and fixes the problem in a snap. This magic tool does the heavy lifting to remove viruses from your phone.
Here’s how you can use Dr. Fone’s System Repair feature:
- Step 1: Launch Dr.Fone. Choose System Repair in the Toolbox section. Ensure that your phone is connected.
safe & secure
3,391,426 people have downloaded it
- Step 2: Choose either Android or iPhone. In this example, iPhone shall be selected. For Android devices, simply follow and mirror the prompts that will follow.

- Step 3: Select iOS Repair to proceed.

- Step 4: Choose either Standard Mode or Standard Repair. Standard Repair will not remove data from your device. However, for a sure fix, choose Standard Mode.

- Step 5: Put your device to Recovery Mode . Dr. Fone will provide on-screen instructions.

- Step 6: Click Download next to the iOS firmware you want to install.

- Step 7: After the firmware is downloaded, click Repair Now.

- Step 8: Once the process is completed, choose Done. Your phone should be virus-free by now.

Method 2: Using Safe Mode
Safe Mode is like a secret agent—it helps but with a downside. It turns off third-party apps, making your phone useful only for basic calls or texts. Use this method if any solutions in this section do not work. It’s especially handy if you use your phone before sending it to a technician. This way, you’ll learn how you can get a virus off your phone before actually letting a technician do it.
Generally, here’s how you can enter Safe Mode on Android Phones. Do check with your phone manufacturer’s official manual/guides on how to enter them:
- Step 1: Press and hold the power button. Wait for the power options to appear.
- Step 2: Tap and hold the Power Off button.
- Step 3: Tap on the prompt when you see the Reboot to safe mode option.

For iPhones, here’s how you can do it:
- Step 1: Power off your iPhone.
- Step 2: Hold the power button.
- Step 3: Hold the volume down button until you see the Apple logo.
- Step 4: Your phone should now be in safe mode.

Method 3: Downloading Anti-Virus Software
Anti-virus software works like a shield, protecting your phone from sneaky viruses and malware. Here are three recommended anti-virus apps that you should try out. They’re available on both the Google Play Store and App Store. So, regardless of what device you’re using, you’re sure to be safe with these:
- Avast Anti-virus – Mobile Security
- Norton 360: Online Security
- Bitdefender Mobile Security & Anti-virus
Method 4: Performing a Factory Reset
A Factory Reset is like a phone makeover—it wipes everything and starts fresh. But be cautious, as it erases all data!
Generally, the Factory Reset option should be in Settings > General & Backup and reset or under Settings > About phone for Android devices.

IOS devices should be under Settings > General > Transfer or Reset iPhone.

Remember, each method has its strengths and weaknesses. Dr.Fone is quick and effective, Safe Mode is limited but useful, anti-virus apps can protect, and a Factory Reset gives a clean slate. Try these methods to zap those viruses away!
Part 3: Handy Prevention Tips To Avoid Future Infections
To keep your phone safe from viruses, follow these easy tips that act as a shield against potential threats.
- **Regular software updates:**Keep your phone updated with the latest software. Updates often include security patches that protect your phone from new threats.
- **Cautious downloads:**Be careful when downloading apps or files. Stick to trusted sources like Google Play Store or Apple Store. Avoid clicking on suspicious links from unknown sources.
- **Secure networks:**Use secure Wi-Fi networks and limit public Wi-Fi use for sensitive activities. Public networks can expose your device to potential risks.
- **Anti-virus software:**Install a reliable anti-virus app and keep it updated. These apps constantly scan for and detect viruses, safeguarding your device against threats.
These simple yet crucial tips will fortify your phone’s defenses, reducing the likelihood of virus infections and ensuring a safer digital experience.
Conclusion
Viruses can make your phones act weird, but you have the tools to fight back. Keep your phone healthy by updating software, being cautious with downloads and links, using secure networks, and having an anti-virus app.
And, if you’re thinking, “**How do I get a virus off My Nokia G310?**” then Wondershare Dr.Fone is a reliable hero. It’s quick and effective in clearing out those bugs. By staying aware and taking preventive steps, you can keep your phone safe and ensure a trouble-free experience. And if viruses strike, Dr. Fone’s got your back for an instant fix!
Also read:
- [New] 2024 Approved Top 12 Best Idle Games You Can Find on PC
- [Updated] Vehicular Vitality Ranking 10 Top Turbo Mods for OS X and Windows
- 2024 Approved Discover 11 Leading Streamers' Audio Recorders
- 6 Fixes to Unfortunately WhatsApp has stopped Error Popups On Samsung Galaxy A14 5G | Dr.fone
- 9 Solutions to Fix Lava Yuva 2 Pro System Crash Issue | Dr.fone
- Android Safe Mode - How to Turn off Safe Mode on Vivo Y100 5G? | Dr.fone
- Authentication Error Occurred on Vivo T2x 5G? Here Are 10 Proven Fixes | Dr.fone
- Best 4 Choices Unhackable Video Meetings for Small Firms
- Best Sound Format Converter Software Compatible with Windows 10
- Directed Camera Roll Efficient Sync with Snapchat Features
- Facebook Dating Transformed: The Future of Relationships?
- Fixing Persistent Pandora Crashes on Vivo Y100i | Dr.fone
- In 2024, Innovation Unveiled 5 Cutting-Edge Webcams With Sound Tech
- Master the Art of Seamless Video Compatibility
- Navigate the Art of Location Sharing on macOS: Tips, Tricks and Why It Matters.
- Top 4 Android System Repair Software for Lava Yuva 2 Pro Bricked Devices | Dr.fone
- Want to Uninstall Google Play Service from OnePlus Ace 3? Here is How | Dr.fone
- What To Do When Tecno Camon 20 Premier 5G Has Black Screen of Death? | Dr.fone
- Why Your Honor 90 GT Screen Might be Unresponsive and How to Fix It | Dr.fone
- Title: Why Your Nokia G310 Screen Might be Unresponsive and How to Fix It | Dr.fone
- Author: Ariadne
- Created at : 2024-11-21 04:02:03
- Updated at : 2024-11-21 19:13:34
- Link: https://howto.techidaily.com/why-your-nokia-g310-screen-might-be-unresponsive-and-how-to-fix-it-drfone-by-drfone-fix-android-problems-fix-android-problems/
- License: This work is licensed under CC BY-NC-SA 4.0.