
8 Workable Fixes to the SIM not provisioned MM#2 Error on Asus ROG Phone 8 Pro | Dr.fone
8 Workable Fixes to the SIM not provisioned MM#2 Error on Asus ROG Phone 8 Pro
SIM cards are small chips that act as a connecting medium between your cell phone and your carrier. It is programmed to help your carrier identify your cell phone account with certain information. And eventually, you are enabled to make calls and to make use of mobile internet. Now, if your device is showing “SIM not provisioned” on Android then it signifies that the connection to carrier network cannot be established or perhaps, your carrier isn’t able to identify your cell phone account.
 OtsAV TV Webcaster
Part 1. Why does the error “SIM not provisioned MM#2” pop up?
There can be numerous reasons behind the pop up that reads “SIM not provisioned” on Android. But basically, it most probably affects the users who have registered a new SIM card. If you get to experience this issue in other situations or if the SIM is not working in Android, then the problem is with the SIM card and needs to be replaced. Anyways, here is a list of situations when the “SIM not provisioned” error may bother you.
- You got a new SIM card for your new phone.
- You are transferring your contacts into the new SIM card.
- In case, the carrier network provider’s authorization server is unavailable.
- Perhaps, you’re out of the reach of the carrier coverage area and that too, without active roaming agreement.
- Though new SIM cards work flawlessly. But it is often necessary to get your SIM card activated due to security reasons.
Just in case, you haven’t bought any new SIM card and the one you were using was working fine until now, then the most probable reasons behind it could be listed below:
- If your SIM card is too old, possibly it might have gone dead, try replacing it.
- Perhaps, the SIM card was not properly inserted into the slot or there might be some dirt between the SIM and smartphone pins.
A yet another reason could be that your SIM card got deactivated by your carrier provider as it could have been locked to a particular phone. Now, if you insert such a SIM card to another device or a new device even, you may get to witness a message that reads “SIM not valid”.
 ZoneAlarm Pro Antivirus + Firewall NextGen
2.1 One click to fix the “SIM not provisioned MM#2” error on Android
Without talking any further, let’s straightly get to the first and the easiest way to repair SIM not provisioned issue on Android. For this purpose, we’re glad to introduce Dr.Fone - System Repair (Android) , one of its kind of tool that is capable of repairing almost all sort of Android OS issues in just a matter of few clicks. Whether it is SIM not provisioned on Android or SIM not working in Android or your device stuck in a boot loop or black/white screen of death. The most probable reason for these errors is Android OS corruption. And with Dr.Fone – Repair (Android) you can efficiently and effectively repair your Android OS in a hassle freeway.
### [Dr.Fone - System Repair (Android)](https://tools.techidaily.com/wondershare/drfone/android-repair/)Android repair tool to fix “SIM not provisioned MM#2” error
- Fix any type of Android system issue with ease.
- Even novice users can use it without any hassle.
- Compatible with all major Asus ROG Phone 8 Pro smartphone models.
- Highest success rate in the market for fixing Android issues.
- Supports all Android OS versions.
3981454 people have downloaded it
Step by step Tutorial to fix “SIM not provisioned MM#2” error
Step 1. Connect your Asus ROG Phone 8 Pro
Download and launch the Dr.Fone toolkit on your computer and then opt for the “System Repair” option from the main interface. Meanwhile, get your Asus ROG Phone 8 Pro connected with the computer using a genuine cable.


Step 2. Opt for Android Repair and key in important information
Now, hit on the “Android Repair” from the 3 options on the left, followed by hitting the “Start” button. From the upcoming screen, you’ll be asked to key in important device-related information, like brand, model, country, and carrier details. Hit “Next” afterward.
![]() FX PRO (Gold Robot + Silver Robot(Basic Package))
FX PRO (Gold Robot + Silver Robot(Basic Package))

Step 3. Boot your device in Download mode
You must put your device in Download mode for better repairing of your Android OS. Simply follow the onscreen guide to boot your Android in DFU mode and hit “Next” thereafter. Once done, the software will automatically start downloading the most compatible and recent firmware for your device.

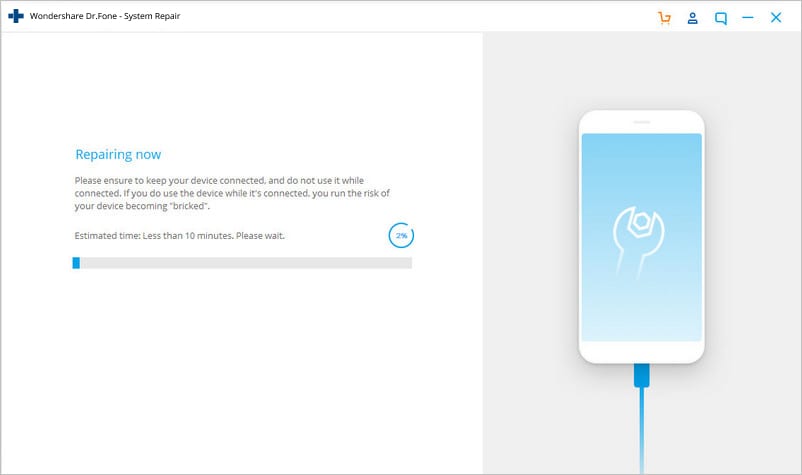
Step 4. Initiate Repairing
As soon as the download completes, the software verifies the firmware and automatically initiates repairing your Asus ROG Phone 8 Pro. Within a short period, you’ll notice that your Asus ROG Phone 8 Pro has been successfully repaired.

 safe & secure

2.2 Ensure the SIM card is not dirty or wet
At times, the issue can be as simple as cleaning your SIM card and SIM slot properly. Ensuring that SIM is not wet either and then putting it back into its place. If this works, then the SIM not working in Android was due to the dirt or moisture that was preventing proper contact between SIM card pins and smartphone circuit.

2.3 Insert the SIM card correctly
If your SIM card was working properly until yet, there is a good possibility that the SIM card may have moved a bit from its actual location. Eventually, there is poor contact between the SIM card pins and the circuit. Try inserting your SIM card properly with the following steps.
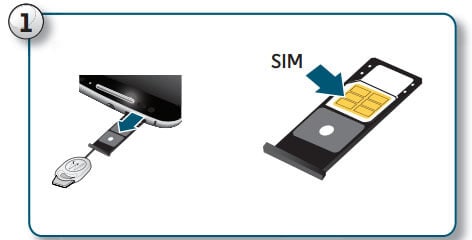
- Power off your Asus ROG Phone 8 Pro and with the help of Q pin, eject the SIM card holder from the SIM slot of your device.
- Now, grab a soft rubber pencil eraser and gently rub it in on the gold pins of SIM card to clean them properly. Then, with the help of a soft cloth wipe away the rubber residue from the SIM card.
- Next, push the SIM back into the SIM card holder properly and push it back into the SIM slot now.
- Turn your device back on and look if your SIM not provisioned on the Android issue is resolved or not.
2.4 Activate the SIM card
Usually, when you buy a new SIM card, it gets automatically activated within 24 hours of being plugged into a new device. But if that’s not happening in your case and you’re wondering how to activate SIM card, make use of the three options below to enable activation:
- Call your carrier service provider
- Send an SMS
- Log on to your carrier’s website and look for the activation page over it.
Note: The aforementioned options are straightforward and are quick ways to enable activation. It depends on your carrier network whether they support them.
 Easy and Safe Partition Software & Hard Disk Manager
2.5 Contact your carrier
Even if your SIM isn’t activated, grab another working device to make a phone call to your carrier or network. Ensure, to explain the entire situation and the error message to them. Be patient while they investigate the issue. It may eat up a heck load of time or may get resolved in a few minutes that completely depend upon the complexity of the issue.


2.6 Try the other SIM card slot
A yet another reason why SIM not working in Android can be because of the SIM card slot might have gone corrupted. Thanks to the dual SIM technology, you do not have to rush immediately to get it to check or repair. You can simply rule out this possibility by ejecting the SIM card from its original SIM slot and then replacing it into the other SIM card slot. If this solution did work out for you then it is obvious that the problem was with the SIM card slot that got corrupted. And hence, it was triggering SIM not responding issue.
2.7 Try the SIM card in other phones
Or just in case, you’ve still no joy and the SIM not provisioned on Android message is bothering you. Try making use of another Android device. Eject the SIM card from the Asus ROG Phone 8 Pro device which is creating problems and try plugging it into other Asus ROG Phone 8 Pro] and other smartphones. Perhaps, this will let you know whether the issue is with your device only or with the SIM card itself.
2.8 Try a new SIM card
Still, wondering how to fix SIM not provisioned? Perhaps, nothing worked for you, right? Well, on that note, you must head to your carrier store and request a new SIM card. Also, inform them about the “SIM not provisioned MM2” error, they will be able to execute proper diagnostics over your old SIM card and hopefully get it resolved. Or else, they’ll equip you with a brand new SIM card and swap the new SIM card into your device and get it activated in the meantime. Eventually, restoring the normal functioning of your device.

Conclusion
In wrapping up, SIM not provisioned errors on Android can be troubling, but they’re certainly fixable. There are several methods, from a simple device restart to reaching out to your network provider. But if these don’t work, we suggest trying Dr.Fone - System Repair (Android) . This tool is known for its ability to handle an array of Android issues and could be just what your device needs. Navigate your tech challenges with ease using Dr.Fone.
safe & secure
How To Fix Unresponsive Phone Touchscreen Of Asus ROG Phone 8 Pro
Smartphones nowadays contribute to our daily workflow, whether you’re a student or a professional. They get more sophisticated and add new features every year, making them more attractive with each new release. However, users sometimes deal with their screen touch not working on Android, raising various concerns.


If you are facing a similar issue, this page has all the solutions to teach you what to do if your phone screen is not working. By exploring the different methods below, you will be able to know how to fix a frozen phone touch screen as an Android user. Read on for more information.
Part 1: Top Causes of an Unresponsive Touchscreen
Android has been the best-selling OS since 2011, with over three billion active users. With the release of Android 13, complaints over touch issues on certain Android phones have popped up over the internet. Meanwhile, software updates over the years can sometimes make their phones stuck on the loading screen, causing worry among Android users.
Here are some of the top causes why your phone screen stopped working, mainly for Android.
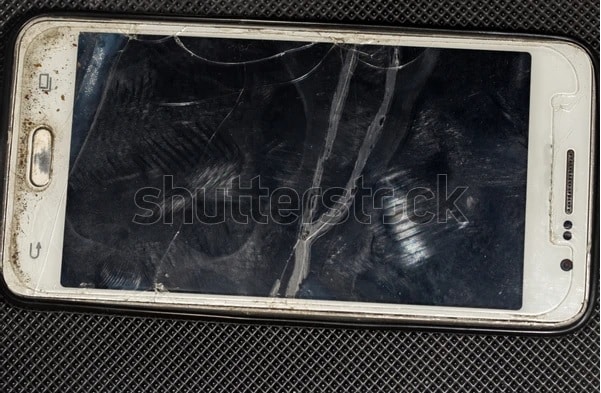
- Physical Damage
If your Android phone is not responding to touch, it can be due to a cracked LCD causing temperature variants or magnetic fields to malfunction on your Asus ROG Phone 8 Pro.

For iOS users, your iPhone will temporarily stop working if it detects extreme temperatures such as a too-hot or too-cold reading. You should turn off your iPhone and let it cool down or warm to a normal temperature.
- Faulty Applications
Certain apps can sometimes make your phone experience touch issues. Your Android screen may work everywhere except a particular app. In this case, the fault is likely on the app, not your smartphone. It’s recommended to download the latest apps with frequent software updates to prevent malicious apps from corrupting or crashing your phone.
- iOS/Android Software Issues
Your phone screen not responding can also be due to software glitches that your smartphone picks up during regular use. Your iOS/Android device will sometimes freeze or hang if you run too many intensive apps simultaneously. The situation can lead to touch issues when using the phone.
- Dirty Screen or Bad Peripherals
It may not respond properly when an Android device is dirty due to water, sweat, or body oils. It will not be able to take inputs, causing your phone to not respond to touch. A poor screen protector and a tightly pressed phone case will also negatively impact your smartphone.
Part 2: What To Do When Your Smartphone Is Not Responding to Touch
Here is a list of things you should do how to fix a frozen phone touch screen, whether you’re using an iPhone or an Android smartphone.
1. Clean Your Smartphone
Your screen touch not working can sometimes get fixed by simply cleaning the screen on your smartphone. Use a soft dry cloth, gently clean your iPhone or Android device, and ensure water, oils, dirt, or other debris are no longer on your display. If you recently dropped your device in water, turn it off and leave it untouched for the next few hours.

2. Remove Extra Peripherals
Unplug any external device connected to your iPhone’s Lightning port or USB-C if your phone screen stops working. For Android users, meanwhile, disconnect any accessories like chargers or wireless headphones. After that, try using the touchscreen. If it works, the outcome proves that the fault appeared due to the external device.
 Nero Burning ROM:
The ultimate burning program for all your needs!
3. Force Restart Your Device
If your phone screen is still unresponsive,maybe it is overloaded. You should force restart your Asus ROG Phone 8 Pro. It doesn’t delete any data. Here’s how.
Example 1: For Asus ROG Phone 8 Pro Smart Phones
Here’s how to force restart your smartphone to fix your phone screen that’s not responding.
- Press and hold the Powerand Volume Down buttons simultaneously for more than 7 seconds to force a reboot.

E****xample 2: For Asus ROG Phone 8 Pro Redmi
If your Asus ROG Phone 8 Pro Redmi phone is stuck on loading screen or “thinking” for a long time without responding, reboot it in just two steps.
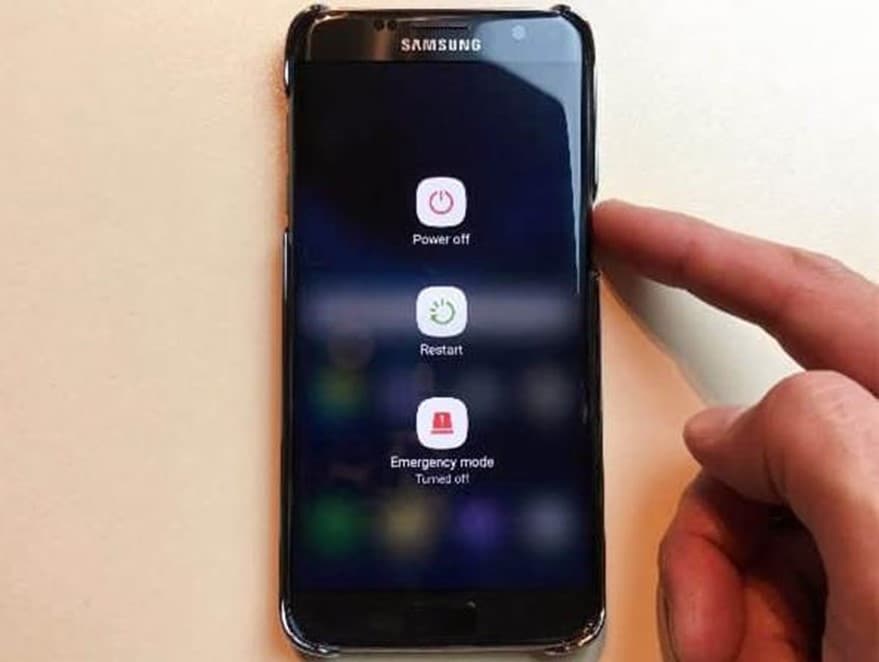
Step 1: Press and hold the power button on the right side of the screen, then a screen showing several options appears.
Step 2: Choose Restart, then Accept if a confirmation message spears. Then wait a few seconds or minutes when your device is performing the reboot.

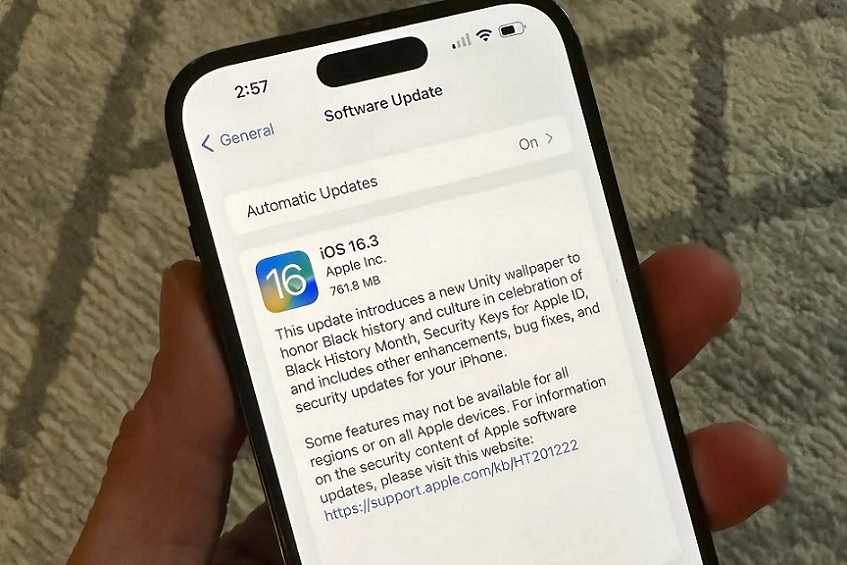
4. Update Your Software
Your smartphone may behave erratically due to software bugs. While these are out of your control, you can quickly fix your phone not responding to touch by simply updating your OS to the latest version. Here’s how.
- For iOS users, go to your iPhone Settings> General > Software Update > Download and Install.
- For Android owners, go to Settings > Software Update. Tap the Check for software updatesto see if a new update is available.

5. Perform a Factory Reset
If nothing helps, your remaining option is to try completing a Factory Reset. Doing this will erase all your data, but this is arguably the quickest way to restore your screen-frozen phone to its factory default settings. Factory Reset is available on Android devices with almost similar steps. Here’s how.
For Android, Asus ROG Phone 8 Pro Series
Step 1: Search and tap the Settings option, and open General management.
S****tep 2: Swipe the options, find and tap Reset > Factory data reset, and check the information below. Then swipe and press the Reset button.
Note:
You might be asked to enter the pin of the security lock on the phone if you’ve set one.
S****tep 3: You may need to enter your Asus ROG Phone 8 Pro account password if you have bounded an account to your phone after taping Delete all. Then your Asus ROG Phone 8 Pro phone will reset. You’ll see its initial setup screen when it turns back on.
 PearlMountain Image Converter
Part 3: How to Fix Unresponsive Touchscreen With an Alternative
The methods outlined above usually solve issues on your smartphone not responding to touch. If all else fails, Wondershare Dr.Fone for iOS and Android can fix various smartphone issues within less than 10 minutes. The program enables you to fix common scenarios such as black screen, boot loop, bricked iOS or Android, and much more without any required skills.

Key Features
The key features of Wondershare Dr.Fone for iOS and Android are listed below.
- Fix all iOS and Android Problems in Minutes
Wondershare Dr.Fone for Android and iOS allows you to fix your smartphone within less than 10 minutes. For iPhone owners, common issues such as a black screen, white screen of death, iPhone frozen, stuck on a restart loop, or recovery mode can easily be repaired with Dr.Fone. For Android users, meanwhile, problems, including unresponsive screen, black screen of death, boot loop, and more, are done within minutes.
- Supports up to 1000+ Android Models and iOS 16
The program supports all iOS versions, including the latest iOS 16 and iOS 16 beta. Compared to the iTunes store or other methods, the app can quickly fix any iPhone issues without data loss. For Android users, meanwhile, Dr.Fone supports up to 1000+ Android smartphones making it highly versatile even if you’re using an older Android device or the latest models.
Tech Specs
Here are the minimum system requirements of Wondershare Dr.Fone (iOS) for your computer.
| Computer OS | iOS |
|---|---|
| Windows: 7, 8, 8.1, 10, 11 | Support all iOS versions, including the latest iOS 16 & iOS 16 beta |
| macOS: 12, 11, 10.15, 10.14, 10.13, 10.12, 10.11, 10.10, 10.9, or 10.8 |
Meanwhile, here are the tech specs for Wondershare Dr.Fone (Android)’s minimum system requirements.
| Computer OS | Android |
|---|---|
| Windows 7, 8, 8.1, 10, 11 | Android 2.1 and up |
Pros and Cons
Here are the pros and cons of using Wondershare Dr.Fone (Android)
Pros
- Fone – System Repair’s UI for iOS and Android is clutter free and beginner-friendly. You can start repairing your phone right away after installation.
- Repairing your iOS or Android smartphone within less than 10 minutes saves you precious time.
Cons
- The iOS and Android versions of Wondershare Dr.Fone are sold separately. You’ll have to get each version of the program if you own a smartphone for both iOS and Android.
Pricing
The iOS and Android versions of Wondershare Dr.Fone has different price plans. See them below.
Wondershare Dr.Fone (iOS) offers a quarterly, 1-year, and perpetual license, depending on your budget. Here’s the pricing below.
- Quarterly License (1-5 Mobile Devices) - $6.65/Month – With Auto Renew
- 1 Quarter License (1-5 Mobile Devices) - $7.32/Month – No Auto Renew
- 1-Year License (1-5 Mobile Devices) - $4.99/Month – No Auto Renew
- Perpetual License (1-5 Mobile Devices) - $79.95
Wondershare Dr.Fone (Android) price plans are available for a 1-Year or Perpetual License, depending on your budget.
- 1-Year License (1-5 Mobile Devices) - $39.95
- Perpetual License (1-5 Mobile Devices) - $49.95
- 1-Year Business License (Unlimited Devices) - $399.00
How To Fix Unresponsive Touchscreen With Wondershare Dr.Fone
In this step-by-step guide below, you can fix your unresponsive phone screen using Wondershare Dr.Fone on iOS and Android.
Step 1: Download and install Wondershare Dr.Fone for iOS or Android on your computer. Launch the app afterward and connect your smartphone.

Step 2A (For iOS): Choose the correct model of your iPhone to download the appropriate firmware package.
Step 2B (For Android): Choose the correct Brand, Name, Model, Country, as well as Carrier, then click Next.

Step 3: Follow the on-screen instructions provided on the main program window and wait for the repair process to complete.
Part 4: People Also Ask
Some common questions you should know when taking care of an unresponsive phone touchscreen are listed below.
1. Why Did My iPhone Screen Go Black After Not Responding to Touch?
Your iPhone screen with a touch issue will sometimes go black after not responding to touch due to several issues. It could be hardware, software, issues with a particular app, software crash, or you have a low battery. If it’s a drained battery, you’re in luck; all you have to do is charge it. Otherwise, you’ll have to perform a force restart on your iPhone to try to reboot it.
2. How Do I Keep My Android From Crashing?
Keeping your apps updated should help you solve app crashing issues that can impact your Android OS. These apps build up large caches throughout your normal usage. Clearing cached data from time to time can drastically improve your smartphone’s performance and prevent touch issues. To remove your app cache, go to Settings > Storage and tap Cached Data.

3. Can I Use Dr.Fone for Free?
Wondershare Dr.Fone for iOS and Android is free to download and install. You can also test the first few steps and see if the program supports your device. However, when you click the Fix Now button to start the repair process, you will be required to enter a valid license to activate the program.
 safe & secure
Conclusion
Knowing the common causes of an unresponsive phone touchscreen is the first step to preventing it from happening to your smartphone. While there are ways to fix it when it does happen, prevention is better than cure, as most experts say. However, if the methods outlined above don’t work, your best bet is to use a dedicated program such as Wondershare Dr.Fone for Android and iOS.
Wondershare Dr.Fone works on almost all modern smartphones today and can fix a stop-working phone screen within less than 10 minutes. It’s beginner-friendly and doesn’t require advanced technical know-how to use right away.
Reasons for Asus ROG Phone 8 Pro Stuck on Boot Screen and Ways To Fix Them
One of the main reasons why people own a phone is for convenience. It will be ironic if that device, supposed to grant convenience, provides problems instead. Some people face this when their Android phone is stuck on the logo page and unable to do anything. As expected, this is common in Android phones and is why people are unhappy with Android phones.
This article will share the possible reasons why your Android phone is stuck on the boot screen. This article will share three possible reasons for this problem and five valuable tips to help fix this issue. If all else fails, we have an application to share and recommend that is guaranteed to solve your problem in no time. Keep on reading to find out more!
 Glarysoft File Recovery Pro - Helps to recover your lost file/data, even permanently deleted data.
Part 1. Why Is Your Asus ROG Phone 8 Pro Stuck on the Boot Screen?
There are countless reasons why a problem happens, just like why your Android phone is stuck on the logo page. This section sieved out the top 3 reasons why your Android boot screen happens and some tips to overcome it.
 Any DRM Removal for Win:Remove DRM from Adobe, Kindle, Sony eReader, Kobo, etc, read your ebooks anywhere.
1. Changes to the Software
Android is a flexible operating system. It allows users to customize it in any way they desire, which is Android’s beauty. The customizable nature of the operating system allows users to unlock, root, flash, and tinker. However, this flexibility in customization might be a double edge sword. Accidental tampering with the Android system might result in software problems, such as being stuck on the Android boot screen.
Fortunately, this is not a complicated fix. Android accepts different fixes and allows the system to return to how it once was. Even with software issues, the system does not get completely inoperable. The best way to fix changes to the software is to start from the beginning of the process. This might offer the best chance for you to restore your phone to normal.
Although it is fun to customize and change the software, following trusted sources ensures you do not damage your phone. Having an Android phone stuck on the logo page is one of the many examples of the problems that might happen if changes to the software go out of hand.
2. Android Software Updates
Updates are a common cause of Android phones stuck on the logo. It happened when the update did not complete as it should have been. Several reasons for incomplete updates, such as poor internet connection, the connection between computer and phone being lost, a power cut, the phone freezing, and the list go on. When an update is uncompleted, issues such as being stuck at the Android boot screen and many others might occur.
Before an update starts, your mobile device will notify you of the duration of the update. As a tip, set aside an additional 10-15 minutes on top of the update duration to ensure your update is completed successfully. It will be ideal for activating the software update only when there is sufficient power in your phone or keep it charging during the update.
When an update is disrupted or stopped before it completes, the existing Android version will become corrupted while the new software to be updated is incomplete. This means that your Asus ROG Phone 8 Pro has no system to run on. Always complete your software updates, and you will not have the problem of your Android phone getting stuck on the logo.

3. Malfunctioning Applications
If you noticed that your Android phone is stuck on the logo page only after installing certain apps, there is a high chance that the app is not compatible with the existing apps in your phone or with the Android version. When an app conflicts with the Android system or other apps, this will run into problems with your phone.
This problem typically happens when an app is downloaded from a third-party source, not the official Google Play Store. This app from a third-party source might be malicious or contain a virus. This can cause problems such as being stuck at the Android boot screen.
To overcome this, locate the app that has been giving you issues and remove the app from your phone. Restart your device, and you should be able to have your Asus ROG Phone 8 Pro functioning properly.
Part 2. 5 Helpful Ways To Fix Android Phones Stuck on Boot Screen
After understanding the common problems on why your Android phone is stuck on the logo page, here are five easy solutions you can try solving at home.
1. Force Reboot
When encountering problems with your Asus ROG Phone 8 Pro, such as being stuck at the Android boot screen, you should first try a forced reboot. This simple yet effective solution could be what you need to solve all your Android problems. It is essential to leave your device turned off for at least a minute or two before turning it back on.
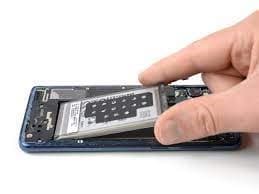
2. Pull Out Battery
Another way to restart your Asus ROG Phone 8 Pro when it is frozen is to try taking the battery out. Android devices are designed with a removable battery, and sometimes you can resolve the issue easily by removing the battery and replacing it after a couple of seconds. Then, turn on your device again and test to see if your Android phone is stuck on the logo page.
If it works, then the problem is solved. However, some Android devices come with a built-in battery. For these kinds of devices, a stimulated battery pull should be attempted. A simulated battery pull is a set of instructions telling your Asus ROG Phone 8 Pro to switch off and on again. If your device does not offer the simulated battery pull option, omit this troubleshooting option.
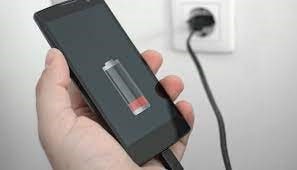
3. Charge Your Device
If your Android phone is stuck on the logo page and not getting past it, no matter how many times you have tried, it may be due to a low battery! As simple as it sounds, plug your device into a power outlet and try restarting your phone. You might be surprised that this simple fix is all it takes to solve your Android problem.
4. Wipe Cache Data
Cache refers to a software or hardware component of an Android device that stores your program and data for reference. This data might result from the daily usage of your device or duplicate data from a different source on the Asus ROG Phone 8 Pro device. Similar to a computer, if the cache occupies too much space on your device, it might cause your Asus ROG Phone 8 Pro to become slower and eventually get stuck at the Android boot screen.
Wiping out the cache data from your Asus ROG Phone 8 Pro could free up more space, allow your device to function faster, and avoid problems such as being stuck at the Android boot screen. Do not worry; wiping the cache data is entirely safe and will not lead to any loss of important data or programs on your phone.

5. Factory Reset
If all the methods above fail, performing a factory rest might be your last option. However, it is important to note that performing a factory reset will erase everything on your phone, including apps, contacts, photos, etc. As a tip, back up all your data from your device before performing a factory reset. That way, you can still retrieve all your precious information after the reset.
Follow the steps below to perform a factory rest on your Asus ROG Phone 8 Pro:
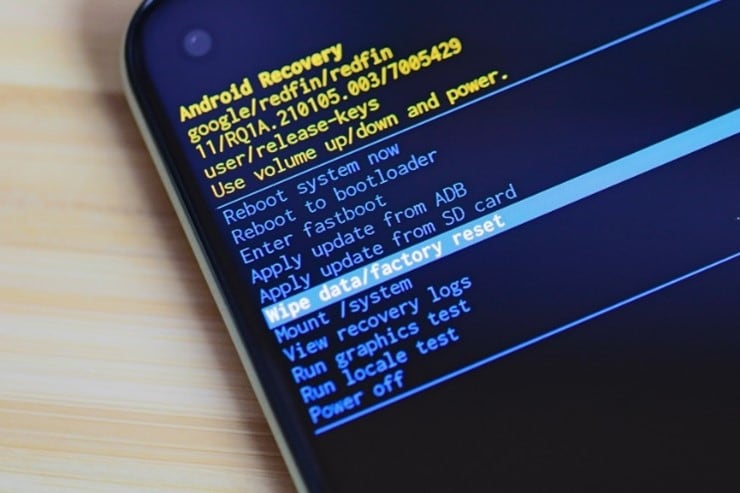
Step 1: Turn off your phone and press the Power button and Volume Down button at the same time
Step 2: Use the Volume button to scroll the options and highlight Wipe data/factory reset. Press the Power button to begin the factory reset.
Part 3. Bonus Tip: Best App To Solve Android Phone Stuck On Boot Screen
If all the solutions above do not work and you do not want to perform a factory reset on your phone, one option is to use an app called Dr.Fone. It is one of the most effective phone recovery solutions and can help to bring your Asus ROG Phone 8 Pro back to a state like it was brand new. Being stuck on the Android boot screen will be a problem of the past.

Refer to the tutorial below to solve your Android phone is stuck on the logo page issue.
Step 1: Download and install Dr.Fone – System Repair (Android) on your computer. Open the application and connect your Asus ROG Phone 8 Pro to the computer.
Step 2: Select the issue you face on the next page. If you use a Asus ROG Phone 8 Pro phone, select Stuck at Asus ROG Phone 8 Pro Logo. Alternatively, you can click on Black Screen or Stuck in Boot Loop.
Step 3: Input the Brand, Name, Model, Country, and Carrier of your phone and click on Next.
Step 4: Follow the instructions provided on the page and wait for the system repair to finish. After which, click on Done to complete the process.
safe & secure
Conclusion
This article summarizes some possible reasons your Android phone is stuck on the logo page. Five useful strategies were shared to easily overcome your Asus ROG Phone 8 Pro being stuck in the boot. However, if all the above methods do not work, we recommend trying the Dr.Fone-System Repair.
Dr.Fone-System Repair repairs the operating system issues and fixes the problem with your Asus ROG Phone 8 Pro. Once you power on your Asus ROG Phone 8 Pro again, you can rest assured that it will be like new.
- Title: 8 Workable Fixes to the SIM not provisioned MM#2 Error on Asus ROG Phone 8 Pro | Dr.fone
- Author: Ariadne
- Created at : 2024-07-30 08:35:12
- Updated at : 2024-07-31 08:35:12
- Link: https://howto.techidaily.com/8-workable-fixes-to-the-sim-not-provisioned-mm2-error-on-asus-rog-phone-8-pro-drfone-by-drfone-fix-android-problems-fix-android-problems/
- License: This work is licensed under CC BY-NC-SA 4.0.