
Android Safe Mode - How to Turn off Safe Mode on Oppo Find X7? | Dr.fone
Android Safe Mode - How to Turn off Safe Mode on Oppo Find X7?
Safe mode on Android is very useful to get rid of dangerous apps and malware. This allows the user to perform a uninstall of the crashed or malicious apps by putting safe mode on Android. Now the question is how to remove safe mode? In this article, we have discussed in detail how to get out of safe mode and also discussed some frequently asked questions. Keep reading this article.

Part 1: How to turn off safe mode on Android?
This is very important to turn off the safe mode after you put the safe mode on Android. Your mobile performance is limited in this mode. So you have to turn off safe mode. For doing this, there are some methods. Try to apply them one by one. If you succeed, stop there. Else go to the next method.
Method 1: Restarting the Oppo Find X7 device
This is the easiest method to turn off the safe mode in Android. To use this method, follow the steps below.
Step 1 – Tap and hold the power button of your Oppo Find X7.
Step 2 – You could find the option “Restart”. Tap on it. (If you have only one option, move to the step no 2)
Step 3 – Now, your phone will boot up in some time and you can see the Oppo Find X7 device is no more on safe mode.

This method, if goes well, will turn off safe mode in Android from your device. IF not, move to the next method instead.
Method 2: Do a soft reset:
The soft reset is very easy to perform. It won’t delete any of your personal files etc. Besides, it clears all the temp files and unnecessary data and recent apps so that you get a healthy device. This method is very good for turning off Safe mode on Android.
Step 1 – Tap and hold the power button.
Step 2 – Now, select “Power off” from the given option. This will make your device off.
Step 3 – Wait a few seconds and then turn it on again.
This time you can see your phone is no more in safe mode. Also, your junk files have been also removed. If you still find the Oppo Find X7 device is the safe mode, follow the next method.
Method 3: Break all power
This method is sometimes very helpful to turn off safe mode on android by disconnecting all the power as well as resetting the SIM card.
Step 1 – Take the back cover off from the Oppo Find X7 device and remove the battery. (Not all devices will give you this facility)
Step 2 – Take out the SIM card.
Step 3 – Reinsert the SIM card and insert the battery again.
Step 4 – Turn the Oppo Find X7 device on by tapping and holding the power button.
Now, you can see your device is out of safe mode. If you still find your device in Safe mode, see the next method.
Method 4: Wipe the cache of the Oppo Find X7 device.
The cache of the Oppo Find X7 device sometimes creates an obstacle in overcoming the safe mode on Android. To solve this issue, follow the steps below.
Step 1 – Turn on your device in safe mode. It can generally be done by tapping the home, power, and volume up button on Android device. If this combination is not working for you, search the internet with your device model number.


Step 2 – Now you can find the recovery mode screen. Navigate to the “Wipe cache” option with the volume up and down button and select the option by tapping the power button.


Step 3 – Now follow on-screen instruction and your device will be rebooted.
After successful completion of this method, your device should no longer be in safe mode. If the problem still persists, the only solution is to do a factory reset. This will erase all the data from your device. So take backup of your internal storage.
Method 5: Factory data reset
To factory data reset, you have to follow the below steps.
Step 1 – Enter in the recovery mode by following the steps mentioned earlier.
Step 2 – Now select “Factory data reset” from the given options.

Step 3 – Now, follow the on-screen instructions and your device will be factory reset.
After this method, you can successfully get rid of the safe mode on Android. Restore your data from the backup you created.
Watch the video below to turn off safe mode on your phone:
Part 2: How to put the phone in safe mode?
If some apps or programs create a problem on your device, the solution is safe mode. Safe mode allows you to uninstall the app or the program out of your device safely. So, safe mode on Android is quite useful sometimes. Let’s have a look at how to turn on safe mode in Android.
Before this, remember to take a backup of your Oppo Find X7. We recommend you to use the Dr.Fone - Phone Backup (Android). This tool is the best in its class to provide users with a very easy-to-use user interface yet powerful solution.
 Glary Utilities PRO - Premium all-in-one utility to clean, speed up, maintain and protect your PC
Dr.Fone - Phone Backup (Android)_
Flexibly Backup and Restore Android Data
- Selectively backup Android data to the computer with one click.
- Preview and restore the backup to any Android devices.
- Supports 8000+ Android devices.
- There is no data lost during backup, export, or restore.
Always remember to use this tool before you enter in the safe mode as you never know what will happen next and you might end up with factory resetting. This, as the result, will erase all your valuable data. So always perform backup data before you proceed.
To enter the safe mode, follow the instructions below.
Step 1 – First of all, long press the power button and let the Power options appear.


Step 2 – Now, long press on the “Power off” option. This will instantly ask you if you want to reboot into safe mode. Select the option and your device will reboot in safe mode.

If you are using Android version 4.2 or earlier, turn off the Oppo Find X7 device and turn it on the back by tapping the power button. When the logo appears, tap and hold the volume down button. This will allow the Oppo Find X7 device to boot in safe mode.
Follow these steps carefully and now you can see a “Safe Mode” written at the corner of your device. This will confirm that you have successfully entered in Safe mode on Android.

Part 3: Safe mode on Android FAQs
In this section, we’ll discuss some frequently asked questions about the safe mode. Some users have many questions regarding the safe mode. Here we’ll try to cover some of them.
1. Why is My Oppo Find X7 on safe mode?
This is a very common question around the world. For many Android device users, it’s quite common to see your phone in safe mode suddenly. Android is a secure platform and if your device sees any threat from your recently installed apps or any programs that want to harm your device; it would go into safe mode automatically. Sometimes, you might accidentally perform the steps discussed in part 2 and boot your device in safe mode.
2. Safe mode won’t turn off on My Oppo Find X7
For the solution to remove safe mode from your device you must follow the step-by-step methods as mentioned in part 1. This will surely take your device out of the safe mode.
The safe mode is a very useful program for any Android device. But it limits the programs of Android and you must remove safe mode after uninstalling the harmful app. This article showed you how to turn off safe mode easily.
 Allavsoft Batch Download Online Videos, Music Offline to MP4, MP3, MOV, etc format
Fix Oppo Find X7 Android System Webview Crash 2024 Issue
In recent months, the term “Android WebView crash 2023“ has become a common search term among Android users seeking solutions to these app crashes . The issue has been particularly prevalent on Oppo Find X7 devices, but it has also affected users of other Android models.
Android WebView for Android apps allows you to see and interact with web pages without leaving your app. But lately, it’s been causing more headaches than it’s worth.
So, what’s going on with Oppo Find X7 Android System WebView, and what can you do to fix its issues? Let’s take a look. This article will shed light on Oppo Find X7 Android System WebView crashing apps, helping you understand what triggers them, how to identify them, and what you can do to prevent them from happening again.


Part 1: What Should We Know About Oppo Find X7 Android System WebView Crashes?
This year, the term “Android WebView crash 2023“ has become a familiar and dreaded phrase. This issue has plagued Android users, causing app crashes, freezing , and frustration. But what exactly is Android WebView, and what triggers these apps to crash?
Android WebView is an integral component of Android apps, acting as the invisible engine that renders web content within these apps. It allows users to seamlessly browse websites, watch videos, and interact with web pages without switching to a separate browser. However, when WebView crashes, it disrupts this integrated experience, causing apps to malfunction.
Several signs can indicate an impending or ongoing Android WebView crash. These include:
- App Freezing
One of the earliest signs of an Oppo Find X7 Android System WebView crash is the app freezing. The app may become unresponsive, refusing to respond to your taps or gestures.
- Unexpected App Closures
Another common sign is unexpected app closing. The app may shut down without warning, abruptly ending your activity. Oppo Find X7 Android System WebView crashing apps can be disruptive if you are in the middle of a conversation, shopping online, or filling out an important form.
- Error Messages
Error messages can also provide valuable clues about the impending crash. These messages may appear as pop-ups or be displayed within the app itself.

- Slow Loading Times
Slow loading times can also be a sign of an impending crash. If webpages within the app take unusually long to load or images and other content appear pixelated or distorted, it could be a sign that Oppo Find X7 Android System WebView is struggling to handle the workload.
But why does WebView crash Android smartphones? The answer involves several factors:
- Updates and Compatibility Issues
Updates are often intended to improve software stability and compatibility, but in some cases, they can introduce new bugs or compatibility issues that lead to crashes. It is particularly evident when app developers and WebView developers release updates that don’t fully align, causing conflicts.
- Insufficient Memory
Oppo Find X7 Android System WebView requires a certain amount of memory to operate properly. If your device is running low on memory, it can cause Oppo Find X7 Android System WebView to crash. It is more likely to happen on older devices with less RAM.

- Outdated Oppo Find X7 Android System WebView
The WebView app is responsible for rendering web content within Android apps. Using an outdated version of WebView can introduce known bugs and security vulnerabilities that can cause crashes.
- Conflicts With Other Apps
WebView might crash if it conflicts with other resources or processes running on the Oppo Find X7 device. It can happen if the Oppo Find X7 device runs low on memory or other resource-intensive apps compete for system resources.
In the next section, you’ll explore potential solutions to keep your apps running smoothly.
Part 2: Android WebView Crashes? Here Are Quick and Proven Solutions
Now you’ve identified the signs and causes of Oppo Find X7 Android System WebView crashing apps on your phone. While these issues can be frustrating, there are several quick and proven solutions to fix them.
Uninstall WebView Updates
If you’re experiencing apps crashing after a recent update, consider uninstalling those updates. This action can potentially revert to a more stable version of Oppo Find X7 Android System WebView.
To do this on your Oppo Find X7, navigate to Settings > Apps, then select Oppo Find X7 Android System WebView. Tap the menu icon in the top right corner and tap Uninstall updates.
 /a>
/a>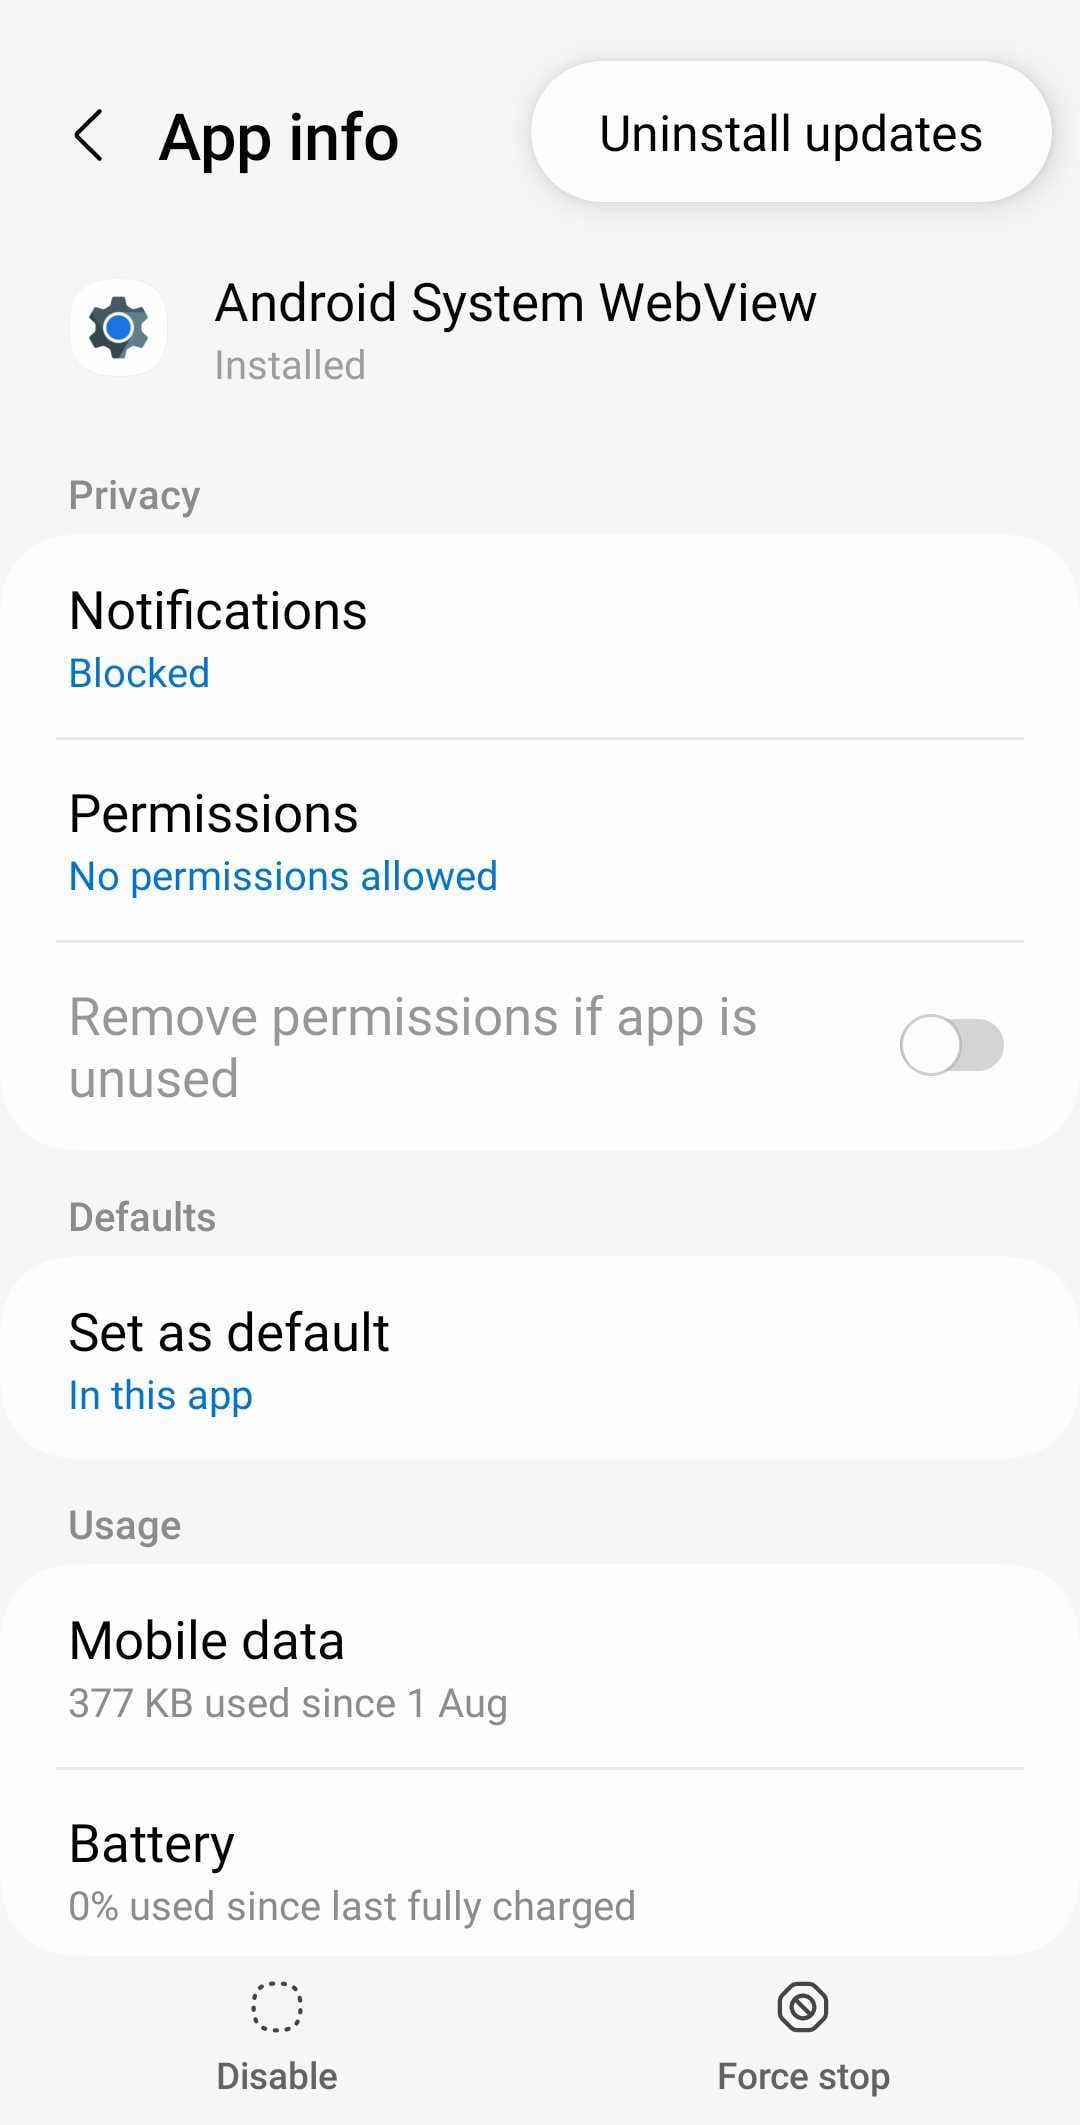
Update Android WebView
Regularly updating Oppo Find X7 Android System WebView to the latest version is crucial for maintaining compatibility and addressing known bugs. Google releases updates to address these concerns, ensuring optimal performance and stability.
Check for available updates on Oppo Find X7 devices by navigating to Settings > Apps. Then, select Oppo Find X7 Android System WebView and tap App details in-store. If an update is available, tap Update to install it and restart your phone.

Update Google Chrome
Android WebView is closely tied to Google Chrome, and issues with Chrome can sometimes affect WebView functionality. As such, updating Chrome to the latest version can help address Android System and WebView forcibly closing your phone’s apps.
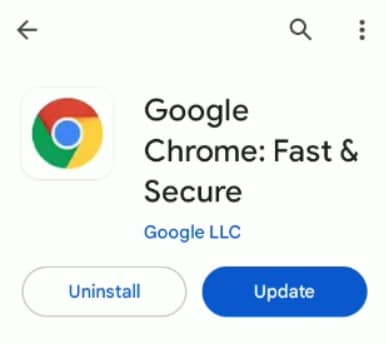
Open the Google Play Store and search for Google Chrome. If an update is available, tap Update to install it, then restart your device.

Clearing Cache and Data for Android WebView
Clearing the cache frees up phone storage and helps the app run more efficiently. To clear Oppo Find X7 Android System WebView’s cache and data, go to Settings > Apps and select Oppo Find X7 Android System WebView. Tap on Storage and tap Clear cache on the lower right corner of your screen.
 Easy and Safe Partition Software & Hard Disk Manager

Restart Device
A simple restart can often resolve temporary glitches or conflicts that might be causing Android WebView crashes. The specific steps to restart your phone will vary depending on your device type.
Check Internet Connection
A stable internet connection is essential for Oppo Find X7 Android System WebView to render web content properly. If the internet connection is unstable or down, it can lead to crashes. Ensure you have a stable internet connection before using WebView-based apps.
Update Device Software
OS updates may introduce changes to the Oppo Find X7 Android System WebView that make it more compatible with newer web standards and technologies. It can enhance the performance and stability of apps that rely on WebView for web content.
Check for available software updates by going to Settings > Software Update. If an update is required, tap on Download and install.
 vMix HD - Software based live production. vMix HD includes everything in vMix Basic HD plus 1000 inputs, Video List, 4 Overlay Channels, and 1 vMix Call
While problems like when the Android System WebView crashes Android phones are common, they don’t have to be a persistent problem for Oppo Find X7 users. It’s also equally important to have effective solutions when app crashes occur. This is where Wondershare Dr.Fone steps in as a reliable and comprehensive solution for restoring app stability and overall phone performance.
Part 3: Restoring Apps and Phone Stability: A Step-by-Step Guide
Dr. Fone’s System Repair tool can help you resolve common Android scenarios, including Google Play Store malfunctions and persistent app crashes.
How To Use Dr.Fone for Oppo Find X7 Android System WebView Crashing Apps?
Before attempting any repairs, it is crucial to back up your Oppo Find X7 to prevent data loss. Once you have a secure backup, follow these steps to fix WebView app crashes and restore your Oppo Find X7 to its optimal performance.
- Step 1: Download the Dr.Fone toolkit. Next, install the software on your desktop and launch it.
 safe & secure
3,090,920 people have downloaded it
- Step 2: Connect your Oppo Find X7 to your computer using a USB cable. Dr.Fone will automatically detect and establish a connection.
- Step 3: Select the System Repair function from the Toolbox homepage and choose Android to confirm your device type.

- Step 4: Click Start to begin the process of fixing Oppo Find X7 Android System WebView crashes. Next, choose your device details and follow the in-app instructions to put your device in Download mode.

- Step 5: Dr.Fone will analyze your device’s system and download the firmware to solve the root cause of the issue.

- Step 6: Confirm your device information in the dialogue box. Dr.Fone will proceed to repair the detected WebView-related problems.

- Step 7: Once the repair is complete, your device will restart, and Oppo Find X7 Android System WebView crashing apps should no longer occur.

More Articles About Android System:
5 Ways to Do With & Access Android Phone with Broken Screen
Google Play Services Won’t Update? 12 Fixes are Here!
Easy Ways to Bypass Google Account Verification (FRP) On Android Phones
Conclusion
The “Android WebView crash 2023“ issue was widespread for many Android users. The common issues encountered were app crashes, slow loading times, and error messages. Fortunately, these problems are manageable with the right approach.
By understanding the signs and causes of Oppo Find X7 Android System WebView crashes, you can take proactive measures to prevent them. Quick fixes such as clearing cache and data or updates can often resolve the issue promptly.
For more comprehensive troubleshooting, Dr. Fone’s mobile solution offers a reliable and user-friendly approach. Its advanced capabilities effectively tackle app crashing issues, providing you peace of mind that your phone is functioning optimally.
safe & secure
4,684,259 people have downloaded it
7 Solutions to Fix Error Code 963 on Google Play Of Oppo Find X7
People are increasingly complaining about Google Play Error Codes which pop-up during downloading, installing or updating an App via Google Play Store. Amongst these, the most recent and common one being Error Code 963.
Google Play Error 963 is a typical error which shows up not only when you try to download and install an App but also during App update.
Error 963 cannot be attributed to a particular App or its update. It is a Google Play Store error and is experienced by Android users across the world.
Error Code 963, just like any other Google Play Store errors, is not something difficult to deal with. It’s a minor glitch which can be fixed easily. There is no need to worry or panic if you see Error 963 on Google Play Store preventing your favorite App from downloading or updating.
Read on to find out more about the Google Play Error 963 and best ways to fix it.
Part 1: What is Error Code 963?
Error 963 is a common Google Play Store error which basically hinders Apps from downloading and updating. Many people get worried when Error Code 963 does not let them install new Apps or update existing ones. However, please understand that Google Play Error is not such a big deal as it may sound and can be overcome easily.
Error 963 pop-up message reads as follows: “cannot be downloaded due to an error (963)” as shown in the image below.

A similar message shows up even while you are trying to update an App, as shown in the screenshot below.

Error Code 963 is basically an outcome of data crash which mostly is seen in cheaper smartphones. There might another reason for Error 963 preventing Apps from downloading and updating, which is Google Play Store Cache being corrupted. People also speculate SD Card related issues as many-a-times external memory enhancer chips do not support large Apps and their updates. Also, Error 963 is very common with HTC M8 and HTC M9 smartphones.
All these reasons and more can handle with ease and you can continue to use Google play services smoothly. In the following segment, we will discuss various fixes to cure the problem to enable to you download, install and update Apps on your device normally.
Part 2: Easiest solution to fix Error Code 963 on Android
When it comes to the most convenient solution to fix error 963, Dr.Fone - System Repair (Android) cannot be missed. It is the most productive program that covers a wide range of Android issues. It ensures full safety while performing and one can fix the Android issues in a hassle-free way.
Dr.Fone - System Repair (Android)
One click to fix Google Play error 963
- The tool is recommended for its higher success rate.
- Not just Google Play error 963, it can fix a large number of system issues including app crashing, black/white screen etc.
- It’s considered as the first tool that offers one-click operation for Android repairing.
- There’s no technical expertise needed to use this tool.
4,997,014 people have downloaded it
This section will provide you the tutorial guide for how to fix error code 963.
Note: Before moving to solve the error 963, we would like to inform you that the process may result in wiping away your data. And therefore, we suggest you to make backup of your Oppo Find X7 prior to fixing this Google Play error 963.
Phase 1: Connecting and preparing the Oppo Find X7 device
Step 1 – To begin fixing error 963, run Dr.Fone after downloading and installing it on your PC. Now, pick out the ‘System Repair’ tab from the main screen. Thereupon, with the help of a USB cable, make connection between your Oppo Find X7 and PC
 Project Manager - Asset Browser for 3Ds Max
Step 2 – On the left panel, you’re supposed to choose ‘Android Repair’ and then click the ‘Start’ button.
Step 3 – On the following screen, you need to choose the appropriate details for your device like the name, brand, model, country/region etc. Later, go for warning confirmation and hit ‘Next’.

Phase 2: Taking Android device in Download mode for repairing
Step 1 – It is essential to get your Oppo Find X7 or tablet entered in Download mode. For this, following are the steps to be taken:
If the Oppo Find X7 device contains Home button:
- Turn the Oppo Find X7 device off and then keep holding the ‘Power’, ‘Volume Down’ and ‘Home’ buttons altogether for about 10 seconds. Next, release them all and push the ‘Volume Up’ key. This way, your device will enter the Download mode.

If the Oppo Find X7 device contains no Home button:
- Switch off your phone/tablet and press the ‘Volume Down’, ‘Bixby’ and ‘Power’ buttons for 10 seconds. Leave the buttons and then press the ‘Volume Up’ button for entering download mode.

Step 2 – Press the ‘Next’ button and then the program will commence the firmware downloading.
Step 3 – Upon successful downloading and verification of the firmware, the process of Android device repairing will begin automatically.
Step 4 – Within a while, the Google play error 963 will be vanished.
Part 3: 6 Common Solutions to fix Error Code 963

Since there is no specific reason for Error Code 963 to occur, similarly there is no one solution to the problem. You may use any one of them below or try them all to never see Error Code 963 on your device.
1. Clear Play Store Cache and Play Store Data
Clearing Google Play Store Cache and Data basically means keeping Google Play Store clean and free from trouble-making data stored in respect of it. It is advisable to carry out this process regularly to prevent Errors like Error Code 963 from occurring.
Follow the steps given below to fix Error Code 963:
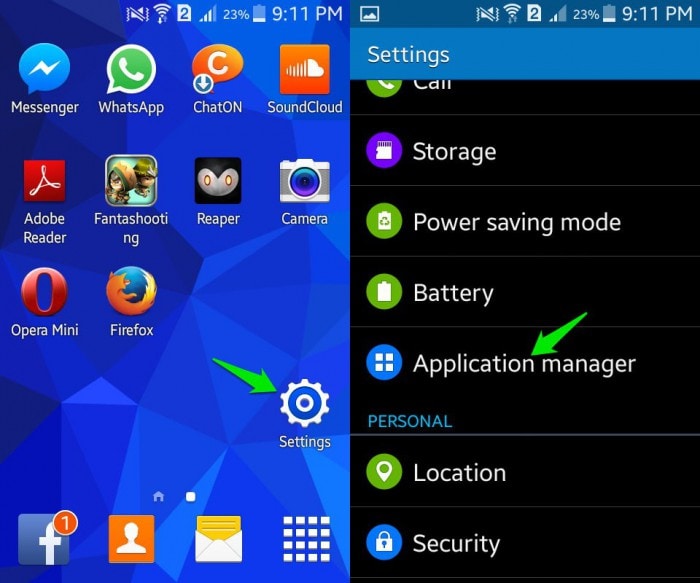
Visit “Settings” and select “Application Manager”.

Now select “All” to see all downloaded and built-in Apps on your device.
Select “Google Play Store” and from the options that appear, tap on “Clear Cache” and “Clear Data”.

Once you are done clearing Google Play Store Cache and Data, try to download, install or update the App facing Google Play Error 963 again.
2. Uninstall updates for Play Store
Uninstalling Google Play Store updates is an easy and quick task. This method is known to have helped many as it brings back the Play Store to its original state, free from all updates.
Visit “Settings” and select “Application Manager”.
Now select “Google Play Store” from “All” Apps.

In this step, click on “Uninstall Updates” as shown below.

3. Shift the App from SD Card to device’s memory
This method is strictly for certain Apps which cannot be updated because they are stored on an external memory card, i.e., SD Card. Such memory enhancing chips do not support large Apps and due to a shortage of space prevents them from updating. It advisable to move such Apps from the SD Card to the Oppo Find X7 device’s internal memory and then try to update it.
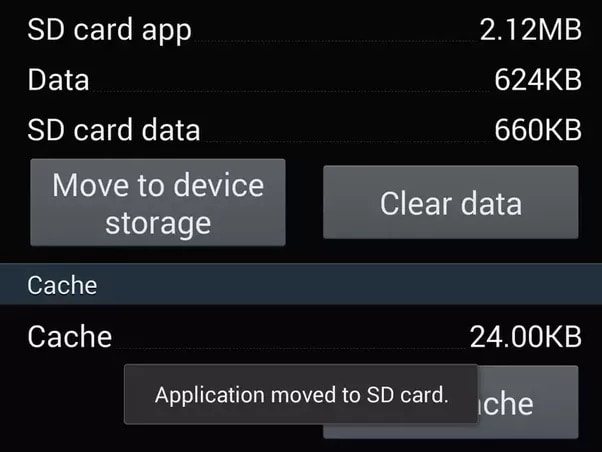
Visit “Settings” and select “Apps”.

From “All” Apps click on the App which is unable to update.
Now click on “Move to Phone” or “Move to internal storage” and try to download its update again from the Google Play Store.
Try updating the App now. If the Apps’s update does not download even now, DO NOT worry. There are three more ways to help you.
4. Unmount your external Memory Card
Error Code963 may also occur due to an external memory chip used in your device to enhance its storage capacity. This is very common and can be dealt with by unmounting the SD Card temporarily.
To unmount your SD Card:
Visit “Settings” and keep scrolling downwards.
Now select “Storage”.
From the options that appear, select “Unmount SD Card” as explained in the screenshot below.

Note: If the App or its update downloads successfully now, do not forget to mount the SD Card back.
5. Remove and Re-add your Google account
Deleting and re-adding your Google account in might sound a little tedious but it does not take much of your precious time. Moreover, this technique is very effective when it comes to fixing Error Code 963.
Carefully follow the steps given below to remove and then re-add your Google account:
Visit “Settings”, under “Accounts” select “Google”.
Select your account and from the “Menu” select “Remove account” as shown below.

Once your account is removed, follow the steps given hereunder to add it back again after a few minutes:
Go back to “Accounts” and select “Add Account”.


Select “Google” as shown above.
In this step feed in your account details and your Google account will be configured once again.
6. Special technique for HTC users
This technique is specially crafted fro HTC smartphone users who frequently face Google Play Error 963.
Follow the step-by-step instructions given below to uninstall all updates for your HTC One M8 Lock Screen App:
Visit “Settings” and find “HTC Lock Screen” under “Apps”.
Now click on “Force Stop”.
In this step, Click on “Uninstall Updates”.
This remedy is as simple as it sounds and has helped many HTC users to get rid of Error 963.
Google Play Errors are a very common phenomenon these days, especially Error Code 963 which usually occurs in the Google Play Store when we try to download, install or update an App. There is no need to worry if you see Error Code 963 pop-up on your screen as your device and its software are not to be blamed for Error 963 to suddenly surface. It is a random error and can be fixed easily by you. You do not need any technical assistance to deal with the issue. All you need to do is follow the steps introduced in this article to use Google Play Store and its services smoothly.
- Title: Android Safe Mode - How to Turn off Safe Mode on Oppo Find X7? | Dr.fone
- Author: Ariadne
- Created at : 2024-07-30 09:08:46
- Updated at : 2024-07-31 09:08:46
- Link: https://howto.techidaily.com/android-safe-mode-how-to-turn-off-safe-mode-on-oppo-find-x7-drfone-by-drfone-fix-android-problems-fix-android-problems/
- License: This work is licensed under CC BY-NC-SA 4.0.